Author

michael

Browsing

Discover the Joy of a Vibrant Quinoa & Roasted Vegetable Bowl

Welcome to the world of comforting and delicious meals that don’t require hours in the kitchen! Today, we’re diving into a colorful Quinoa & Roasted Vegetable Bowl topped with a luscious creamy tahini dressing. This recipe is not only a feast for your taste buds but also a fantastic way to elevate your meal prep game. With a handful of fresh ingredients and straightforward steps, you’ll be on your way to enjoying a nutritious and satisfying bowl that suits both busy weeknights and leisurely weekends.

Why You’ll Love This Recipe

  • Quick & Easy: This recipe comes together in under an hour, making it perfect for those busy days when time is of the essence.
  • Nutritious & Filling: Packed with protein from quinoa and vitamins from a variety of roasted vegetables, this bowl is a wholesome meal option.
  • Customizable: Feel free to swap in your favorite veggies or proteins. This bowl can change with the seasons or your pantry stock!
  • Meal Prep Friendly: Make a big batch to enjoy throughout the week. It stores well and tastes just as good reheated!
  • Visually Stunning: The bright colors of the bell peppers, zucchini, and tomatoes make this dish a feast for the eyes!

Ingredients Breakdown

Let’s talk about what you’ll need for this mouthwatering quinoa and roasted vegetable bowl:

  • 1 cup quinoa: A complete protein source, quinoa is gluten-free and provides a nutty flavor.
  • 1 cup bell peppers (diced): Adds sweetness and crunch. You can use any color you like!
  • 1 cup zucchini (diced): Softens beautifully when roasted, adding a lovely texture.
  • 1/2 cup red onion (diced): For a flavorful kick, the red onion caramelizes nicely during roasting.
  • 1 cup cherry tomatoes (halved): These burst with sweetness and add a pop of color.
  • 2 tbsp olive oil: Helps with roasting and adds healthy fats.
  • 1/4 cup tahini: The star of the dressing; it provides a rich, nutty flavor.
  • 2 tbsp lemon juice: Brightens the dish and adds a zesty flavor.
  • Salt and pepper to taste: Essential for enhancing all the flavors.

If you need substitutions, here are some ideas:

  • **Quinoa**: Try brown rice or farro if you prefer a different grain.
  • **Vegetables**: Swap zucchini for asparagus or carrots, or add in leafy greens like spinach.
  • **Tahini**: If you’re allergic, try sunflower seed butter or omit it entirely for a light dressing.
  • **Olive oil**: Can be replaced with avocado oil or melted coconut oil.

How to Make Your Quinoa & Roasted Vegetable Bowl

Close-up side view of a quinoa and roasted vegetable bowl showcasing vibrant vegetables and creamy tahini.

Ready to cook? Let’s get started with these simple steps:

  1. Preheat oven: Set your oven to 400°F (200°C) and line a baking sheet with parchment paper.
  2. Toss the veggies: In a large bowl, combine the diced bell peppers, zucchini, red onion, and halved cherry tomatoes. Drizzle with olive oil, sprinkle with salt and pepper, and toss until everything is coated.
  3. Roast the vegetables: Spread the veggies evenly on the prepared baking sheet. Roast for 20-25 minutes until tender and caramelized, stirring halfway through.
  4. Cook the quinoa: Rinse the quinoa under cold water to remove its natural bitterness. In a saucepan, combine 1 cup of quinoa with 2 cups of water or vegetable broth. Bring to a boil, then reduce heat to low and cover. Simmer for about 15 minutes, or until the quinoa is fluffy and the liquid is absorbed.
  5. Make the tahini dressing: In a bowl, whisk together tahini, lemon juice, a pinch of salt, and a little water until smooth and creamy. Adjust the consistency by adding more water if needed.
  6. Assemble your bowl: Start with a base of quinoa, layer on the roasted vegetables, and generously drizzle with the tahini dressing.

Pro Tips for Success

  • Rinse quinoa thoroughly: This removes the bitter saponin coating and ensures a pleasant flavor.
  • Uniform veggie cuts: Chop all vegetables into similar sizes for even roasting.
  • Don’t overcrowd the pan: Spread the vegetables out to promote crisping and caramelization.
  • Taste as you go: Adjust seasoning in the dressing and quinoa for a flavor punch.
  • Experiment with spices: Add cumin, paprika, or garlic powder to the veggies for an extra flavor boost.
  • Make it colorful: Use a variety of veggies for a vibrant presentation.
  • Let it cool: If prepping ahead, allow the bowl components to cool before storing to prevent sogginess.
  • Dress it up!: Add fresh herbs like parsley or cilantro for a burst of freshness.

Common Mistakes and Troubleshooting

  • Overcooked quinoa: Keep an eye on it! Overcooking results in mushy quinoa. Once the water is absorbed, remove from heat and let it sit covered for a few minutes.
  • Undercooked vegetables: If not tender after the suggested roasting time, give them a few extra minutes. Every oven is different!
  • Too thick tahini dressing: If your dressing is too thick, thin it out with a bit more water or lemon juice until it reaches your desired consistency.
  • Flavorless bowl: Don’t skip the seasoning! Salt and pepper are key to enhancing the overall taste.

Variations You’ll Love

Looking to mix things up? Here are some delicious variations to try:

  • Protein-Packed: Add grilled chicken, chickpeas, or black beans for a heartier meal.
  • Spicy Kick: Toss in some diced jalapeños or drizzle with hot sauce for heat.
  • Greens Galore: Incorporate fresh spinach or kale for added nutrients and a pop of color.
  • Grain-Free: Swap quinoa for cauliflower rice for a low-carb option.

Storage and Make-Ahead Instructions

This bowl is perfect for meal prep:

  • **Refrigeration**: Store in an airtight container in the refrigerator for up to 4 days.
  • **Freezing**: You can freeze the quinoa and roasted vegetables separately for up to a month. Thaw before reheating.
  • **Reheating**: Microwave or reheat on the stove, adding a splash of water to keep it moist.

Frequently Asked Questions

  • What makes quinoa a superfood? Quinoa is packed with protein, fiber, and essential amino acids, making it a complete protein source.
  • Can I use other dressings? Absolutely! Try a balsamic vinaigrette or a yogurt-based dressing for a different flavor profile.
  • How do I make this dish vegan? This recipe is already vegan! Ensure the dressing ingredients are vegan-friendly.
  • Can I add cheese? Yes! Crumbled feta or goat cheese can add a delightful creaminess.
  • What’s the best way to reheat it? Gently reheat on the stove or microwave until warmed through. Add a little water for moisture.
  • How do I store leftovers? Keep in an airtight container in the fridge, and consume within 4 days.
  • Can I use frozen vegetables? Yes! Just adjust the cooking time as frozen veggies may cook faster.
  • Is tahini dressing necessary? While it’s delicious, you can enjoy the bowl without it. Try a simple olive oil and lemon juice dressing instead.

Nutrition Tips and Dietary Adaptations

This bowl is inherently healthy. Here’s how you can adapt it further:

  • Gluten-Free: Quinoa is naturally gluten-free, making this dish great for those with gluten sensitivities.
  • Low-Carb Option: Replace quinoa with cauliflower rice for a low-carb, grain-free option.
  • High-Protein: Add grilled salmon or tofu for an extra protein boost.
  • Low-Fat Version: Use less tahini or substitute with a yogurt-based dressing.

Equipment Recommendations

To make the process even smoother, here are a few tools you might find helpful:

  • Baking Sheet: A large one for roasting vegetables evenly.
  • Saucepan: A medium-sized saucepan for cooking quinoa perfectly.
  • Mixing Bowls: A couple of mixing bowls for tossing veggies and making the dressing.
  • Whisk: For combining the tahini dressing smoothly.

Serving Suggestions

To elevate your experience, consider these serving ideas:

  • Top with fresh herbs: Chopped parsley or cilantro add a refreshing taste.
  • Serve with pita bread: A side of warm pita can round out the meal nicely.
  • Add nuts or seeds: Sprinkle toasted pine nuts or sunflower seeds for added crunch.
  • Pair with a refreshing drink: A glass of iced tea or infused water complements the meal beautifully.

Conclusion

And there you have it! A beautiful, nutritious Quinoa & Roasted Vegetable Bowl that’s as easy to make as it is delightful to eat. With its vibrant colors and robust flavors, this dish is sure to please everyone at the table. Remember, cooking is about enjoying the process, so don’t stress about perfection. Dive in, have fun, and embrace the delicious messiness that comes with home cooking. Happy eating!

Quinoa & Roasted Vegetable Bowl with Tahini Dressing

Prep Time 10 minutes
Cook Time 25 minutes
Total Time 35 minutes
Servings 4 servings
Calories 450
A vibrant and nutritious bowl combining roasted vegetables, fluffy quinoa, and creamy tahini dressing for a wholesome meal.

Ingredients

Grains

  • 1 cup quinoa

Vegetables

  • 1 cup bell peppers (diced)
  • 1 cup zucchini (diced)
  • 1/2 cup red onion (diced)
  • 1 cup cherry tomatoes (halved)

Dressing

  • 1/4 cup tahini
  • 2 tbsp lemon juice
  • 2 tbsp olive oil
  • to taste Salt and pepper

Instructions 

  • Preheat oven to 400°F (200°C). Toss vegetables with olive oil, salt, and pepper; roast for 20-25 minutes.
  • Rinse quinoa and cook in 2 cups water for about 15 minutes until fluffy.
  • Whisk tahini, lemon juice, salt, and water to make the dressing.
  • Assemble bowls with quinoa, roasted vegetables, and drizzle with tahini dressing.

Notes

You can add fresh herbs or a squeeze of extra lemon for more flavor.
Calories: 450kcal
Cost: $15
Course: Main Course
Cuisine: Healthy
Keyword: Quinoa

Welcome to the delightful world of keto-friendly treats! If you’re looking for a low-carb dessert that satisfies your sweet tooth without the guilt, you’ve come to the right place. These Keto Peanut Butter Hearts are here to save the day! Combining creamy peanut butter, rich chocolate, and a few simple ingredients, this recipe is an easy way to treat yourself while staying on track with your dietary goals. Let’s dive into why you’ll absolutely love this recipe!

Why You’ll Love This Recipe

  • Quick and Easy: Whip up these hearts in under an hour, making them perfect for last-minute cravings or surprise guests!
  • Low-Carb Delight: With minimal carbs, these treats will keep your keto journey on the right track without sacrificing flavor.
  • Customizable: You can easily modify the sweetness or try different nut butters to suit your taste.
  • Perfect for Sharing: These heart-shaped goodies are great for special occasions like Valentine’s Day or just because!
  • Kid-Friendly: Involve your little chefs in the kitchen—these treats are fun and easy to make together!

Gathering Your Kitchen Crew: The Ingredients

Before we get started, let’s round up our ingredients. Here’s what you’ll need:

  • 1 cup natural peanut butter (unsweetened, creamy)
  • ½ cup almond flour
  • 2-3 tbsp powdered erythritol (to taste)
  • 1 tsp vanilla extract (optional)
  • 1 cup sugar-free chocolate chips
  • 1 tbsp coconut oil (for melting chocolate)

These ingredients are not only easy to find, but they also come together to create a delicious treat. If you’re out of almond flour, you can substitute it with ground flaxseed or sunflower seed flour for a nut-free option!

Let’s Get Crafting: Step-by-Step Instructions

Ready to make these irresistible Keto Peanut Butter Hearts? Follow these simple steps:

1. Make the Filling

In a mixing bowl, combine the peanut butter, almond flour, powdered erythritol, and vanilla extract. Mix until a thick dough forms. Don’t be afraid to get your hands in there!

2. Shape

Press the mixture into silicone heart molds, or shape them by hand for a more rustic look. Place them in the freezer for 20-30 minutes until firm.

3. Melt Chocolate

In a microwave-safe bowl, melt the sugar-free chocolate chips with the coconut oil. Heat in 30-second bursts, stirring until smooth. This will create a luscious chocolate coating!

4. Dip & Set

Remove the hearts from the molds and dip them in the melted chocolate. Place them on parchment paper and refrigerate until the chocolate is set. This step is crucial for that perfect bite!

Pro Tips for Perfect Peanut Butter Hearts

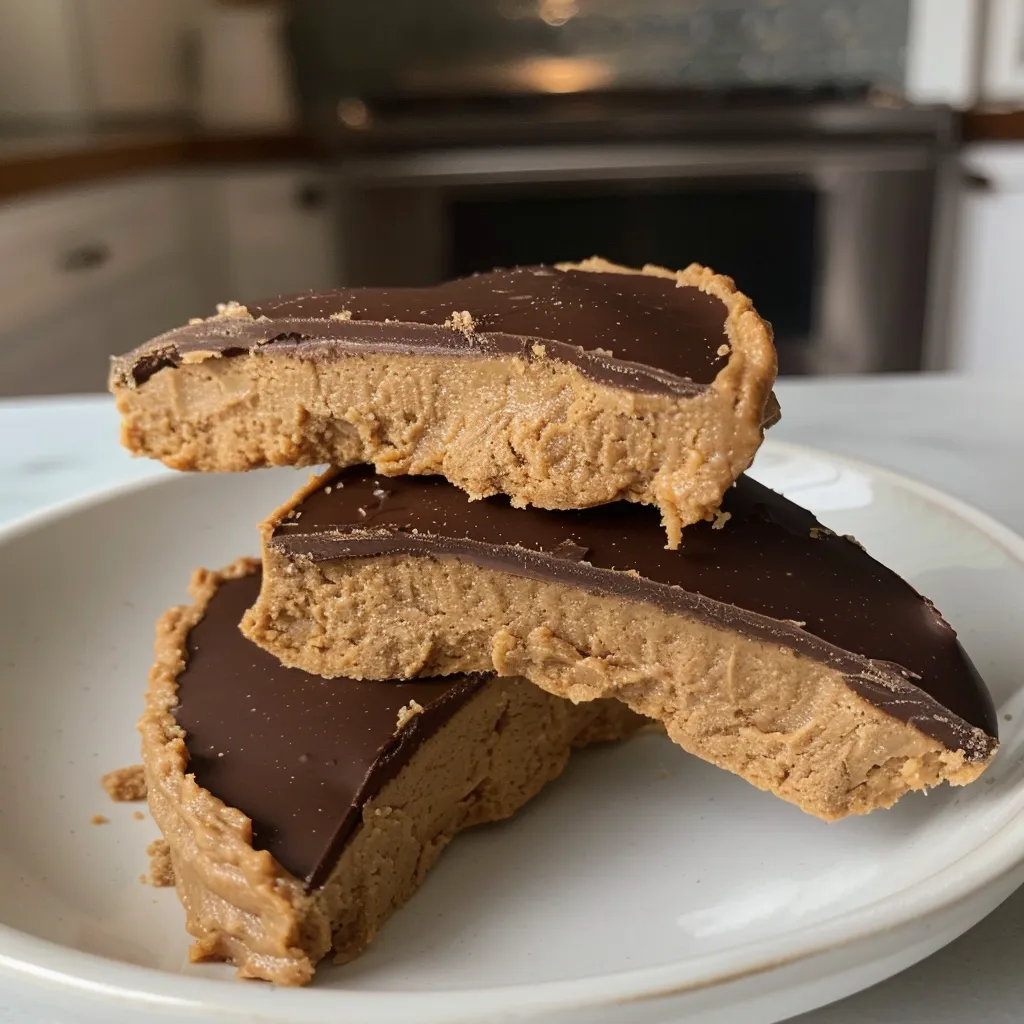
Side view of heart-shaped chocolate treats filled with peanut butter.
  • Mix well: Ensure the peanut butter mixture is well combined for even flavor throughout.
  • Chill the dough: If the dough is too sticky, chill it for a few minutes before shaping.
  • Experiment with flavors: Add a pinch of sea salt or cinnamon for a flavor boost!
  • Use high-quality chocolate: Opt for sugar-free chocolate that you genuinely enjoy for the best taste.
  • Keep it cool: Store these hearts in the refrigerator to maintain their shape and texture.
  • Don’t rush: Allow the chocolate to set completely for a flawless finish.
  • Make them festive: Use different molds for holidays or special events!
  • Share the love: These treats make for a thoughtful homemade gift!

Common Mistakes and Troubleshooting

Even though this recipe is straightforward, here are a few common pitfalls and how to avoid them:

  • Dough is too crumbly: If your dough isn’t holding together, add a bit more peanut butter or a splash of coconut oil.
  • Chocolate won’t coat: Make sure the chocolate is fully melted and smooth. If it’s too thick, add a touch more coconut oil.
  • Hearts are too soft: Ensure they’re adequately chilled before dipping in chocolate; this will help them retain their shape.
  • Chocolate cracking: If your chocolate cracks after setting, it may have been overheated. Aim for a gentle melting process.

Mix It Up! Delicious Recipe Variations

Feeling adventurous? Here are some fun variations to try:

  • Chocolate Chip Surprise: Fold in sugar-free chocolate chips into the peanut butter mixture for extra chocolatey goodness.
  • Nutty Almond Joy: Replace half of the peanut butter with almond butter and top with shredded coconut before dipping in chocolate.
  • Minty Fresh: Add peppermint extract to the peanut butter mixture for a refreshing twist.
  • Spicy Kick: Incorporate a dash of cayenne pepper or chili powder for a surprising heat!

Storage and Make-Ahead Instructions

These Keto Peanut Butter Hearts can be made ahead of time and stored for later enjoyment.

  • Storage: Keep them in an airtight container in the refrigerator for up to 2 weeks.
  • Freezing: You can freeze them for up to 3 months! Just make sure to separate layers with parchment paper to prevent sticking.
  • Thawing: When ready to enjoy, simply let them sit at room temperature for a few minutes before serving.

Your Questions Answered: FAQs

  • Can I use crunchy peanut butter? Absolutely! Crunchy peanut butter will add a delightful texture to your hearts.
  • Is this recipe nut-free? To make it nut-free, substitute peanut butter with sunflower seed butter.
  • Can I use another sweetener? Yes! You can use any keto-friendly sweetener you prefer, just adjust to taste.
  • What if I don’t have heart molds? No problem! Shape them by hand for a rustic look or use any silicone mold you have.
  • How can I make these dairy-free? Use dairy-free chocolate chips and ensure your peanut butter is dairy-free.
  • Can I add protein powder? Yes, adding a scoop of protein powder can boost the nutritional value!
  • Why are they called fat bombs? These treats are rich in healthy fats, making them a perfect snack for keto dieters.
  • What’s the best way to serve these? Serve chilled for the best texture, and consider pairing them with a cup of keto coffee!

Nutritional Tips and Dietary Adaptations

These Keto Peanut Butter Hearts are not just delicious; they offer nutritional benefits too:

  • Healthy Fats: The use of peanut butter and coconut oil provides healthy fats that can keep you satiated.
  • Low Sugar: With sugar-free chocolate and low-carb sweeteners, you’re minimizing sugar intake.
  • Protein Boost: Peanut butter and almonds are excellent sources of protein, which is essential for muscle maintenance.
  • Gluten-Free: This recipe is naturally gluten-free, making it suitable for those with gluten sensitivities.

Essential Equipment Recommendations

To ensure your success with this recipe, here are some essential tools you’ll need:

  • Mixing Bowls: A good set of mixing bowls is essential for combining ingredients.
  • Silicone Molds: Heart-shaped silicone molds make forming your treats easy and fun.
  • Microwave-Safe Bowl: For melting chocolate, a microwave-safe bowl is a must.
  • Parchment Paper: Line your baking sheets or plates to prevent sticking.

Serving Suggestions

These Keto Peanut Butter Hearts can be enjoyed in numerous delightful ways:

  • As a Snack: Perfect for a mid-day pick-me-up or post-workout refuel.
  • With Coffee: Pair them with a cup of keto-friendly coffee for a satisfying treat.
  • Gift Them: Wrap them in a cute box or bag as a thoughtful homemade gift for friends or family.
  • On a Dessert Platter: Add them to a platter with other keto desserts for a festive touch!

Cooking is all about connection, creativity, and enjoying the process—so don’t stress if everything isn’t perfect. Embrace the joy of making these Keto Peanut Butter Hearts, and remember, every bite is a step towards a healthier you. Enjoy!

Keto Peanut Butter Hearts : Low-Carb Chocolate Treats You’ll Love

Prep Time 10 minutes
Cook Time 10 minutes
Total Time 20 minutes
Servings 12 pieces
Calories 150
These adorable keto-friendly peanut butter hearts are coated in rich, sugar-free chocolate, making for a perfect low-carb treat.

Ingredients

Filling

  • 1 cup natural peanut butter (unsweetened, creamy)
  • ½ cup almond flour
  • 2–3 tbsp powdered erythritol (to taste)
  • 1 tsp vanilla extract (optional)
  • 1 cup sugar-free chocolate chips
  • 1 tbsp coconut oil (for melting chocolate)

Instructions 

  • Mix peanut butter, almond flour, erythritol, and vanilla until a thick dough forms.
  • Shape the mixture into hearts and freeze for 20–30 minutes.
  • Melt chocolate chips with coconut oil in 30-second bursts until smooth.
  • Dip the frozen hearts into melted chocolate and place on parchment paper.
  • Refrigerate until chocolate is set before serving.

Notes

Store in the refrigerator for best results.
Calories: 150kcal
Cost: $15
Course: Dessert
Cuisine: American
Keyword: chocolate, keto, Peanut Butter

Indulge in a Slice of Happiness with Mom’s Ultimate Gluten-Free Chocolate Cake

Welcome to the wonderful world of baking, where even gluten-free desserts can bring joy and satisfaction! If you’ve ever had the urge to dive into a rich, decadent chocolate cake but were held back by dietary restrictions, fear not. Today, we’re whipping up Mom’s Famous Gluten-Free Chocolate Cake — a recipe that is moist, chocolatey, and so delicious that no one will believe it’s gluten-free! In this comprehensive guide, we’ll explore everything you need to bake this delectable treat, from the ingredients to expert tips, troubleshooting advice, and even variations for those who like to mix things up. So grab your apron, and let’s get baking!

Why You’ll Love This Recipe

  • Moist and Decadent: The combination of buttermilk and boiling water ensures that this cake stays moist, making every bite a chocolate lover’s dream.
  • Easy to Make: With simple steps and common ingredients, this recipe is accessible for bakers of all skill levels.
  • Perfect for All Occasions: Whether it’s a birthday, holiday, or just a Tuesday, this cake is sure to impress family and friends.
  • Customizable: The recipe allows for various substitutions and variations, making it versatile for different diets and preferences.
  • Kid-Friendly: Kids will love helping out in the kitchen, and they’ll be excited to enjoy a delicious cake that everyone can eat!

Gather Your Ingredients for Mom’s Famous Gluten-Free Chocolate Cake

Before we dive into the baking process, let’s ensure you have all the necessary ingredients at hand. Here’s what you’ll need:

  • 1 cup gluten-free all-purpose flour: This is your base. Look for a blend that includes xanthan gum for the best results.
  • ¾ cup unsweetened cocoa powder: Choose high-quality cocoa for a rich chocolate flavor.
  • 1 ½ cups granulated sugar: Sweetens the cake beautifully and helps create a moist texture.
  • 1 ½ teaspoons baking soda: This helps the cake rise.
  • ¾ teaspoon baking powder: Works alongside baking soda for a light, fluffy cake.
  • ¾ teaspoon salt: Enhances the overall flavor of the cake.
  • 1 cup buttermilk: Adds moisture and richness; can be substituted with dairy-free milk + vinegar.
  • ½ cup vegetable oil: Keeps the cake moist and tender.
  • 2 large eggs: Binds the ingredients together and adds structure.
  • 2 teaspoons vanilla extract: A must for flavor! Add a splash for extra depth.
  • 1 cup boiling water: This is key for mixing into the batter, creating a thin mixture that bakes perfectly.

How to Make Mom’s Famous Gluten-Free Chocolate Cake: Step-by-Step Instructions

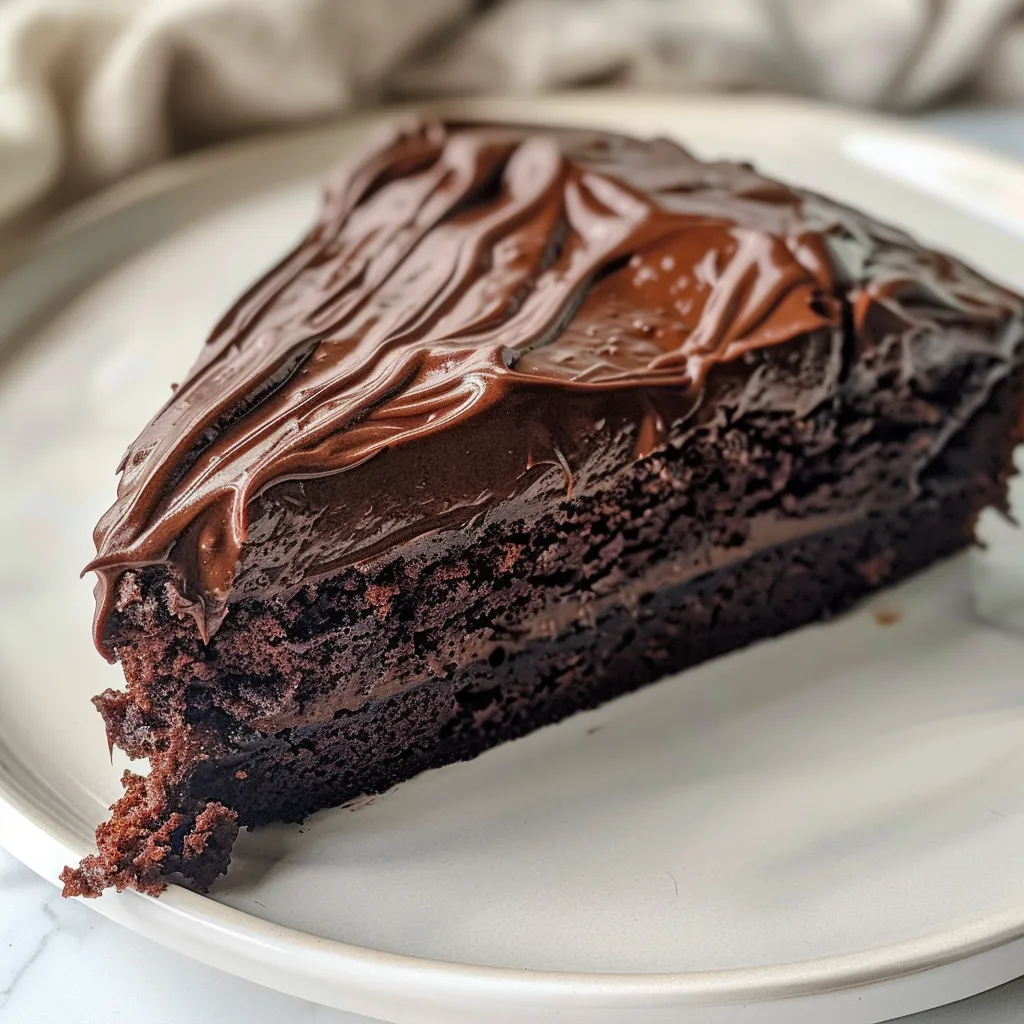
Side view of a decadent gluten-free chocolate cake, with chocolate layers visible and a smooth chocolate ganache.

Ready to get your bake on? Let’s break down the process into simple, easy-to-follow steps. You’ll be enjoying your delicious cake in no time!

Step 1: Preheat the Oven

Preheat your oven to 350°F (175°C). This is crucial for ensuring that your cake rises properly.

Step 2: Prepare Your Cake Pan

Grease and flour a 9-inch round cake pan. To ensure the cake comes out easily, you can also use parchment paper at the bottom.

Step 3: Mix Dry Ingredients

In a large bowl, whisk together the gluten-free flour, cocoa powder, sugar, baking soda, baking powder, and salt. This step ensures even distribution of the leavening agents!

Step 4: Combine Wet Ingredients

Add the buttermilk, vegetable oil, eggs, and vanilla extract to the dry ingredients. Beat with an electric mixer on medium speed for about 2 minutes until smooth.

Step 5: Add Boiling Water

Gradually add the boiling water to the batter, mixing until well combined. Don’t worry if the batter seems thin; that’s exactly how it should be!

Step 6: Bake the Cake

Pour the batter into the prepared cake pan and bake for 30-35 minutes, or until a wooden skewer inserted into the center comes out clean.

Step 7: Cool the Cake

Let the cake cool in the pan for about 10 minutes before inverting it onto a wire rack to cool completely. Patience is key here!

Step 8: Frost and Serve

Once the cake is completely cool, frost it with your favorite frosting — chocolate buttercream is a classic choice! Enjoy a slice and watch the smiles unfold.

Pro Tips for Baking Success

Want to ensure your gluten-free chocolate cake turns out perfectly? Here are some expert tips to keep in mind:

  • Measure your flour correctly: Spoon the flour into your measuring cup and level it off with a knife. This avoids packing it down, which can lead to a dense cake.
  • Use room temperature ingredients: Bringing eggs and buttermilk to room temperature helps them mix better into the batter.
  • Check your oven temperature: An oven thermometer can help ensure your cake bakes at the right temperature, as oven settings can vary.
  • Don’t skip the boiling water: This step is essential for keeping the cake moist and enhancing the chocolate flavor.
  • Let the cake cool completely: This avoids melting your frosting into a gooey puddle!
  • Explore gluten-free flour blends: Different blends produce varying results. Experiment to find what works best for you.
  • Frost with care: Use a spatula or an offset knife to spread frosting smoothly for a beautiful finish.
  • Store properly: Keep your cake in an airtight container to maintain freshness, especially if you have leftovers.

Common Mistakes and Troubleshooting

Even experienced bakers can run into issues, so here are some common mistakes and how to avoid or fix them:

  • Cake is too dense: This could be due to overmixing or incorrect flour measurements. Ensure you’re measuring correctly and mixing just until combined.
  • Cake doesn’t rise: Make sure your baking soda and baking powder are fresh. Expired leavening agents can lead to flat cakes.
  • Cake is dry: If the cake is dry, it may have been baked too long or the oven temperature was too high. Always check for doneness a few minutes early.
  • Frosting is too runny: This usually means you need more powdered sugar or that the cake wasn’t completely cooled before frosting.

Variations on Mom’s Famous Gluten-Free Chocolate Cake

Feeling adventurous? Here are some fun variations to consider:

  • Flourless Chocolate Cake: Omit the flour and replace it with cocoa powder for a rich, fudgy cake.
  • Dairy-Free Option: Substitute buttermilk with almond milk mixed with a tablespoon of vinegar and use a dairy-free frosting.
  • Chocolate Chip Addition: Add 1 cup of gluten-free chocolate chips to the batter for extra chocolatey goodness!
  • Mint Chocolate Cake: Add peppermint extract to the batter for a refreshing twist.

Storage and Make-Ahead Instructions

Want to prepare ahead of time? Here’s how to store your cake:

  • Room Temperature: Keep the cake covered at room temperature for up to 3 days.
  • Refrigerator: For longer storage, refrigerate the cake for up to a week. Just make sure it’s in an airtight container!
  • Freezing: You can freeze the cake for up to 3 months. Wrap it well in plastic wrap and aluminum foil to prevent freezer burn.

Comprehensive FAQ

Here are answers to some frequently asked questions:

  • Can I use regular flour instead of gluten-free flour? No, this recipe is specifically formulated for gluten-free flour. Regular flour contains gluten, which is not suitable for gluten-free diets.
  • What can I use instead of buttermilk? You can mix regular milk with a tablespoon of vinegar or lemon juice to create a buttermilk substitute.
  • How do I know when the cake is done? Insert a toothpick in the center; if it comes out clean or with a few crumbs, it’s done!
  • Can I make this cake ahead of time? Yes! This cake stores well and can be made a day or two in advance.
  • What frosting goes well with chocolate cake? Chocolate buttercream, cream cheese frosting, and whipped cream are all great options!
  • Is this cake suitable for kids? Absolutely! It’s a delicious treat everyone can enjoy, and kids love it!
  • Can I add nuts to the batter? Yes! Chopped walnuts or pecans can add a delightful crunch.
  • How do I make this cake more chocolatey? Consider adding cocoa powder or chocolate chips to the batter for an extra chocolate kick!

Nutrition Tips and Dietary Adaptations

Here’s how to make this cake even healthier:

  • Reduce Sugar: Consider using a sugar substitute or reducing the sugar by 25% for a less sweet cake.
  • Whole Grains: If you’re not strictly gluten-free, you can use whole wheat flour for added nutrition.
  • Add Fiber: Incorporate ground flaxseed or chia seeds to boost fiber content.
  • Fruit Purees: Substitute some of the oil with unsweetened applesauce for a healthier fat option.

Equipment Recommendations

Here’s what you’ll need to make this cake:

  • Mixing Bowl: A large mixing bowl for combining ingredients.
  • Electric Mixer: Makes mixing a breeze, but you can also use a whisk and some elbow grease!
  • 9-inch Round Cake Pan: This is the perfect size for our cake.
  • Cooling Rack: Essential for cooling your cake evenly.
  • Measuring Cups and Spoons: Accurate measurements are key to baking success!

Serving Suggestions

When it comes to serving your cake, consider these delightful options:

  • With Ice Cream: A scoop of vanilla or chocolate ice cream pairs perfectly with the rich cake.
  • Fresh Berries: Serve with strawberries or raspberries for a refreshing contrast.
  • Drizzled with Chocolate Sauce: Add an extra layer of chocolatey goodness with a warm chocolate drizzle.
  • Whipped Cream: Top with a dollop of whipped cream for a classic touch!

There you have it, friends! A comprehensive guide to baking Mom’s Famous Gluten-Free Chocolate Cake. With its rich flavor, moist texture, and delightful ease, this cake is sure to become a family favorite. Remember, the kitchen is a place for joy and creativity, so don’t stress if things don’t go perfectly. Enjoy the process, share with loved ones, and savor every delicious bite! Happy baking!

Bake Mom's Famous Gluten-Free Chocolate Cake: An Unbeatable Treat

Prep Time 15 minutes
Cook Time 35 minutes
Total Time 50 minutes
Servings 8 pieces
Calories 350
This rich and moist gluten-free chocolate cake is perfect for any celebration or craving. Easy to make and irresistibly delicious.

Ingredients

Dry ingredients

  • 1 cup gluten-free all-purpose flour
  • ¾ cup unsweetened cocoa powder
  • 1 ½ cups granulated sugar
  • 1 ½ teaspoons baking soda
  • ¾ teaspoon baking powder
  • ¾ teaspoon salt
  • 1 cup buttermilk
  • ½ cup vegetable oil
  • 2 large eggs
  • 2 teaspoons vanilla extract
  • 1 cup boiling water

Instructions 

  • Preheat oven to 350°F (175°C). Grease and flour a 9-inch round pan.
  • Mix dry ingredients in a large bowl. Add wet ingredients and beat for 2 minutes.
  • Gradually add boiling water, mix until smooth. Pour into pan.
  • Bake for 30-35 minutes. Cool before frosting.

Notes

Use high-quality cocoa for best flavor.
Calories: 350kcal
Cost: $15
Course: Dessert
Cuisine: American
Keyword: chocolate

Whip Up a Delightful Valentine’s Breakfast Plate

Valentine’s Day is not just about flowers and chocolates; it’s a day to show your love in every little way, including breakfast! Crafting a charming Valentine’s breakfast plate is a wonderful way to express affection, and you don’t need to be a gourmet chef to pull it off. With a few simple ingredients and a sprinkle of love, you can create a delightful spread that will impress your partner and set a sweet tone for the day. So, let’s dive into making a breakfast plate that’s not just delicious but also full of heart!

Why You’ll Love This Recipe

  • Simple Ingredients: All you need are everyday pantry staples to create a stunning breakfast experience.
  • Customizable Options: Easily swap ingredients based on your or your partner’s preferences.
  • Fun Presentation: Heart-shaped pancakes, colorful sprinkles, and fresh berries make for an Instagram-worthy plate.
  • Quality Time: Cooking together can be a bonding experience that enhances your connection.
  • Quick and Easy: This recipe doesn’t require hours in the kitchen, making it perfect for busy mornings.

Essential Components of a Valentine’s Breakfast Plate

Your Valentine’s breakfast plate will consist of several delightful elements that cater to different tastes and aesthetics. Here’s what you’ll need:

  • Heart-Shaped Pancakes: The star of the show! Fluffy and sweet, these pancakes are made with love.
  • Chocolate Dipped Donuts: A sweet surprise that adds a touch of decadence.
  • Mini Chocolate Chip Muffins: These bite-sized treats are perfect for a sweet nibble.
  • Pink Strawberry Milkshake: A creamy and refreshing drink that balances the sweet flavors.
  • Fresh Berries: Add a pop of color and freshness to your plate.
  • Whipped Cream: To top it all off, because everything’s better with whipped cream!

Recipe: Valentine’s Breakfast Plate

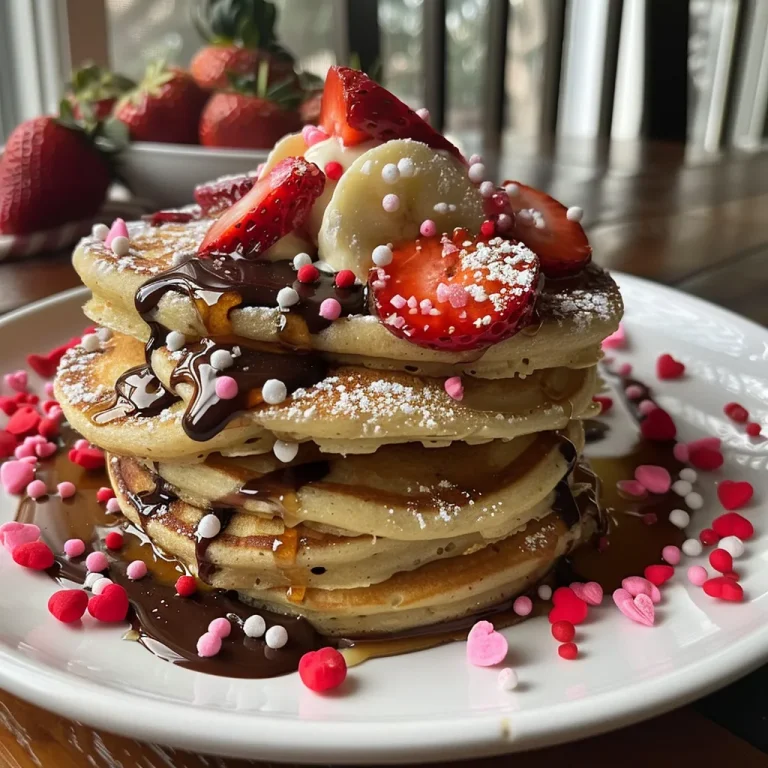
A close-up view of a Valentine's breakfast plate featuring chocolate-dipped treats and sprinkles.

Ingredients

Gather the following ingredients to create your Valentine’s breakfast plate:

  • 1 cup all-purpose flour
  • 1 tbsp sugar
  • 1 tsp baking powder
  • Pinch of salt
  • 1 egg
  • ¾ cup milk
  • 1 tbsp melted butter
  • ¼ cup sugar (for donuts)
  • 1 tsp baking powder (for donuts)
  • ½ tsp baking soda (for donuts)
  • ½ cup milk (for donuts)
  • 2 tbsp oil (for donuts)
  • ½ tsp vanilla extract (for donuts)
  • Melted chocolate (milk or dark)
  • Pink and red sprinkles
  • ¼ cup mini chocolate chips (for muffins)
  • 2 cups cold milk (for milkshake)
  • 1 cup vanilla ice cream (for milkshake)
  • ½ cup strawberries or strawberry syrup (for milkshake)
  • Whipped cream
  • Pink sprinkles

Steps

Let’s bring this breakfast plate to life in a few simple steps:

  • Mix the dry ingredients for the pancakes in one bowl.
  • In another bowl, whisk together the egg, milk, and melted butter.
  • Combine the wet and dry mixtures, stirring gently.
  • Heat a non-stick pan, lightly grease it, and pour batter into a heart-shaped mold.
  • Cook until golden brown and flip to cook the other side.
  • Preheat your oven to 350°F (180°C) for the donuts.
  • Mix dry ingredients for the donuts in a bowl.
  • In another bowl, mix the wet ingredients separately.
  • Combine wet and dry ingredients, then pour into greased donut molds.
  • Bake for 10-12 minutes, then dip in melted chocolate and decorate with sprinkles.
  • For the mini muffins, mix dry ingredients in one bowl and wet ingredients in another.
  • Combine, fold in chocolate chips, and bake in mini muffin tins at 350°F for 12-15 minutes.
  • Blend milk, ice cream, and strawberries until smooth for the milkshake.
  • Pour into clear cups and top with whipped cream and sprinkles.

Pro Tips for a Perfect Valentine’s Breakfast Plate

  • Use a Heart-Shaped Mold: For perfect heart-shaped pancakes, invest in a good quality heart-shaped pancake mold.
  • Chill Your Ingredients: Cold ingredients help create fluffier pancakes and muffins.
  • Don’t Overmix: Mix your batter just until combined to avoid tough pancakes.
  • Experiment with Flavors: Add vanilla or almond extract for an extra flavor kick in your pancakes.
  • Keep Warm: Keep finished pancakes and muffins warm in the oven while you finish cooking.
  • Make Ahead: Prepare the batter the night before and store it in the fridge for a quicker morning prep.
  • Garnish Wisely: Use fresh mint or chocolate shavings for an extra touch of elegance on your plate.
  • Pair with Coffee: A nice cup of coffee or tea can elevate your breakfast experience.

Common Mistakes and Troubleshooting

Even the best of us can make mistakes in the kitchen! Here are common pitfalls and how to avoid them:

  • Overcooking Pancakes: Keep an eye on them; they only need a couple of minutes per side.
  • Dry Muffins: Ensure you measure your flour correctly; too much can lead to dry muffins.
  • Runny Milkshake: If your milkshake is too runny, add more ice cream or frozen strawberries.
  • Chocolates Not Sticking: Ensure your donuts are still warm when dipping them in chocolate for better adherence.

Delicious Variations

Mix things up with these fun variations to your Valentine’s breakfast plate:

  • Blueberry Pancakes: Add fresh or frozen blueberries to your pancake batter for a fruity twist.
  • Vegan Option: Substitute eggs with flaxseed meal and use almond milk and dairy-free butter.
  • Nutty Muffins: Incorporate chopped walnuts or pecans for an added crunch in your muffins.
  • Chocolate Banana Milkshake: Blend in a ripe banana for a creamy, chocolatey delight in your milkshake.

Storage and Make-Ahead Instructions

If you want to prep ahead for your Valentine’s breakfast:

  • Pancake Batter: Refrigerate for up to 24 hours.
  • Muffins: Store in an airtight container for up to 3 days or freeze for up to a month.
  • Donuts: Best served fresh, but can be stored at room temperature for up to 2 days.
  • Milkshake: Best served immediately, but you can blend ingredients and store in the fridge for a quick pour in the morning.

Frequently Asked Questions

  • Can I make this breakfast plate gluten-free? Yes! Use a gluten-free all-purpose flour for the pancakes and muffins.
  • What can I use instead of milk? Almond milk or oat milk works great as substitutes.
  • How long does it take to make this breakfast? Approximately 30-40 minutes from start to finish.
  • Can I add protein to my pancakes? Absolutely! You can mix in protein powder or Greek yogurt for an extra boost.
  • What’s the best way to serve this breakfast? Arrange everything on a large platter for a beautiful spread.
  • Are there any nut-free options? Yes! Just avoid any nuts in the muffins and use nut-free milk.
  • Can I use frozen berries? Yes! Frozen berries work perfectly in pancakes and muffins.
  • What’s the best type of chocolate for dipping? Milk chocolate or dark chocolate, depending on your preference.

Nutrition Tips and Dietary Adaptations

Keep your breakfast both delicious and nutritious:

  • Opt for Whole Wheat Flour: For a healthier pancake, use whole wheat flour instead of all-purpose.
  • Reduce Sugar: Feel free to cut down on sugar in the pancakes or muffins without sacrificing taste.
  • Add Seeds: Chia or flax seeds can provide extra nutrients and fiber.
  • Use Fresh Fruit: Fresh berries not only taste great but also add vitamins and antioxidants.

Equipment Recommendations

For a smooth cooking experience, here’s what you’ll need:

  • Non-Stick Pan: Ideal for making pancakes without them sticking.
  • Heart-Shaped Pancake Mold: To achieve those perfect heart shapes.
  • Mixing Bowls: A set of mixing bowls in various sizes is essential.
  • Baking Trays: For baking the donuts and muffins.
  • Blender: Necessary for whipping up that delicious milkshake.

Serving Suggestions

Present your Valentine’s breakfast plate with flair:

  • Use Fresh Flowers: Decorate your table with fresh flowers to enhance the romantic vibe.
  • Colorful Plates: Use vibrant plates to make the food pop visually.
  • Pair with Mimosas: A refreshing mimosa can add a celebratory feel to the breakfast.
  • Offer a Sweet Note: Leave a little love note on the plate or table to surprise your partner.

Cooking can be a delightful form of expression, especially on a day dedicated to love. With this Valentine’s breakfast plate, you’re not just serving food; you’re serving up affection and creativity. So roll up your sleeves, don that apron, and let’s make some memories in the kitchen. Remember, it’s all about enjoying the process, even if things don’t go perfectly. Happy cooking, and happy Valentine’s Day!

Valentine’s Breakfast Plate

Prep Time 20 minutes
Cook Time 20 minutes
Total Time 40 minutes
Servings 4 plates
Calories 950
A delightful breakfast featuring heart-shaped pancakes, muffins, donuts, and a strawberry milkshake, perfect for celebrating love and sweetness.

Ingredients

Dry Ingredients for Pancakes

  • 1 cup all-purpose flour
  • 1 tbsp sugar
  • 1 tsp baking powder
  • Pinch salt

Wet Ingredients for Pancakes

  • 1 egg egg
  • ¾ cup milk
  • 1 tbsp melted butter

Additional Dry for Muffins

  • 1 cup flour
  • ¼ cup sugar
  • ½ tsp baking powder
  • 1 egg egg
  • ½ cup milk
  • 2 tbsp oil
  • ¼ cup mini chocolate chips

Milkshake Ingredients

  • 2 cups cold milk
  • 1 cup vanilla ice cream
  • ½ cup strawberries or strawberry syrup

Toppings

  • as needed whipped cream
  • as needed pink sprinkles

Instructions 

  • Mix dry ingredients for pancakes in one bowl.
  • Whisk egg, milk, and butter; combine with dry ingredients.
  • Pour batter into heart molds and cook until golden.
  • Bake muffins and donuts; dip donuts in melted chocolate and decorate.
  • Blend milk, ice cream, and strawberries; serve with whipped cream and sprinkles.

Notes

Use heart-shaped molds for a festive touch and enjoy immediately.
Calories: 950kcal
Cost: $15
Course: Breakfast
Cuisine: American
Keyword: Pancakes, Sweet, Valentine

Welcome to Your New Favorite Detox Soup Recipe

Are you ready to embrace a vibrant, healthy lifestyle without sacrificing flavor? This easy detox vegetable soup is the perfect solution for busy days when nutritious meals are a must. Bursting with fresh vegetables and wholesome ingredients, this soup not only nourishes your body but also delights your taste buds. In under an hour, you’ll have a hearty meal that’s as comforting as it is revitalizing. Let’s dive into the details of this incredible recipe!

Why You’ll Love This Recipe

This detox soup is more than just a meal; it’s a celebration of health and flavor. Here are five reasons you’ll love it:

  • Quick and Easy Preparation: With minimal prep time and simple steps, you can whip this soup up even on your busiest days.
  • Nutrient-Dense Ingredients: Packed with colorful vegetables and beans, this soup provides essential vitamins and minerals that help your body thrive.
  • Versatile and Customizable: Feel free to add your favorite veggies or proteins to make this recipe your own!
  • Comforting and Satisfying: This soup is not only healthy but also hearty, making it a perfect meal for any time of the year.
  • Great for Meal Prep: It stores well in the fridge and tastes even better the next day, making it ideal for meal planning!

Ingredients Breakdown

To create this nourishing soup, you’ll need the following ingredients:

  • 1 medium sweet potato (*peeled and cut into cubes): This adds natural sweetness and a creamy texture.
  • 1 cup carrots (*sliced): Carrots bring color and are rich in beta carotene.
  • 2 stalks celery (*diced): Adds crunch and a subtle flavor.
  • 1 small yellow onion (*diced): The aromatic base for your soup.
  • 2 tbsp olive oil: For sautéing and enhancing flavor.
  • 3 cloves garlic (*minced): A must for that aromatic kick!
  • 1 ½ cups freshly chopped tomatoes (*about 2 tomatoes): Adds freshness and acidity.
  • ½ tsp smoked paprika: For a hint of smokiness.
  • 1 can kidney beans (*rinsed and drained): A great source of protein and fiber.
  • 4 cups low sodium vegetable broth (*plus 2 cups of water as needed): The soup’s liquid base that enhances flavor.
  • 1 large kale leaf (*chopped): A nutrient powerhouse that wilts perfectly into the soup.
  • ½ cup chopped parsley: Fresh herbs brighten up the flavors.
  • Sea salt and fresh ground pepper (*to taste): Essential for seasoning.

**Substitutions**: You can easily swap out any of the vegetables for what you have on hand. Spinach can replace kale, or you can use any type of beans instead of kidney beans. Just remember to adjust cooking times for different vegetables!

How to Make Detox Soup

Side angle of a vibrant detox soup showcasing sweet potatoes, carrots, and kale.

Now, let’s get cooking! Follow these simple steps to create your delicious detox soup:

  1. In a large soup pot, heat the olive oil over medium heat.
  2. Stir in the sweet potato, carrots, celery, and onion. Season with sea salt and fresh pepper and stir well. Cook until softened, stirring occasionally, for about 5-7 minutes.
  3. Add the tomatoes, garlic, and smoked paprika. Cook for another minute, stirring frequently.
  4. Stir in the kidney beans and broth. Bring to a simmer and let it cook on medium-low for about 45 minutes, stirring occasionally. Add up to 2 cups of water, 1/4 cup at a time, if the soup reduces too much.
  5. Finally, stir in the kale and parsley, remove from heat, and let sit for five minutes, covered, to wilt the kale.
  6. Serve warm and enjoy!
  7. Store leftovers in a sealed container in the fridge for up to 4 days.

Pro Tips for the Perfect Detox Soup

Here are some expert insights to elevate your soup-making game:

  • Prep Ahead: Chop your veggies the night before to save time.
  • Use Fresh Ingredients: The fresher your ingredients, the better the flavor. Choose seasonal veggies whenever possible.
  • Don’t Skip the Seasoning: Proper seasoning at each step builds layers of flavor. Taste and adjust as you go!
  • Texture Matters: If you prefer a smoother texture, blend a portion of the soup and mix it back in for a creamy finish.
  • Add Complexity: Try adding a splash of lemon juice or a dash of hot sauce for an added flavor kick!
  • Garnish with Fresh Herbs: A sprinkle of fresh parsley or cilantro right before serving can elevate the presentation and flavor.
  • Cook with Love: Remember, cooking is an art! Enjoy the process and let your creative juices flow.
  • Don’t Rush It: Allow the soup to simmer gently. This helps develop deeper flavors.

Common Mistakes and Troubleshooting

Even the best cooks make mistakes! Here’s how to avoid some common pitfalls:

  • Overcooking Vegetables: Keep an eye on your veggies. Overcooked vegetables can become mushy and lose their vibrant colors.
  • Not Enough Liquid: If the soup is too thick, simply add more broth or water until you reach your desired consistency.
  • Forgetting to Season: Always taste your soup before serving. Adjust seasoning as needed to enhance flavors.
  • Using Dried Herbs Instead of Fresh: Fresh herbs can significantly boost flavor. If using dried, remember they are more concentrated, so adjust quantities accordingly.

Delicious Variations to Try

Want to switch things up? Here are four variations that keep this soup exciting:

  • Spicy Detox Soup: Add diced jalapeños or a teaspoon of crushed red pepper flakes for a spicy kick.
  • Creamy Coconut Detox Soup: Stir in a can of coconut milk for a creamy texture and tropical flavor.
  • Protein-Packed Detox Soup: Add shredded chicken, tofu, or quinoa for an extra protein boost.
  • Herbed Detox Soup: Mix in fresh basil, dill, or thyme for a completely different flavor profile.

Storage and Make-Ahead Instructions

This soup is perfect for meal prep! Here’s how to store it properly:

  • Refrigeration: Store in an airtight container in the fridge for up to 4 days.
  • Freezing: Freeze leftovers in a freezer-safe container for up to 3 months. Thaw in the fridge overnight before reheating.
  • Reheating: Reheat on the stove over medium heat, adding a splash of water or broth to loosen the soup if needed.

Comprehensive FAQ

Got questions? Here are some common inquiries about this detox soup:

  • Can I use frozen vegetables? Yes! Just add them directly to the pot, but you may need to adjust the cooking time slightly.
  • Is this soup vegan? Absolutely! All ingredients are plant-based.
  • Can I add grains? Yes! Quinoa or brown rice can be added during the last 15 minutes of cooking.
  • How spicy is this soup? It’s mild, but you can easily add more spice to suit your taste.
  • What if I don’t like kale? Feel free to substitute with spinach or omit it altogether.
  • Can I make this soup in a slow cooker? Yes! Sauté vegetables first, then transfer to the slow cooker with broth and cook on low for 6-8 hours.
  • What’s the nutritional value? This soup is low in calories but high in vitamins, fiber, and protein, making it a nutritious option.
  • Can I use other beans? Definitely! Chickpeas or black beans are great alternatives.

Nutrition Tips and Dietary Adaptations

Keep your health goals in mind with these easy adaptations:

  • Low-Carb Option: Substitute sweet potatoes with zucchini or cauliflower for a lower carb count.
  • Gluten-Free: This recipe is naturally gluten-free, perfect for those with dietary restrictions.
  • Heart-Healthy: Using low-sodium broth and healthy fats like olive oil makes this a heart-friendly dish.

Equipment Recommendations

To make your cooking experience seamless, consider these essential tools:

  • Large Soup Pot: A heavy-bottomed pot helps distribute heat evenly.
  • Sharp Knife: For efficient chopping of vegetables.
  • Cutting Board: A stable surface ensures safety while prepping.
  • Measuring Cups and Spoons: Precision is key for consistent results.
  • Blender (Optional): For those who prefer a smooth soup texture, an immersion blender works wonders!

Serving Suggestions

This detox soup is versatile and pairs well with many options:

  • Crusty Bread: Serve with a slice of whole-grain bread for a filling meal.
  • Salad: A light green salad on the side makes for a balanced meal.
  • Avocado: Top your soup with sliced avocado for creaminess and healthy fats.

Conclusion: Embrace Health with Every Spoonful

Cooking doesn’t have to be overwhelming or complicated; it can be fun, rewarding, and delicious! This detox vegetable soup is your ticket to a healthier lifestyle, packed with flavors that warm your heart and nourish your soul. Remember, it’s all about enjoying the process and sharing good food with loved ones. Try this recipe today, and let me know how you loved it! Happy cooking!

Easy to Make Detox Soup Recipe - Packed with Vegetables

Prep Time 10 minutes
Cook Time 45 minutes
Total Time 55 minutes
Servings 4 servings
Calories 250
This vibrant detox soup is packed with wholesome vegetables and flavors, perfect for a healthy, nourishing meal.

Ingredients

Vegetables

  • 1 medium sweet potato (peeled and cut into cubes)
  • 1 cup carrots (sliced)
  • 2 stalks celery (diced)
  • 1 small yellow onion (diced)
  • 2 tbsp olive oil
  • 3 cloves garlic (minced)
  • 1.5 cups freshly chopped tomatoes (about 2 tomatoes)
  • ½ tsp smoked paprika
  • 1 can kidney beans (rinsed and drained)
  • 4 cups low sodium vegetable broth (plus 2 cups of water as needed)
  • 1 large kale leaf (chopped)
  • ½ cup chopped parsley
  • to taste sea salt and fresh ground pepper

Instructions 

  • Heat olive oil in a large pot over medium heat.
  • Add sweet potato, carrots, celery, and onion; season with salt and pepper. Cook until softened, about 5-7 minutes.
  • Stir in tomatoes, garlic, and paprika; cook for 1 minute.
  • Add beans and broth; simmer for 45 minutes, adding water if needed.
  • Stir in kale and parsley; cover and let sit for 5 minutes to wilt kale.
  • Serve warm and store leftovers in a sealed container in the fridge.

Notes

This soup is a nutritious and easy way to boost your vegetable intake.
Calories: 250kcal
Cost: $15
Course: Soup
Keyword: Vegetables

Welcome to the delightful world of mini chocolate cakes! These bite-sized wonders are perfect for every occasion, whether you’re celebrating a birthday, hosting a dinner party, or just treating yourself after a long day. With their rich chocolate flavor and creamy ganache, these mini cakes are sure to impress everyone at the table. Plus, they’re made with everyday ingredients that you probably already have in your pantry. So, what are you waiting for? Let’s dive into this easy and delicious recipe!

Why You’ll Love This Recipe

Here are five reasons why this mini chocolate cake recipe will become a favorite in your kitchen:

  • Quick and Easy: You can whip up these mini cakes in no time, making them perfect for last-minute gatherings or sweet cravings.
  • Perfect Portions: These individual chocolate cakes are the ideal serving size for guests, ensuring everyone can enjoy their own little piece of heaven.
  • Endless Customization: Feel free to play around with flavors, fillings, and toppings. From berry compote to caramel drizzle, the options are endless!
  • Impressive Presentation: With their charming appearance and rich ganache topping, these mini cakes are sure to wow your guests and elevate your dessert game.
  • Make Ahead Delight: You can prepare these mini cakes in advance and store them, making entertaining easier and stress-free.

Ingredients Breakdown

Before you start baking, let’s take a closer look at the ingredients you’ll need for these mini chocolate cakes, along with some substitutions if you’re missing an item or two!

  • Plain Flour: 1 ½ cups. You can substitute with whole wheat flour for a nuttier flavor, though the texture may vary.
  • Baking Powder: 1 tsp. This helps the cakes rise; baking soda can be used in its place if necessary, but adjust the quantity accordingly.
  • Baking Soda: ½ tsp. Provides additional lift; it works best when paired with an acidic ingredient like buttermilk.
  • Cocoa Powder: ¾ cup (unsweetened). For a deeper chocolate flavor, consider using Dutch-processed cocoa.
  • White Sugar: 1 cup. You can replace this with brown sugar for a hint of caramel flavor.
  • Buttermilk: 1 cup. If you don’t have buttermilk, mix milk with a tablespoon of vinegar and let it sit for 5 minutes.
  • Melted Unsalted Butter: ½ cup. Coconut oil or vegetable oil can be used as a dairy-free alternative.
  • Hot Water: ½ cup. This helps to bloom the cocoa, enhancing the chocolate flavor.
  • Heavy Cream: 1 cup (for ganache). Use coconut cream for a non-dairy option.
  • Chopped Dark Chocolate: 8 oz. Semi-sweet chocolate chips can also work in a pinch.
  • Confectioner’s Sugar: 2 tbsp. For a touch of sweetness in the whipped cream; you can omit this for a less sweet topping.
  • Vanilla Extract: 1 tsp. Always a great addition to enhance flavors.

How to Make Mini Chocolate Cakes

Follow these simple steps to create your delicious mini chocolate cakes:

  1. Preheat your oven to 175°C (350°F). Prepare a mini cake tray by greasing and flouring it, or line it with parchment paper.
  2. In a large mixing bowl, whisk together the flour, white sugar, cocoa powder, salt, baking powder, and baking soda.
  3. In another bowl, combine the buttermilk, eggs, melted butter, and vanilla. Mix until well combined.
  4. Gradually add the wet ingredients to the dry ingredients, stirring until just combined. Then, stir in the hot water carefully until the batter is smooth.
  5. Spoon the batter into your prepared mini cake trays, filling each about two-thirds full. Bake for 18-20 minutes, or until a toothpick inserted into the center comes out clean.
  6. Let the mini cakes cool completely in the pan before transferring them to a wire rack.

Making the Ganache

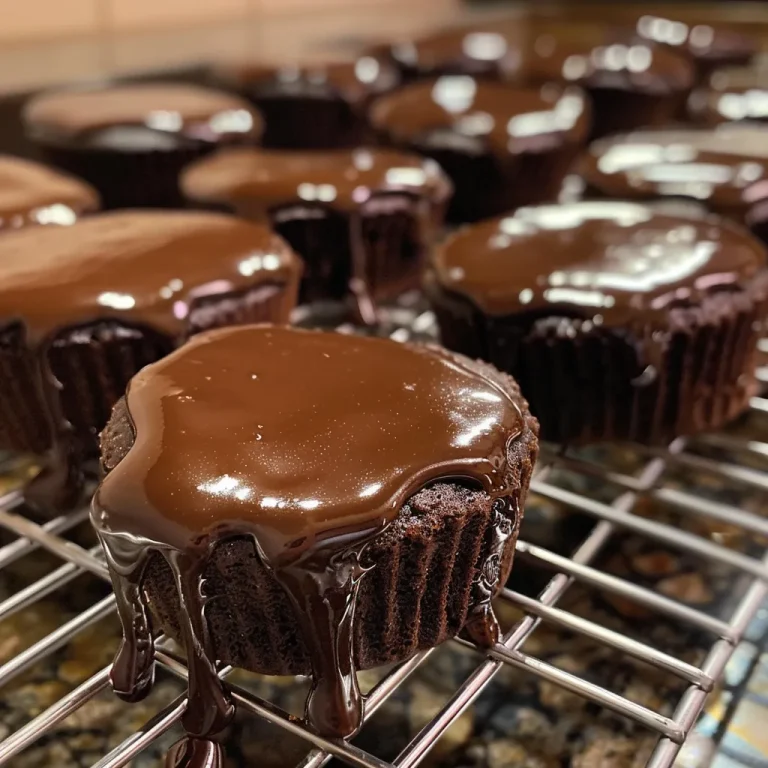
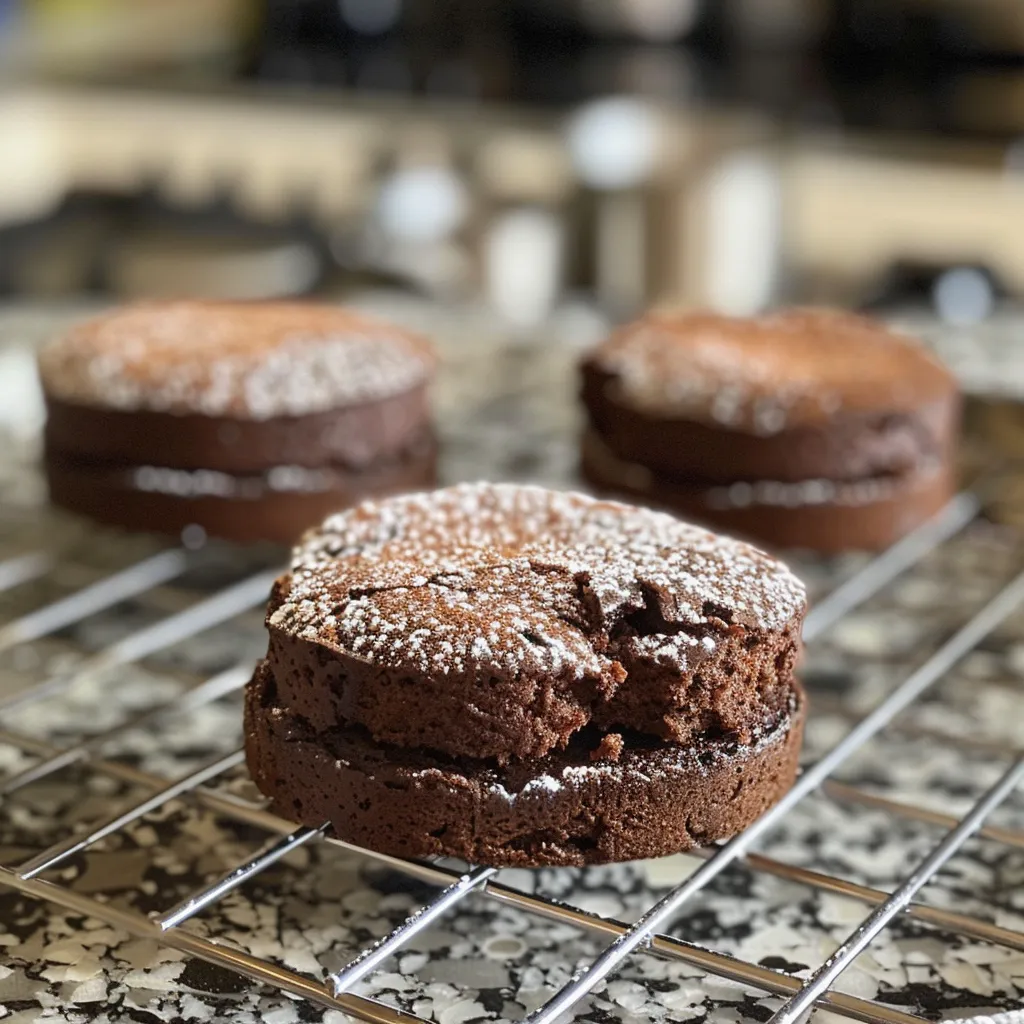
Side view of rich mini chocolate cakes featuring a creamy frosting and a sprinkle of cocoa.

Now, let’s create that heavenly chocolate ganache that will drizzle so beautifully over your mini cakes:

  1. In a small saucepan, warm the heavy cream over medium heat until it just starts to simmer.
  2. Pour the hot cream directly over the chopped dark chocolate. Let it sit for a minute to melt.
  3. Gently stir until the mixture is smooth and shiny. Allow it to cool slightly so it thickens up a bit.

Whipping the Cream

For a luscious topping, let’s whip some cream:

  1. In a chilled bowl, beat together the chilled heavy cream, confectioner’s sugar, and vanilla extract until soft peaks form. Be careful not to overwhip!

Assembling Your Mini Cakes

It’s time to assemble your mini chocolate cakes!

  1. Once the cakes are cool, carefully slice each one in half horizontally.
  2. Spread a layer of the whipped cream on the bottom half of each cake, then place the top layer back on.
  3. Drizzle the ganache over the tops of the cakes, allowing it to cascade down the sides for that stunning effect.

Pro Tips for Perfect Mini Cakes

Here are some expert tips to ensure your mini chocolate cakes turn out perfectly every time:

  • Room Temperature Ingredients: Ensure all your ingredients are at room temperature for a smooth batter.
  • Don’t Overmix: Mix the batter just until combined to keep the cakes tender.
  • Use Quality Chocolate: The better the chocolate, the richer your ganache will be.
  • Chill Your Bowl: For the whipped cream, chill your mixing bowl and beaters for better volume.
  • Check for Doneness: Use a toothpick to check; if it comes out clean, your cakes are ready!
  • Experiment with Flavors: Add espresso powder to the batter for a deeper chocolate flavor or orange zest for a citrusy twist.
  • Let the Ganache Cool: Allow the ganache to sit briefly before pouring; it should be pourable but not too runny.
  • Store Properly: Keep any leftovers in an airtight container in the fridge.

Common Mistakes and Troubleshooting

If you’ve run into any issues, here are some common mistakes to avoid:

  • Cakes are dry: This could be due to overbaking or too much flour. Always measure flour correctly and check for doneness early.
  • Ganache is too thin: If it doesn’t set properly, it may need more chocolate. Heat and stir again to help it thicken.
  • Whipped cream won’t hold peaks: Ensure your cream is cold and don’t overwhip, or it will turn to butter.

Variations to Try

Feeling adventurous? Here are some fun variations to consider:

  • Mocha Mini Cakes: Add 1 tablespoon of instant coffee to the batter for a mocha twist.
  • Nutty Delight: Fold in chopped walnuts or pecans into the batter for added crunch.
  • Berry Topping: Top your cakes with fresh berries for a pop of color and freshness.
  • Chocolate Mint: Add a few drops of peppermint extract to the ganache for a refreshing minty flavor.

Storage and Make-Ahead Instructions

You can make these mini chocolate cakes ahead of time:

  • Storing: Keep any leftover cakes in an airtight container in the fridge for up to 3 days.
  • Make Ahead: Bake the mini cakes a day in advance and store them without frosting in the fridge. Frost them just before serving for best results.

Frequently Asked Questions

Got questions? Here are some common ones:

  • Can I freeze these mini cakes? Yes! Bake the cakes and freeze them without frosting. Thaw before decorating.
  • What can I use instead of buttermilk? Mix 1 cup of regular milk with 1 tablespoon of vinegar or lemon juice and let it sit for 5 minutes.
  • How do I make my ganache shiny? Use high-quality chocolate and ensure the cream is hot enough to melt it fully.
  • Can I use cocoa powder instead of chocolate? While you can add cocoa powder to the batter, the ganache should be made with actual chocolate for best results.
  • What if my ganache separates? Gently reheat and stir to bring it back together; adding a bit more cream can help too.
  • How do I know when my cakes are done? A toothpick inserted in the center should come out clean or with a few moist crumbs.
  • Can I make mini cakes without eggs? Yes! Substitute with flax eggs or unsweetened applesauce for a vegan option.
  • How thick should my ganache be? It should be pourable but not runny; let it cool slightly before pouring.

Nutritional Tips and Dietary Adaptations

This recipe can easily be adapted to suit various dietary needs:

  • Gluten-Free: Substitute all-purpose flour with a gluten-free blend.
  • Dairy-Free: Replace the buttermilk and cream with plant-based alternatives.
  • Lower Sugar: Use a sugar substitute or reduce the sugar amount in the batter.

Equipment Recommendations

To make these mini chocolate cakes, here are some essential tools you’ll need:

  • Mini Cake Tray: Perfect for baking your individual cakes.
  • Mixing Bowls: A set of different sizes will make your prep easier.
  • Whisk: For combining dry ingredients and mixing wet ingredients.
  • Measuring Cups and Spoons: Accurate measurements are key for baking success.
  • Offset Spatula: Great for frosting and smoothing ganache.

Serving Suggestions

Serve your mini chocolate cakes with style! Here are a few ideas:

  • Fresh Berries: Top with strawberries or raspberries for a vibrant touch.
  • Ice Cream: A scoop of vanilla or mint ice cream pairs perfectly with the rich chocolate.
  • Chocolate Shavings: Decorate with chocolate curls for an elegant finish.

In conclusion, these mini chocolate cakes are not just desserts; they are an experience. With their rich chocolate flavor, creamy ganache, and easy preparation, you’ll find that they are the perfect sweet treat for any occasion. So go ahead, get in the kitchen, and indulge your sweet tooth. Remember, great cooking is about enjoying the process just as much as the final dish. Happy baking!

Mini Chocolate Cakes

Prep Time 20 minutes
Cook Time 20 minutes
Total Time 40 minutes
Servings 12 pieces
Calories 350
Delight in these rich, moist mini chocolate cakes topped with luscious ganache and whipped cream, perfect for any celebration.

Ingredients

Dry ingredients

  • 1 tsp vanilla
  • 2 large eggs
  • 1.5 cups plain flour
  • 1 tsp baking powder
  • 0.5 tsp baking soda
  • 0.25 tsp salt
  • 1 cup white sugar
  • 0.75 cup cocoa powder (unsweetened)
  • 1 cup buttermilk
  • 0.5 cup melted unsalted butter
  • 0.5 cup hot water

Ganache

  • 8 oz chopped dark chocolate
  • 2 tbsp softened butter
  • 1 cup chilled heavy cream
  • 2 tbsp confectioner’s sugar
  • 1 tsp pure vanilla

Instructions 

  • Preheat oven to 175°C (350°F). Prepare mini cake tray with grease and flour or parchment.
  • Mix dry ingredients in one bowl. Beat wet ingredients in another. Combine and add hot water until smooth.
  • Fill trays 2/3 full, bake 18-20 mins. Cool before removing.
  • Heat cream until simmering, pour over chocolate, stir until smooth. Cool slightly.
  • Whip chilled cream with sugar and vanilla until peaks form. Slice cakes, spread whipped cream, top with ganache.

Notes

Ensure not to overbake for moist cakes. Chill ganache before pouring for best texture.
Calories: 350kcal
Cost: $15
Course: Dessert
Keyword: chocolate

Start Your Day with a Sweet Surprise: Heart-Shaped Pancakes

Whether it’s a special occasion like Valentine’s Day or just a regular Saturday morning, nothing says love quite like a stack of heart-shaped pancakes topped with fresh berries. These delightful pancakes are fluffy, easy to make, and perfect for bringing a smile to anyone’s face. In this article, we’ll dive deep into the world of heart-shaped pancakes, exploring everything from the recipe to variations, pro tips, and more!

Why You’ll Love This Recipe

These heart-shaped pancakes aren’t just about looks; they’re packed with flavor and joy. Here are some reasons why you’ll absolutely adore this recipe:

  • Fun and Festive: Perfect for celebrations, they create a cheerful atmosphere at breakfast.
  • Easy to Make: With simple ingredients and straightforward instructions, even beginner cooks can whip these up!
  • Customizable: Add your favorite fruits or toppings to make them uniquely yours.
  • Perfect for Sharing: Great for family breakfasts, breakfast in bed, or brunch with friends.
  • Deliciously Satisfying: Fluffy and flavorful, these pancakes will leave everyone asking for seconds.

Ingredients Breakdown

Let’s gather our ingredients and get ready to make some delicious heart-shaped pancakes! Here’s what you’ll need:

  • 1 ½ cups all-purpose flour: The base for fluffy pancakes.
  • 3 ½ tsp baking powder: This is your secret ingredient for light, airy texture.
  • ½ tsp salt: Enhances the overall flavor of the pancakes.
  • 1 tbsp granulated sugar: Adds a touch of sweetness.
  • 1 ¼ cups milk: For moisture; you can substitute with almond or oat milk for a dairy-free option.
  • 1 egg: Binds the ingredients together; a flax egg works well for a vegan version.
  • 3 tbsp melted butter: Adds richness; you can use coconut oil for a dairy-free alternative.
  • Fresh strawberries, blueberries, and raspberries: Perfect for topping, these add flavor and color.
  • Maple syrup: A must-have for drizzling over the pancakes.
  • Powdered sugar: For a sweet finishing touch.
  • Whipped cream (optional): Because who doesn’t love a little extra indulgence?

Step-by-Step Instructions to Perfect Heart-Shaped Pancakes

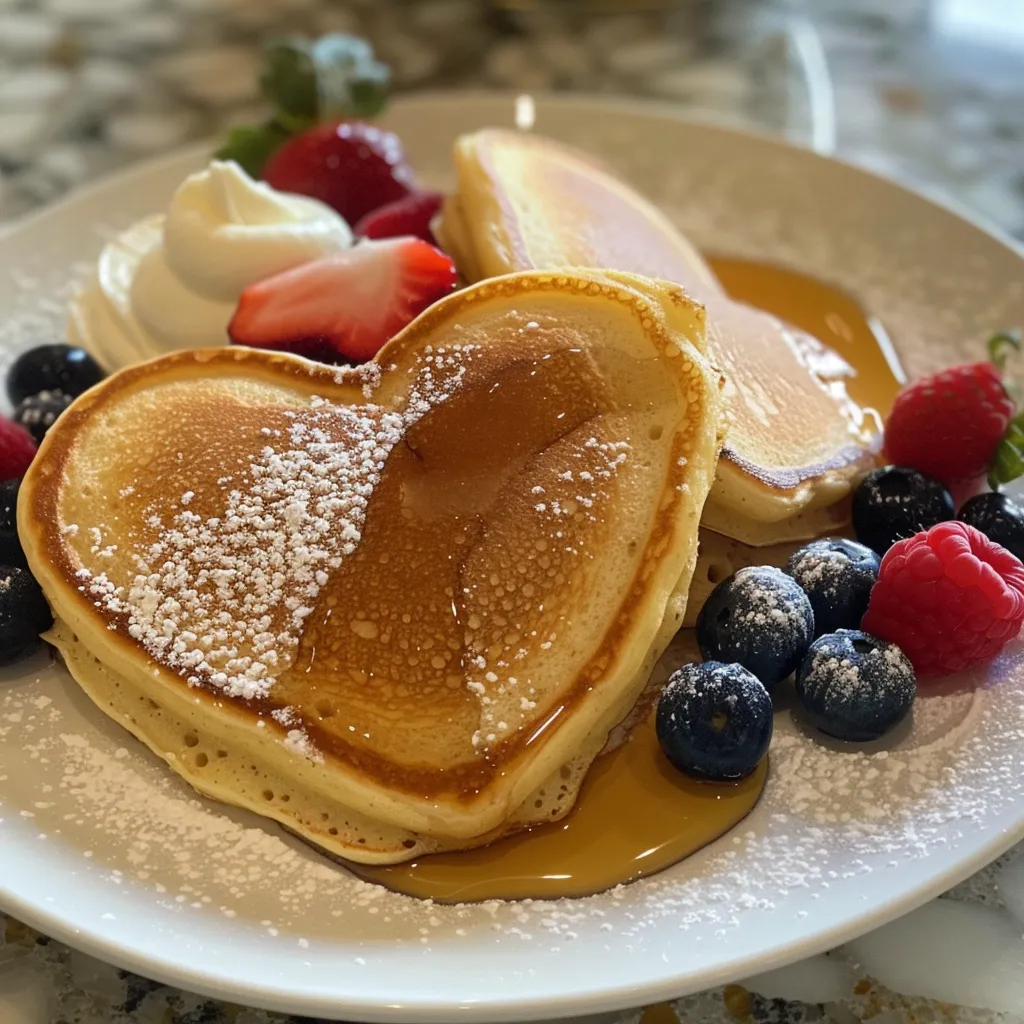
Side view of fluffy heart-shaped pancakes garnished with strawberries, blueberries, and raspberries.

Now that we have all our ingredients, let’s get cooking! Follow these steps to make your heart-shaped pancakes:

  1. In a mixing bowl, combine the flour, baking powder, salt, and sugar.
  2. In another bowl, whisk together the milk, egg, and melted butter until well combined.
  3. Gradually mix the wet ingredients into the dry ingredients until smooth.
  4. Let the batter rest for 5 minutes; this is key for achieving fluffy pancakes.
  5. Use a heart-shaped mold or a squeeze bottle to pour the batter onto a hot, greased skillet.
  6. Cook each side for 2-3 minutes or until golden brown and bubbles form on the surface.
  7. Carefully remove the mold to maintain the heart shape.
  8. Stack the heart-shaped pancakes on a plate, layering them neatly.
  9. Scatter fresh berries around and on top of the pancakes for a colorful presentation.
  10. Drizzle with maple syrup, dust with powdered sugar, and add a dollop of whipped cream if desired.

Pro Tips for Perfect Pancakes

Want to take your heart-shaped pancakes to the next level? Here are some tips from the kitchen:

  • Don’t Overmix: Mix the batter just until combined; lumps are okay. Overmixing can lead to tough pancakes.
  • Resting the Batter: Allowing the batter to rest helps develop gluten, resulting in fluffier pancakes.
  • Heat Control: Keep your skillet medium-hot; too hot will burn the pancakes before they cook through.
  • Use Fresh Ingredients: Fresh baking powder and eggs yield the best results.
  • Experiment with Flavors: Add vanilla extract or a pinch of cinnamon for extra flavor.
  • Keep Them Warm: Place cooked pancakes in a warm oven while you finish cooking the rest.
  • Try Different Toppings: Swap out berries for chocolate chips, banana slices, or even nuts for variety!
  • Use a Non-Stick Spray: Ensure your pancakes release easily from the skillet by greasing it well.

Common Mistakes and Troubleshooting

Even the best of us make mistakes in the kitchen. Here are common pitfalls and how to avoid them:

  • Pancakes are too dense: This often results from overmixing the batter or using too much flour. Measure accurately and mix gently.
  • Burnt edges: Your skillet may be too hot. Adjust the temperature to medium and test with a small amount of batter first.
  • Pancakes stick to the skillet: Ensure your skillet is properly greased. A non-stick pan works wonders!
  • Pancakes don’t hold their shape: If using a mold, ensure it’s firmly placed on the skillet before pouring in the batter.

Delicious Variations to Try

Looking to mix things up? Here are some fun variations on the classic heart-shaped pancakes:

  • Chocolate Chip Heart-Shaped Pancakes: Add chocolate chips to the batter for a sweet twist.
  • Banana Oatmeal Pancakes: Substitute half the flour with oats and mash in a ripe banana for added flavor.
  • Blueberry Lemon Pancakes: Fold fresh blueberries and a teaspoon of lemon zest into the batter.
  • Red Velvet Pancakes: Add cocoa powder and red food coloring for a festive flair, perfect for Valentine’s Day!

Storage and Make-Ahead Instructions

If you want to prepare ahead of time, here’s how to store your heart-shaped pancakes:

  • Refrigerating: Store leftover pancakes in an airtight container in the fridge for up to 3 days.
  • Freezing: Place pancakes in a single layer on a baking sheet to freeze, then transfer to a zip-top bag for up to 2 months.
  • Reheating: Reheat pancakes in the microwave for 30 seconds or in a toaster oven until warm.

Frequently Asked Questions (FAQs)

Here are some common questions about heart-shaped pancakes:

  • Can I make the batter the night before? Yes, you can prepare the batter and store it in the fridge overnight for easier morning cooking.
  • What can I use instead of a heart-shaped mold? You can use a squeeze bottle or even freehand the shapes with a steady hand!
  • Can I make these pancakes gluten-free? Absolutely! Use a gluten-free flour blend for a gluten-free version.
  • What toppings can I use? Fresh fruit, yogurt, nuts, or even a drizzle of chocolate sauce are all great options!
  • How do I prevent pancakes from sticking? Ensure your skillet is well-greased and preheated before adding the batter.
  • Are these pancakes suitable for meal prep? Yes, they freeze well and can be reheated for busy mornings.
  • Can I make these pancakes vegan? Yes! Substitute the egg with a flax egg and use plant-based milk and butter.
  • How can I add protein to these pancakes? You can mix in protein powder or serve with Greek yogurt for a protein boost.

Nutritional Tips and Dietary Adaptations

Enjoy heart-shaped pancakes while keeping nutrition in mind:

  • Whole Wheat Flour: Substitute half or all of the all-purpose flour with whole wheat for added fiber.
  • Low-Sugar Option: Reduce the sugar amount or use a sugar substitute to make it healthier.
  • Serving Size: Consider portion sizes, as pancakes can be quite filling!

Essential Equipment for Making Pancakes

Gather these tools to make your pancake-making experience seamless:

  • Mixing Bowls: A set of various sizes for mixing ingredients.
  • Whisk: To mix the wet and dry ingredients smoothly.
  • Measuring Cups and Spoons: Accurate measurements are key to perfect pancakes.
  • Non-Stick Skillet: For even cooking and easy flipping.
  • Heart-Shaped Mold: Optional, but great for those perfect shapes!

Serving Suggestions for the Ultimate Experience

Make your pancake breakfast even more special with these serving ideas:

  • Breakfast Platter: Serve with crispy bacon or sausage on the side for a hearty meal.
  • Fruit Salad: A refreshing bowl of mixed fruit pairs perfectly with sweet pancakes.
  • Special Drinks: Consider serving with fresh orange juice or a fun smoothie to brighten up the meal.

Conclusion: Celebrate Every Morning with Heart-Shaped Pancakes

Making heart-shaped pancakes is not just about the food; it’s about creating moments of joy and connection. With simple ingredients, easy steps, and a dash of creativity, you can turn an ordinary breakfast into something extraordinary. So gather your loved ones, whip up a batch, and enjoy the delightful experience of cooking and sharing together. Remember, delicious food is always within reach, and with these heart-shaped pancakes, you’re sure to start your day with love!

Heart-Shaped Pancakes with Berries

Prep Time 10 minutes
Cook Time 10 minutes
Total Time 20 minutes
Servings 4 servings
Calories 350
Delight in these charming heart-shaped pancakes topped with fresh berries and drizzled with maple syrup for a perfect breakfast treat.

Ingredients

Dry Ingredients

  • 1 ½ cups all-purpose flour
  • 3 ½ tsp baking powder
  • ½ tsp salt
  • 1 tbsp granulated sugar

Wet Ingredients

  • 1 ¼ cups milk
  • 1 egg egg
  • 3 tbsp melted butter

Garnishes & Extras

  • Fresh strawberries, blueberries, and raspberries (for garnish)
  • Maple syrup (for drizzling)
  • Powdered sugar (for dusting)
  • Whipped cream (optional, for topping)

Instructions 

  • Mix dry ingredients in a bowl.
  • Whisk wet ingredients separately, then combine with dry until smooth.
  • Let batter rest for 5 minutes.
  • Pour batter into heart-shaped molds on a hot skillet and cook 2-3 minutes per side.
  • Remove molds, stack pancakes, and garnish with berries, syrup, powdered sugar, and whipped cream.

Notes

Use a heart-shaped mold or squeeze bottle for perfect shapes.
Calories: 350kcal
Cost: $15
Course: Breakfast
Cuisine: American
Keyword: Pancakes

Whip Up Delicious Chicken Fajita Meal Prep Bowls: A Flavorful Journey

If you’re on the hunt for a quick, delicious, and nutritious meal that can be prepped in advance, look no further than these Chicken Fajita Meal Prep Bowls! Packed with vibrant veggies, tender chicken, and zesty spices, these bowls are not only a feast for the eyes but also a treat for your taste buds. In just a matter of minutes, you’ll have a week’s worth of satisfying meals ready to go, making your busy days feel a little less hectic and a lot more delicious.

Why You’ll Love This Recipe

Before we dive into the specifics, here are some reasons why this Chicken Fajita Meal Prep Bowl recipe will quickly become a staple in your kitchen:

  • Quick to Prepare: In just 30 minutes, you can have these delightful bowls ready. Whether you’re meal prepping for the week or cooking for a busy evening, you’ll spend less time in the kitchen and more time enjoying your meal.
  • Nutritious and Satisfying: Each bowl is loaded with protein from chicken and plenty of colorful veggies, making it a balanced meal that fuels you throughout the day.
  • Customizable: You can easily swap out proteins or veggies based on your preferences or what you have on hand. Try swapping chicken for shrimp or tofu, or add in your favorite seasonal vegetables!
  • Meal Prep Friendly: These bowls store beautifully in the fridge or freezer, allowing you to enjoy delicious homemade meals even on your busiest days.
  • Family-Friendly: With flavors that appeal to adults and kids alike, this recipe is sure to be a hit at your dinner table.

Ingredients You’ll Need

Gathering the right ingredients is the first step to creating your Chicken Fajita Meal Prep Bowls. Here’s what you’ll need:

  • 1 1/2 cups white rice: This serves as the hearty base of your bowls. You can substitute brown rice, quinoa, or cauliflower rice for a lower-carb option.
  • 2 tablespoons olive oil: Used for sautéing the chicken and veggies, adding a rich flavor.
  • 1 pound chicken breasts: Cut into strips. Feel free to use boneless thighs for a juicier option.
  • 2 teaspoons chili powder: For that warm, spicy kick that fajitas are known for.
  • 1 teaspoon paprika: Adds depth and a slight sweetness to the dish.
  • 1 teaspoon cumin: A key spice that brings a warm, earthy flavor to the bowl.
  • 1/2 teaspoon garlic powder: Enhances the overall flavor profile.
  • 1/4 teaspoon cayenne pepper (optional): For those who like it spicy!
  • 1 teaspoon salt: Adjust to taste.
  • 3 bell peppers: Thinly sliced. A mix of red, green, and yellow adds color and sweetness.
  • 1 red onion: Thinly sliced for that slight bite and sweetness.
  • 1 avocado: Sliced, for creamy texture and healthy fats.
  • Lime wedges: To squeeze over the top for a bright finish.
  • Chopped cilantro: For garnish and fresh flavor.

How to Make Chicken Fajita Meal Prep Bowls

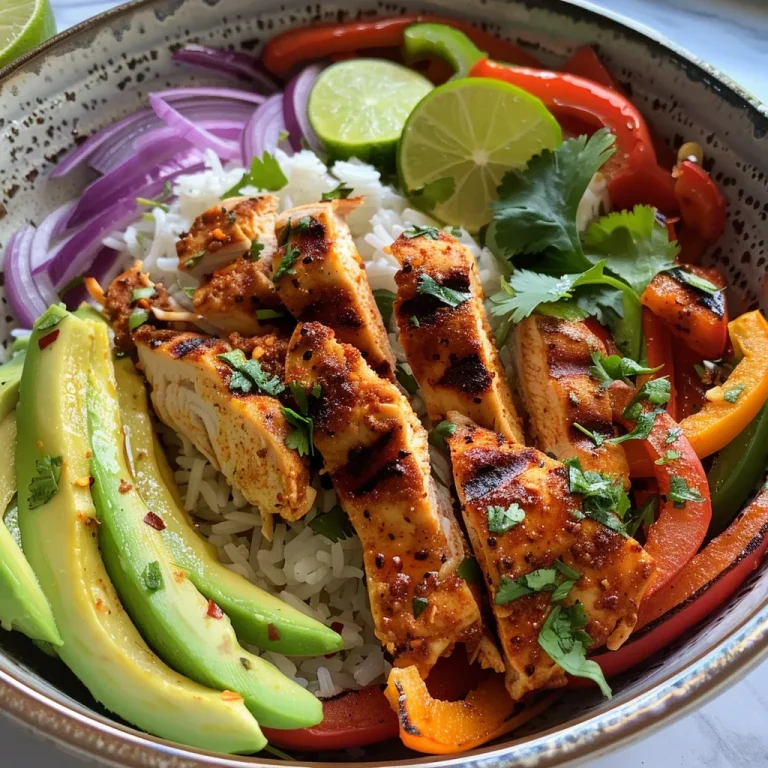
A side view of a portioned Chicken Fajita Meal Prep Bowl featuring chicken, rice, and fresh toppings.

Now that you have all your ingredients ready, let’s get cooking! Follow these simple steps:

  • Step 1: Cook the Rice: Prepare the rice according to package instructions. Once fluffy, set it aside.
  • Step 2: Season the Chicken: In a bowl, combine the chicken strips with chili powder, paprika, cumin, garlic powder, cayenne pepper, and salt. Mix until well-coated.
  • Step 3: Sauté the Chicken: Heat olive oil in a skillet over medium-high heat. Add the seasoned chicken and cook until golden brown and cooked through, about 6-8 minutes. Remove from the skillet and set aside.
  • Step 4: Sauté the Veggies: In the same skillet, add the sliced bell peppers and onion. Sauté until tender, approximately 5-7 minutes.
  • Step 5: Assemble the Bowls: For meal prep, divide the cooked rice among your containers, then top with the sautéed chicken and veggies. Add slices of avocado and sprinkle with chopped cilantro.

How to Serve Chicken Fajita Meal Prep Bowls

These bowls can be enjoyed in many ways! Here are some serving suggestions:

  • Garnishes: Top with fresh lime juice, more cilantro, or even a dollop of sour cream or Greek yogurt for extra creaminess.
  • Side Dishes: Pair with tortilla chips, a fresh salad, or even a side of black beans for a heartier meal.

Pro Tips for Perfect Fajita Bowls

Here are some expert insights to elevate your Chicken Fajita Meal Prep Bowls:

  • Marinating the Chicken: For maximum flavor, marinate the chicken for at least 30 minutes (or overnight) in the spices and olive oil.
  • Use Fresh Ingredients: Fresh veggies not only taste better but also add vibrant color and nutrients to your meal.
  • Store Separately: If meal prepping, store avocado and lime separately to prevent browning until you’re ready to eat.
  • Experiment with Proteins: Try using shrimp, beef, or plant-based options like tempeh for a fun twist on this recipe.
  • Make it a Salad: Serve the fajita toppings over a bed of greens for a lighter, refreshing meal option.
  • Layering Flavors: Consider adding a layer of refried beans or cheese at the bottom of the bowl for extra flavor.
  • Adjust Spice Levels: If you’re serving kids or those sensitive to heat, reduce the cayenne pepper or use a milder seasoning blend.
  • Leftovers Magic: These bowls reheat well, so don’t hesitate to make an extra batch for easy lunches!

Common Mistakes and Troubleshooting

Even the best cooks make mistakes! Here are some common issues and how to avoid them:

  • Overcooking Chicken: Keep an eye on the chicken while cooking; it should be juicy and tender, not dry!
  • Undercooked Veggies: Make sure you sauté the bell peppers and onions until they’re tender but still vibrant for the best texture.
  • Skipping Seasoning: Don’t be shy with the spices! Proper seasoning is key to flavorful fajitas.
  • Not Using Fresh Ingredients: Fresh produce makes a significant difference in taste, so opt for fresh veggies whenever possible.

Variations on Chicken Fajita Meal Prep Bowls

Want to mix things up? Here are some delicious variations to try:

  • Spicy Shrimp Fajita Bowls: Substitute shrimp for chicken and adjust the spices to your liking.
  • Vegetarian Fajita Bowls: Use black beans, tofu, or a mix of mushrooms and zucchini instead of chicken.
  • Southwestern Chicken Bowls: Add corn, black beans, and diced tomatoes for a Southwestern flair.
  • Asian-Inspired Fajitas: Use soy sauce and sesame oil instead of olive oil, and add snap peas and carrots for a unique twist.

Storage and Make-Ahead Instructions

These Chicken Fajita Meal Prep Bowls are perfect for make-ahead meals! Here’s how to store them:

  • Refrigeration: Store in airtight containers in the fridge for up to 4 days.
  • Freezing: For longer storage, you can freeze the chicken and veggie mixture in freezer-safe containers for up to 3 months. Just add fresh toppings when ready to eat!
  • Reheating: To reheat, simply microwave for 1-2 minutes or until heated through.

FAQ: Your Burning Questions Answered

Here are some frequently asked questions about Chicken Fajita Meal Prep Bowls:

  • Can I use brown rice instead of white rice? Absolutely! Brown rice adds more fiber and nutrients.
  • How long do these bowls last in the fridge? They’ll stay fresh for up to 4 days in the refrigerator.
  • Can I make these vegetarian? Yes! Substitute the chicken with beans, tofu, or your favorite vegetables.
  • What other toppings can I add? Try cheese, salsa, or guacamole for added flavor!
  • Is this recipe gluten-free? The ingredients used are gluten-free, but check any pre-packaged items for gluten content.
  • How can I make it spicier? Add more cayenne pepper or serve with hot sauce!
  • Can I prepare the bowls in advance? Yes! These bowls are perfect for meal prep.
  • What are some good side dishes? Consider serving with a simple salad or tortilla chips.

Nutrition Tips and Dietary Adaptations

If you’re looking to make this dish even healthier, consider these tips:

  • Increase Fiber: Add black beans or chickpeas to boost fiber content.
  • Lower Calorie Count: Use cauliflower rice instead of traditional rice for a low-carb option.
  • Opt for Lean Proteins: Use skinless chicken breast or turkey to reduce fat content.
  • Vegan Adaptations: Swap chicken for plant-based proteins and use nutritional yeast for a cheesy flavor.

Recommended Equipment

Here’s what you’ll need to prepare these Chicken Fajita Meal Prep Bowls:

  • Skillet: A non-stick or cast-iron skillet is perfect for sautéing your chicken and veggies.
  • Rice Cooker: For perfectly cooked rice every time.
  • Meal Prep Containers: Airtight containers help keep your meals fresh and organized.
  • Cutting Board and Knife: Essential for prepping your veggies and chicken.

Conclusion: Your New Favorite Meal Prep Recipe

These Chicken Fajita Meal Prep Bowls are not just a meal; they’re a celebration of flavors, colors, and nutritious ingredients that come together in harmony. Whether you’re busy with work, school, or family obligations, having these ready to go will save you time and keep you satisfied. So grab your apron, crank up the heat in your skillet, and let’s make some delicious memories in the kitchen! Remember, cooking is not just about the food; it’s about the joy it brings to you and your loved ones. Enjoy!

Chicken Fajita Meal Prep Bowls

Prep Time 15 minutes
Cook Time 20 minutes
Total Time 35 minutes
Servings 4 bowls
Calories 550
Enjoy these flavorful chicken fajita bowls packed with colorful veggies and fresh toppings, perfect for quick and healthy meals.

Ingredients

Rice

  • 1 1/2 cups white rice

Oil

  • 2 tablespoons olive oil

Chicken

  • 1 pound chicken breasts (cut into strips)

Spices

  • 2 teaspoons chili powder
  • 1 teaspoon paprika
  • 1 teaspoon cumin
  • 1/2 teaspoon garlic powder
  • 1/4 teaspoon cayenne pepper (optional)
  • 1 teaspoon salt

Veggies

  • 3 bell peppers bell peppers (thinly sliced)
  • 1 red onion red onion (thinly sliced)

Toppings

  • 1 avocado avocado (sliced)

Lime Wedges

  • to taste Lime wedges

Cilantro

  • Chopped cilantro cilantro

Instructions 

  • Cook rice according to package instructions; set aside.
  • Season chicken with spices and cook in a skillet with olive oil until browned.
  • Sauté sliced peppers and onion until tender.
  • Assemble bowls with rice, chicken, veggies, and top with avocado and cilantro.

Notes

Prepare ingredients ahead of time for quick assembly during the week.
Calories: 550kcal
Cost: $15
Course: Main Course
Cuisine: Mexican
Keyword: chicken, Fajita, meal prep

Discover the Joy of Cooking with This 30-Minute Detox Soup

Welcome, fellow food lovers! Today, we’re diving into a delightful recipe that will not only tantalize your taste buds but also help you feel revitalized and ready to tackle your day. This 30-Minute Vegetable Detox Soup is your new go-to for banishing bloat and refreshing your body with a medley of vibrant flavors. Packed with nourishing ingredients and bursting with nutrients, this soup is perfect for those busy days when you need something wholesome and satisfying in a flash. Let’s get started!

Why You’ll Love This Recipe

This isn’t just any soup; it’s a magical bowl of goodness that’s perfect for anyone looking to lighten up their meals without sacrificing flavor. Here are some reasons why you’ll adore this soup:

  • Quick and Easy: Ready in just 30 minutes, this soup is ideal for those “I need something wholesome NOW” moments.
  • Packed with Nutrients: Featuring a rainbow of veggies, this soup is like drinking liquid vitamins that nourish your body.
  • Flexible Ingredients: Feel free to swap out veggies based on what you have on hand; it’s forgiving like that!
  • Detoxifying Benefits: Turmeric and ginger join forces for a powerful anti-inflammatory boost, making this soup not just delicious but also great for your gut.
  • Family-Friendly: With a mild flavor profile, even picky eaters will enjoy this satisfying bowl of goodness.

Ingredient Breakdown

Let’s talk about the star players in this vegetable detox soup. Here’s what you’ll need:

  • 2 carrots, chopped: Adds natural sweetness and crunch.
  • 1 celery stalk, chopped: Contributes a fresh, aromatic base.
  • 1 onion, diced: A flavor powerhouse that enhances the soup’s depth.
  • 2 cloves garlic, minced: Known for its immune-boosting properties and robust flavor.
  • 1 zucchini, chopped: Adds a lovely texture and absorbs the soup’s flavors beautifully.
  • 4 cups vegetable broth: The base of your soup, providing hydration and flavor.
  • 1 cup kale, chopped: A nutrient-dense leafy green that adds color and health benefits.
  • 1 tsp turmeric: Known for its anti-inflammatory properties, it adds a warm, golden hue.
  • 1 tsp ginger, grated: Adds a zesty kick and aids digestion.
  • Salt and pepper to taste: Essential for enhancing flavors.

Ingredient Substitutions

If you’re missing an ingredient or want to customize the flavors, here are a few substitutions you can consider:

  • Carrots: You can use parsnips or sweet potatoes for a different sweetness.
  • Zucchini: Yellow squash or bell peppers work well too.
  • Kale: Spinach or Swiss chard can be great alternatives.
  • Vegetable broth: Chicken broth or water can be used, though the flavor may differ.

How to Make This Detox Soup

Side view of a bowl filled with colorful detox soup, showcasing fresh vegetables and broth.

Now that we’ve gathered our ingredients, let’s dive into the cooking process!

  1. Heat olive oil in a large pot over medium heat.
  2. Add onion, garlic, carrots, and celery. Cook for 5 minutes until the onions are soft.
  3. Stir in the zucchini and cook for an additional 3 minutes.
  4. Pour in the vegetable broth and bring the mixture to a boil.
  5. Reduce the heat and let it simmer for 15 minutes, allowing all the flavors to meld.
  6. Add the kale, turmeric, and ginger. Cook for 5 more minutes.
  7. Season with salt and pepper to taste.
  8. Serve hot and enjoy your nourishing bowl of goodness!

Pro Tips for the Best Soup

Here are some expert insights to elevate your soup-making game:

  • Chop evenly: Aim for uniform pieces to ensure even cooking.
  • Don’t skip the sauté: Sautéing the aromatics (onion, garlic) brings out their natural sweetness and enhances flavors.
  • Adjust seasoning: Always taste before serving; you might need a little extra salt or pepper.
  • Use fresh herbs: A sprinkle of fresh parsley or cilantro before serving brightens up the flavors.
  • Make it creamy: For a creamy version, blend half the soup before serving.
  • Batch cooking: Make a double batch and freeze leftovers for a quick meal later.
  • Garnish wisely: Top with avocado, croutons, or a drizzle of olive oil for an extra touch.
  • Stay vigilant: Keep an eye on the simmering time; overcooking can lead to mushy vegetables.

Common Mistakes and Troubleshooting

Even the best chefs make mistakes! Here are some common pitfalls and how to avoid them:

  • Overcooking the veggies: This can lead to a mushy texture. Aim for a tender-crisp finish.
  • Skipping the seasoning: Don’t forget to season throughout the cooking process for depth of flavor.
  • Using stale spices: Ensure your spices are fresh for maximum flavor impact.
  • Not tasting as you go: Always sample your soup at different stages to adjust flavors as needed.

Delicious Variations to Try

If you’re feeling adventurous, here are some fun variations on this soup that you can try:

  • Spicy Detox Soup: Add a chopped jalapeño or a pinch of red pepper flakes for a kick.
  • Creamy Coconut Variation: Stir in coconut milk to create a rich, creamy texture.
  • Lentil Detox Soup: Add 1 cup of cooked lentils for added protein and heartiness.
  • Herb-Infused Soup: Add fresh thyme or rosemary for a fragrant twist.

Storage and Make-Ahead Instructions

Planning ahead can make life easier! Here’s how to store and reheat your soup:

  • Refrigeration: Store leftovers in an airtight container in the fridge for up to 3 days.
  • Freezing: This soup freezes beautifully! Freeze in portions for up to 3 months.
  • Reheating: To reheat, simply warm on the stove over medium heat until heated through.

Comprehensive FAQ

Got questions? Here are some common queries about this soup:

  • Can I use frozen vegetables? Absolutely! Just add them directly to the pot without thawing.
  • Is this soup gluten-free? Yes, as long as your vegetable broth is gluten-free.
  • How can I make this soup vegan? This recipe is already vegan! Just ensure your broth is plant-based.
  • Can I add protein to this soup? Yes! Consider adding chickpeas or cooked lentils for extra protein.
  • What can I serve with this soup? Pair it with crusty bread, a salad, or grilled cheese for a complete meal.
  • Is this soup good for meal prep? Absolutely! It stores well and gets even better the next day.
  • How do I enhance the flavor? Experiment with fresh herbs, citrus zest, or even a splash of soy sauce for added depth.
  • Can I use other greens? Yes! Feel free to use any leafy greens you enjoy, like spinach or collard greens.

Nutrition Tips and Dietary Adaptations

This vegetable detox soup is not just delicious; it’s also packed with health benefits!

  • Vegan and Vegetarian-Friendly: This recipe is perfect for plant-based eaters.
  • Low-Calorie Option: With lots of veggies and minimal oil, this soup is low in calories but high in nutrients.
  • Customizable Nutrition: Add beans or lentils for a protein boost or quinoa for extra fiber.
  • Rich in Antioxidants: The ingredients are full of vitamins and minerals that promote overall health.

Essential Equipment for Making Soup

Having the right tools in the kitchen can make your cooking experience smoother. Here’s what you’ll need:

  • Large Pot: A heavy-bottomed pot is essential for even cooking.
  • Sharp Knife: A good knife helps with chopping veggies efficiently.
  • Cutting Board: A stable surface for all your chopping needs.
  • Measuring Cups and Spoons: For precise ingredient measurements.

Serving Suggestions

Now that your soup is ready, here are some ideas on how to serve it:

  • Garnish: Top with fresh herbs, a squeeze of lemon, or a dollop of yogurt for a flavor boost.
  • Pair with Bread: Enjoy with crusty sourdough or whole-grain rolls for dipping.
  • Side Salads: A light green salad can complement the soup wonderfully.
  • Make It a Meal: Serve alongside grilled cheese, quesadillas, or a savory quiche.

In conclusion, this 30-Minute Vegetable Detox Soup is not just a recipe; it’s a celebration of wholesome ingredients and comfort food. Remember, cooking should be fun and stress-free! So grab your ingredients, follow these simple steps, and enjoy the process. Whether you’re a seasoned cook or just starting, this soup is sure to bring warmth to your kitchen and nourishment to your table. Happy cooking!

30-Minute Vegetable Detox Soup That Banishes Bloat Fast

Prep Time 10 minutes
Cook Time 20 minutes
Total Time 30 minutes
Servings 4 servings
Calories 120
This quick and nourishing vegetable detox soup helps reduce bloating and boosts your energy in just 30 minutes.

Ingredients

Vegetables

  • 2 pieces carrots (chopped)
  • 1 stalk celery (chopped)
  • 1 piece onion (diced)
  • 2 cloves garlic (minced)
  • 1 piece zucchini (chopped)
  • 4 cups vegetable broth
  • 1 cup kale (chopped)
  • 1 tsp turmeric
  • 1 tsp ginger (grated)
  • to taste Salt and pepper

Instructions 

  • Heat olive oil in a large pot over medium heat.
  • Add onion, garlic, carrots, and celery. Cook for 5 minutes.
  • Add zucchini and cook for 3 minutes.
  • Pour in vegetable broth and bring to a boil, then simmer for 15 minutes.
  • Add kale, turmeric, and ginger. Cook for 5 minutes, season with salt and pepper, then serve hot.

Notes

Feel free to add a squeeze of lemon for extra flavor.
Calories: 120kcal
Cost: $10
Course: Soup
Keyword: Vegetables

Discover the Joy of Baked Oatmeal

Welcome to the world of baked oatmeal, where wholesome ingredients come together to create a breakfast that’s not only easy to make but also incredibly satisfying. If you’re looking for a way to kickstart your mornings with warmth and comfort, this recipe is your golden ticket! Baked oatmeal is a delightful twist on traditional oatmeal, combining the goodness of oats with a variety of flavors and textures. In this comprehensive guide, we’ll explore everything you need to know about baked oatmeal, including why you’ll love this recipe, ingredient breakdowns, tips for perfecting it, and even some delicious variations to keep your breakfast routine exciting!

Why You’ll Love This Recipe

Baked oatmeal isn’t just another breakfast dish; it’s a game-changer! Here are five reasons to fall in love with it:

  • One-bowl wonder: Say goodbye to multiple dishes! This recipe allows you to mix everything in one bowl, making cleanup a breeze.
  • Customizable: You can easily tailor the flavors to suit your taste preferences or use whatever ingredients you have on hand.
  • Meal prep friendly: Perfect for busy mornings, baked oatmeal can be made ahead and stored for quick breakfasts throughout the week.
  • Wholesome ingredients: Packed with nutritious oats, fruits, and healthy fats, this dish fuels your day without weighing you down.
  • Kid-approved: With its soft texture and delicious flavors, even the pickiest eaters will ask for seconds!

Ingredient Breakdown

Let’s take a closer look at the ingredients that make this baked oatmeal a delightful choice, along with some handy substitutions:

  • Milk: Use your favorite dairy or nondairy milk, such as almond, oat, or soy milk. This provides creaminess and helps bind the ingredients.
  • Eggs: Eggs add structure and moisture. For a vegan option, substitute with flax eggs (1 tablespoon ground flaxseed mixed with 2.5 tablespoons water per egg).
  • Maple syrup: This natural sweetener lends a rich flavor. You can swap it with honey or agave nectar, but adjust the amount to taste.
  • Butter: Unsalted butter enhances flavor. For a dairy-free option, replace it with coconut oil or vegan butter.
  • Applesauce: Adds moisture and sweetness. Mashed bananas can be used as a substitute if you prefer.
  • Old-fashioned rolled oats: These are essential for that hearty texture. Quick oats can work too, but avoid instant oats as they won’t hold up.
  • Baking powder: This helps the oatmeal rise and become fluffy.
  • Cinnamon: Adds warmth and depth. Feel free to experiment with other spices like nutmeg or pumpkin spice.
  • Salt: A pinch enhances all the flavors.
  • Berries: Fresh or frozen mixed berries add a burst of flavor and nutrition. You can substitute with chopped apples, peaches, or even chocolate chips!
  • Nuts: Optional but recommended, chopped walnuts or pecans provide a satisfying crunch.

Pro Tips for Perfect Baked Oatmeal

Side view of a delicious baked oatmeal dish with a golden crust and colorful berries.

Ready to nail this recipe? Here are some expert insights to ensure your baked oatmeal turns out perfectly every time:

  • Mix thoroughly: Make sure all ingredients are well combined before pouring into the pan to ensure even flavor distribution.
  • Don’t overbake: Keep an eye on the baking time; the center should be *almost* set for a soft texture. If you prefer it drier, bake a little longer.
  • Experiment with toppings: Top with yogurt, extra fruit, or nut butter before serving for an added flavor boost.
  • Let it cool: Allow the baked oatmeal to cool for a few minutes before slicing or serving; this helps it set up nicely.
  • Store leftovers properly: Refrigerate any leftovers in an airtight container for up to a week. Reheat in the microwave or oven before serving.
  • Try different flavor combinations: Don’t hesitate to swap out the fruits or nuts for your favorites or what you have on hand.
  • Use the right pan: A 9×9 inch square or 11×7 inch rectangular pan works best. Avoid smaller pans to prevent overflow.
  • Make it a muffin: Pour the mixture into muffin tins for perfectly portioned baked oatmeal bites!

Common Mistakes and Troubleshooting

Even the best cooks have off days! Here’s how to avoid common pitfalls:

  • Too dry? If your baked oatmeal comes out dry, try reducing the baking time or increasing the liquid next time.
  • Too mushy? If it’s too wet, ensure that you’re measuring your oats and liquids correctly, and give it a proper baking time.
  • Not enough flavor? Adjust your spices or sweeteners to your liking. Remember, flavors can be adjusted easily in this recipe!

Delicious Variations

Why stick to the same recipe when you can switch it up? Here are some fun variations to try:

  • Chocolate Chip Banana: Add a mashed banana and chocolate chips for a sweet treat that feels indulgent.
  • Apple Cinnamon: Stir in diced apples and increase the cinnamon for a classic flavor combo that’s always a hit.
  • Peanut Butter & Jelly: Mix in a swirl of peanut butter and top with jelly or fresh berries for a nostalgic twist.
  • Pumpkin Spice: Replace applesauce with pumpkin puree and add pumpkin spice for a seasonal favorite!

Storage and Make-Ahead Instructions

Stay organized and enjoy baked oatmeal on your busy mornings! Here’s how:

  • Make-ahead: Prepare the mixture the night before and refrigerate it. Bake it fresh in the morning for a hot breakfast!
  • Storing: Keep leftovers in an airtight container in the refrigerator for up to a week. Reheat individual portions as needed.
  • Freezing: For longer storage, freeze portions in individual containers. Thaw overnight in the fridge before reheating.

Comprehensive FAQ

Got questions? We’ve got answers! Here are some common queries about baked oatmeal:

  • Can I use quick oats? Yes, but they may result in a softer texture. Old-fashioned oats give the best results.
  • Is it okay to use frozen berries? Absolutely! Just add them directly without thawing.
  • Can I make it vegan? Yes, substitute the eggs with flax eggs and use plant-based milk and butter.
  • How do I know when it’s done? The center should be almost set; it will firm up as it cools.
  • Can I double the recipe? Yes, just ensure your pan is large enough and adjust baking time as needed.
  • What’s the best way to serve it? Enjoy it warm, topped with yogurt, nuts, or a drizzle of maple syrup.
  • How long does baked oatmeal last? In the fridge, it stays good for up to a week and can be frozen for longer storage.
  • Can I make baked oatmeal muffins? Yes! Just pour the mixture into muffin tins and adjust the baking time accordingly.

Nutritional Tips and Dietary Adaptations

Want to make this dish fit your dietary needs? Here are some tips:

  • Low Sugar: Reduce the amount of maple syrup or use a sugar substitute to make it lower in sugar.
  • Gluten-Free: Ensure your oats are certified gluten-free and substitute any other ingredients as needed.
  • High Protein: Add protein powder or cottage cheese for an extra boost.

Essential Equipment Recommendations

Here’s what you’ll need to whip up this delicious baked oatmeal:

  • Mixing bowl: A large bowl for easy mixing of all ingredients.
  • Measuring cups and spoons: Accurate measurements are key to recipe success!
  • Baking pan: A 9×9 inch square or 11×7 inch rectangular pan is ideal.
  • Whisk: For mixing ingredients smoothly.

Serving Suggestions

Serve your baked oatmeal warm with a variety of toppings to elevate it even further:

  • Fresh fruit: Sliced bananas, strawberries, or a handful of berries add freshness.
  • Nuts: Chopped walnuts, pecans, or almonds for crunch.
  • Yogurt: A dollop of yogurt for creaminess and flavor.
  • Maple syrup: Drizzle some over the top for that classic touch!

Conclusion: Your New Breakfast Favorite Awaits!

Baked oatmeal is not just a meal; it’s a warm hug on a plate, perfect for any day of the week. With its simple ingredients, easy preparation, and endless variations, you’ll quickly make it a staple in your kitchen. Remember, cooking is about experimenting and having fun—so don’t hesitate to make this recipe your own! Thank you for joining me on this culinary adventure, and happy cooking!

1 Bowl Baked Oatmeal

Prep Time 10 minutes
Cook Time 35 minutes
Total Time 45 minutes
Servings 4 servings
Calories 250
A cozy and nutritious baked oatmeal perfect for a quick breakfast or snack, customizable with berries and nuts.

Ingredients

Dairy or nondairy milk

  • 1 and 3/4 cups milk (dairy or nondairy)
  • 2 large eggs
  • 1/2 cup pure maple syrup
  • 1/4 cup unsalted butter, melted and slightly cooled
  • 1/4 cup unsweetened applesauce or mashed banana
  • 3 cups old-fashioned whole rolled oats
  • 1 teaspoon baking powder
  • 1 teaspoon ground cinnamon
  • 1 teaspoon pure vanilla extract
  • 1/4 teaspoon salt
  • 1 1/2 cups mixed berries, fresh or frozen (do not thaw)

optional topping

  • 1/2 cup chopped walnuts or pecans

Instructions 

  • Preheat oven to 350°F (177°C) and prepare a 9x9 inch or similar baking dish.
  • Whisk all ingredients together in a large bowl and pour into the prepared dish. Top with nuts if desired.
  • Bake for 35 minutes until the center is almost set. Cool for 5 minutes before serving.

Notes

You can customize with different fruits or nuts for variety.
Calories: 250kcal
Cost: $10
Course: Breakfast
Keyword: Oats