Author

michael

Browsing

Unleash Your Inner Chef with Colorful Roasted Vegetable Bowls

Welcome to the vibrant world of Colorful Roasted Vegetable Bowls! If you’re looking for a meal that’s not only delicious but also eye-catching, healthy, and easy to prepare, you’ve come to the right place. This recipe is perfect for busy weeknights or any day you want to treat yourself to wholesome goodness without breaking a sweat. In this guide, I’ll walk you through everything you need to know to create these delightful bowls topped with a zesty green tahini sauce that will elevate your meal to a feast!

Whether you’re a seasoned cook or just starting out, I’m here to help you every step of the way. Let’s dive into why this recipe is a must-try, shall we?

Why You’ll Love This Recipe

  • Quick and Easy: With just 30 minutes of prep and cooking time, you can have a beautiful bowl ready to enjoy without any fuss.
  • Nutritious and Wholesome: Packed with seasonal vegetables, this bowl is a nutritional powerhouse, providing vitamins, minerals, and fiber to keep you energized.
  • Customizable: Feel free to mix and match your favorite vegetables. If you’ve got leftovers in your fridge, toss them in!
  • Meal Prep Friendly: Roast a big batch of veggies on the weekend, and you’ll have healthy meals ready to go for the week.
  • Deliciously Versatile: The zesty green tahini sauce adds a rich flavor that complements the sweetness of the roasted vegetables beautifully.

Ingredients for Roasted Vegetable Bowls

Before we get cooking, let’s gather our ingredients! Here’s what you’ll need:

  • 2 cups broccoli florets
  • 1 red bell pepper, diced
  • 1 zucchini, sliced
  • 1 carrot, sliced
  • 2 tablespoons olive oil
  • Salt and pepper to taste
  • 1/2 cup tahini
  • 1/4 cup water
  • 2 tablespoons lemon juice
  • 1 garlic clove, minced
  • 1/4 cup fresh parsley, chopped
  • Salt to taste

Now you might be wondering if you can swap out any ingredients. Absolutely! Here are some fantastic substitutions:

  • Vegetables: Swap broccoli for cauliflower, or toss in some sweet potatoes for extra sweetness.
  • Oil: Use avocado oil or melted coconut oil if you prefer.
  • Tahini: If tahini isn’t your thing, try almond butter or sunflower seed butter for a different taste.

Step-by-Step Instructions
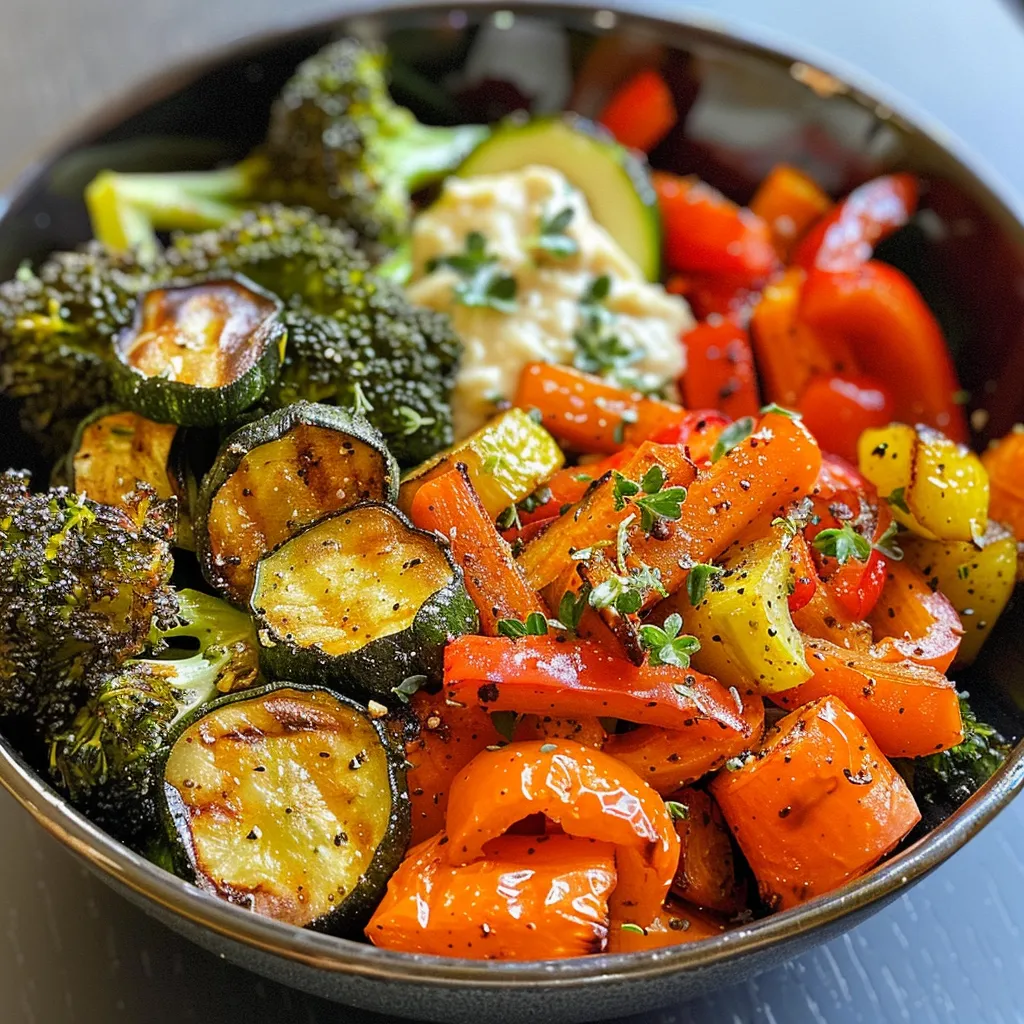
Side angle of a colorful roasted vegetable bowl filled with assorted veggies and a creamy green tahini dressing.

Now that we have our ingredients ready, let’s get to the fun part—cooking!

Step 1: Preheat the Oven

Preheat your oven to 400°F (200°C). This is the perfect temperature for roasting vegetables and getting that lovely caramelization.

Step 2: Prepare the Vegetables

In a large bowl, combine the broccoli, red bell pepper, zucchini, and carrot. Drizzle with olive oil and season with salt and pepper. Toss well to ensure all the veggies are coated.

Step 3: Roast the Vegetables

Spread the seasoned vegetables on a baking sheet in a single layer. Roast in the preheated oven for 25-30 minutes, or until they are tender and slightly caramelized. Be sure to give them a stir halfway through for even roasting!

Step 4: Make the Green Tahini Sauce

While the veggies are roasting, let’s whip up the zesty green tahini sauce. In a small bowl, whisk together the tahini, water, lemon juice, minced garlic, and chopped parsley. Season with salt to taste, and adjust the consistency with more water if needed. You want it to be drizzly but not too runny!

Step 5: Assemble Your Bowls

Once the vegetables are roasted, it’s time to assemble your bowls. Divide the roasted veggies among serving bowls and drizzle generously with the green tahini sauce. Serve immediately and enjoy your culinary creation!

Pro Tips for Perfect Roasted Vegetable Bowls

Want to take your roasted vegetable bowls to the next level? Here are some insider tips:

  • Don’t Crowd the Pan: Give your vegetables space on the baking sheet. Crowding can lead to steaming instead of roasting, which means less flavor.
  • Experiment with Seasonings: Feel free to add spices like smoked paprika, cumin, or even a pinch of cayenne for heat.
  • Use Fresh Ingredients: Fresh, seasonal vegetables will always yield the best flavor. Visit your local farmer’s market for the freshest picks!
  • Mix Up the Base: Instead of just using veggies, try adding grains like quinoa or farro for extra substance.
  • Add Protein: Consider including chickpeas, tofu, or grilled chicken for added protein.
  • Garnish for Flavor: A sprinkle of toasted nuts or seeds can add a delightful crunch to your bowls.
  • Make Extra Sauce: Always prepare a little extra green tahini sauce for drizzling on salads or wraps throughout the week!
  • Store Leftovers Properly: Keep your roasted vegetables and sauce in airtight containers for up to 4 days in the fridge.

Common Mistakes and Troubleshooting

Sometimes, things don’t go as planned in the kitchen. Here’s how to troubleshoot common issues:

  • Vegetables Not Roasting Properly: If your veggies are soggy, they were likely overcrowded on the pan. Make sure to spread them out!
  • Tahini Sauce Too Thick: If your sauce is too thick, simply add a bit more water, a teaspoon at a time, until you reach the desired consistency.
  • Vegetables Burned: Keep an eye on them in the last few minutes, as oven temperatures can vary. If they start to brown too much, reduce the heat slightly.

Variations to Try

Feeling adventurous? Here are some variations to switch things up:

  • Mexican-Inspired Bowls: Add black beans, corn, avocado, and top with a lime-cilantro dressing.
  • Italian Twist: Incorporate cherry tomatoes, basil, and a balsamic glaze for a Mediterranean flair.
  • Asian Influence: Use bok choy, mushrooms, and drizzle with a sesame soy sauce for a delicious twist.
  • Breakfast Bowls: Add a poached egg on top for a protein-packed breakfast option!

Storage and Make-Ahead Instructions

Want to make this dish ahead of time? Here’s how:

  • Refrigerate: Store roasted vegetables in an airtight container for up to 4 days.
  • Make the Sauce Ahead: The green tahini sauce can be prepared up to a week in advance. Just store it in the fridge.
  • Reheat: When you’re ready to eat, simply reheat the vegetables in the oven for a few minutes to bring back their crispness.

FAQs About Roasted Vegetable Bowls

Got questions? I’ve got answers! Here are some frequently asked questions about roasted vegetable bowls:

  • Can I use frozen vegetables? Yes, but fresh vegetables will give you better texture and flavor. If using frozen, reduce roasting time.
  • How do I make this recipe vegan? This recipe is already vegan! The tahini sauce is plant-based and delicious.
  • What if I don’t like tahini? No worries! Substitute with another nut butter or skip the sauce altogether. A drizzle of olive oil and lemon juice works too!
  • Can I add grains to this bowl? Absolutely! Quinoa, brown rice, or farro make excellent additions for extra nutrition.
  • How spicy is the tahini sauce? The sauce is not inherently spicy, but you can add red pepper flakes for a kick if you like.
  • Is this recipe gluten-free? Yes, all the ingredients are gluten-free, making it a great option for gluten-sensitive individuals.
  • Can I use different herbs? Definitely! Feel free to use herbs like dill or cilantro in the tahini sauce for a different flavor profile.
  • How do I make it more filling? Add protein like chickpeas, beans, or grilled chicken to make this a heartier meal.

Nutrition Tips and Dietary Adaptations

Understanding the nutritional benefits of this recipe can help you make it even healthier:

  • Fiber-Rich: The vegetables are high in fiber, promoting digestive health.
  • Healthy Fats: The tahini sauce provides healthy fats, which are essential for brain health.
  • Low-Calorie Option: This recipe is naturally low in calories, making it a great choice for those watching their intake.
  • Vitamins Galore: Each vegetable brings its own unique set of vitamins and minerals, contributing to a well-rounded meal.

Essential Equipment for Success

Here’s what you’ll need to whip up these delicious bowls:

  • Oven: A reliable oven is essential for perfectly roasted vegetables.
  • Baking Sheet: A large, rimmed baking sheet will help contain the veggies while they roast.
  • Mixing Bowls: Use a large bowl for mixing the vegetables with oil and seasonings.
  • Whisk: A whisk is perfect for blending the tahini sauce smoothly.

Serving Suggestions

Feeling creative? Here are some ideas for how to serve your roasted vegetable bowls:

  • Top with Protein: Add grilled chicken, shrimp, or tofu for a complete meal.
  • Fresh Greens: Serve on a bed of fresh spinach or arugula for added nutrients.
  • Garnish: Top with toasted nuts or seeds for an extra crunch.
  • Serve with Grains: Pair with quinoa or brown rice for a more filling dish.

There you have it! Your ultimate guide to creating stunning and flavorful Colorful Roasted Vegetable Bowls with a zesty green tahini drizzle. This recipe is not only easy to make but also allows for endless customization, ensuring you can enjoy it time and time again. Remember, cooking is about joy and creativity, so don’t hesitate to experiment and make this dish your own. Happy cooking!

Roasted Vegetable Bowls with Green Tahini

Prep Time 10 minutes
Cook Time 30 minutes
Total Time 40 minutes
Servings 4 servings
Calories 350
A vibrant and healthy bowl featuring roasted vegetables topped with a flavorful green tahini sauce.

Ingredients

Vegetables

  • 2 cups broccoli florets
  • 1 red bell pepper diced red bell pepper
  • 1 zucchini sliced zucchini
  • 1 carrot sliced carrot
  • 2 tablespoons olive oil
  • Salt and pepper to taste Salt and pepper
  • 1/2 cup tahini
  • 1/4 cup water
  • 2 tablespoons lemon juice
  • 1 garlic clove minced garlic
  • 1/4 cup fresh parsley
  • Salt to taste Salt

Instructions 

  • Preheat oven to 400°F (200°C).
  • Toss vegetables with olive oil, salt, and pepper; roast for 25-30 minutes.
  • Mix tahini, water, lemon juice, garlic, and parsley to make sauce.
  • Divide roasted vegetables into bowls and drizzle with tahini sauce.
Notes

Feel free to add your favorite grains or protein for a more filling meal.
Calories: 350kcal
Cost: $15
Course: Main Course
Cuisine: Healthy
Keyword: Vegetables

Unleashing the Magic of Red Velvet Cake

Welcome, fellow baking enthusiasts! If you’re ready to create a stunning dessert that’s as delightful to eat as it is to look at, you’ve come to the right place. This Red Velvet Cake recipe combines rich flavors, a moist texture, and that signature red hue to make any occasion feel special. Whether it’s a birthday, anniversary, or simply a Tuesday, this cake is sure to impress. Let’s dive into the world of baking and discover how to make the best red velvet cake that’ll have everyone asking for seconds!

Why You’ll Love This Recipe

  • Easy to Follow: This recipe is designed for bakers of all skill levels. With clear instructions and simple ingredients, you’ll feel like a pro in no time!
  • Moist and Flavorful: The combination of buttermilk and oil ensures a cake that’s not only soft but bursting with flavor.
  • Beautiful Presentation: The vibrant red color paired with creamy white frosting creates a visually stunning dessert that’s perfect for any celebration.
  • Versatile and Customizable: Whether you choose to make a traditional layer cake or cupcakes, this recipe adapts beautifully to your needs.
  • Perfect for Any Occasion: This red velvet cake is not just for Valentine’s Day! It’s great for birthdays, weddings, or even just a treat for yourself.

Ingredient Breakdown: What You Need

Before you start baking, it’s essential to gather all your ingredients. Here’s what you’ll need to make the best red velvet cake:

  • 2 cups granulated sugar (400g): This sweetens the cake and helps achieve that moist texture.
  • 3/4 cup vegetable oil (170g): Adds moisture and richness.
  • 1/2 cup unsalted butter, melted (113g): Enhances flavor and texture.
  • 3 large eggs: Provides structure and stability.
  • 1 tbsp vanilla extract: Adds a lovely aromatic note.
  • 1 1/3 cup buttermilk (320g): A key ingredient that reacts with baking soda for a fluffy cake. You can make your own by mixing 1 1/3 cup whole milk with 4 tsp vinegar or lemon juice.
  • 2 tsp vinegar: This adds tanginess and helps the cake rise.
  • 1 tbsp gel red food color: The star ingredient that gives the cake its signature color. Depending on the brand, you may need up to 1.5 tbsp.
  • 1/4 cup boiling water (60g): Helps to dissolve cocoa powder and enhances the cake’s moisture.
  • 2 1/2 tbsp Dutch processed cocoa powder (15g): Adds a subtle chocolate flavor without overpowering the red velvet.
  • 3 cups all-purpose flour (390g): The base for our cake.
  • 1/4 cup cornstarch (30g): Creates a soft and tender crumb.
  • 1 tsp baking soda: A leavening agent that helps the cake rise.
  • 1/2 tsp baking powder: Works in tandem with baking soda for a fluffy cake.
  • 1 tsp salt: Enhances flavor.

For the Cream Cheese Frosting

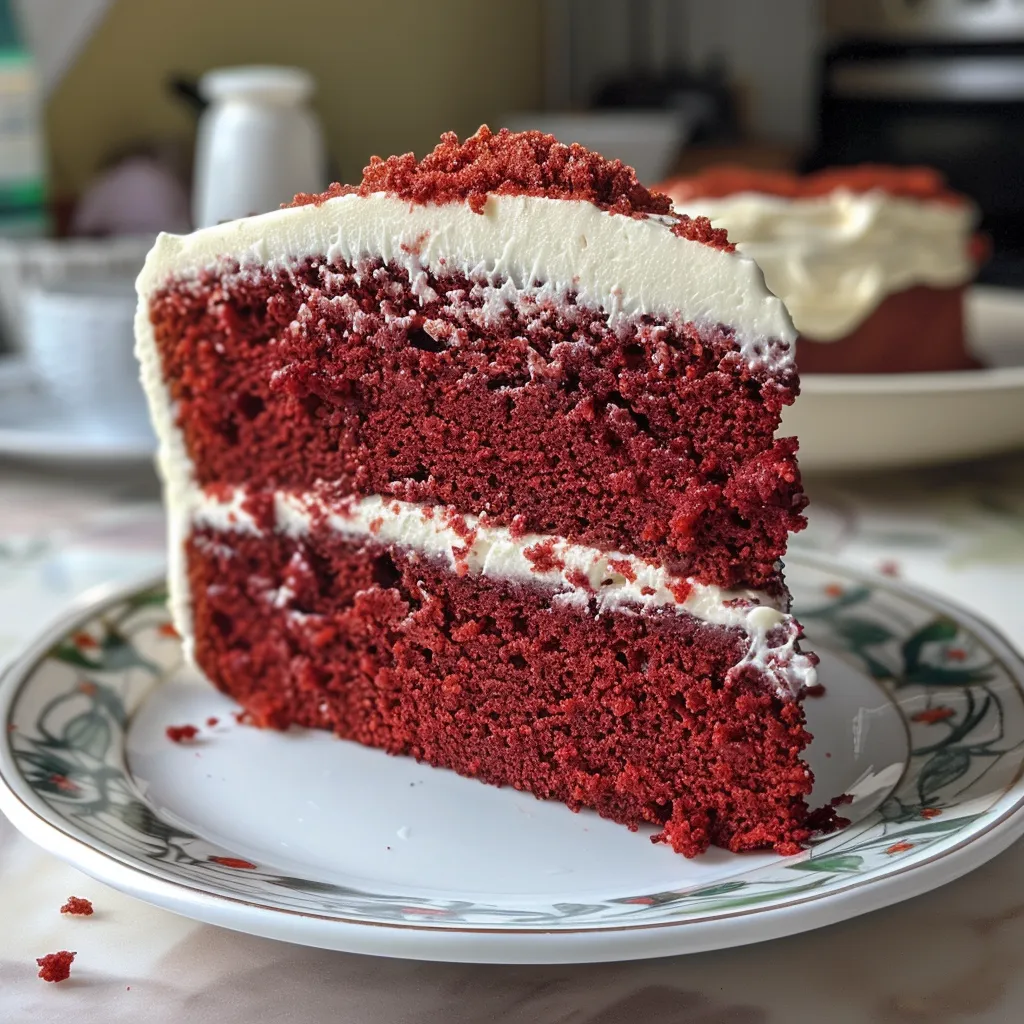
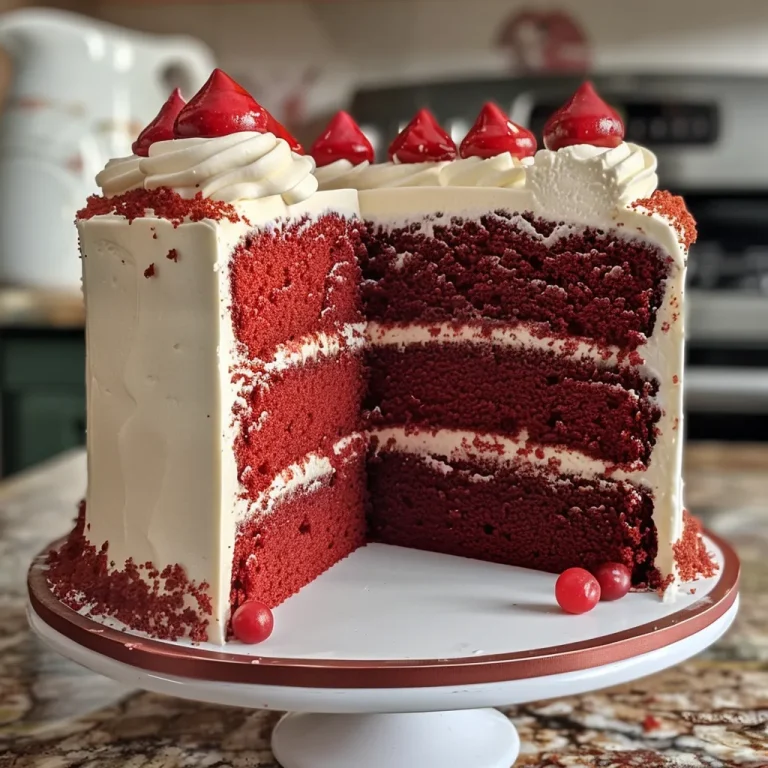
Juicy red velvet cake with a rich cream cheese topping displayed on a plate.

And what’s a red velvet cake without its famous frosting? Here’s what you’ll need:

  • 1 1/4 cup unsalted butter, softened (2.5 sticks or 283g): The base of your frosting for a rich, creamy texture.
  • 20 oz cream cheese, room temperature (2.5 8 oz blocks or 570g): The star ingredient giving the frosting its tangy flavor.
  • 1 tsp vanilla extract: Adds sweetness and depth to the frosting.
  • 1/2 tsp salt: Balances the sweetness.
  • 3-4 cups icing sugar, sifted (360 to 480g): Sweetens the frosting to your liking.

Pro Tips for Red Velvet Success

  • Room Temperature Ingredients: Ensure that your eggs, butter, and cream cheese are at room temperature for the best mixing results.
  • Don’t Overmix: Mix your batter until just combined to avoid a dense cake.
  • Check for Doneness: Use a toothpick inserted into the center of the cake. It should come out clean or with a few crumbs attached.
  • Frosting Tip: Make sure your cream cheese is softened to avoid lumps in your frosting.
  • Chill Your Cake: After frosting, chill the cake for about 30 minutes to help set the frosting.
  • Use Gel Food Coloring: It provides a more vibrant color without adding too much liquid to the batter.
  • Layer Cake Strategy: If making a layer cake, level your cake tops with a serrated knife for easier stacking.
  • Let It Rest: Allow your cake to sit for a few hours or overnight for the flavors to meld.

Avoiding Common Mistakes

Even the best bakers can run into hiccups. Here are some common pitfalls and how to avoid them:

  • Dry Cake: Ensure you’re measuring your flour correctly—too much can lead to a dry cake. Use the spoon and level method!
  • Too Dense: Overmixing the batter can lead to a dense texture. Mix until just combined.
  • Frosting Issues: If your frosting is too runny, add more icing sugar until you achieve the desired consistency.
  • Flavor Imbalance: Taste your cream cheese frosting before applying. Adjust vanilla or salt to suit your palate.

Delicious Variations to Try

If you’re feeling adventurous, here are some fun variations on the classic red velvet cake:

  • Red Velvet Cupcakes: Bake the batter in cupcake liners for individual servings.
  • Red Velvet Layer Cake: Create a multi-tiered cake for a grand presentation.
  • Red Velvet Pancakes: Transform the flavors into fluffy pancakes for a breakfast treat.
  • Red Velvet Cheesecake: Combine the best of both worlds by making a red velvet cheesecake!

Storage and Make-Ahead Tips

Want to enjoy your cake over several days? Here’s how to store it properly:

  • At Room Temperature: If consumed within 2 days, store your cake at room temperature in an airtight container.
  • In the Refrigerator: For longer storage, keep it in the fridge for up to a week. Just make sure it’s well covered to prevent it from drying out.
  • Freezing: You can freeze the cake layers wrapped tightly in plastic wrap for up to 3 months. Thaw overnight in the fridge before frosting.

Comprehensive FAQ

Got questions? We’ve got answers! Here are some frequently asked questions about red velvet cake:

  • What does red velvet cake taste like? It has a subtle chocolate flavor with a slight tanginess from the buttermilk and vinegar.
  • Can I use regular cocoa powder? Yes, but Dutch processed cocoa powder gives a deeper flavor and color.
  • What’s the best food coloring? Gel food coloring is recommended for the best color without altering the batter’s consistency.
  • How can I make this cake gluten-free? Substitute the all-purpose flour with a gluten-free flour blend.
  • Can I use butter instead of oil? Yes, but using a combination of both gives the best results.
  • How do I know when my cake is done? A toothpick inserted into the center should come out clean or with a few moist crumbs.
  • What’s the best way to frost my cake? Start by frosting the top of the first layer, then stack the second layer and frost the top and sides evenly.
  • Can I make this cake in advance? Yes! Both the cake and frosting can be made ahead of time. Store separately until ready to assemble.

Nutritional Tips and Dietary Adaptations

If you’re watching your diet or have dietary preferences, here are some ideas:

  • Lower Sugar Version: Substitute granulated sugar with coconut sugar or a sugar substitute.
  • Vegan Option: Use flax eggs in place of regular eggs and replace buttermilk with almond milk mixed with vinegar.
  • Lower Fat Option: Use applesauce instead of oil or butter for a lighter cake.

Essential Equipment Recommendations

To make this red velvet cake, here’s what you’ll need:

  • Mixing Bowls: A set of mixing bowls for combining ingredients.
  • Electric Mixer: A stand or handheld mixer for effortless mixing.
  • Measuring Cups and Spoons: Accurate measurements are key to baking success!
  • 9-inch Round Cake Pans: For a classic round cake.
  • Spatula: For spreading frosting smoothly.
  • Cooling Rack: Allows the cake to cool evenly and prevents sogginess.

Serving Suggestions

Now that you’ve created your masterpiece, how can you serve it? Here are some ideas:

  • Classic Slice: A simple slice with a dollop of whipped cream or a scoop of vanilla ice cream.
  • Festive Touch: Garnish with fresh berries or chocolate shavings for an elegant look.
  • Pair with Coffee: Enjoy a slice with a cup of coffee or tea for a delightful afternoon treat.

In conclusion, baking a red velvet cake is an adventure that’s both rewarding and delicious. With this easy recipe, rich flavors, and a few pro tips, you’ll be well on your way to impressing friends and family with your baking skills. Remember, the key to a successful bake is patience, practice, and most importantly, enjoying the process! Happy baking, and may your kitchen always be filled with the sweet aroma of freshly baked goodies!

BEST RED VELVET CAKE RECIPE (SOFT, MOIST AND EASY)

Prep Time 20 minutes
Cook Time 30 minutes
Total Time 50 minutes
Servings 12 pieces
Calories 450
This red velvet cake is soft, moist, and easy to make, perfect for any celebration or special occasion.

Ingredients

Cake Batter

  • 2 cups granulated sugar (400g)
  • 3/4 cup vegetable oil (170g)
  • 1/2 cup unsalted butter, melted (113g)
  • 3 large eggs
  • 1 tbsp vanilla
  • 1 1/3 cup buttermilk (320g (mix 1 1/3 cup whole milk with 4 tsp vinegar or lemon juice))
  • 2 tsp vinegar
  • 1 tbsp gel red food color (may need up to 1.5 tbsp depending on brand)
  • 1/4 cup boiling water (60g)
  • 2 1/2 tbsp Dutch processed cocoa powder (15g)

Dry Ingredients

  • 3 cups all-purpose flour (390g)
  • 1/4 cup cornstarch (30g)
  • 1 tsp baking soda
  • 1/2 tsp baking powder
  • 1 tsp salt

Frosting

  • 20 oz cream cheese (room temperature, 570g)
  • 1 tsp vanilla
  • 1/2 tsp salt
  • 3-4 cups icing sugar, sifted (360 to 480g)

Instructions 

  • Preheat oven to 350°F (175°C). Grease and flour your cake pans.
  • Mix dry ingredients: flour, cocoa powder, baking soda, baking powder, salt.
  • Combine wet ingredients: sugar, oil, butter, eggs, vanilla, buttermilk, food color, and water. Mix well.
  • Gradually add dry ingredients to wet mixture. Mix until smooth.
  • Divide batter into pans and bake for 30 minutes. Cool before frosting.

Notes

Ensure all ingredients are at room temperature for best results.
Calories: 450kcal
Cost: $15
Course: Dessert
Cuisine: American
Keyword: cake, red velvet

Indulge in Guilt-Free Delight: The Ultimate Guide to Keto Red Velvet Brownies

If you’re a fan of rich, decadent desserts but want to keep your carb count low, you’re in for a treat! These keto red velvet brownies are not just a feast for the eyes; they’re also a deliciously satisfying way to indulge your sweet tooth without the guilt. With simple ingredients and a touch of love, you can whip up these velvet brownies that are perfect for any occasion, whether it’s a cozy night in or a festive gathering.

Join me, Michael, your friendly kitchen guide, as we navigate the ins and outs of creating these delightful keto treats. Trust me, delicious food is within reach, even on the busiest days!

Why You’ll Love This Recipe

  • Guilt-free indulgence: Enjoy the rich flavors of red velvet without the added sugar or carbs.
  • Simple ingredients: This recipe uses everyday items you likely have in your pantry, making it accessible for everyone.
  • Quick preparation: With just a few easy steps, you can have these brownies ready in no time!
  • Versatile options: Customize your brownies with different mix-ins like nuts or sugar-free chocolate chips.
  • Perfect for sharing: These brownies are a hit at gatherings, ensuring you can share your love for keto without compromising on taste!

Ingredients Breakdown

Let’s dive into the star players of our keto red velvet brownies. Here’s what you’ll need:

  • 1/4 cup coconut flour: A low-carb alternative that adds a delightful texture.
  • 1/4 cup tapioca starch: Keeps the brownies chewy and moist.
  • 1/3 cup granulated sugar-free sweetener: Sweetens without the sugar crash—perfect for keto!
  • 1 tbsp cocoa powder: Adds a depth of chocolate flavor to enhance the red velvet.
  • 1/4 tsp baking soda: Helps the brownies rise for that perfect texture.
  • 1/2 tsp salt: Balances flavors and enhances sweetness.
  • 1/2 cup Greek yogurt or sour cream: Provides moisture and richness while keeping the carbs low.
  • 3 tbsp butter (melted): Adds that rich buttery flavor we all love.
  • 1 large egg: Binds everything together for a perfect brownie consistency.
  • 1/2 tsp vanilla extract: Enhances the overall flavor with a warm note.
  • Red food coloring: It wouldn’t be red velvet without that signature hue!
  • 1/2 cup sugar-free white chocolate chips: Optional but highly recommended for that gooey, sweet finish.

If you need substitutes, here are some ideas:

  • Coconut flour substitute: Almond flour can work, but adjust the quantity as it absorbs more moisture.
  • Sugar-free sweetener options: Erythritol, stevia, or monk fruit sweetener are great alternatives.
  • Greek yogurt substitute: You can use unsweetened applesauce for a fruity twist, but it may alter the texture slightly.

Pro Tips for Baking Success

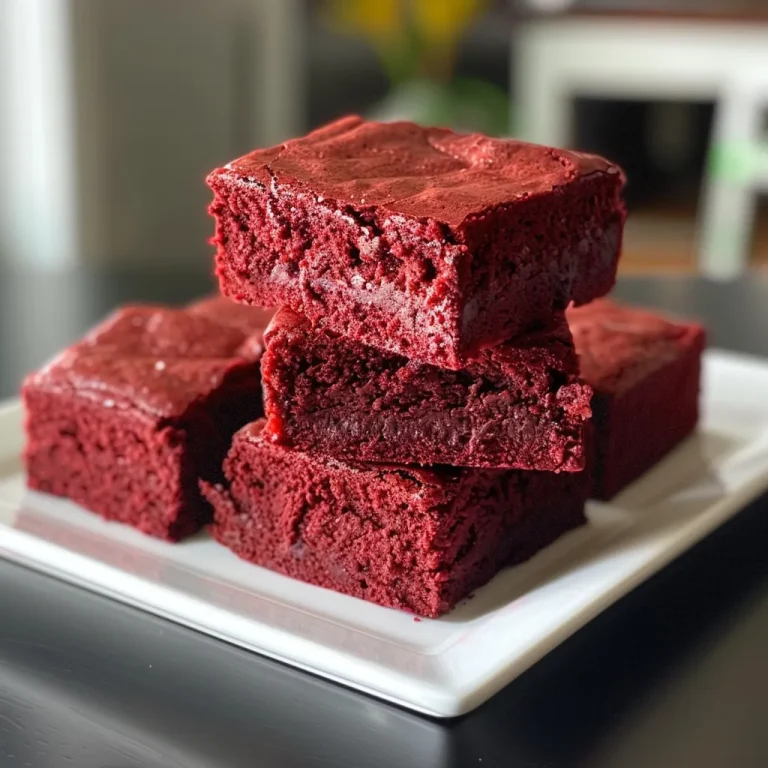
A slice of Keto Red Velvet Brownie with a glossy top and melted chocolate chips, presented on a plate.

Before we dive into the recipe, here are some expert insights to ensure your brownies turn out perfect:

  • Room temperature ingredients: Make sure your eggs and yogurt are at room temperature for a smoother batter.
  • Don’t overmix: Stir until just combined to keep your brownies tender.
  • Watch your bake time: Ovens vary; start checking for doneness a few minutes before the recommended time.
  • Cool before cutting: Let them cool in the pan for easier slicing and to help maintain their shape.
  • Experiment with flavors: Add a splash of almond extract for a unique twist!
  • Store properly: Keep brownies in an airtight container to maintain freshness.
  • Use parchment paper: Line your pan for easy removal and cleanup.
  • Feel free to double the recipe: Perfect for parties or meal prep!

Common Mistakes and Troubleshooting

Even the best bakers encounter hiccups now and then. Here are some common mistakes and how to avoid them:

  • Brownies are too dry: Ensure you’re measuring flour correctly; too much can lead to dryness. Always spoon and level your flour.
  • Not enough sweetness: Taste the batter before baking and adjust sweetener as needed.
  • Crumbly texture: This could be due to overbaking. Keep an eye on the timer!

Variations to Try

Ready to switch things up? Here are four tasty variations on your keto red velvet brownies:

  • Nutty addition: Stir in a handful of chopped walnuts or pecans for a crunchy texture.
  • Chocolate swirl: Add a dollop of cream cheese or chocolate batter for a marbled effect.
  • Minty twist: Incorporate peppermint extract for a refreshing flavor change.
  • Spicy kick: Add a pinch of cayenne or chili powder for a surprising kick!

Storage and Make-Ahead Instructions

These brownies can be made ahead of time and stored for later enjoyment:

  • Room temperature: Store in an airtight container at room temperature for up to 3 days.
  • Refrigeration: For longer freshness, keep them in the fridge for up to a week.
  • Freezing: Wrap individual brownies in plastic wrap and then foil for up to 3 months. Thaw before enjoying!

Frequently Asked Questions

You’ve got questions, and I’ve got answers! Here are some common queries about these keto red velvet brownies:

  • Can I use a different sweetener? Absolutely! Just keep in mind that different sweeteners may have varying sweetness levels.
  • Can I make these brownies dairy-free? Yes! Use coconut oil instead of butter and a dairy-free yogurt alternative.
  • How do I know when they are done? A toothpick inserted into the center should come out with a few moist crumbs.
  • What if I don’t have coconut flour? Almond flour works, but use only half the amount as it’s more absorbent.
  • Can I add cocoa powder? Yes, a tablespoon or two can enhance the chocolate flavor!
  • How do I serve these brownies? Enjoy them plain, or top with whipped cream or a scoop of keto ice cream!
  • How long do they take to bake? Bake for about 20 minutes, but check for doneness early!
  • What if I want to make them more chocolatey? Add in some sugar-free chocolate chips or increase cocoa powder!

Nutritional Tips and Dietary Adaptations

For those watching their macros, here’s a rough breakdown of what you can expect from these keto red velvet brownies:

  • Low carb: Perfect for keto diets, keeping your carb intake low while satisfying your sweet cravings.
  • High protein: Greek yogurt adds a protein punch to keep you feeling full longer.
  • Gluten-free: Coconut flour and tapioca starch make this recipe gluten-free friendly.
  • Customizable: Easily modify the sweetness and flavors to suit your dietary needs!

Equipment Recommendations

Having the right tools can make all the difference:

  • Mixing bowls: A good set of mixing bowls will help you combine ingredients easily.
  • Whisk: For smooth batter, a whisk is essential for incorporating wet and dry ingredients.
  • Measuring cups and spoons: Precise measurements are key to baking success.
  • 8×8-inch baking pan: The perfect size for these brownies—don’t forget to line it with parchment paper!
  • Cooling rack: Ensures even cooling for better texture.

Serving Suggestions

Ready to enjoy your delicious keto red velvet brownies? Here are a few serving ideas:

  • With whipped cream: A dollop of sugar-free whipped cream on top is always a winner.
  • With ice cream: Serve with a scoop of keto-friendly vanilla ice cream for a decadent treat.
  • Pair with coffee: Enjoy these brownies with a cup of your favorite coffee or tea for a delightful afternoon snack.
  • As a dessert board: Cut into bite-sized pieces and serve on a dessert board with fruit and other treats.

In conclusion, these keto red velvet brownies are not only a delicious treat but also a fantastic way to keep your diet on track without sacrificing flavor. With a little love and these straightforward steps, you’ll have a dessert that everyone can enjoy—guilt-free!

So grab those ingredients, roll up your sleeves, and let’s bake something incredible together. Remember, cooking is about connection and creativity, so don’t stress; enjoy the process — deliciousness is just a brownie away!

Keto Red Velvet Brownies

Prep Time 10 minutes
Cook Time 20 minutes
Total Time 30 minutes
Servings 9 pieces
Calories 180
Delight in these rich, low-carb red velvet brownies that combine vibrant color with a moist, chocolatey texture.

Ingredients

Dry ingredients

  • 1/4 cup coconut flour
  • 1/4 cup tapioca starch
  • 1/3 cup granulated sugar-free sweetener
  • 1 tbsp cocoa powder
  • 1/4 tsp baking soda
  • 1/2 tsp salt

Wet ingredients

  • 1/2 cup greek yogurt or sour cream
  • 3 tbsp butter (melted)
  • 1 large egg egg
  • 1/2 tsp vanilla extract

Food coloring

  • as needed Red food coloring

Chocolate chips

  • 1/2 cup sugar-free white chocolate chips (milk or dark chocolate also work!)

Instructions 

  • Preheat oven to 350°F (175°C). Line an 8x8-inch pan with parchment paper.
  • Mix dry ingredients in a bowl. Add yogurt, melted butter, egg, vanilla, and mix well.
  • Add red food coloring until desired shade. Fold in chocolate chips.
  • Spread batter into pan. Bake for 20 minutes. Cool, slice, and serve.

Notes

Use high-quality food coloring for vibrant red color.
Calories: 180kcal
Cost: $15
Course: Dessert
Cuisine: American
Keyword: brownies, keto, red velvet

Welcome to Your New Favorite Teriyaki Chicken Bowl Recipe!

If you’re looking for a delicious, simple meal that works for busy weeknights and meal prep, you’ve landed in the right spot! These Teriyaki Chicken Bowls are not only packed with flavor, but they also come together quickly, making them a perfect choice for anyone who wants to enjoy a homemade meal without spending hours in the kitchen. Plus, the combination of tender chicken, crunchy veggies, and a savory teriyaki sauce is sure to please the whole family!

Why You’ll Love This Recipe

  • Quick and Easy: This recipe can be whipped up in about 30 minutes, making it perfect for a weeknight dinner.
  • Meal Prep Friendly: These bowls store well, so you can make a batch for the week and enjoy healthy lunches or dinners.
  • Customizable: Feel free to swap in your favorite vegetables or proteins—these bowls are versatile!
  • Homemade Teriyaki Sauce: You’ll learn how to make a delicious teriyaki sauce from scratch that’s better than store-bought!
  • Nutritious: Packed with lean protein, veggies, and whole grains, these bowls are as good for you as they are tasty.

Gather Your Ingredients

Before we dive into the cooking, let’s gather everything you’ll need for these scrumptious bowls. Here’s what you’ll require:

For the Chicken Bowls:

  • 1.5 lbs chicken breasts, diced: You can also use chicken thighs for extra juiciness!
  • 1.5 tbsp sesame oil, divided: This adds a nutty flavor, and using a little for the veggies makes a world of difference.
  • 4 cups frozen stir-fry vegetables: No chopping required! Use a mix of your favorites or whatever you have on hand.
  • 2 cups cooked brown rice or quinoa: This serves as the hearty base for your bowls.
  • 1 tbsp sesame seeds, for garnish: A finishing touch that adds a lovely crunch!

For the Homemade Teriyaki Sauce:

  • 2 garlic cloves, minced: Fresh garlic enhances the flavor profile.
  • 2 tbsp fresh ginger, grated: A little zing that complements the sweetness of the sauce.
  • 1.5 tbsp raw honey: This balances the savory flavors perfectly.
  • ⅓ cup coconut aminos: A soy sauce alternative that’s gluten-free and delicious!
  • ½ cup vegetable or chicken broth: This adds depth and richness to the sauce.
  • ½ tbsp gluten-free flour: Helps to thicken the sauce for that perfect glossy finish.

Let’s Get Cooking: Step-by-Step Guide

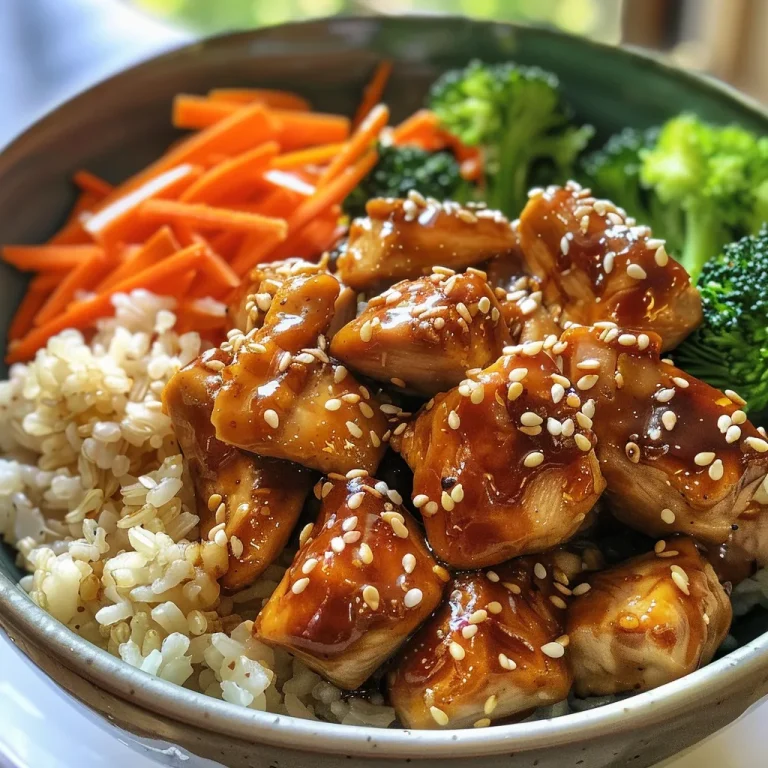
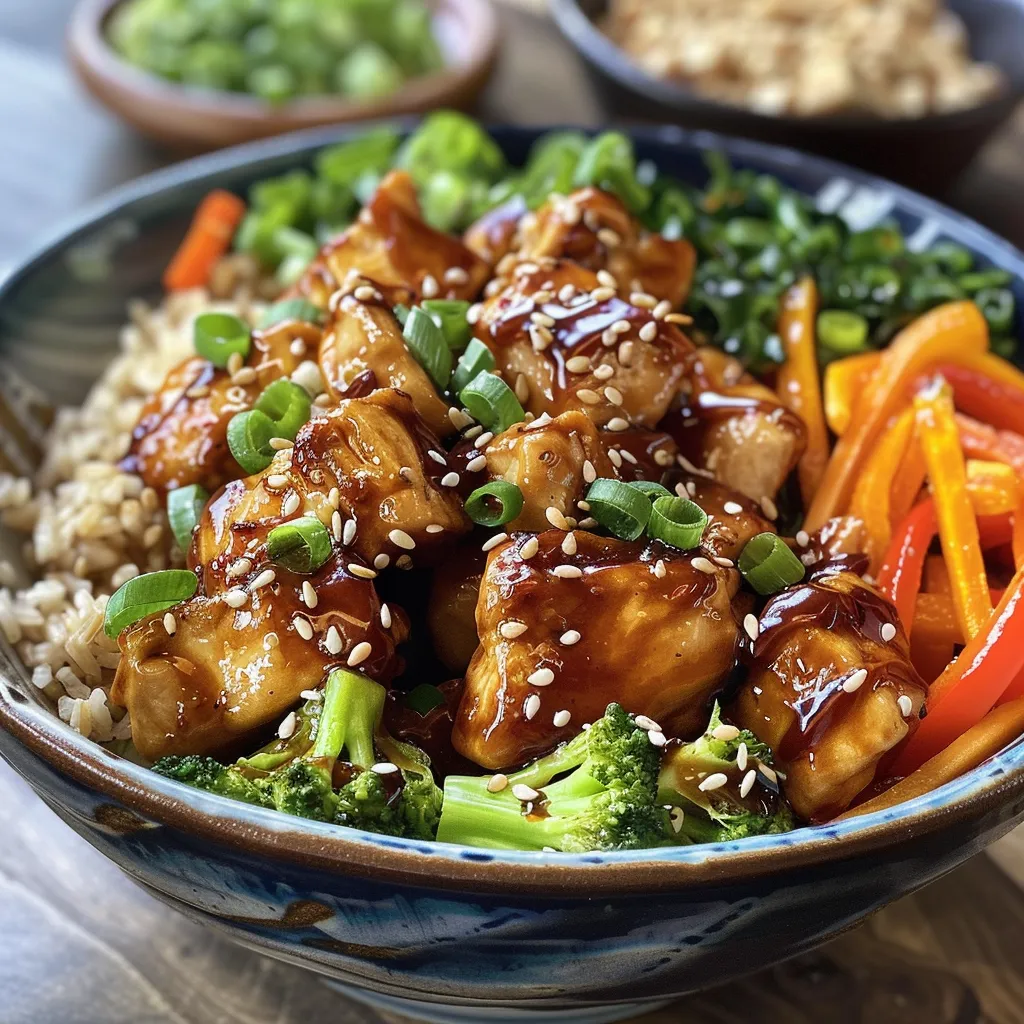
Juicy Teriyaki Chicken served over brown rice with sesame seeds garnish.

Ready to make these tasty teriyaki chicken bowls? Let’s break it down into simple steps!

Step 1: Make the Teriyaki Sauce

In a small pot, whisk together the minced garlic, grated ginger, honey, coconut aminos, and broth. Bring the mixture to a simmer over medium heat. Once it’s bubbling, whisk in the gluten-free flour and stir until the sauce thickens. Set it aside while you cook the chicken.

Step 2: Cook the Chicken

Heat 1 tablespoon of sesame oil in a skillet over medium-high heat. Add the diced chicken and cook until golden brown and fully cooked, about 6–8 minutes. Pour in the teriyaki sauce and let it simmer for another 2 minutes to coat the chicken evenly.

Step 3: Sauté the Veggies

In another pan, heat the remaining sesame oil. Add the frozen stir-fry vegetables and sauté for 5–6 minutes until they are crisp-tender. This quick cooking keeps them vibrant and full of nutrients!

Step 4: Assemble the Bowls

To serve, divide the cooked brown rice or quinoa into bowls. Top each with the teriyaki chicken and sautéed veggies. Don’t forget to sprinkle with sesame seeds for that delightful crunch!

Pro Tips for Perfect Teriyaki Bowls

  • Ingredient Swaps: You can use tofu or shrimp instead of chicken for a different protein option!
  • Make it Spicy: Add a dash of sriracha or red pepper flakes to the teriyaki sauce for a kick!
  • Fresh Herbs: Consider topping your bowls with chopped green onions or cilantro for added freshness.
  • Extra Crunch: Toss in some sliced almonds or crushed peanuts for a delightful texture contrast.
  • Meal Prep: These bowls can be made ahead and stored in the fridge for up to 4 days. Just reheat before serving.
  • Freezing: You can freeze the cooked chicken and sauce separately. Thaw and reheat when ready to enjoy!
  • Adding Flavor: Marinate the chicken in a bit of the teriyaki sauce for an hour before cooking for deeper flavor.
  • Vegetable Variations: Get creative! You can use any fresh or frozen veggies you love—bell peppers, snap peas, or broccoli work beautifully!

Avoid These Common Mistakes

  • Overcooking Chicken: Keep an eye on the chicken to prevent it from drying out—cook just until golden and no longer pink inside.
  • Thickening the Sauce Too Much: If the sauce thickens too much, add a splash of water or broth to loosen it up.
  • Skipping the Sesame Seeds: Don’t skip this step! They add not just flavor but also a lovely texture.
  • Skipping the Sauce: The teriyaki sauce is the star! Make sure to coat the chicken well for maximum flavor.

Variations to Try

  • Teriyaki Salmon Bowls: Swap the chicken for salmon fillets for a delicious seafood twist!
  • Vegetarian Bowls: Replace chicken with marinated tofu or tempeh and add extra veggies.
  • Sticky Rice Bowls: Use sticky rice instead of brown rice for a different texture and taste.
  • Asian Noodle Bowls: Serve the teriyaki chicken over cooked noodles for a hearty change!

Storage and Make-Ahead Instructions

These teriyaki chicken bowls are fantastic for meal prep! Here’s how to store and make ahead:

  • Refrigerate: Store assembled bowls in airtight containers in the fridge for up to 4 days.
  • Freeze: You can freeze the cooked chicken and sauce separately for up to 3 months. Thaw overnight in the fridge before reheating.
  • Reheat: When ready to enjoy, simply microwave or sauté until heated through.

Frequently Asked Questions

  • Can I use frozen vegetables? Yes! Frozen stir-fry veggies are perfect for this recipe and save time.
  • Can I substitute chicken thighs for chicken breasts? Absolutely! Chicken thighs are juicier and work wonderfully.
  • Is the teriyaki sauce gluten-free? Yes, if you use gluten-free soy sauce or coconut aminos.
  • How do I make this dish spicier? Add red pepper flakes or sriracha to the sauce for some heat.
  • Can I make this recipe in advance? Yes! These bowls are great for meal prep and can be stored in the fridge.
  • What can I serve with teriyaki chicken bowls? They pair well with a side salad or steamed edamame.
  • How long does the homemade teriyaki sauce last? Store leftovers in the fridge for up to one week.
  • Can I use a different sweetener? Yes! Maple syrup or agave can be used in place of honey.

Nutritional Tips and Dietary Adaptations

This recipe is not only delicious but can also be adjusted to meet various dietary needs:

  • Low-Carb: Swap brown rice for cauliflower rice to keep it low-carb.
  • Gluten-Free: Use gluten-free soy sauce or coconut aminos for the teriyaki sauce.
  • Paleo-Friendly: Substitute honey with maple syrup and use a compliant protein.
  • Vegetarian/Vegan: Swap chicken for tofu and use maple syrup or agave in the sauce.

Equipment Recommendations

To make your cooking process smoother, here are a few kitchen tools you might find helpful:

  • Non-stick Skillet: Great for cooking the chicken and sautéing vegetables without sticking.
  • Small Saucepan: Perfect for making the teriyaki sauce.
  • Whisk: Use for mixing the sauce ingredients thoroughly.
  • Measuring Cups and Spoons: Essential for accurate ingredient measurements.

Serving Suggestions

These teriyaki chicken bowls can be personalized to suit your taste:

  • Fresh Herbs: Top with chopped cilantro or green onions for extra flavor.
  • Pickled Vegetables: Add a side of pickled carrots or cucumbers for a tangy crunch.
  • Sesame Oil Drizzle: A drizzle of sesame oil brings an extra layer of flavor.
  • Hot Sauce: Keep some sriracha on the table for those who like it spicy!

Conclusion

There you have it! A simple, satisfying, and scrumptious recipe for Teriyaki Chicken Bowls that you can make any day of the week. Remember, cooking is all about enjoying the process and making it your own. So, don’t hesitate to experiment with flavors and ingredients. Happy cooking, and may your kitchen always be filled with delicious aromas!

Meal Prep Teriyaki Chicken Bowls

Prep Time 10 minutes
Cook Time 20 minutes
Total Time 30 minutes
Servings 4 servings
Calories 450
Enjoy these flavorful and easy-to-make teriyaki chicken bowls, perfect for meal prep and healthy eating.

Ingredients

Chicken Bowls

  • 1.5 lbs chicken breasts, diced
  • 1.5 tbsp sesame oil, divided
  • 4 cups frozen stir-fry vegetables
  • 2 cups cooked brown rice or quinoa
  • 1 tbsp sesame seeds, for garnish
  • 2 garlic cloves minced garlic
  • 2 tbsp fresh ginger, grated
  • 1.5 tbsp raw honey
  • cup coconut aminos
  • ½ cup vegetable or chicken broth
  • ½ tbsp gluten-free flour

Instructions 

  • Whisk garlic, ginger, honey, coconut aminos, and broth in a small pot. Simmer, then whisk in flour until thickened.
  • Heat 1 tbsp sesame oil in a skillet. Cook chicken until golden, then add sauce and simmer 2 minutes.
  • Sauté frozen vegetables in remaining sesame oil for 5–6 minutes.
  • Divide rice or quinoa into containers. Top with chicken, vegetables, and sprinkle sesame seeds.

Notes

Store in airtight containers for up to 4 days.
Calories: 450kcal
Cost: $15
Course: Main Course
Cuisine: Asian
Keyword: chicken, meal prep, Teriyaki

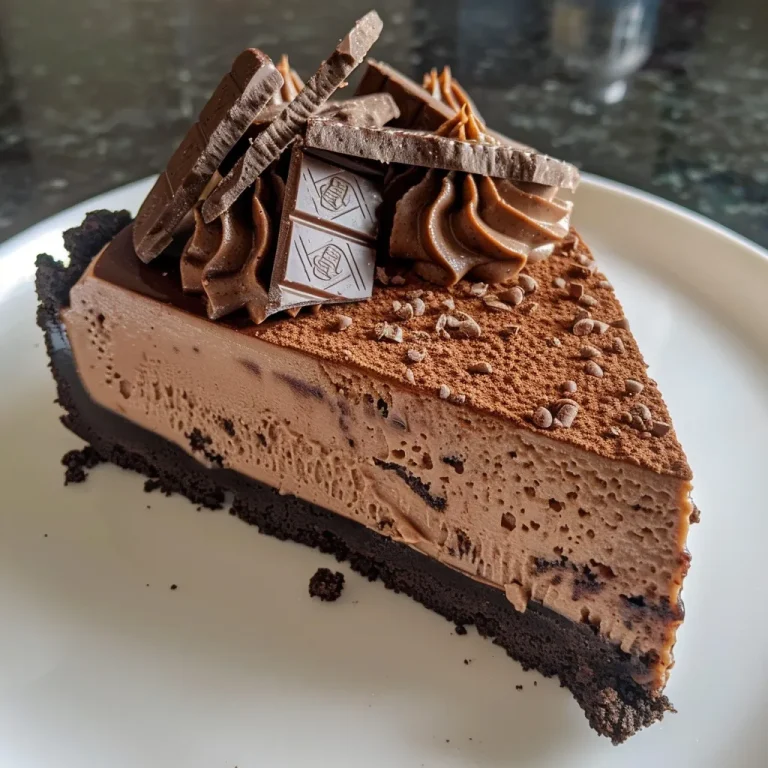
Welcome to a dessert experience that’s as easy as it is indulgent! This no bake chocolate cheesecake is a rich and creamy delight that requires minimal effort but promises maximum flavor. Perfect for any occasion or just because you deserve a treat, this cheesecake is here to satisfy your sweet tooth without the fuss of baking. So, grab your ingredients, and let’s dive into this deliciously simple recipe!

Why You’ll Love This Recipe

This recipe isn’t just about satisfying your chocolate cravings; it’s about making your life easier while enjoying a scrumptious treat. Here’s why you’ll adore this no bake chocolate cheesecake:

  • Effortless Preparation: With no baking involved, you can whip this up in under an hour and let the fridge do the hard work.
  • Rich, Creamy Texture: The combination of cream cheese and whipped cream results in a velvety filling that melts in your mouth.
  • Customizable Flavors: Feel free to experiment with different types of chocolate or add flavors like vanilla or coffee to elevate your cheesecake.
  • Perfect for Any Occasion: Whether it’s a birthday, holiday, or just a cozy night in, this cheesecake fits every celebration.
  • Minimal Ingredients: Using just a handful of pantry staples, this recipe proves that great desserts can be simple!

Ingredient Breakdown

Let’s get into the specifics of what you’ll need to create this masterpiece. Here’s a detailed list of ingredients along with some helpful substitutions:

  • 25 Oreos or chocolate creme cookies (~285g): Use any chocolate cookie you love for the crust.
  • 5 tbsp unsalted butter, melted (~70g): This helps bind the crust. You can substitute with coconut oil for a dairy-free option.
  • 250g dark chocolate (see notes): Feel free to use semi-sweet or milk chocolate for a sweeter flavor.
  • 1 1/2 cup heavy cream, chilled (divided into 3/4 cup and 3/4 cup): Essential for the rich texture; ensure it’s very cold for whipping.
  • 24 oz cream cheese, room temperature (3 8oz packs or 680g): Make sure it’s softened to blend easily.
  • 1 cup granulated sugar (200g): Adjust to taste; you can also use powdered sugar for a smoother texture.
  • 1/2 tsp salt: Balances the sweetness.
  • Optional: 1 tsp instant coffee: Enhances the chocolate flavor.
  • ½ cup heavy cream (120g): For the ganache topping.
  • 100g chocolate (can use dark, semi-sweet or milk): This will be melted for the ganache.
  • 1/4 cup granulated sugar (50g): For sweetening the ganache.
  • 3 tbsp cocoa powder, sifted (25g): Adds richness to the whipped cream topping.

Step-By-Step Instructions

Ready to create your masterpiece? Follow these simple steps, and you’ll have a delectable cheesecake ready to chill!

  • Prepare the pan: Lightly brush the bottom and edges of a 9″ springform pan with butter. Optionally, place parchment paper on the bottom for easy release.
  • Make the crust: In a food processor, grind the Oreos with melted butter until they form a fine crumb. Transfer this mixture to the pan and press down tightly using the back of a spoon or measuring cup. Place in the fridge while you prepare the filling.
  • Create the ganache: In a heat-safe glass bowl, combine 250g dark chocolate and 3/4 cup heavy cream. If using instant coffee, add it in too. Place this bowl over a small saucepan of simmering water (double boiler method) and stir until melted. Set aside to cool for 5 minutes.
  • Mix the filling: In a separate bowl, whisk together room temperature cream cheese, sugar, and salt for 2-3 minutes until creamy. Scrape the bowl halfway through for an even mix.
  • Combine: Pour the cooled ganache into the cream cheese mixture and whisk on medium-low speed until just combined. Scrape the bowl again.
  • Whip the cream: In another bowl, whisk the remaining 3/4 cup heavy cream until stiff peaks form. Gently fold the whipped cream into the cheesecake filling using a rubber spatula until smooth and fluffy.
  • Layer the cheesecake: Transfer the cheesecake filling onto the crust in the springform pan and spread it out evenly. Refrigerate overnight or at least 6 hours to set.
  • Prepare the topping: Once set, melt together ½ cup heavy cream and 100g chocolate over a double boiler for the ganache. Let it cool slightly before pouring over the cheesecake. For the chocolate whipped cream, whisk the remaining heavy cream with 1/4 cup sugar and cocoa powder until stiff peaks form.
  • Serve: Carefully remove the cheesecake from the springform pan, pour the ganache on top, and decorate with chocolate whipped cream. Enjoy!

Pro Tips for Perfection

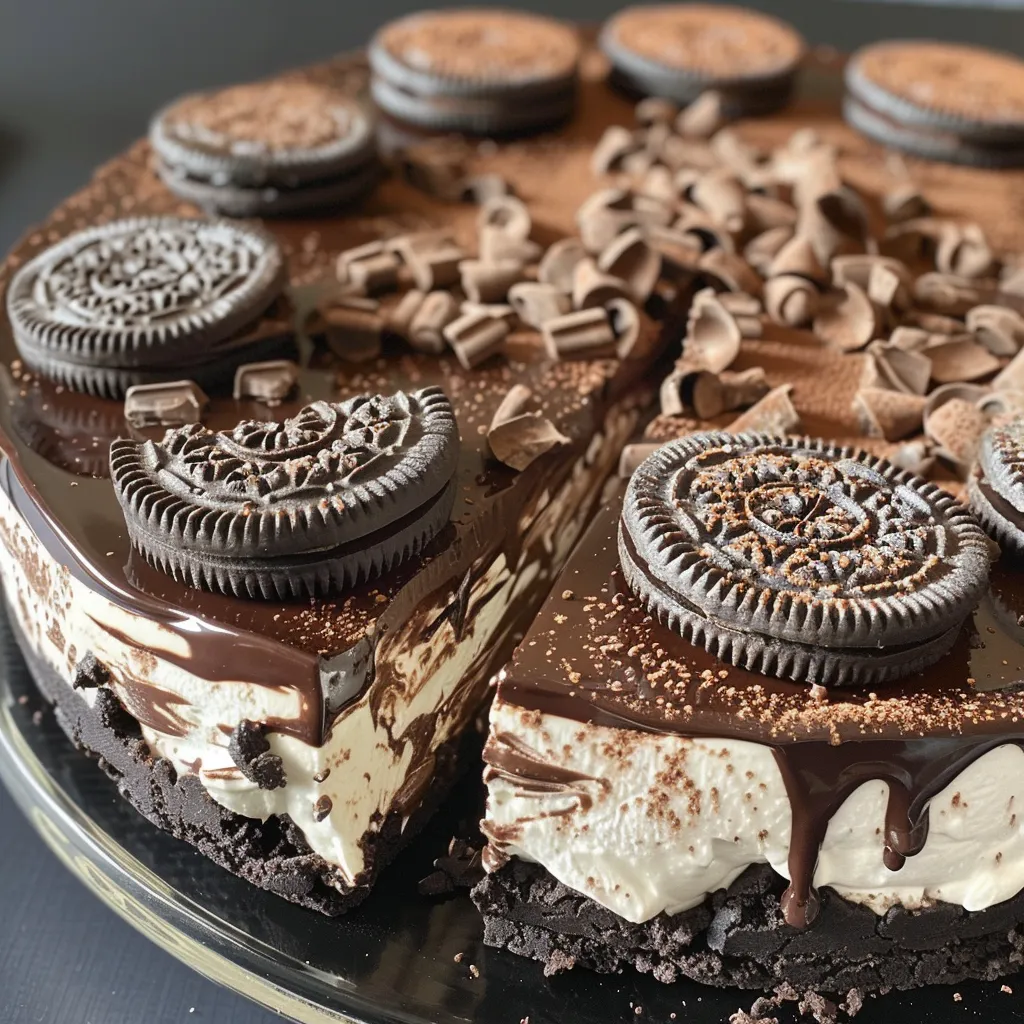
Side view of a decadent chocolate cheesecake, showcasing its rich layers and glossy chocolate finish.

Want to elevate your cheesecake to the next level? Here are some expert tips to ensure your no bake chocolate cheesecake is a showstopper:

  • Room Temperature Ingredients: Ensure your cream cheese is at room temperature to avoid lumps in your filling.
  • Chill Your Equipment: Chill your mixing bowl and beaters before whipping cream for better volume.
  • Don’t Overmix: When folding in the whipped cream, be gentle to maintain that fluffy texture.
  • Use Quality Chocolate: The better the chocolate, the richer and more satisfying your cheesecake will be.
  • Chill Long Enough: Allow the cheesecake to chill for at least 6 hours; overnight is best for a firmer texture.
  • Garnish Creatively: Top with fresh berries, chocolate shavings, or even a drizzle of caramel for added flair.
  • Check for Doneness: The cheesecake should be firm but slightly jiggly in the center when you take it out of the fridge.
  • Stay Organized: Prepare all your ingredients beforehand for a smoother cooking experience.

Common Mistakes and Troubleshooting

Even the best bakers make mistakes, so here’s how to avoid pitfalls and what to do if things don’t go as planned:

  • Lumpy Filling: If your filling is lumpy, it might be due to cold cream cheese. Blend it longer until smooth.
  • Crust Falling Apart: If your crust crumbles, ensure you used enough butter and pressed it down tightly.
  • Too Sweet: If the cheesecake is too sweet, balance it out by adding a pinch of salt or a dash of lemon juice.
  • Not Setting Properly: Make sure to chill it for the recommended time. If it’s still soft, it might need more time in the fridge.

Delicious Variations

Want to switch things up? Here are some tasty variations to try with your no bake chocolate cheesecake:

  • White Chocolate Raspberry: Swap dark chocolate for white chocolate and fold in fresh raspberries for a fruity twist.
  • Mint Chocolate Cheesecake: Add peppermint extract to the filling and top with crushed mint candies for a refreshing flavor.
  • Nutty Chocolate Cheesecake: Mix in crushed nuts like pecans or walnuts into the crust for added crunch and flavor.
  • Mocha Cheesecake: Incorporate espresso powder into the filling for a delightful coffee flavor.

Storage and Make-Ahead Instructions

This cheesecake is perfect for making ahead of time! Here’s how to store it properly:

  • Refrigerator: Store in an airtight container in the fridge for up to 5 days.
  • Freezer: This cheesecake can be frozen for up to 2 months. Wrap it tightly in plastic wrap and then foil before freezing.
  • Thawing: To serve, thaw overnight in the fridge before enjoying.

Frequently Asked Questions

Got questions? We’ve got answers! Here are some common FAQs about this recipe:

  • Can I use low-fat cream cheese? Yes, but the texture may be slightly different and less creamy.
  • Is it necessary to add coffee? No, it’s optional! It enhances the chocolate flavor but can be left out.
  • What type of chocolate works best? Dark chocolate gives a rich flavor, but feel free to experiment with your favorites.
  • Can I make this gluten-free? Absolutely! Use gluten-free chocolate cookies for the crust.
  • How long does it take to set? It needs at least 6 hours, but overnight is best for a firmer texture.
  • Can I use whipped topping instead of whipped cream? Yes, if you’re looking for convenience, whipped topping can be a great substitute.
  • Can I double the recipe? Yes, just use a larger springform pan and adjust the chilling time accordingly.
  • What’s the best way to slice the cheesecake? For clean slices, dip your knife in hot water, wipe it dry, and slice through the cheesecake.

Nutritional Tips and Dietary Adaptations

Want to enjoy this cheesecake while keeping mindful of your diet? Here are some tips:

  • Portion Control: Serve smaller slices to enjoy the richness without overindulging.
  • Healthier Alternatives: Use Greek yogurt instead of cream cheese for a lighter filling.
  • Low-Sugar Options: Substitute sugar with a low-calorie sweetener if you’re watching your sugar intake.

Essential Equipment

To make this recipe, you’ll need a few key tools:

  • 9″ Springform Pan: Essential for easy release and presentation.
  • Food Processor: For making the crust quickly and easily.
  • Mixing Bowls: A couple of medium and large bowls for mixing the filling and ganache.
  • Electric Mixer: A hand mixer or stand mixer makes whipping cream effortless.

Serving Suggestions

This cheesecake is a showstopper on its own, but here are some fun ideas to serve it:

  • Top with Fresh Fruits: Strawberries, raspberries, or cherries add a refreshing contrast to the rich cheesecake.
  • Drizzle with Caramel or Chocolate Sauce: A drizzle of sauce takes your presentation to the next level.
  • Serve with Coffee or Tea: Pair with your favorite hot beverage for a delightful end to your meal.

So there you have it! This no bake chocolate cheesecake is not only delicious but also incredibly versatile and easy to make. Remember, cooking is all about joy and comfort, so don’t stress the small stuff. Enjoy your time in the kitchen, and happy baking (or rather, no baking)! If you have any questions or variations you’ve tried, feel free to share in the comments below. Cheers to your culinary adventures!

BEST NO BAKE CHOCOLATE CHEESECAKE RECIPE

Prep Time 30 minutes
Total Time 6 hours
Servings 12 pieces
Calories 550
A rich and creamy no-bake chocolate cheesecake that combines a chocolate cookie crust with a luscious chocolate filling, perfect for any occasion.

Ingredients

Crust

  • 285 g Oreos or chocolate creme cookies
  • 70 g unsalted butter, melted

Chocolate Filling

  • 250 g dark chocolate (see notes)
  • 360 g heavy cream, divided (3/4 cup + 3/4 cup)
  • 680 g cream cheese (room temperature)
  • 200 g granulated sugar
  • 0.5 tsp salt
  • 1 tsp instant coffee (optional)

Toppings & Ganache

  • 120 g heavy cream
  • 100 g chocolate (dark, semi-sweet, or milk)
  • 240 g heavy cream
  • 50 g granulated sugar
  • 25 g cocoa powder, sifted

Instructions 

  • Prepare a 9" springform pan by brushing with butter and lining with parchment paper.
  • Make the crust by blending cookies and melted butter, then press into the pan and chill.
  • Heat chocolate and 3/4 cup heavy cream to melt and form ganache; cool slightly.
  • Mix cream cheese, sugar, salt, and optional coffee until smooth; fold in ganache and whipped cream.
  • Pour filling over crust, smooth, and refrigerate overnight to set.
  • Top with ganache and chocolate whipped cream before serving.

Notes

Ensure the cheesecake is fully chilled before adding toppings for best results.
Calories: 550kcal
Cost: $15
Course: Dessert
Cuisine: American
Keyword: cheesecake, chocolate, no bake

Unleashing Flavor: Your Guide to Roasted Vegetables with Creamy Tahini-Yogurt Dressing

Welcome to the world of vibrant flavors and wholesome ingredients! In this guide, we’ll dive into how to create mouthwatering roasted vegetables topped with a luscious tahini-yogurt dressing. If you’re looking for a dish that combines ease with deliciousness, you’ve found it. Roasting vegetables brings out their natural sweetness and enhances their flavor, while the creamy tahini-yogurt dressing adds a delightful twist. Whether you’re busy or just craving something comforting, this recipe is perfect for you!

Why You’ll Love This Recipe

  • Quick & Easy: This recipe is straightforward, allowing you to whip up a delicious dish in under an hour.
  • Wholesome Ingredients: Packed with nutrition, roasted vegetables provide essential vitamins and minerals.
  • Versatile: Customize with your favorite vegetables or swap out the tahini for a different dressing.
  • Meal Prep Friendly: Make it ahead of time for an easy side dish or light meal throughout the week.
  • Flavorful & Satisfying: The combination of roasted veggies and creamy dressing is a taste sensation!

Ingredients Breakdown

Let’s gather our ingredients! Here’s what you’ll need for this roasted vegetable masterpiece:

  • Chickpeas: 400 g (1 can, drained and rinsed) for a protein boost.
  • Onion: 1 large, sliced into wedges; it caramelizes beautifully.
  • Sweet Potatoes: 2 medium, cubed; their sweetness pairs perfectly with the savory tahini.
  • Broccoli Florets: 150 g, adding a lovely crunch.
  • Cauliflower Florets: 150 g, for a nutty flavor when roasted.
  • Spices: 2 tsp paprika and 2 tsp cumin for depth of flavor.
  • Salt and Pepper: To taste, enhancing all the flavors.
  • Chili Flakes: Optional, for a little heat.
  • Olive Oil: 2-3 tbsp for roasting and 2 tbsp for the dressing; a heart-healthy choice.
  • Tahini: 2 tbsp; this creamy ingredient is the star of the dressing!
  • Yogurt: 120 g of vegan or Greek yogurt for creaminess.
  • Lemon Juice: 2 tbsp, brightening up the dish.
  • Garlic: 1 clove, minced or grated, for an aromatic kick.
  • Mustard: 1 tsp, adding a zesty flavor.
  • Agave or Honey: 1 tsp, optional, for a hint of sweetness.

Step-by-Step Instructions

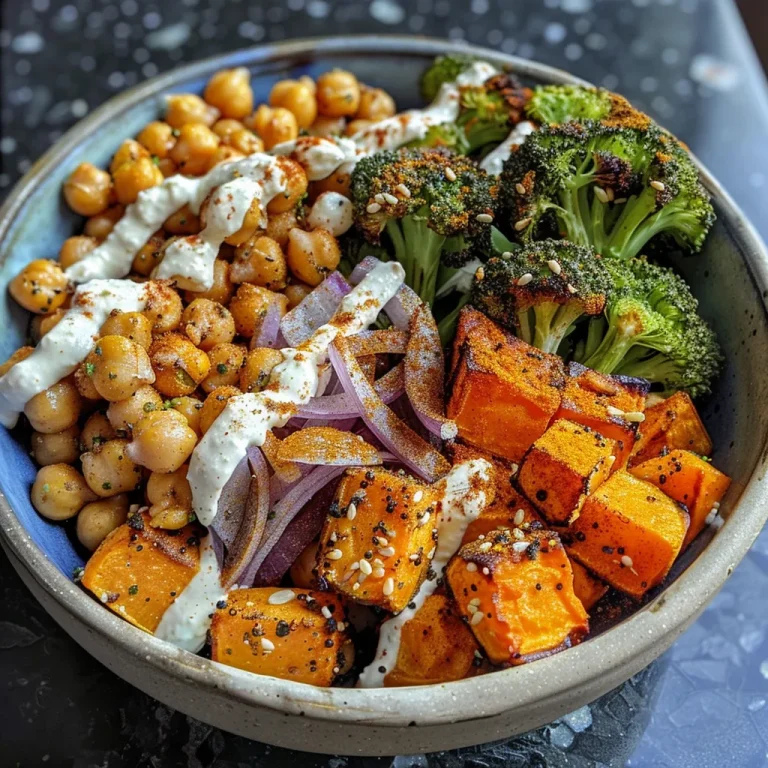
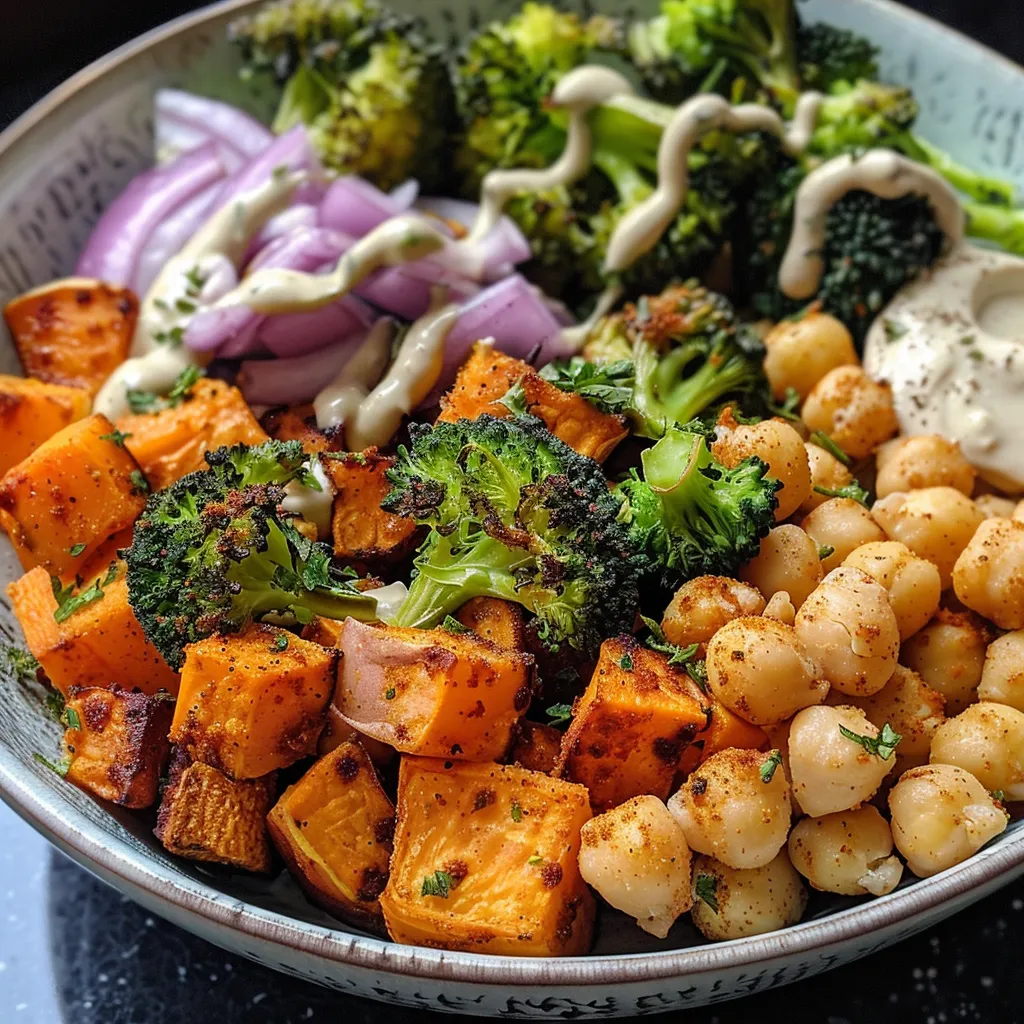
Side view of a vibrant bowl filled with roasted chickpeas, sweet potatoes, broccoli, and a creamy sauce.

Ready to get cooking? Here’s how to bring your roasted veggies to life:

1. Prepare the Vegetables

Preheat your oven to 425°F (220°C). While it heats, wash and chop your vegetables into even-sized pieces. This helps them cook evenly.

2. Roast Until Golden

Spread the vegetables on a baking sheet. Drizzle with olive oil and sprinkle with paprika, cumin, salt, and pepper. Toss to coat. Bake for 25-30 minutes or until tender and golden, tossing halfway through for even cooking.

3. Make the Tahini Yogurt Sauce

In a bowl, mix together tahini, yogurt, lemon juice, minced garlic, mustard, and agave (if using). Add a splash of water to thin it to your desired consistency. Season with salt and pepper.

4. Assemble the Dish

Once your veggies are roasted, drape the creamy tahini-yogurt dressing over them. Give it a gentle toss to combine flavors.

Pro Tips for Roasted Vegetables

  • Uniform Cuts: Cut vegetables into similar sizes for even cooking.
  • Don’t Overcrowd: Spread veggies out on the baking sheet to prevent steaming—this keeps them crispy.
  • Experiment with Spices: Feel free to use different spices like garlic powder or Italian seasoning.
  • Fresh vs. Frozen: Fresh vegetables yield the best texture, but frozen can work in a pinch.
  • Cook in Batches: If making a large quantity, roast in batches for optimal results.
  • Add a Crunch: Top with nuts or seeds for extra texture and nutrition.
  • Mind the Oven: Keep an eye on your veggies; oven times may vary based on size and type.
  • Taste as You Go: Adjust seasoning as needed throughout the cooking process.

Common Mistakes to Avoid

Even the best cooks make mistakes! Here are a few to watch out for:

  • Not Preheating the Oven: Always preheat to ensure even cooking.
  • Using Old Ingredients: Fresh veggies roast better, so use what’s in season!
  • Skipping the Dressing: The tahini-yogurt dressing is essential for flavor—don’t skip it!
  • Overcooking: Keep an eye on your veggies to avoid mushy results.

Variations to Try

Want to mix things up? Here are some delicious variations:

  • Root Vegetable Medley: Swap in carrots, parsnips, or beets for a different flavor profile.
  • Herb-Infused Dressing: Add fresh herbs like dill or parsley to the tahini sauce for a fresh twist.
  • Spicy Kick: Add sriracha or harissa to the dressing for a fiery finish.
  • Grain Bowls: Serve over quinoa or brown rice for a hearty meal.

Storage & Make-Ahead Instructions

This recipe is great for meal prep! Here’s how to store it:

  • Refrigeration: Store leftovers in airtight containers in the fridge for up to 3 days.
  • Freezing: Vegetables can be frozen after roasting; just reheat in the oven before serving.
  • Make-Ahead: You can prep the veggies a day in advance and store them in the fridge prior to roasting.

Frequently Asked Questions

  • Can I use any type of yogurt for the dressing? Yes! Greek, dairy-free, or any yogurt of choice works well.
  • How do I make this dish gluten-free? All ingredients are gluten-free; just ensure any added elements are safe.
  • What other vegetables can I use? Feel free to add zucchini, bell peppers, or asparagus!
  • Can I make the tahini dressing ahead of time? Absolutely! It keeps well in the fridge for up to a week.
  • How can I add protein? Toss in some grilled chicken or chickpeas for added protein.
  • What’s the best way to reheat leftovers? Reheat in the oven for the best texture; microwave if you’re in a hurry.
  • Are there any substitutions for tahini? Sunflower seed butter or almond butter can work as alternatives.
  • Can I serve this cold? Yes! It can be enjoyed as a salad or cold side dish.

Nutritional Tips & Dietary Adaptations

This recipe is naturally vegan and gluten-free, making it suitable for various diets:

  • Protein Boost: Add more chickpeas or your choice of protein for a filling meal.
  • Low-Calorie Option: Reduce the olive oil for a lighter dish while still retaining flavor.
  • Low-Carb: Skip the sweet potatoes and focus on lower-carb vegetables like zucchini.

Equipment Recommendations

Here’s what you’ll need for success:

  • Baking Sheet: A large rimmed baking sheet is ideal for roasting veggies.
  • Mixing Bowls: For preparing your tahini-yogurt dressing.
  • Chef’s Knife: For chopping vegetables with ease.
  • Measuring Cups & Spoons: Essential for accuracy in your recipes.

Serving Suggestions

Finally, let’s talk presentation! Here are some ideas to elevate your dish:

  • Garnish with Herbs: Fresh herbs like cilantro or parsley can brighten up the dish.
  • Serve with Grains: Pair it with couscous or quinoa for a heartier meal.
  • Add a Crunch: Top with toasted nuts or seeds for added texture.

Enjoy your culinary adventure with roasted vegetables and creamy tahini-yogurt dressing! Remember, cooking should be fun and stress-free. So roll up your sleeves, get creative, and savor the flavors. Happy cooking!

Roasted Vegetables with Creamy Tahini-Yogurt Dressing

Prep Time 15 minutes
Cook Time 30 minutes
Total Time 45 minutes
Servings 4 servings
Calories 450
A flavorful and nutritious roasted vegetable dish topped with a creamy tahini-yogurt dressing, perfect for a wholesome meal.

Ingredients

Vegetables

  • 400 g Chickpeas (1 can, drained and rinsed)
  • 1 large Onion (sliced into wedges)
  • 2 medium Sweet Potatoes (cubed)
  • 150 g Broccoli Florets
  • 150 g Cauliflower Florets
  • 2 tsp Paprika
  • 2 tsp Cumin
  • to taste Salt and Pepper
  • to taste Chili Flakes (as desired)
  • 2-3 tbsp Olive Oil (for roasting, plus 2 tbsp for the dressing)
  • 2 tbsp Tahini
  • 120 g Vegan or Greek Yogurt
  • 2 tbsp Lemon Juice
  • 1 clove Garlic (minced or grated)
  • 1 tsp Mustard
  • 1 tsp Agave or Honey (if not vegan)

Instructions 

  • Toss vegetables and chickpeas with olive oil, paprika, cumin, salt, pepper, and chili flakes. Roast at 400°F (200°C) for 30 minutes.
  • Meanwhile, prepare the dressing by whisking together tahini, yogurt, lemon juice, garlic, mustard, and sweetener. Add water to thin if needed.
  • Serve roasted vegetables topped with the creamy tahini-yogurt dressing.

Notes

Feel free to add fresh herbs or a squeeze of lemon for extra flavor.
Calories: 450kcal
Cost: $15
Course: Main Course
Cuisine: Mediterranean
Keyword: Vegetables

Indulge Guilt-Free: Your Ultimate Guide to 2-Ingredient Chocolate Bars

If you’re craving something sweet but want to keep it healthy, you’re in for a treat! These 2-ingredient chocolate bars are not only easy to whip up, but they’re also low carb and sugar-free. Perfect for busy parents, sweet-toothed friends, or anyone looking to indulge without the guilt, this recipe is a game changer. Let’s dive into why you’ll absolutely love this recipe and how you can make it your own!

Why You’ll Love This Recipe

Here are just a few reasons why these chocolate bars will become a staple in your kitchen:

  • Quick and Simple: With only two ingredients, you can prepare these bars in under 30 minutes. Perfect for those busy days when you need a sweet fix!
  • Customizable: Feel free to add your favorite toppings or mix-ins like nuts, dried fruits, or even a pinch of sea salt for an extra flavor boost!
  • Low Carb & Sugar-Free: Ideal for those on a keto or sugar-free diet, these bars allow you to indulge without the sugar crash.
  • Perfect for Meal Prep: Make a batch at the beginning of the week and enjoy a delicious snack whenever the cravings hit!
  • Kid-Friendly: Get your kids involved in the kitchen! They’ll love helping to mix and pour, and you’ll love that they’re eating something healthy.

Ingredients Breakdown

Let’s get into what you need:

  • 2 cups (approx. 170g) sugar-free chocolate chips: Choose between milk or dark chocolate—both work wonderfully!
  • 2 cups (approx. 227g) sugar-free Cool Whip: This adds a light and fluffy texture, making your bars a delight to eat.

If you’re looking for substitutions:

  • Chocolate Chips: Feel free to use unsweetened baking chocolate if you prefer a richer taste. Just remember to sweeten it according to your taste!
  • Cool Whip: For a dairy-free version, you can substitute with coconut whipped cream or any plant-based alternative.

Step-by-Step Instructions

Side view of creamy chocolate bars on a plate, highlighting their rich texture.

Ready to make these chocolate bars? Let’s get started!

  1. Melt the Chocolate: Use a double boiler or microwave to melt the sugar-free chocolate chips in 20-second intervals, stirring in between until smooth.
  2. Combine with Cool Whip: In a separate bowl, gently fold the sugar-free Cool Whip into the melted chocolate. Be careful not to deflate the mixture!
  3. Prep Your Dish: Line a small baking dish (about 8×8 inches or smaller for thicker bars) with parchment paper. Lightly grease it to help the paper stick.
  4. Pour & Spread: Pour the chocolate-Cool Whip mixture into the prepared dish, spreading it evenly.
  5. Freeze: Place the dish in the freezer for at least 1 hour, or until firm. Patience pays off here!

Pro Tips for Perfect Chocolate Bars

Here are some expert insights to elevate your chocolate bar game:

  • Use Quality Ingredients: The better the chocolate, the better the flavor. Invest in high-quality sugar-free chocolate chips.
  • Don’t Overmix: When folding in the Cool Whip, just mix until combined. Overmixing can lead to a dense texture.
  • Experiment with Flavors: Add a splash of vanilla extract or a pinch of sea salt for added depth of flavor.
  • Adjust Sweetness: If you prefer a sweeter bar, stir in a bit of stevia or your favorite sweetener before freezing.
  • Keep it Cold: Store any leftovers in the freezer to maintain their texture and flavor.

Common Mistakes and Troubleshooting

We all make mistakes, and that’s okay! Here’s how to avoid common pitfalls:

  • Chocolate Seizing: If your chocolate seizes while melting, add a teaspoon of coconut oil to help smooth it back out.
  • Bars Too Soft: If your bars are too soft after freezing, they may need more time in the freezer. Check after another 30 minutes.
  • Sticking to the Pan: If your bars stick, ensure you lightly grease the parchment paper or try using a silicone baking mold.

Variations to Try

Want to switch things up? Here are some variations you can try:

  • Nutty Delight: Add chopped nuts like almonds or walnuts for a crunchy texture.
  • Fruit Fusion: Mix in dried fruits like cranberries or apricots for a chewy bite.
  • Crunchy Rice Bars: Stir in some Rice Krispies for a delicious crunch.
  • Coconut Craze: Add shredded unsweetened coconut for a tropical twist.

Storage and Make-Ahead Instructions

These bars can be made ahead of time and stored easily:

  • Storage: Keep your chocolate bars in an airtight container in the freezer. They’ll last for up to two months!
  • Make-Ahead: Prepare a batch during the weekend and enjoy them throughout the week for a quick and easy snack.

Frequently Asked Questions

Here are some common questions about these delightful chocolate bars:

  • Can I use regular chocolate chips? Yes, but that will increase the sugar content significantly.
  • How long do these bars last? They can be stored in the freezer for up to two months.
  • Can I use a different type of sweetener? Absolutely! Feel free to use any sugar substitute you prefer.
  • How do I cut the bars? Use a sharp knife dipped in warm water for clean cuts.
  • Can I add flavorings? Yes! A dash of vanilla or peppermint extract works beautifully.
  • What’s the best way to serve these bars? Enjoy them straight from the freezer for a refreshing treat!
  • Are these bars kid-friendly? Definitely! Kids will love the sweet taste without the sugar.
  • Can I make these bars vegan? Yes! Use dairy-free chocolate chips and coconut whipped cream.

Nutrition Tips and Dietary Adaptations

These chocolate bars are versatile enough to fit many dietary needs:

  • Keto-Friendly: With low carbs and sugar-free ingredients, they fit perfectly into a keto diet.
  • Gluten-Free: Ensure you use certified gluten-free chocolate chips to keep these bars gluten-free.
  • Low-Calorie Option: These bars are a guilt-free treat when you need something sweet without the calories.

Equipment Recommendations

Here’s what you’ll need to make these delicious chocolate bars:

  • Double Boiler: For melting chocolate smoothly, a double boiler is ideal.
  • Mixing Bowls: Have a couple of medium-sized bowls for mixing your ingredients.
  • Parchment Paper: Essential for easy removal of your chocolate bars from the dish.
  • Sharp Knife: For cutting the bars into perfect squares once they are set.

Serving Suggestions

How to enjoy your chocolate bars:

  • Pair with Fresh Fruit: Serve with strawberries or bananas for a delightful contrast.
  • Drizzle with Nut Butter: A drizzle of almond or peanut butter adds a lovely richness.
  • Enjoy with Coffee or Tea: These bars make a perfect accompaniment to your favorite warm beverage.

Final Thoughts

And there you have it! These 2-ingredient chocolate bars are not only easy to make, but they also cater to a variety of dietary preferences while satisfying your sweet tooth. Remember, cooking is about having fun and experimenting. Don’t be afraid to make this recipe your own! Happy cooking, and enjoy your delightful creations!

Easy 2-Ingredient Chocolate Bars: Low Carb & Sugar-Free Treat

Prep Time 10 minutes
Total Time 1 hour 10 minutes
Servings 8 bars
Calories 250
A simple, delicious low-carb, sugar-free chocolate treat made with just two ingredients. Perfect for a quick, satisfying dessert.

Ingredients

Chocolate

  • 2 cups sugar-free chocolate chips (milk or dark)

Cool Whip

  • 2 cups sugar-free Cool Whip

Instructions 

  • Melt the chocolate chips in a double boiler or microwave until smooth.
  • Gently fold Cool Whip into the melted chocolate until combined.
  • Line a small dish with parchment paper and lightly grease it.
  • Pour the mixture into the dish and spread evenly.
  • Freeze for at least 1 hour until firm.

Notes

Use high-quality sugar-free chocolate for best flavor.
Calories: 250kcal
Cost: $15
Course: Dessert
Cuisine: American
Keyword: chocolate, sugar free

Indulge in the Joy of Making White Chocolate Strawberry Truffles

Welcome to the delightful world of White Chocolate Strawberry Truffles! If you’re looking for a sweet treat that combines the richness of white chocolate with the fresh, fruity flavor of strawberries, you’ve come to the right place. These truffles are not just a feast for your taste buds, but they also bring a touch of elegance to any occasion. In this guide, we’ll walk you through everything you need to know to create these indulgent bites of bliss, even on the busiest of days.

Whether you’re celebrating a special occasion or just want to pamper yourself with a homemade treat, these truffles will surely impress. With their creamy texture and vibrant flavor, they are perfect for parties, gifts, or a cozy night in. Let’s dive into why you’ll love this recipe!

Why You’ll Love This Recipe

  • Quick and Easy: With just a few simple ingredients, these truffles can be whipped up in less than an hour, making them a fantastic last-minute dessert option.
  • Perfect for Any Occasion: Whether it’s a birthday, wedding, or just a treat for yourself, these truffles add a touch of sophistication and sweetness.
  • Customizable: You can easily modify this recipe to suit your taste by adding different flavorings or coatings.
  • Impressive Presentation: The beautiful appearance of these truffles makes them a show-stopping dessert that will wow your guests.
  • Deliciously Indulgent: The combination of rich white chocolate and strawberry creates a deliciously unique flavor that’s hard to resist.

Ingredient Breakdown

Let’s take a closer look at the ingredients that make up these delightful truffles:

  • Freeze-Dried Strawberries: These are the secret ingredient that gives your truffles a powerful burst of strawberry flavor. You can find them at most grocery stores or online. If you can’t find freeze-dried strawberries, you can use fresh strawberries, but keep in mind they will alter the texture.
  • Good Quality White Chocolate: Use a high-quality white chocolate for the best results. Avoid chocolate chips as they don’t melt as smoothly.
  • Heavy Whipping Cream: This adds creaminess to the ganache. If you’re looking for a lighter version, you can use half-and-half instead.
  • Unsalted Butter: This helps to create a rich and smooth ganache. If you want a dairy-free option, coconut oil can be a great substitute.
  • Icing Sugar: This is used to roll the truffles and gives them a sweet coating. You can also use cocoa powder or crushed nuts for a different finish.
  • Dark Chocolate: This is used for drizzling over the truffles for a beautiful presentation. You can opt for milk chocolate or even white chocolate if you prefer.

Step-by-Step Instructions to Make White Chocolate Strawberry Truffles

Side view of creamy white chocolate truffles with bits of freeze-dried strawberries.

Now that you have your ingredients ready, let’s get started with making these delightful treats!

Step 1: Prepare the Strawberry Powder

Place the freeze-dried strawberries in a sandwich bag, press out the air, and seal it shut. Use a rolling pin or meat mallet to crush the strawberries into a powder with only a few small chunks remaining.

Step 2: Chop the White Chocolate

Unwrap the white chocolate baking bars and use a sharp knife to chop them into small pieces. This helps the chocolate melt evenly.

Step 3: Warm the Cream

Warm the cream until it reaches about 110-115°F. You can do this in a small saucepan over gentle heat or in a double boiler. Add the butter and whisk until it is fully melted.

Step 4: Make the Ganache

Add the chopped chocolate to the warm cream and stir with a flexible spatula until all the chocolate has melted. You may need to return it to the heat for a few seconds to ensure there are no lumps.

Step 5: Incorporate Strawberry Powder

Stir the strawberry powder into the ganache until it’s well mixed. This will thicken the mixture slightly and infuse it with strawberry flavor.

Step 6: Chill the Mixture

Refrigerate the ganache uncovered for at least 1 hour. The ganache is ready to roll when you can scoop it out and it can hold its shape.

Step 7: Shape the Truffles

Roll the chilled ganache mixture into small balls. If the mixture is sticky, roll them in icing sugar to make handling easier.

Step 8: Coat the Truffles

Melt the dark chocolate in a double boiler. Pour it into the corner of a sandwich bag, twist the top, and snip off the tip to create a piping bag. Drizzle the melted chocolate over the truffles and chill for 10 minutes to allow the chocolate to set.

Step 9: Serve and Enjoy

Serve the truffles chilled or at room temperature. Enjoy these delightful bites of sweetness with your friends and family!

Expert Tips for the Best Truffles

  • Don’t Skimp on Quality: Use high-quality ingredients for the best flavor. Good white chocolate and fresh freeze-dried strawberries make a difference!
  • Keep Your Kitchen Cool: If you find the ganache too soft, work in a cool environment to help it set better.
  • Experiment with Coatings: Try rolling your truffles in different toppings like crushed nuts, cocoa powder, or even coconut flakes for added texture and flavor.
  • Use a Cookie Scoop: For uniform truffles, a cookie scoop can help you achieve consistent sizing.
  • Chill Before Shaping: If the ganache is too soft to handle, a quick chill in the fridge can help firm it up for easier rolling.
  • Don’t Overheat the Chocolate: When melting the chocolate, avoid overheating it; this can cause it to seize up.
  • Store Properly: Store truffles in an airtight container in the fridge to maintain their freshness.
  • Make Ahead: You can prepare these truffles a few days in advance; they taste even better after a day or two as the flavors meld!

Common Mistakes and Troubleshooting

  • Too Sticky to Roll: If your ganache is too sticky, it may need more chilling time. Consider returning it to the fridge before rolling.
  • Chocolate Seized: If your chocolate has seized, try adding a small amount of vegetable oil to loosen it up.
  • Uneven Texture: If your truffles are lumpy, make sure to mix the ganache thoroughly to ensure a smooth consistency.
  • Too Sweet: If you find your truffles too sweet, consider reducing the icing sugar next time or balancing it with a pinch of salt.

Variations to Try

  • Mint Chocolate Strawberry Truffles: Add a few drops of peppermint extract to the ganache for a refreshing twist.
  • Nutty Chocolate Strawberry Truffles: Roll the truffles in crushed nuts like almonds or hazelnuts for added crunch.
  • Spicy Chocolate Strawberry Truffles: Incorporate a pinch of cayenne pepper or chili powder into the ganache for a surprising kick.
  • Vegan Strawberry Truffles: Substitute the white chocolate for vegan chocolate and use coconut cream instead of heavy cream for a dairy-free version.

Storage and Make-Ahead Instructions

These truffles can be stored in an airtight container in the fridge for up to two weeks. If you want to make them ahead of time, prepare the truffles and store them in the fridge until you’re ready to serve. They also freeze well; just make sure to keep them in a freezer-safe container. Thaw them in the fridge before serving for the best texture.

Frequently Asked Questions

  • Can I use fresh strawberries instead of freeze-dried?
    Yes, but they will change the texture and may require adjustments to the recipe.
  • How can I tell when the ganache is ready?
    The ganache is ready when it is thick enough to hold its shape but still soft enough to scoop.
  • What is the best way to melt chocolate?
    The best method is to use a double boiler or heat in short bursts in the microwave, stirring in between.
  • Can I add flavors to the ganache?
    Absolutely! Vanilla extract, almond extract, or even citrus zest can enhance the flavor.
  • Are these truffles gluten-free?
    Yes, as long as you check your ingredient labels, these truffles can be gluten-free.
  • Can I use milk chocolate instead of white chocolate?
    Yes, you can! Just keep in mind that the flavor will be different.
  • How should I serve these truffles?
    They can be served chilled or at room temperature, and they pair wonderfully with coffee or tea.
  • What’s the best way to package these for gifts?
    Use a decorative box or tin lined with parchment paper for a lovely presentation.

Nutrition Tips and Dietary Adaptations

If you’re looking to make these truffles a bit healthier, consider the following tips:

  • Reduce Sugar: You can cut down on the icing sugar or use a sugar substitute if you’re watching your sugar intake.
  • Dark Chocolate Option: Using dark chocolate instead of white chocolate can provide a richer flavor and potentially lower sugar content.
  • Dairy-Free Version: Use plant-based alternatives for the cream and butter to make this recipe dairy-free.

Essential Equipment for Success

  • Double Boiler: Ideal for melting chocolate without burning it.
  • Flexible Spatula: Great for mixing and scraping down bowls.
  • Cookie Scoop: Ensures even-sized truffles for a professional look.
  • Sandwich Bags: Perfect for piping chocolate or storing crushed ingredients.

Serving Suggestions

These truffles are versatile and can be served in various settings:

  • Elegant Desserts: Place them on a beautiful platter for an elegant dessert display.
  • Party Favors: Package them in small boxes as delightful party favors.
  • With Coffee or Tea: Serve them alongside your favorite hot beverage for a cozy treat.
  • As a Gift: Wrap them up nicely for a thoughtful homemade gift.

In Conclusion

Making White Chocolate Strawberry Truffles is not only simple but also a rewarding experience that brings joy to both the maker and the eater. With this comprehensive guide, you’re now equipped with all the knowledge you need to create these delicious treats. Remember, cooking is about enjoying the process and connecting with those you share your food with. So, roll up your sleeves, get into the kitchen, and let the sweetness unfold! Happy cooking!

White Chocolate Strawberry Truffles

Prep Time 20 minutes
Cook Time 10 minutes
Total Time 30 minutes
Servings 12 pieces
Calories 150
Delight in these creamy white chocolate truffles infused with crushed strawberries, perfect for a sweet treat or gift.

Ingredients

Dried ingredients

  • 1 ounce freeze-dried strawberries
  • 8 ounces white chocolate (good quality)
  • 0.5 cup heavy whipping cream
  • 1 tablespoon unsalted butter
  • 0.25 cup icing sugar
  • 2 ounces dark chocolate

Instructions 

  • Crush the freeze-dried strawberries into powder.
  • Chop the white chocolate into small pieces.
  • Heat the cream with butter until just simmering, then add chopped chocolate and stir until smooth.
  • Mix in the strawberry powder, refrigerate until firm, then roll into balls.
  • Melt dark chocolate and drizzle over the truffles, then chill to set.

Notes

Chill the truffles before serving for best texture.
Calories: 150kcal
Cost: $15
Course: Dessert
Keyword: strawberries, white chocolate

Unleash the Magic of Mini Cakes This Holiday Season!

Welcome to your new favorite holiday tradition! These delightful Chocolate Gingerbread Mini Cakes are not just sweet treats; they’re little bundles of joy that bring warmth and cheer to your festive celebrations. Perfectly spiced and decadently chocolaty, they will have your guests asking for seconds—and maybe even the recipe! In this article, we will dive deep into everything you need to know about making these mini masterpieces, ensuring you feel confident every step of the way.

Why You’ll Love This Recipe

Let’s talk about the irresistible reasons to love these mini cakes:

  • Easy to Make: With simple steps and minimal fuss, you’ll be amazed at how quickly these cakes come together. Perfect for busy holiday schedules!
  • Festive Flavors: The combination of chocolate and gingerbread spices delivers a cozy flavor that embodies the spirit of the season.
  • Perfect Portion Size: Mini cakes mean no fussing over slicing—just pop one in your hand and enjoy a delightful bite!
  • Customizable: Dress them up with your favorite glazes and toppings, making them as festive as your imagination allows.
  • Make Ahead Friendly: Bake these beauties in advance and store them for a stress-free holiday gathering.

Ingredient Breakdown

Before you grab your apron, let’s go over the ingredients you’ll need to create these delightful gingerbread mini cakes!

  • Unsalted Butter: ½ cup (113 g/4 oz), softened for a creamy texture.
  • Brown Sugar: ½ cup (100 g), packed to add a rich sweetness.
  • Molasses: ½ cup (170 g), essential for that deep, gingerbread flavor.
  • Egg: 1 large, to bind everything together.
  • Buttermilk: ½ cup (120 ml/4 fl oz), adds moisture for a tender cake.
  • Hot Water: ½ cup (120 ml/4 fl oz), helps dissolve the cocoa and creates a smooth batter.
  • All-Purpose Flour: 1 ½ cups (375 ml), the backbone of any cake.
  • Unsweetened Cocoa Powder: ¼ cup (60 ml), for that rich chocolate flavor.
  • Baking Soda: 1 tsp, helps the cakes rise.
  • Spices: 1 tsp ground ginger, ½ tsp ground cinnamon, and ¼ tsp ground cloves to create a warming spice blend.
  • Salt: ¼ tsp, enhances all the flavors.
  • Chocolate Chips: ½ cup (85 g), for added chocolatey goodness.
  • Powdered Sugar: Optional, for dusting.
  • Crystallized Ginger Slices: Optional, for an extra zing.
  • Holiday Sprinkles: Optional, for festive flair!

Expert Tips for Success

Side view of a juicy chocolate gingerbread mini cake, decorated with powdered sugar and crystallized ginger slices.

Ready to become a mini cake master? Here are some expert insights to elevate your baking:

  • Prep Your Pans: Thoroughly grease mini bundt pans or cake molds to ensure easy release. A light dusting of flour can help too!
  • Don’t Overmix: When combining the batter, mix just until combined to avoid dense cakes.
  • Check for Doneness: Use a toothpick inserted into the center; if it comes out clean, they’re ready!
  • Cool Before Glazing: Allow your cakes to cool completely before adding any glazes or toppings to prevent melting.
  • Experiment with Flavors: Feel free to add a hint of orange zest to the batter for a refreshing twist.
  • Store Properly: Keep your mini cakes in an airtight container at room temperature to maintain freshness.
  • Chocolate Glaze Tip: Stir in a little corn syrup or honey for a beautiful, shiny finish.
  • Presentation Matters: Garnish with a sprinkle of powdered sugar or colorful holiday sprinkles for an eye-catching display.

Common Mistakes and Troubleshooting

Everyone makes mistakes in the kitchen, and that’s perfectly okay! Here are some common pitfalls and how to avoid them:

  • Dry Cakes: Be careful not to overbake! Check them a few minutes early to ensure they stay moist.
  • Dense Texture: If the batter is overmixed, the cakes can turn out heavy. Mix just until combined.
  • Sticking to Pans: Make sure to grease and flour your pans thoroughly; otherwise, your mini cakes might not release cleanly.
  • Flavors Not Coming Through: Ensure your spices are fresh and properly measured for the best flavor.

Variations to Try

Want to get creative? Here are some variations for your chocolate gingerbread mini cakes:

  • Gluten-Free: Substitute all-purpose flour with a 1:1 gluten-free blend for a gluten-free treat.
  • Vegan Option: Replace the egg with a flax egg (1 tbsp flaxseed meal + 2.5 tbsp water) and use plant-based butter.
  • Spiced Up: Add a pinch of cayenne pepper for a zesty kick that complements the ginger.
  • Chocolate Chip Variation: Fold in a cup of chopped nuts or dried fruit for added texture and flavor.

Storage and Make-Ahead Instructions

Planning ahead? Here’s how to store and prepare your mini cakes:

  • Room Temperature: Store in an airtight container for up to 3 days.
  • Refrigerator: Keep them fresh for up to a week in the fridge.
  • Freezing: Wrap in plastic wrap and store in an airtight container for up to 3 months. Thaw before serving.
  • Make Ahead: Bake the cakes a day or two in advance and glaze just before serving for the best presentation.

Frequently Asked Questions (FAQs)

Got questions? We’ve got answers! Here are some FAQs about our delightful mini cakes:

  • Can I use different types of flour? Yes, but results may vary. Stick to all-purpose flour for the best texture.
  • How do I know when they’re done? A toothpick inserted in the center should come out clean when fully baked.
  • Can I make them larger? Absolutely! Just adjust the baking time and keep an eye on them.
  • What can I serve with these mini cakes? They pair beautifully with vanilla ice cream, whipped cream, or a cup of coffee!
  • How can I make them more festive? Add a drizzle of white chocolate or festive sprinkles for a pop of color!
  • What if I’m out of buttermilk? You can substitute with milk mixed with a splash of vinegar or lemon juice.
  • Can I make them ahead of time? Yes! These mini cakes freeze well, making them perfect for holiday prep.
  • How do I store leftovers? Keep them in an airtight container at room temperature or in the fridge for longer freshness.

Nutritional Tips and Dietary Adaptations

Want to make your treats a bit healthier? Here are some adaptations:

  • Reduce Sugar: Cut down on the brown sugar slightly for a less sweet cake, or use a sugar substitute.
  • Whole Wheat Flour: Substitute half of the all-purpose flour with whole wheat flour for added fiber.
  • Low-Fat Options: Use low-fat butter or yogurt instead of regular butter to reduce calories.
  • Portion Control: Enjoy these mini cakes as a small treat to satisfy your sweet tooth without overindulging!

Equipment Recommendations

Here’s a quick rundown of the tools you’ll need to whip up your mini cake wonders:

  • Mini Bundt Pan: Essential for achieving that beautiful shape. Invest in a non-stick version for easy release.
  • Mixing Bowls: A set of various sizes will help you with all your mixing needs.
  • Electric Mixer: A handheld mixer makes creaming the butter and sugar a breeze.
  • Measuring Cups and Spoons: Accurate measurements are key to baking success!

Serving Suggestions

When it comes to serving these delightful mini cakes, the possibilities are endless:

  • Classic Display: Dust with powdered sugar and serve with fresh berries for a touch of elegance.
  • Ice Cream Delight: Serve warm with a scoop of vanilla ice cream on top.
  • Festive Platter: Arrange them on a large platter with holiday-themed decorations to impress your guests.
  • Personalized Treats: Top each mini cake with a different garnish to make them uniquely yours!

Now that you’re equipped with all the knowledge and tips you need, it’s time to roll up your sleeves and dive into the wonderful world of baking these Chocolate Gingerbread Mini Cakes. Remember, the kitchen is a place of joy and creativity, so have fun with it! Enjoy the process, embrace any little mishaps, and most importantly, savor every bite. Happy baking, friend!

Festive Chocolate Gingerbread Mini Cakes Recipe

Prep Time 15 minutes
Cook Time 20 minutes
Total Time 35 minutes
Servings 12 cakes
Calories 250
Delight in these moist, spiced mini cakes topped with glossy chocolate glaze, perfect for holiday celebrations.

Ingredients

Dried Ingredients

  • 113 g unsalted butter, softened
  • 100 g brown sugar, packed
  • 170 g molasses
  • 1 large egg
  • 120 ml buttermilk
  • 120 ml hot water
  • 375 ml all-purpose flour
  • 60 ml unsweetened cocoa powder
  • 1 tbsp corn syrup or honey (optional, for shine)
  • 85 g semi-sweet chocolate chips
  • 30 g unsalted butter
  • 1 tsp baking soda
  • 1 tsp ground ginger
  • 0.5 tsp ground cinnamon
  • 0.25 tsp ground cloves
  • 0.25 tsp salt

Decorative Toppings

  • Powdered sugar
  • Crystallized ginger slices (optional)
  • Holiday sprinkles

Instructions 

  • Preheat oven to 350F (175C) and grease mini bundt pans or molds.
  • Whisk dry ingredients in a bowl; cream butter and sugar, then add molasses and egg.
  • Alternate adding dry ingredients and buttermilk; fold in hot water for a smooth batter.
  • Fill molds 3/4 full; bake 18-20 minutes; cool in pan, then transfer to wire rack.
  • Melt chocolate chips and butter; stir in honey or corn syrup if desired, then drizzle over cooled cakes.
  • Garnish with powdered sugar, ginger slices, or sprinkles before serving.

Notes

Ensure not to overfill the molds for best presentation.
Calories: 250kcal
Cost: $15
Course: Dessert
Cuisine: holiday
Keyword: chocolate, gingerbread

As winter settles in and the days grow colder, there’s nothing quite like a warm bowl of soup to nurture your body and soul. This winter detox cabbage soup is not just a deliciously cozy dish but also a fantastic way to refresh and nourish your body. With vibrant vegetables and warming spices, it’s simple to make—even on your busiest days. Whether you’re aiming for a health boost or just looking for a comforting meal, this soup has you covered!

Why You’ll Love This Recipe

This recipe is designed with your taste buds and well-being in mind. Here are five reasons why you’ll adore this detox cabbage soup:

  • Quick and Easy Preparation: With straightforward steps, you can whip this soup up in under 30 minutes, making it perfect for busy weeknights.
  • Vibrant and Nutritious Ingredients: Packed with vitamins, especially vitamin C from the cabbage and a zing of fresh ginger, this soup is a powerhouse of nutrition.
  • Versatile Flavor Profile: The combination of spices, including turmeric and garlic, creates a rich and warming flavor that will delight your palate.
  • Great for Meal Prep: This soup stores well, allowing you to make a big batch and enjoy it throughout the week—ideal for meal prepping.
  • Comforting and Satisfying: The hearty vegetables and savory broth make this soup comforting enough to satisfy any hunger!

Ingredient Breakdown

Here’s what you’ll need to make this incredible soup, along with some handy substitutions:

  • 1 medium green cabbage, shredded (about 800g): Try savoy cabbage for a sweeter flavor.
  • 2 large carrots, sliced into thin rounds: Substitute with parsnips for a different twist.
  • 2 stalks celery, diced: Leeks can be a flavorful alternative.
  • 1 large onion, finely chopped: Shallots work beautifully if you prefer a milder taste.
  • 3 cloves garlic, minced: Fresh garlic enhances flavor; powdered can be used in a pinch.
  • 1 tablespoon fresh ginger, grated: Ground ginger is an alternative, but fresh is best for a vibrant taste.
  • 1 teaspoon ground turmeric: Add smoked paprika for a deeper flavor.
  • 1 tablespoon olive oil: Use avocado oil for a different flavor profile.
  • 4 cups low-sodium vegetable broth: Homemade broth gives the best flavor, but store-bought works well.
  • 2 cups water: Adjust based on your desired soup thickness.
  • 2 tablespoons lemon juice: Apple cider vinegar can be used as a tangy alternative.
  • 1/2 teaspoon sea salt: Adjust to taste.
  • 1/4 teaspoon freshly ground black pepper: Freshly ground adds a kick.
  • 2 tablespoons fresh parsley, chopped: Basil or cilantro can provide a fresh twist!

Step-by-Step Preparation

Now that you have everything ready, let’s dive into making this delightful soup!

  • Step 1: Heat 1 tablespoon of olive oil in a large pot over medium heat. Add the onion, garlic, ginger, and celery, sauté for about 3-4 minutes until fragrant and the onion becomes translucent.
  • Step 2: Stir in the ground turmeric, then add the sliced carrots and shredded cabbage. Cook, stirring occasionally, for another 5 minutes to allow the vegetables to soften slightly.
  • Step 3: Pour in the vegetable broth and water, bring the mixture to a gentle boil, then reduce heat to low. Cover and simmer for 20 minutes, or until the cabbage and carrots are tender.
  • Step 4: Add lemon juice, sea salt, and black pepper. Taste and adjust seasoning if needed. Remove from heat and stir in fresh parsley.
  • Step 5: Ladle the hot soup into bowls and enjoy immediately. Garnish with an extra sprinkle of parsley or a drizzle of olive oil if desired.

Expert Tips for Success

Side angle photo of cabbage soup showing colorful vegetables like carrots and celery in broth.

Here are some pro tips to elevate your cabbage soup game:

  • Chop Uniformly: Cut your vegetables into uniform sizes to ensure even cooking.
  • Don’t Rush the Sauté: Allow the aromatics to become fragrant; this builds a deeper flavor base for the soup.
  • Adjust Consistency: If you prefer a thicker soup, reduce the amount of water or broth.
  • Enhance Flavor: For a more robust flavor, add a splash of apple cider vinegar just before serving.
  • Add More Greens: Feel free to toss in kale or spinach for an additional nutritional boost.
  • Make it Spicy: Add a pinch of red pepper flakes for a kick of heat.
  • Store Properly: Keep any leftovers in an airtight container in the fridge for up to 5 days.
  • Freeze for Later: This soup freezes well. Portion out servings and store in freezer-safe containers.

Common Mistakes and Troubleshooting

Even the best cooks make mistakes! Here’s how to troubleshoot common issues:

  • Too Salty? Add a potato to absorb excess salt while cooking, then remove it before serving.
  • Too Thick? Stir in more broth or water until you reach your desired consistency.
  • Too Bland? Boost flavor with more spices or a splash of vinegar.
  • Overcooked Vegetables? Reduce simmer time next time to keep veggies tender-crisp.

Variations to Try

This soup is incredibly adaptable! Here are some variations you might enjoy:

  • Detox with Turmeric: Add an extra teaspoon of turmeric for a health boost and vibrant color.
  • Cabbage and Quinoa: Stir in cooked quinoa for added protein and texture.
  • Spicy Southwest: Incorporate black beans, corn, and diced tomatoes with a sprinkle of cumin.
  • Asian Twist: Add soy sauce, sesame oil, and sliced mushrooms for an Asian-inspired version.

Storage and Make-Ahead Instructions

This soup is perfect for meal prep! Here’s how to store and reheat:

  • Refrigerate: Store in airtight containers for up to 5 days.
  • Freeze: Portion into freezer-safe containers and freeze for up to 3 months. Thaw overnight in the fridge before reheating.
  • Reheat: Warm on the stove over medium heat, adding a splash of water or broth if needed.

Frequently Asked Questions

Got questions? I’ve got answers! Here are some common queries about this detox cabbage soup:

  • Can I use green cabbage instead of purple? Absolutely! Green cabbage works perfectly in this recipe.
  • Is this soup gluten-free? Yes, as long as you use gluten-free broth.
  • Can I add meat? You can add shredded chicken or sausage for a heartier option.
  • How can I make it vegan? This recipe is already vegan-friendly, just ensure your broth is plant-based.
  • Can I use frozen vegetables? Yes, frozen vegetables can be used, just adjust cooking times accordingly.
  • What can I serve with this soup? A slice of crusty bread or a fresh salad makes a great pairing!
  • How do I know when the soup is done? The soup is ready when the cabbage and carrots are tender but not mushy.
  • Can I use a slow cooker? Yes, sauté the aromatics first, then add everything to the slow cooker and cook on low for 6-8 hours.

Nutritional Tips and Dietary Adaptations

This detox cabbage soup is packed with nutrition:

  • Low-Calorie: A great option for a light meal without sacrificing flavor.
  • Rich in Vitamins: Cabbage, carrots, and ginger provide a nutrient-rich boost.
  • Heart-Healthy: Low in saturated fats and cholesterol, making it a heart-friendly choice.
  • Adaptable for Dietary Needs: Easily modified for gluten-free, vegan, or low-carb diets.

Equipment Recommendations

Here’s what you’ll need to create this delicious soup:

  • Large Pot: A sturdy pot for simmering the soup.
  • Cutting Board and Knife: Essential for chopping your vegetables.
  • Wooden Spoon: Perfect for stirring and preventing sticking.
  • Measuring Cups and Spoons: For accurate ingredient measurements.

Serving Suggestions

How to serve this soup for maximum enjoyment:

  • Garnish: A sprinkle of fresh parsley or a tablespoon of cream adds a lovely finish.
  • Accompaniments: Serve with whole-grain bread or a green salad for a complete meal.
  • Pair with Beverages: A light white wine or herbal tea complements the flavors beautifully.

In conclusion, this winter detox cabbage soup is not only a delightful dish to warm you up, but it’s also a healthy option that you can feel good about serving your family. Remember, cooking is an adventure, so embrace the process and enjoy every spoonful! Happy cooking!

winter detox cabbage soup

Prep Time 10 minutes
Cook Time 25 minutes
Total Time 35 minutes
Servings 4 servings
Calories 150
A nourishing and detoxifying cabbage soup perfect for winter, packed with fresh vegetables and spices.

Ingredients

Vegetables

  • 1 medium green cabbage, shredded (about 800g)
  • 2 large carrots, sliced into thin rounds
  • 2 stalks celery, diced
  • 1 large onion, finely chopped
  • 3 cloves garlic, minced
  • 1 tablespoon fresh ginger, grated
  • 1 teaspoon ground turmeric
  • 1 tablespoon olive oil
  • 4 cups low‑sodium vegetable broth
  • 2 cups water
  • 2 tablespoons lemon juice
  • 1/2 teaspoon sea salt
  • 1/4 teaspoon freshly ground black pepper
  • 2 tablespoons fresh parsley, chopped

Instructions 

  • Heat olive oil and sauté onion, garlic, ginger, and celery for 3-4 minutes.
  • Add turmeric, carrots, and cabbage; cook for 5 minutes.
  • Pour in broth and water; simmer for 20 minutes until vegetables are tender.
  • Stir in lemon juice, salt, pepper, and parsley; serve hot.

Notes

This soup is a low-calorie, nutrient-dense option to boost your winter wellness.
Calories: 150kcal
Cost: $12
Course: Soup
Cuisine: Healthy
Keyword: cabbage