Author

michael

Browsing

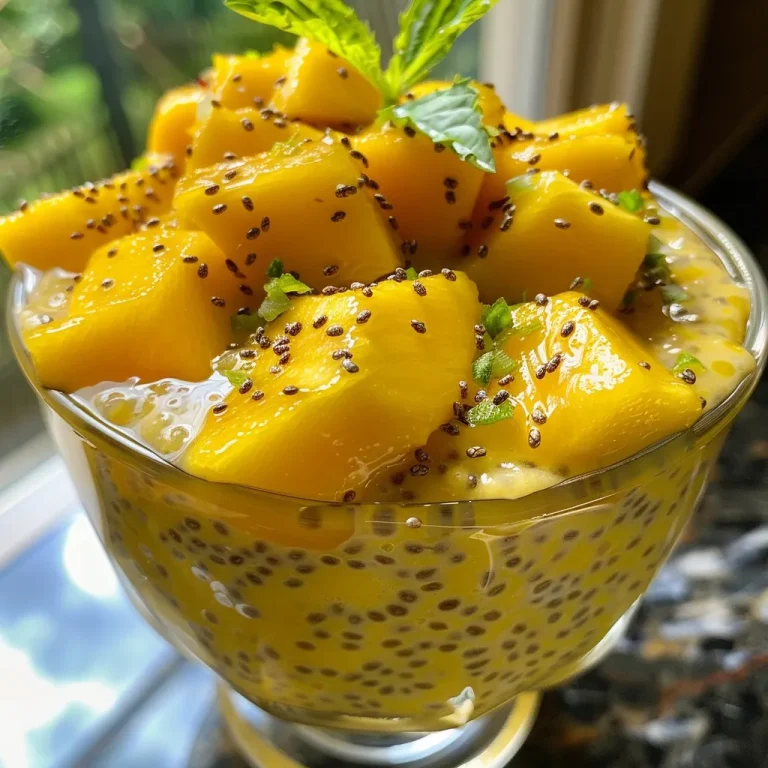
Welcome to the delightful world of Mango Chia Breakfast Pudding, where simplicity meets deliciousness! If you’re looking for a nutritious breakfast or a sweet treat that’s both easy to make and utterly satisfying, you’ve landed in the right place. This recipe transforms a handful of everyday ingredients into a creamy, flavorful pudding that will have you waking up with a smile. Ready to dive in? Let’s get started!

Why You’ll Love This Recipe

Here are just a few reasons why this chia pudding will quickly become a staple in your kitchen:

  • Quick and Easy: With minimal prep time, you can whip up this breakfast pudding in just a few minutes, making it perfect for busy mornings.
  • Nutritious Powerhouse: Packed with fiber, omega-3 fatty acids, and vitamins, chia seeds and mango make a winning combination for health-conscious eaters.
  • Customizable: This pudding is incredibly versatile. Add your favorite toppings, switch up the fruits, or adjust the sweetness to suit your taste.
  • Make-Ahead Friendly: Prepare it the night before and let the flavors meld in the fridge, ensuring a quick, delicious breakfast awaits you.
  • Kid-Friendly: Kids will love the fun texture and sweet taste, making it a fantastic way to get them excited about healthy eating.

Ingredients Breakdown

Let’s take a closer look at the ingredients that bring this delightful dish to life:

  • 1 cup almond milk: A great base for the pudding, almond milk lends creaminess while keeping it dairy-free. Feel free to substitute with coconut milk for a tropical twist!
  • 1/4 cup chia seeds: These tiny seeds are the magic ingredient that thickens the pudding, creating that luscious gel-like texture. They’re rich in fiber and protein!
  • 1 ripe mango, diced: The star of the show! Choose a ripe mango for the best flavor. You can also use frozen mango if fresh isn’t available.
  • 2 tablespoons honey or maple syrup: Sweeten to your liking! Adjust the sweetness based on your preference or dietary needs.
  • 1 teaspoon vanilla extract: This adds a lovely depth of flavor that complements the mango perfectly.
  • Pinch of salt: Just a touch enhances all the flavors in the pudding.

How to Make Mango Chia Breakfast Pudding

Let me guide you through the steps of creating this delightful pudding:

Step 1: Combine Ingredients

In a bowl, combine the almond milk, chia seeds, honey (or maple syrup), vanilla extract, and a pinch of salt. Stir well to ensure everything is mixed together.

Step 2: Refrigerate

Cover the bowl and place it in the fridge. Let it chill for at least 4 hours or overnight. The chia seeds will absorb the liquid, thickening the pudding beautifully.

Step 3: Layer with Mango

Once the pudding has thickened, it’s time to layer it in serving glasses. Start with a layer of chia pudding, followed by a layer of diced mango. Repeat until the glasses are filled.

Step 4: Serve and Enjoy

Serve chilled and enjoy this refreshing breakfast pudding! Feel free to top it with nuts, seeds, or more fruit for an added crunch.

Pro Tips for Perfect Pudding

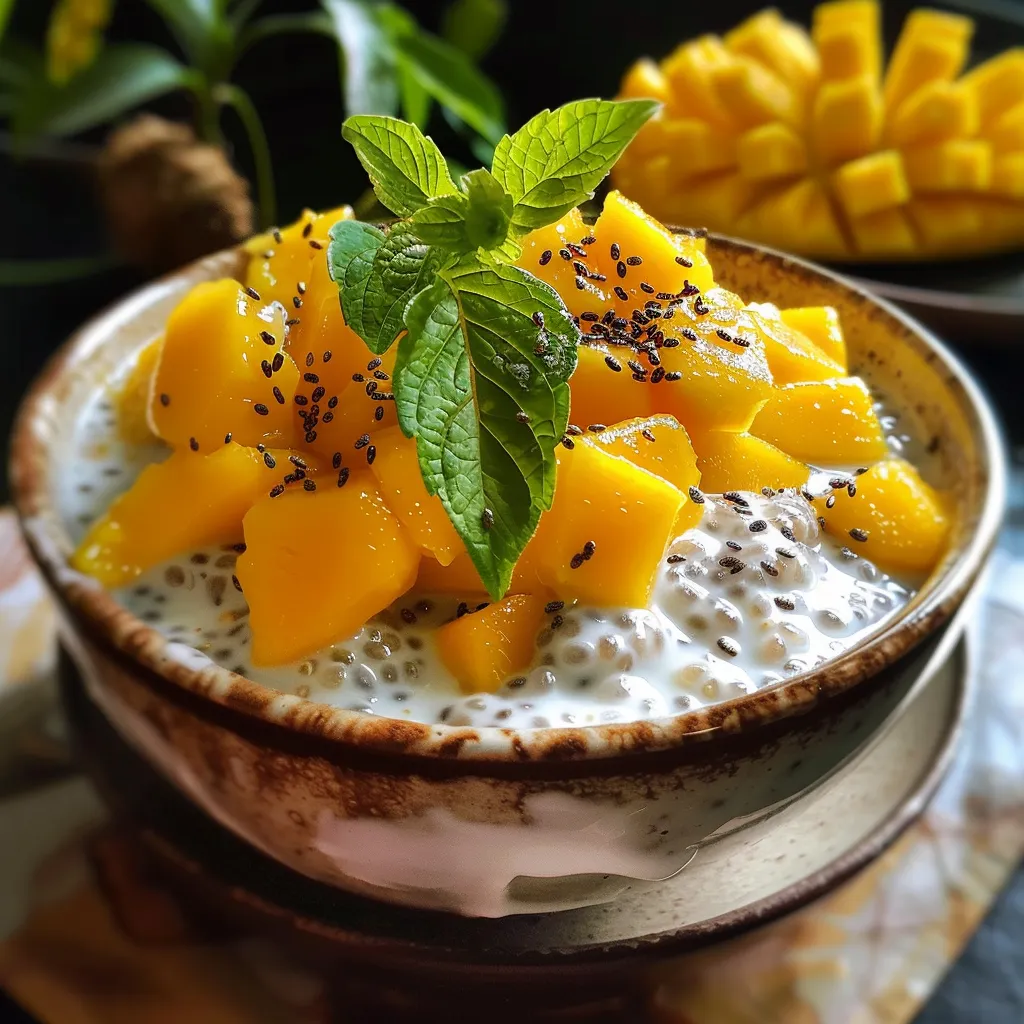
Side view of a mango chia breakfast pudding with chia seeds and honey drizzle.

Want to ensure your pudding turns out perfectly every time? Check out these expert tips:

  • Stir Early: Stir the chia seeds into the mixture after about 10 minutes to prevent clumping. This step ensures a smoother texture.
  • Adjust Sweetness: Taste the mixture before refrigerating and adjust the sweetness if desired. You can always add a little more honey or maple syrup!
  • Use Fresh Ingredients: Fresh, ripe mango makes all the difference. If you can, pick one that’s sweet and fragrant.
  • Experiment with Flavors: Don’t hesitate to add spices like cinnamon or nutmeg for an extra flavor boost.
  • Layer Creatively: Get creative with your serving! Use different fruits, granola, or even a dollop of yogurt on top for added texture.
  • Watch the Chia Seeds: Keep an eye on your chia seeds; if left too long without stirring, they may clump together. A gentle stir every half hour helps!
  • Make it Vegan: This recipe is already vegan-friendly with almond milk and maple syrup, but always check your labels!
  • Check for Consistency: If the pudding is too thick, stir in a little more almond milk until you reach your desired consistency.

Common Mistakes and Troubleshooting

Even the best cooks make mistakes! Here are some common pitfalls and how to avoid them:

  • Too Runny: If your pudding is too runny, it may need more chia seeds or a longer chilling time. Ensure you’re measuring accurately!
  • Too Thick: If it’s thicker than you like, simply stir in a bit more almond milk until it reaches your desired consistency.
  • Clumpy Texture: If you notice clumps, you didn’t stir well enough when mixing the ingredients. Always give it a good stir after mixing and before refrigerating.
  • Weak Flavor: If the flavor is not strong enough, consider adding more vanilla or a splash of fruit juice for an extra zing.

Variations to Try

Feeling adventurous? Here are some fun variations to switch things up:

  • Berry Bliss: Swap the mango for mixed berries for a tart and sweet twist. Strawberries, blueberries, and raspberries work wonderfully!
  • Chocolate Chia Pudding: Add cocoa powder to the base for a chocolatey delight. Top with sliced bananas for a dreamy dessert.
  • Coconut-Lime Chia Pudding: Use coconut milk instead of almond milk and add lime juice and zest for a refreshing tropical taste.
  • Nut Butter Swirl: Stir in a spoonful of almond or peanut butter for added creaminess and nutty flavor.

Storage and Make-Ahead Instructions

Want to prepare this pudding in advance? Here’s how to store it:

  • Refrigeration: Store leftover pudding in an airtight container in the fridge for up to 5 days. The flavors will continue to meld!
  • Make-Ahead: This pudding is perfect for meal prep! Make a batch over the weekend and enjoy it throughout the week.
  • Freezing: While it’s best enjoyed fresh, you can freeze portions in ice cube trays. Thaw in the fridge overnight for a quick breakfast option.

Comprehensive FAQ

Got questions? We’ve got answers! Here are some frequently asked questions:

  • Can I use a different type of milk? Yes! Feel free to use any milk of your choice, such as soy, oat, or coconut milk.
  • Do I need to soak chia seeds overnight? No, you don’t need to soak them overnight. Just a few hours in the fridge will do!
  • Is this recipe vegan? Absolutely! This recipe is vegan-friendly, using almond milk and maple syrup.
  • Can I use frozen mango? Yes! Frozen mango works just as well. Just let it thaw before adding it to the pudding.
  • How long does it take to prepare? Preparation takes about 10 minutes, but remember to let it chill for at least 4 hours.
  • Can I add other fruits? Absolutely! This pudding pairs well with various fruits, so feel free to mix and match!
  • What’s the best way to serve it? Serve it chilled in glasses or bowls, topped with your favorite fruits, nuts, or granola.
  • Is it gluten-free? Yes! All the ingredients are naturally gluten-free, making it suitable for those with gluten sensitivities.

Nutrition Tips and Dietary Adaptations

This Mango Chia Breakfast Pudding is not only delicious but also packed with nutrients:

  • High in Fiber: Chia seeds are an excellent source of fiber, aiding digestion and keeping you full longer.
  • Rich in Omega-3s: These tiny seeds are a great source of plant-based omega-3 fatty acids, which are beneficial for heart health.
  • Low in Calories: This pudding is low in calories, making it a guilt-free treat.
  • Vegan and Paleo-Friendly: With simple, wholesome ingredients, this recipe fits various dietary preferences.

Equipment Recommendations

Here’s what you’ll need to make this pudding:

  • Mixing Bowl: A medium-sized bowl is perfect for combining your ingredients.
  • Whisk or Spoon: Use a whisk or spoon to mix everything together thoroughly.
  • Measuring Cups and Spoons: Accurate measurements are key to perfect pudding!
  • Serving Glasses or Bowls: Choose your favorite glasses or bowls for beautiful presentation.

Serving Suggestions

Here are some fun ideas for serving your Mango Chia Breakfast Pudding:

  • Layered Parfait: Create a parfait with layers of pudding, mango, and granola for a stunning presentation.
  • Breakfast Bowl: Serve it in a bowl topped with fresh fruits, nuts, and a drizzle of honey.
  • On-the-Go: Pack it in a mason jar for a quick breakfast option that’s perfect for busy mornings!

In conclusion, this Mango Chia Breakfast Pudding is a delightful way to start your day on a healthy note. With its creamy texture, sweet mango flavor, and numerous health benefits, it’s sure to become a favorite in your household. So gather your ingredients, follow the steps, and enjoy a delicious breakfast that’s as easy as it is satisfying. Remember, cooking should be fun, so don’t stress if things don’t turn out perfectly! Happy cooking!

Mango Chia Breakfast Pudding: 4 Reasons You'll Love It

Prep Time 10 minutes
Total Time 10 minutes
Servings 2 servings
Calories 250
This vibrant and nutritious mango chia pudding is a perfect healthy breakfast or snack, combining creamy texture with fresh fruit and natural sweetness.

Ingredients

Liquid

  • 1 cup almond milk

Seeds

  • 1/4 cup chia seeds

Fruits

  • 1 ripe mango mango, diced

Sweetener

  • 2 tablespoons honey or maple syrup

Flavorings

  • 1 teaspoon vanilla extract
  • Pinch of salt salt

Instructions 

  • Mix almond milk, chia seeds, honey, vanilla, and salt in a bowl.
  • Stir well and refrigerate for at least 4 hours or overnight.
  • Once thickened, layer pudding with diced mango in serving glasses.
  • Serve chilled and enjoy.

Notes

For extra flavor, top with fresh mint or a sprinkle of granola.
Calories: 250kcal
Cost: $10
Course: Breakfast
Cuisine: fusion
Keyword: Mango

Unveiling the Creamy Delight of Coconut & Cardamom Rice Pudding

If you’re searching for a dessert that brings warmth and comfort while being unbelievably easy to make, look no further than Coconut & Cardamom Rice Pudding! This creamy, dreamy dish combines the tropical richness of coconut milk with the floral notes of cardamom, creating a treat that feels indulgent but is made with everyday ingredients. Perfect for busy days, this recipe is a crowd-pleaser that impresses without the stress. Let’s dive into this delicious journey!

Why You’ll Love This Recipe

  • Quick and easy: With minimal prep and cooking time, you can whip this up in under an hour.
  • Comforting texture: The creamy, silky pudding pairs perfectly with crunchy toppings, creating a delightful contrast.
  • Versatile serving options: Enjoy it warm or chilled, making it suitable for any occasion.
  • Simple ingredients: Uses pantry staples like rice, coconut milk, and cardamom—no fancy equipment needed!
  • Family-friendly: A hit with both kids and adults, it’s a dessert that everyone will love.

Ingredients for Coconut & Cardamom Rice Pudding

Let’s break down the ingredients you’ll need to create this delightful dessert, along with some possible substitutions:

  • Basmati Rice: 1/2 cup (rinsed thoroughly) – contributes long grains that stay tender but not mushy. Substitution: Arborio rice for a creamier texture.
  • Coconut Milk: 2 cups (full-fat) – brings rich, tropical creaminess to the base. Substitution: Light coconut milk for a lower-fat version.
  • Whole Milk: 1 cup – balances the coconut richness with a silky smooth texture. Substitution: Almond or oat milk for a dairy-free option.
  • Sugar: 1/4 cup – adds just the right amount of sweetness without overpowering the spices. Substitution: Maple syrup or honey to taste.
  • Green Cardamom Pods: 4 to 5 (lightly crushed) – infuses the pudding with their signature floral warmth. Substitution: Ground cardamom, 1/2 teaspoon.
  • Salt: A pinch – enhances all the sweet and spiced elements.
  • Vanilla Extract: 1 teaspoon (optional) – deepens the flavor for a rounded finish.
  • Chopped Pistachios or Almonds: 2 tablespoons (optional garnish) – provide a crunchy contrast to the creaminess.

Step-by-Step Instructions for Making Coconut & Cardamom Rice Pudding

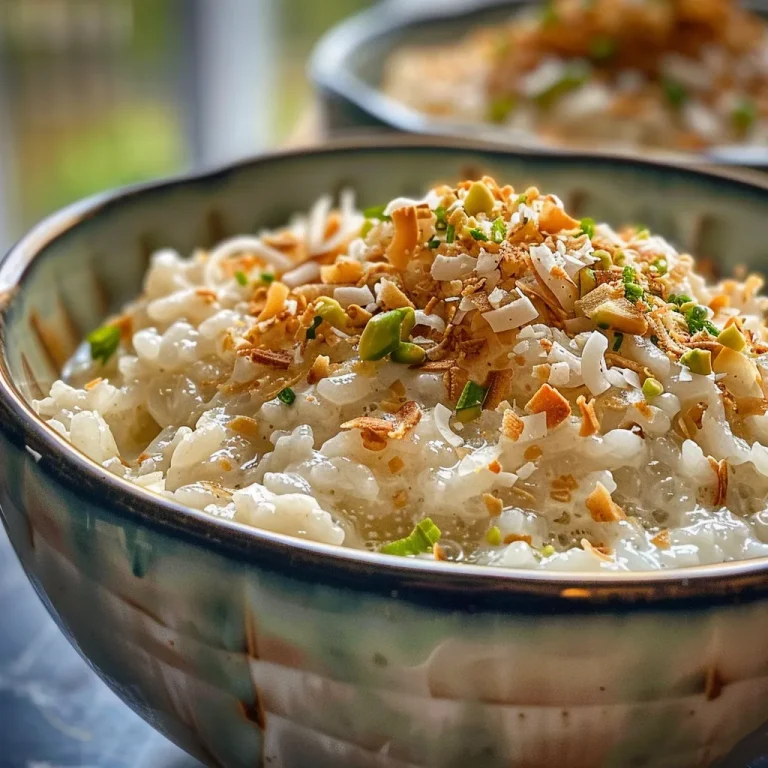
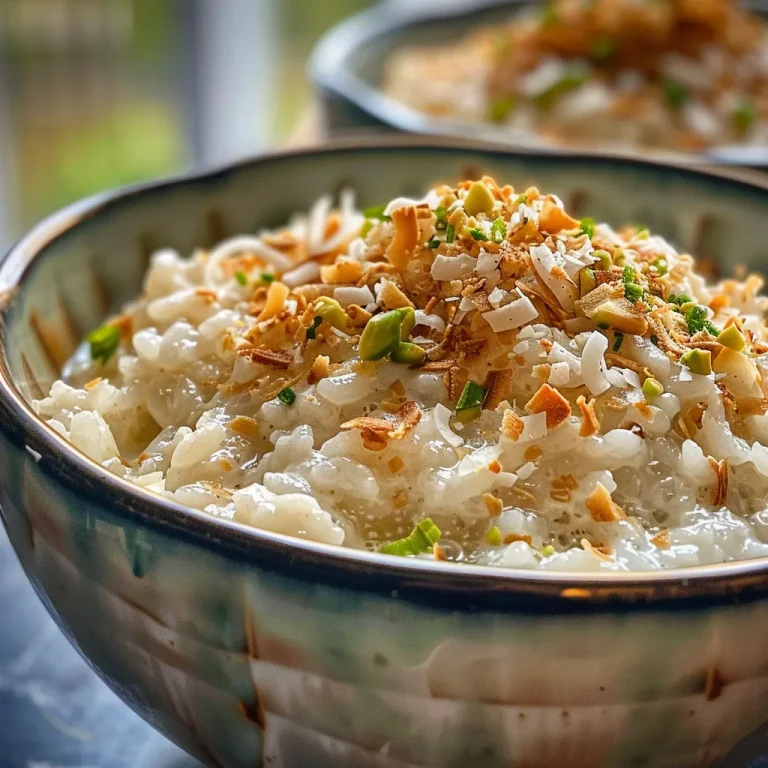
Side view of a bowl of coconut and cardamom rice pudding with a smooth texture.

Now let’s get cooking! Here’s how to prepare your Coconut & Cardamom Rice Pudding:

  • No preheating needed, but have your saucepan ready and set to medium-low heat.
  • In your saucepan, add the rinsed rice, coconut milk, whole milk, sugar, cardamom pods, and a pinch of salt. Stir gently to mix.
  • Ensure your saucepan has a heavy bottom and is large enough to allow the mixture to expand slightly without boiling over.
  • Place the saucepan on medium-low heat, and bring the mixture to a gentle simmer, stirring occasionally to prevent sticking.
  • Let it simmer gently for 25 to 30 minutes, stirring frequently, until the rice is tender and the pudding has thickened to your liking.
  • Stir in the vanilla extract if using, and remove the cardamom pods. Let it cool slightly before serving.
  • Spoon into bowls and top with chopped nuts for texture. Serve warm or chill for a refreshing twist.

Expert Tips for Perfect Coconut & Cardamom Rice Pudding

Here are some pro tips to ensure your pudding turns out perfectly:

  • Use full-fat coconut milk: This ensures a rich, creamy texture that hugs the rice grains beautifully.
  • Stir frequently: Prevent the pudding from sticking or burning by stirring often during cooking.
  • Don’t rush the simmering: A slow, gentle simmer allows the flavors to meld beautifully; don’t crank up the heat!
  • Cool it down: If you prefer a thicker texture, let the pudding cool in the fridge for a few hours before serving.
  • Experiment with spices: Try adding cinnamon or nutmeg for a different flavor profile!
  • Top it off: Get creative with garnishes—fresh fruit, toasted coconut, or chocolate chips can add a fun twist.
  • Make it ahead: You can prepare this dish a day in advance and store it in an airtight container in the fridge.
  • Use a heavy-bottom pot: This helps distribute heat evenly, preventing hot spots that can scorch your pudding.

Common Mistakes and Troubleshooting

Even the best of us make mistakes in the kitchen! Here are some common pitfalls and how to avoid them:

  • Too thick?: If your pudding turns out too thick, stir in a splash of warm milk until you reach your desired consistency.
  • Too watery?: If it’s too runny, continue cooking on low heat until it thickens up—just stir often!
  • Burnt bottom?: If your pudding is sticking to the bottom, lower your heat and add a little more milk to loosen it up.
  • Not sweet enough?: Adjust the sweetness by adding more sugar or a drizzle of honey after cooking.

Delicious Variations of Coconut & Cardamom Rice Pudding

Feeling adventurous? Here are some fun variations to try:

  • Chocolate Coconut Rice Pudding: Stir in cocoa powder or chocolate chips while cooking for a chocolatey twist.
  • Fruit-Infused Pudding: Add diced mango or pineapple for a tropical burst of flavor.
  • Chai-Spiced Pudding: Blend in chai spices like ginger and cloves for a warm, spiced flavor.
  • Nutty Delight: Incorporate almond or hazelnut extract for an extra layer of flavor.

Storage and Make-Ahead Instructions

Want to prepare this dish in advance? Here’s how to store it:

  • Store any leftovers in an airtight container in the fridge for up to 3 days.
  • To keep the pudding creamy, stir in a little milk before serving if it thickens in the fridge.
  • For longer storage, freeze portions in an airtight container for up to 2 months. Thaw overnight in the fridge before reheating.

Frequently Asked Questions (FAQs)

Got questions? We’ve got answers! Here are some common queries about Coconut & Cardamom Rice Pudding:

  • Can I use brown rice instead of basmati? Yes, but note that brown rice will require a longer cooking time.
  • Can I make this vegan? Absolutely! Substitute whole milk with almond or oat milk and leave out the vanilla extract.
  • How do I make it thicker? Simmer longer or refrigerate for a thicker consistency.
  • Can I use canned coconut milk? Yes, canned coconut milk works perfectly for this recipe.
  • What can I serve with this pudding? Fresh fruit, whipped cream, or a drizzle of honey complement the pudding beautifully.
  • Can I reheat leftovers? Yes! Just warm it gently on the stove or in the microwave, adding a splash of milk to loosen it up.
  • How long does coconut rice pudding last? Stored properly, it can last up to 3 days in the refrigerator or 2 months in the freezer.
  • Is this recipe gluten-free? Yes, all the ingredients are naturally gluten-free!

Nutritional Tips and Dietary Adaptations

This Coconut & Cardamom Rice Pudding is not only delicious but also offers some nutritional benefits:

  • Healthy fats: Coconut milk provides healthy fats that can help keep you satiated.
  • Dairy options: Choose low-fat or non-dairy alternatives for a lighter version.
  • Add fiber: Include chia seeds for added fiber and nutrients.

Essential Kitchen Equipment

Here’s what you’ll need to create this delightful dessert:

  • Heavy-bottomed saucepan: Essential for even cooking and preventing sticking.
  • Measuring cups and spoons: Accurate measurements ensure the best results.
  • Wooden spoon or spatula: Perfect for stirring without scratching your pot.
  • Serving bowls: To present your creamy pudding beautifully.

Serving Suggestions

Finally, let’s talk presentation! Here are some serving ideas to elevate your Coconut & Cardamom Rice Pudding:

  • Garnish with nuts: Sprinkle chopped pistachios or almonds on top for a delightful crunch.
  • Fresh fruit: Serve with slices of mango, berries, or banana for a refreshing contrast.
  • Drizzle honey or syrup: Add a touch of sweetness with a honey drizzle right before serving.
  • Whipped cream: Top with a dollop of whipped cream for an indulgent finish.

Conclusion

There you have it! A comprehensive guide to creating your very own Coconut & Cardamom Rice Pudding. This dessert is not just about satisfying your sweet tooth; it’s about creating moments of joy and comfort in the kitchen. With its simple ingredients and straightforward steps, you can enjoy this delightful treat any day of the week. Remember, cooking is all about having fun, so don’t be afraid to experiment and make it your own. Happy cooking!

Coconut & Cardamom Rice Pudding

Prep Time 5 minutes
Cook Time 30 minutes
Total Time 35 minutes
Servings 4 servings
Calories 250
A fragrant and creamy rice pudding infused with coconut and cardamom, perfect for a comforting dessert or snack.

Ingredients

Main

  • 0.5 cup Basmati Rice (rinsed thoroughly)
  • 2 cups Coconut Milk (full-fat)
  • 1 cup Whole Milk
  • 0.25 cup Sugar
  • 4-5 pods Green Cardamom Pods (lightly crushed)
  • a pinch Salt
  • 1 teaspoon Vanilla Extract (optional)
  • 2 tablespoons Chopped Pistachios or Almonds (optional garnish)

Instructions 

  • Combine rice, coconut milk, whole milk, sugar, cardamom pods, and salt in a saucepan.
  • Bring to a gentle simmer over medium-low heat, stirring occasionally.
  • Simmer for 25-30 minutes until rice is tender and pudding thickens.
  • Remove from heat, stir in vanilla extract, and discard cardamom pods.
  • Let cool slightly, then serve topped with chopped nuts.

Notes

For a chilled dessert, refrigerate before serving.
Calories: 250kcal
Cost: $15
Course: Dessert
Cuisine: fusion
Keyword: rice pudding

Unlock the Magic of Mango Coconut Chia Pudding

Welcome to the world of delicious, nutritious, and hassle-free cooking! Today, we’re diving into a recipe that’s not just a feast for the eyes but also incredibly easy to whip up. Mango Coconut Chia Pudding is the perfect blend of tropical flavors, providing a refreshing and energizing start to your day or a delightful dessert to indulge in. Let’s explore why this recipe should become a staple in your kitchen!

Why You’ll Love This Recipe

  • Quick & Easy: With just a few simple ingredients, this pudding comes together in minutes, making it perfect for busy mornings or last-minute gatherings.
  • Nutritious Ingredients: Packed with chia seeds, which are rich in omega-3 fatty acids, fiber, and protein, this pudding is a healthy choice for any time of the day.
  • Customizable Flavors: Whether you prefer honey, maple syrup, or a dash of cinnamon, you can easily tweak the flavors to suit your taste.
  • Make-Ahead Option: Prepare it the night before and let it chill in the fridge, so it’s ready to go when you are!
  • Beautiful Presentation: Layering the pudding with mango puree creates a stunning visual that’s sure to impress!

Ingredients Breakdown

Understanding your ingredients is key to mastering this recipe. Here’s what you’ll need:

  • 1 cup coconut milk: Use canned for a creamier texture or carton for a lighter option.
  • 2 tablespoons chia seeds: These tiny seeds work their magic by absorbing liquid and creating a lovely pudding-like texture.
  • 1 ripe mango, pureed: Fresh mango provides natural sweetness and a tropical flavor. If fresh isn’t available, you can use frozen mango that has been thawed.
  • 2 tablespoons honey or maple syrup: Adjust the sweetness according to your preference.
  • 1 teaspoon vanilla extract: Adds a warm, aromatic flavor that complements the coconut beautifully.
  • 1 pinch of salt: Just a little to enhance all the flavors.
  • Fresh mango slices and shredded coconut for garnish: These are optional but make your pudding look extra special!

How to Make Mango Coconut Chia Pudding

Side angle of a vibrant mango coconut chia pudding with a smooth texture, garnished with mango and coconut.

Ready to get started? Let’s walk through the steps together:

  1. In a medium bowl, whisk together the coconut milk, chia seeds, honey or maple syrup, vanilla extract, and a pinch of salt until well combined.
  2. Let the mixture sit for about 5-10 minutes, then stir again to break up any clumps of chia seeds that may form.
  3. Cover the bowl with plastic wrap or a lid and refrigerate for at least 4 hours, or overnight, to allow the chia seeds to swell and thicken the mixture.
  4. Once set, give the pudding a good stir to smooth out the consistency.
  5. To serve, layer the pudding in glass jars starting with a layer of the chia pudding, followed by a layer of the pureed mango, and repeat until the jars are full.
  6. Garnish with fresh mango slices and a sprinkle of shredded coconut just before serving. Enjoy your tropical delight!

Pro Tips for Perfect Pudding

  • Mix thoroughly: Ensure that the chia seeds are evenly distributed in the liquid to avoid clumps.
  • Experiment with flavors: Try adding a bit of lime or ginger for a zesty twist!
  • Use ripe mango: The riper the mango, the sweeter and more flavorful your pudding will be.
  • Adjust sweetness: Taste before serving and add more sweetener if needed.
  • Storage: This pudding can be stored in the refrigerator for up to 5 days, making it a great make-ahead option.

Common Mistakes to Avoid

Let’s make sure your mango coconut chia pudding turns out perfectly every time! Here are a few common pitfalls:

  • Not letting it sit long enough: Chia seeds need time to absorb the liquid and swell, so be patient!
  • Using too much liquid: If you add too much coconut milk, the pudding may become runny. Stick to the recipe!
  • Forgetting to stir: If you don’t stir after the initial mixing, you might end up with clumps of chia seeds.

Variations on Mango Coconut Chia Pudding

Feeling adventurous? Here are some delicious variations to try:

  • Berry Bliss: Substitute mango with your favorite berries for a vibrant twist!
  • Chocolate Delight: Add cocoa powder or melted dark chocolate for a rich, indulgent version.
  • Nutty Banana: Layer in some mashed banana with a sprinkle of chopped nuts for added texture and flavor.
  • Matcha Magic: Stir in some matcha powder for a unique and energizing green pudding.

Storage and Make-Ahead Instructions

One of the best things about this pudding is that it’s perfect for meal prep! Here’s how to store it:

  • Refrigerate: Keep the pudding in an airtight container in the fridge for up to 5 days.
  • Make in advance: Prepare it on Sunday for a week’s worth of breakfasts or snacks!
  • Freeze: If you have leftovers, you can freeze the pudding. Just ensure you allow it to thaw in the fridge before serving.

FAQs About Mango Coconut Chia Pudding

Got questions? We’ve got answers! Here are some frequently asked questions:

  • How long does chia pudding last in the fridge? Up to 5 days in an airtight container.
  • Can I use different types of milk? Absolutely! Almond milk, oat milk, or even dairy milk work well.
  • Is this pudding vegan? Yes, as long as you use maple syrup instead of honey!
  • Can I make this gluten-free? Yes, all ingredients are naturally gluten-free.
  • What if I don’t have fresh mango? Frozen mango works perfectly; just thaw it before using.
  • How many servings does this recipe make? This recipe typically makes about 2-4 servings, depending on portion size.
  • Can I add protein powder? Yes, you can mix in your favorite protein powder for an extra boost.
  • What toppings can I use? Try nuts, seeds, granola, or fresh fruits for a delicious crunch!

Nutritional Tips and Dietary Adaptations

This pudding is not just delicious; it’s also packed with nutrients! Here’s how it stacks up:

  • Low in calories: A serving is light yet filling, making it great for weight management.
  • High in fiber: Chia seeds help keep you full and support digestive health.
  • Customizable for dietary needs: Easily adapt for gluten-free, dairy-free, and vegan diets.

Essential Equipment for Success

Here’s what you’ll need to make this pudding:

  • Mixing bowl: A medium-sized bowl works perfectly for combining ingredients.
  • Whisk or spoon: For thorough mixing of the pudding.
  • Containers for chilling: Use glass jars or bowls to store the pudding in the fridge.

Serving Suggestions

Now that your Mango Coconut Chia Pudding is ready, here are a few ways to serve it up:

  • Breakfast: Serve it with a side of fresh fruit and a handful of granola for a complete meal.
  • Dessert: Enjoy it as a light dessert after dinner, topped with chocolate shavings.
  • Snack: Perfect for a mid-afternoon pick-me-up, especially when garnished with nuts.

Conclusion

And there you have it! Your own delightful Mango Coconut Chia Pudding that’s not only easy to make but also nourishing and versatile. Remember, cooking is all about enjoying the process and experimenting with flavors. Don’t be afraid to make this recipe your own — add your favorite toppings, switch up the fruits, and most importantly, have fun in the kitchen! I can’t wait for you to try this delicious pudding. Until next time, happy cooking!

Mango-Kokos-Chia-Pudding

Prep Time 10 minutes
Total Time 10 minutes
Servings 4 servings
Calories 250
Enjoy a creamy, tropical chia pudding layered with fresh mango and coconut, perfect for a healthy breakfast or dessert.

Ingredients

Dairy

  • 1 Tasse Kokosmilch (aus der Dose oder aus dem Tetrapack)
  • 2 Esslöffel Chiasamen
  • 1 Stück reife Mango, püriert
  • 2 Esslöffel Honig oder Ahornsirup (nach Geschmack anpassen)
  • 1 Teelöffel Vanilleextrakt
  • 1 Prise Salz

Dekoration

  • 1 Stück Frische Mangoscheiben
  • 1 Stück geraspelte Kokosnuss

Instructions 

  • In einer Schüssel Kokosmilch, Chiasamen, Honig, Vanilleextrakt und Salz gut verrühren.
  • 5-10 Minuten ruhen lassen, dann erneut umrühren.
  • Abdecken und mindestens 4 Stunden oder über Nacht im Kühlschrank quellen lassen.
  • Chia-Pudding umrühren, in Gläser schichten, abwechselnd mit pürierter Mango.
  • Mit frischen Mangoscheiben und geraspelter Kokosnuss garnieren vor dem Servieren.

Notes

Für eine cremigere Konsistenz kannst du die Chiasamen vor dem Einfüllen in die Gläser noch einmal umrühren.
Calories: 250kcal
Cost: $15
Course: Dessert
Cuisine: Tropical
Keyword: Mango

Your New Favorite Dessert Awaits

Welcome to the delightful world of creamy dairy-free rice pudding! If you’re looking for a comforting dessert that’s not only easy to make but also bursting with flavor, you’ve struck gold with this recipe. In less than half an hour, using your Instant Pot, you can whip up a dessert that’s perfect for busy weekdays or special occasions. With its rich coconut milk base and the subtle warmth of cinnamon, this rice pudding is a treat that everyone will love. Let’s dive into why this recipe is a must-try!

Why You’ll Love This Recipe

  • Quick and Easy: With just a handful of simple ingredients, you can create a creamy dessert in approximately 30 minutes. Perfect for when you want something sweet without all the fuss!
  • Dairy-Free Delight: This recipe uses coconut milk and your choice of dairy-free milk, making it suitable for those with dairy restrictions or anyone wanting a lighter option.
  • Rich Flavor: The combination of coconut milk and vanilla extract creates a deliciously rich pudding that feels indulgent yet comforting.
  • Customizable: You can easily adapt this rice pudding to fit your taste preferences. Whether you want to add spices, fruits, or nuts, the possibilities are endless!
  • Perfect for Meal Prep: This pudding stores well in the fridge and can be made ahead, making it an excellent option for busy weeks or last-minute gatherings.

Key Ingredients in Your Creamy Rice Pudding

To create this scrumptious dish, you’ll need just a few key ingredients. Let’s take a closer look at what you’ll need and possible substitutions.

  • Coconut Milk: A 14 oz can of coconut milk provides a creamy base. If you prefer a lighter option, you can substitute with almond milk or any other plant-based milk.
  • Dairy-Free Milk: I recommend using soy milk, almond milk, or oat milk. They all blend beautifully with the coconut milk.
  • Water: Adds the necessary moisture for cooking the rice.
  • Granulated Sugar: I use organic sugar to avoid bone char. You can swap this out for maple syrup or agave nectar if you want a healthier sweetener.
  • Cinnamon Stick: Adds a warm spice that complements the sweetness perfectly. Feel free to adjust the amount or omit it if you prefer.
  • Arborio Rice: This short-grain rice is perfect for a creamy texture. You can also use other short-grain varieties if you prefer.

How to Make Rice Pudding in an Instant Pot

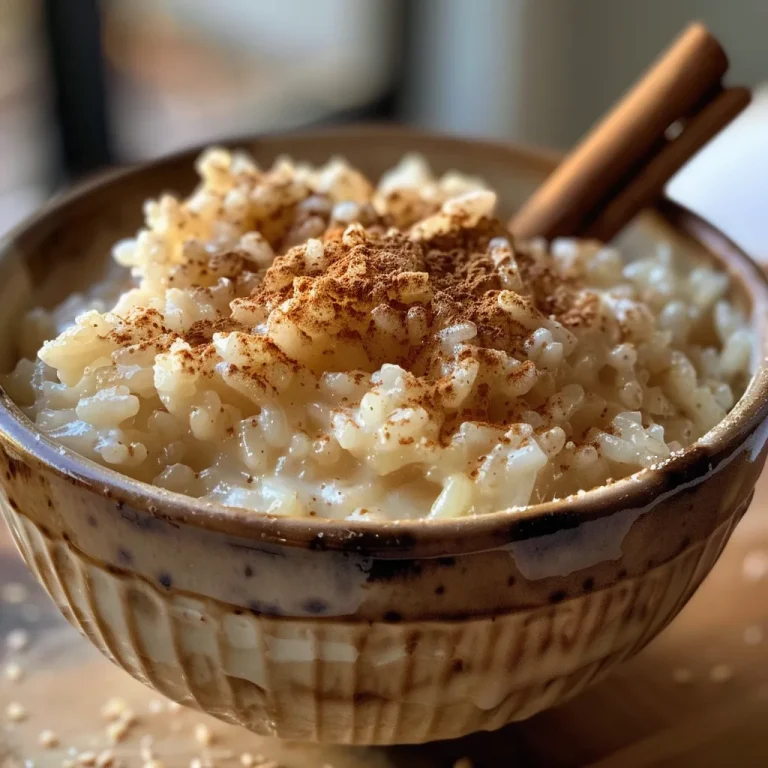
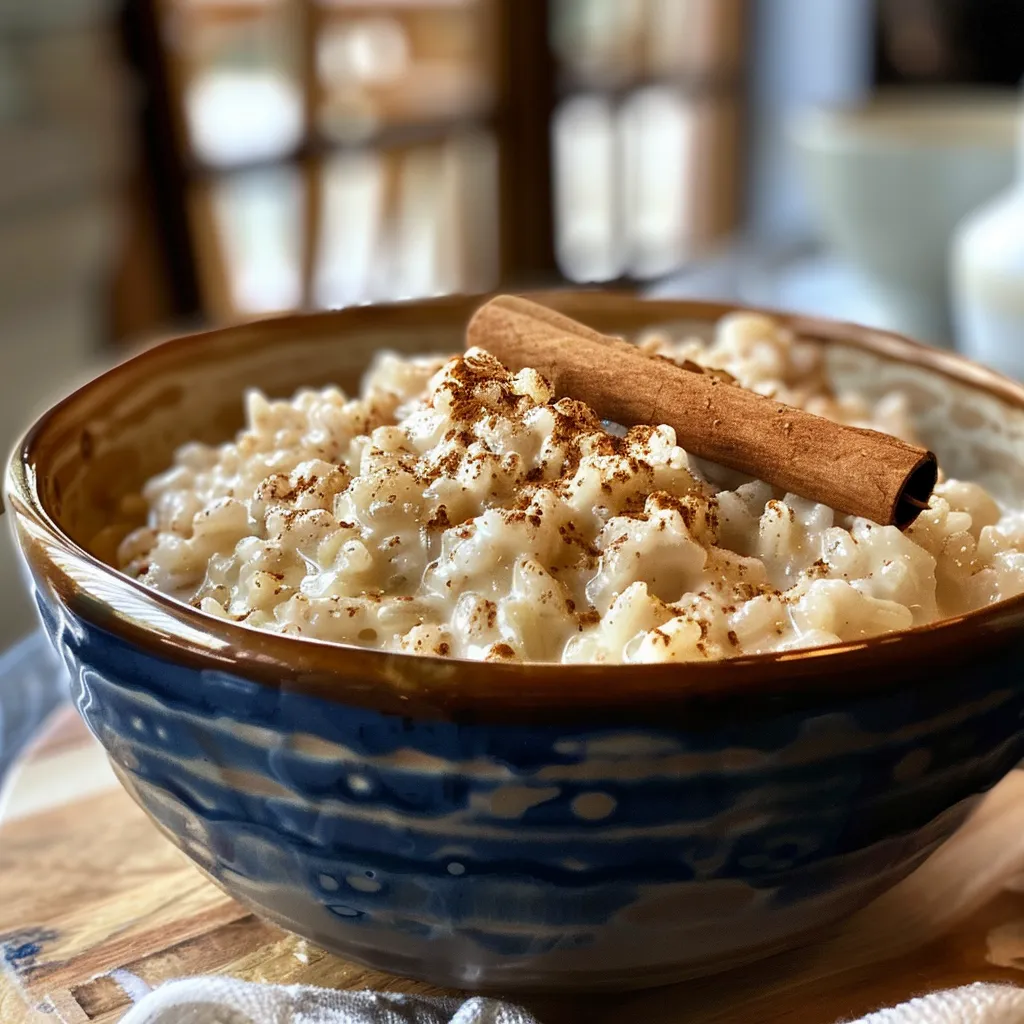
Side view of a bowl filled with smooth, coconut milk-based rice pudding.

Now that you have your ingredients ready, let’s get cooking! Follow these easy steps to create your delicious rice pudding.

  1. Shake the can of coconut milk well to combine before opening. Pour it into the Instant Pot.
  2. Add the dairy-free milk, water, sugar, and a pinch of salt. Stir well to dissolve the sugar.
  3. Mix in the vanilla extract.
  4. Rinse the rice in a mesh strainer until the water runs clear. Add the rinsed, uncooked rice to the milk mixture in the pressure cooker and stir to combine.
  5. Place the cinnamon stick on top of the rice pudding mixture.
  6. Seal the electric pressure cooker and cook on high pressure for 3 minutes.
  7. Once the cook cycle has ended, allow a natural release for 10 minutes before carefully turning off the pot.
  8. Release any remaining pressure and open the Instant Pot. Remove the cinnamon stick and stir the rice pudding. It may seem a bit runny initially but will thicken as it cools.
  9. Serve warm or chill in the fridge, adding your favorite toppings before serving.

Pro Tips for Perfect Rice Pudding

Here are some expert insights to help you achieve the best possible results with your rice pudding:

  • Rinse Your Rice: Rinsing arborio rice before cooking removes excess starch and helps achieve a creamier texture.
  • Adjust the Sweetness: Feel free to taste and adjust the sweetness to your liking. You can always add more sugar or a sweeter milk alternative.
  • Let it Rest: Allowing the pudding to cool for a while before serving helps it thicken up beautifully.
  • Don’t Skip the Vanilla: It adds an essential flavor component that makes the pudding truly special.
  • Experiment with Spices: Try adding a pinch of nutmeg or cardamom for a unique twist on the traditional flavor.
  • Use a Natural Release: This helps prevent the rice from overcooking and ensures a creamy texture.
  • Add Toppings: Top with fresh fruit, nuts, or a drizzle of maple syrup for added flavor and texture.
  • Storage Tips: Store leftover rice pudding in an airtight container in the fridge for up to 5 days.

Common Mistakes and Troubleshooting

Even the best cooks make mistakes! Here are some common issues and how to avoid them:

  • Too Runny: If your pudding is too runny, it may need more time to cool. It will thicken as it sits. If you want to thicken it immediately, you can cook it on the sauté setting for a few minutes, stirring frequently.
  • Overcooked Rice: Ensure you follow the cooking time closely. The natural release is essential to prevent overcooking.
  • Burnt Bottom: If you notice the bottom is burned, make sure to stir well before sealing the lid. This helps distribute the rice evenly.
  • Insufficient Flavor: Always taste and adjust your seasonings. A little extra vanilla or a pinch of salt can elevate the dish!

Variations to Try

Want to switch things up? Here are several delightful variations of rice pudding you can try:

  • Chocolate Rice Pudding: Stir in cocoa powder or melted dark chocolate for a rich chocolatey twist.
  • Fruity Rice Pudding: Mix in dried fruits like raisins or cranberries during the cooking process or add fresh fruits as a topping.
  • Coconut-Lime Rice Pudding: Add lime zest and a splash of lime juice for a refreshing tropical flavor.
  • Maple Pecan Rice Pudding: Use maple syrup instead of sugar and add chopped pecans for a delightful crunch.

Storage and Make-Ahead Instructions

This rice pudding is perfect for meal prep! Here’s how to store and reheat:

  • In the Fridge: Store in an airtight container for up to 5 days. The pudding will thicken as it cools.
  • Reheating: Gently reheat on the stovetop or in the microwave with a splash of dairy-free milk to restore creaminess.
  • Make-Ahead: You can prepare the rice pudding a day in advance. Just be sure to let it cool completely before refrigerating.

Frequently Asked Questions

Here are some common queries about making rice pudding:

  • Can I use brown rice instead of arborio? Yes, but cooking times will vary. Brown rice typically takes longer to cook, so adjust accordingly.
  • Is this recipe gluten-free? Absolutely! All the ingredients are gluten-free, making it a safe dessert option.
  • Can I add eggs for a creamier texture? Yes, you can temper eggs and stir them in after cooking for additional creaminess.
  • What’s the best way to serve rice pudding? Serve it warm or chilled, topped with cinnamon, fresh fruit, or a drizzle of syrup!
  • Can I freeze rice pudding? Yes, but it may change texture upon thawing. It’s best enjoyed fresh!
  • How do I know when the pudding is done? Look for a creamy consistency. The rice should be tender but not mushy.
  • Can I substitute the sugar? Definitely! Maple syrup, honey, or agave can be used as alternatives.
  • What if I don’t have an Instant Pot? You can cook this on the stovetop; just be mindful of stirring frequently to prevent sticking.

Nutritional Tips and Dietary Adaptations

This rice pudding can be tailored to fit various dietary needs:

  • Low-Calorie Option: Use unsweetened almond milk and reduce the sugar for a lighter dessert.
  • High-Protein Version: Mix in some protein powder or use fortified dairy-free milk for extra protein.
  • Nut-Free: Stick with coconut milk and rice for a nut-free version.

Essential Equipment for Your Rice Pudding

To make this creamy rice pudding, here’s what you’ll need:

  • Instant Pot: This magical device helps you cook the pudding quickly and evenly.
  • Measuring Cups and Spoons: Precision is key for the best results.
  • Mesh Strainer: For rinsing the rice to remove excess starch.
  • Wooden Spoon: Perfect for stirring the ingredients together.

Serving Suggestions

Now that your rice pudding is ready, here are some tasty serving suggestions:

  • Top with Fresh Fruit: Berries, bananas, or mango slices add a refreshing touch.
  • Add Crunch: Chopped nuts, granola, or toasted coconut flakes enhance the texture.
  • Drizzle with Syrup: A drizzle of maple syrup or honey can elevate the sweetness.

Wrap-Up: Your Rice Pudding Adventure Awaits!

There you have it! A comprehensive guide to crafting your new favorite dessert: creamy, dairy-free rice pudding in the Instant Pot. Whether you’re treating yourself or sharing with loved ones, this comforting dish is sure to impress. Remember, cooking is all about joy and exploration, so don’t be afraid to experiment with flavors and ingredients. Enjoy this delicious journey, and happy cooking!

Creamy, Dairy-Free Instant Pot Rice Pudding

Prep Time 10 minutes
Cook Time 3 minutes
Total Time 13 minutes
Servings 4 servings
Calories 250
A rich and comforting rice pudding made dairy-free using coconut milk, perfect for a cozy dessert or snack.

Ingredients

Coconut Milk

  • 1 can 14 oz can coconut milk
  • 1.5 cups milk, dairy-free ((soy, almond, or oat milk preferred))
  • 1 cup water
  • 0.25 cup granulated sugar ((organic preferred))
  • 1/8 tsp salt ((or 1/8 tsp))
  • 1 tsp vanilla extract
  • 1 cup arborio rice (or another short-grain rice)
  • 1 stick cinnamon stick

Instructions 

  • Shake the coconut milk can well, then pour into the Instant Pot.
  • Add the dairy-free milk, water, sugar, and salt. Stir to dissolve.
  • Stir in vanilla extract and add rinsed rice. Place cinnamon stick on top.
  • Seal the lid and cook on high pressure for 3 minutes. Let natural release for 10 minutes.
  • Release remaining pressure, remove cinnamon stick, and stir. Serve warm or chilled.

Notes

Use organic sugar to avoid bone char and customize toppings as desired.
Calories: 250kcal
Cost: $15
Course: Dessert
Cuisine: fusion
Keyword: rice pudding

Unlock the Delight of Baked Cinnamon and Sugar Apples

Welcome to a world of warmth and sweetness with these baked cinnamon and sugar apples! Perfect for busy days or cozy evenings, this easy recipe transforms simple apples into a delightful treat that everyone will love. Whether you’re looking for a side dish to complement a meal or a comforting dessert, this recipe is your ticket to culinary bliss.

Let’s dive into the heart of this recipe and discover why baked cinnamon apples are a must-try!

Why You’ll Love This Recipe

Here are five reasons why this recipe for baked cinnamon apples is a game-changer:

  • Easy to Make: With just a handful of ingredients, you can whip up a delicious dish in no time, making it ideal for busy parents or anyone short on time.
  • Perfect for Any Occasion: Whether it’s a family dinner or a festive gathering, these baked apples serve as a charming side dish or a sweet treat.
  • Versatile Uses: Enjoy them warm as a dessert, atop oatmeal for breakfast, or as a topping for pancakes. The possibilities are endless!
  • Homemade Goodness: Unlike store-bought versions, this recipe allows you to control the sweetness and spice, making it a healthier alternative.
  • Family-Friendly Fun: Get the kids involved in the kitchen! They’ll love helping with peeling, coring, and mixing, making it a delightful bonding experience.

Ingredients Breakdown

Here’s what you’ll need to make this scrumptious dish:

  • 6-7 Apples: Choose varieties like Granny Smith for tartness or Fuji for sweetness.
  • 1 1/2 teaspoons of Ground Cinnamon: This spice is the star of the show, giving your apples that warm flavor.
  • 1/2 cup of Brown Sugar: For that rich, caramel-like sweetness. You can use coconut sugar as a substitute!
  • 2 tablespoons of Butter (melted): Adds richness; feel free to use vegan butter if you prefer.
  • 1 teaspoon of Lemon Juice: Helps prevent browning and adds a zesty flavor.
  • 1 teaspoon of Vanilla Extract: For a dash of sweetness and depth.
  • 1/4 teaspoon of Sea Salt: Balances the flavors wonderfully.
  • 1/2 teaspoon of Corn Starch: Helps thicken the mixture for a delightful texture.

How to Make Easy Baked Cinnamon and Sugar Apples Recipe

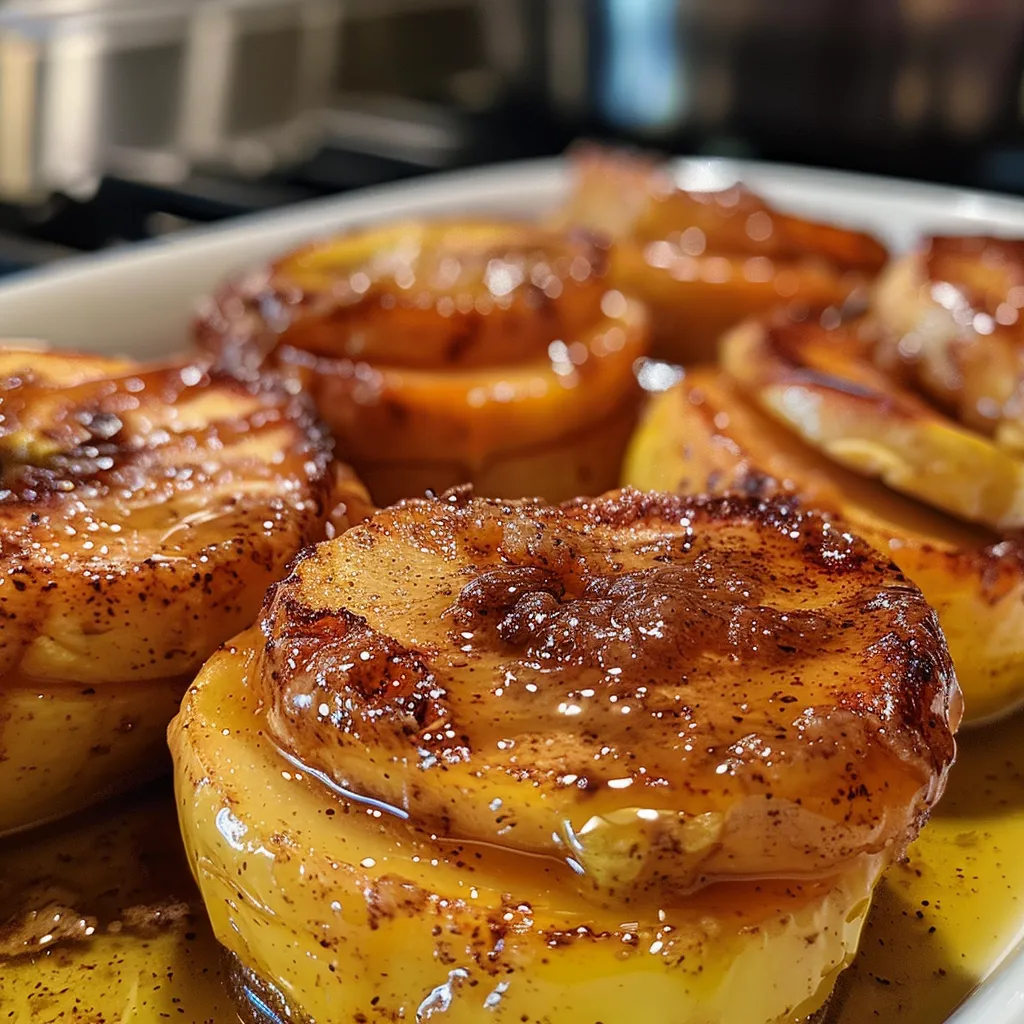
Side view of juicy baked apples sprinkled with cinnamon and sugar.

Follow these simple steps for an irresistible dessert:

  1. Start by preheating the oven to 350°F (175°C).
  2. Wash and peel the apples (this step is optional, but peeling enhances texture).
  3. Core the apples and slice them into even pieces.
  4. Toss the apple slices with lemon juice to prevent browning and place them in a baking dish.
  5. In a large mixing bowl, combine the brown sugar, ground cinnamon, corn starch, and sea salt.
  6. In a small microwave-safe bowl, melt the butter and mix in the vanilla extract.
  7. Pour the melted butter mixture over the apple slices.
  8. Evenly sprinkle the cinnamon-sugar mixture over the apples and stir to coat them well.
  9. Cover the dish with aluminum foil and bake for 35 minutes.
  10. Remove the foil and bake for an additional 10 minutes, or until the apples are tender.
  11. To check for doneness, insert a fork into the apple slices; they should be soft and tender.

Serving Suggestions

These baked cinnamon and sugar apples are incredibly versatile. Here are some delightful ways to serve them:

  • With Ice Cream: Serve warm over a scoop of vanilla ice cream for a comforting dessert.
  • On Oatmeal: Add a spoonful of these apples to your breakfast oatmeal for a sweet start to your day.
  • As a Topping: Use them as a topping for pancakes, waffles, or French toast.
  • With Yogurt: Mix with Greek yogurt for a nutritious snack or breakfast option.

Pro Tips for Perfect Baked Apples

Want to take your baked apples to the next level? Here are some expert tips:

  • Choose the Right Apples: A mix of tart and sweet apples will give you a complex flavor profile.
  • Adjust Sweetness: Feel free to reduce the sugar if you prefer a less sweet dish.
  • Experiment with Spices: Add nutmeg or allspice for a deeper flavor.
  • Don’t Skip the Foil: Covering the dish helps the apples steam and become tender.
  • Make Ahead: Prepare the apple mixture in advance and bake it right before serving.

Common Mistakes and Troubleshooting

Here are some common pitfalls and how to avoid them:

  • Apples Not Tender: If they’re not soft enough, bake them longer! Keep checking every 5 minutes.
  • Too Sweet: Adjust the sugar in future recipes to suit your taste.
  • Burnt Topping: If the top gets too dark, cover it with foil for the last few minutes of baking.

Variations to Try

Feeling adventurous? Here are some delightful variations:

  • Nutty Crunch: Add chopped nuts like walnuts or pecans for added texture.
  • Caramel Drizzle: Drizzle with caramel sauce before serving for a decadent treat.
  • Spiced Rum: Add a splash of spiced rum to the melted butter for a grown-up twist.
  • Berry Blast: Mix in some fresh or frozen berries for a burst of color and flavor.

Storage and Make-Ahead Instructions

You can prepare these apples ahead of time:

  • Refrigerate: Store any leftovers in an airtight container in the fridge for up to 3 days.
  • Reheat: Warm them in the microwave or oven before serving.

Nutrition Tips and Dietary Adaptations

Here are some ways to adapt this recipe for various dietary needs:

  • Gluten-Free: The recipe is naturally gluten-free, making it suitable for those with gluten sensitivities.
  • Low-Sugar Option: Use a sugar substitute like stevia or monk fruit sweetener.
  • Dairy-Free: Substitute the butter with coconut oil or a dairy-free alternative.

Equipment Recommendations

To make this recipe, you’ll need:

  • Baking Dish: A 9×13-inch glass or ceramic baking dish works best.
  • Mixing Bowls: Use at least two bowls for mixing ingredients.
  • Knife and Cutting Board: For peeling and slicing apples.

Frequently Asked Questions

Here are some common questions about baked cinnamon apples:

  • Can I use other fruits? Yes, pears or peaches can be substituted for apples.
  • Is it okay to leave the skin on? Absolutely! Leaving the skin adds texture and nutrients.
  • How can I make this recipe vegan? Use vegan butter and ensure your sugar is vegan-friendly.
  • Can I freeze baked apples? Yes! Freeze in an airtight container for up to 3 months.
  • What if I don’t have brown sugar? You can make your own by mixing white sugar with a little molasses.
  • How do I know when they are done? They should be tender when pierced with a fork.
  • Can I make these in advance? Yes, you can prepare them a day ahead and bake before serving.
  • What spices can I add? Nutmeg, ginger, or allspice can enhance the flavor.

Conclusion

And there you have it! With this easy baked cinnamon and sugar apples recipe, you can create a delicious dish that’s perfect for any occasion. Remember, cooking is all about enjoying the process and connecting with what you love. So gather your ingredients, invite your family into the kitchen, and savor the sweetness together. Happy baking!

Easy Baked Cinnamon and Sugar Apples Recipe

Prep Time 10 minutes
Cook Time 45 minutes
Total Time 55 minutes
Servings 4 servings
Calories 250
Enjoy a warm, sweet treat with tender baked apples coated in cinnamon and sugar, perfect for a cozy dessert.

Ingredients

Fruits

  • 6-7 pieces Apples (preferably tart varieties)
  • 1 1/2 teaspoons ground cinnamon
  • 1/2 cup brown sugar
  • 2 tablespoons butter (melted)
  • 1 teaspoon lemon juice
  • 1 teaspoon vanilla extract
  • 1/4 teaspoon sea salt
  • 1/2 teaspoon corn starch

Instructions 

  • Preheat oven to 350°F (175°C).
  • Core and slice the apples, then toss with lemon juice and place in a baking dish.
  • Mix cinnamon, sugar, cornstarch, and salt; melt butter and vanilla, then pour over apples.
  • Sprinkle cinnamon-sugar mixture over apples and stir to coat.
  • Cover with foil and bake for 35 minutes, then remove foil and bake 10 more minutes.

Notes

For extra flavor, serve with a scoop of vanilla ice cream.
Calories: 250kcal
Cost: $15
Course: Dessert
Keyword: apples

Unlock the Magic of Coconut Rice Pudding

Welcome to the world of coconut rice pudding—a delightful dessert that combines the creamy richness of coconut with the comforting texture of rice. This recipe is more than just a treat; it’s a sweet escape that brings a taste of tropical paradise right to your kitchen. With just a handful of simple ingredients, you’ll be on your way to creating a dish that’s not only delicious but also a hit with family and friends. Let’s dive in and discover why this coconut rice pudding deserves a spot on your dessert table!

Why You’ll Love This Recipe

This coconut rice pudding isn’t just another dessert—it’s a satisfying experience! Here are five reasons you’ll fall head over heels for this creamy delight:

  • Easy to Make: With only a few steps, you can whip this up in no time, making it perfect for busy weeknights.
  • Versatile Ingredients: Use what you have on hand! This recipe allows for plenty of substitutions and variations.
  • Perfect for Any Occasion: Whether it’s a cozy family dinner or a fancy gathering, this pudding fits right in.
  • Make Ahead Friendly: Prepare it in advance, and it’ll be waiting for you whenever you crave something sweet.
  • Rich in Flavor: The combination of creamy coconut milk and sweet coconut flakes creates a flavor explosion that will leave you wanting more.

Ingredients You’ll Need

Let’s gather our ingredients for this decadent coconut rice pudding. Here’s what you’ll need:

  • 1 cup (200 g) long-grain white rice (like Basmati; do not wash or soak): This rice variety ensures a fluffy and creamy texture.
  • 2 cups (500 ml) water: Essential for cooking the rice to tender perfection.
  • 2 cups (500 ml) canned coconut milk (such as Goya or Arroy-D): The star ingredient that adds richness and flavor.
  • 2 cups (200 g) coconut flakes or shredded coconut (to taste): Adds texture and enhances the coconut flavor.
  • 1/3 cup (60 g) white granulated sugar: Sweetens the pudding and balances the creaminess.
  • 2 tbsp coconut flakes (for toasting): A delicious topping that adds crunch.

How to Make Coconut Rice Pudding

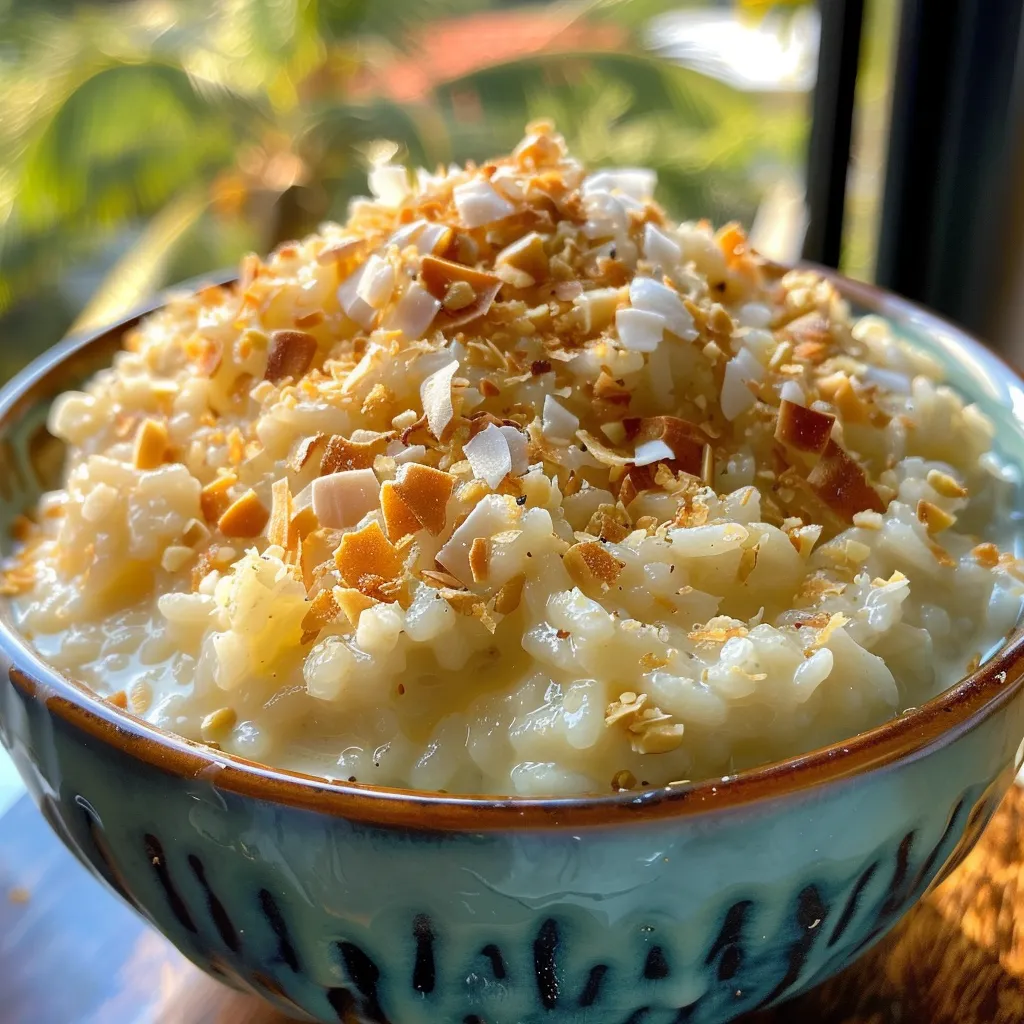
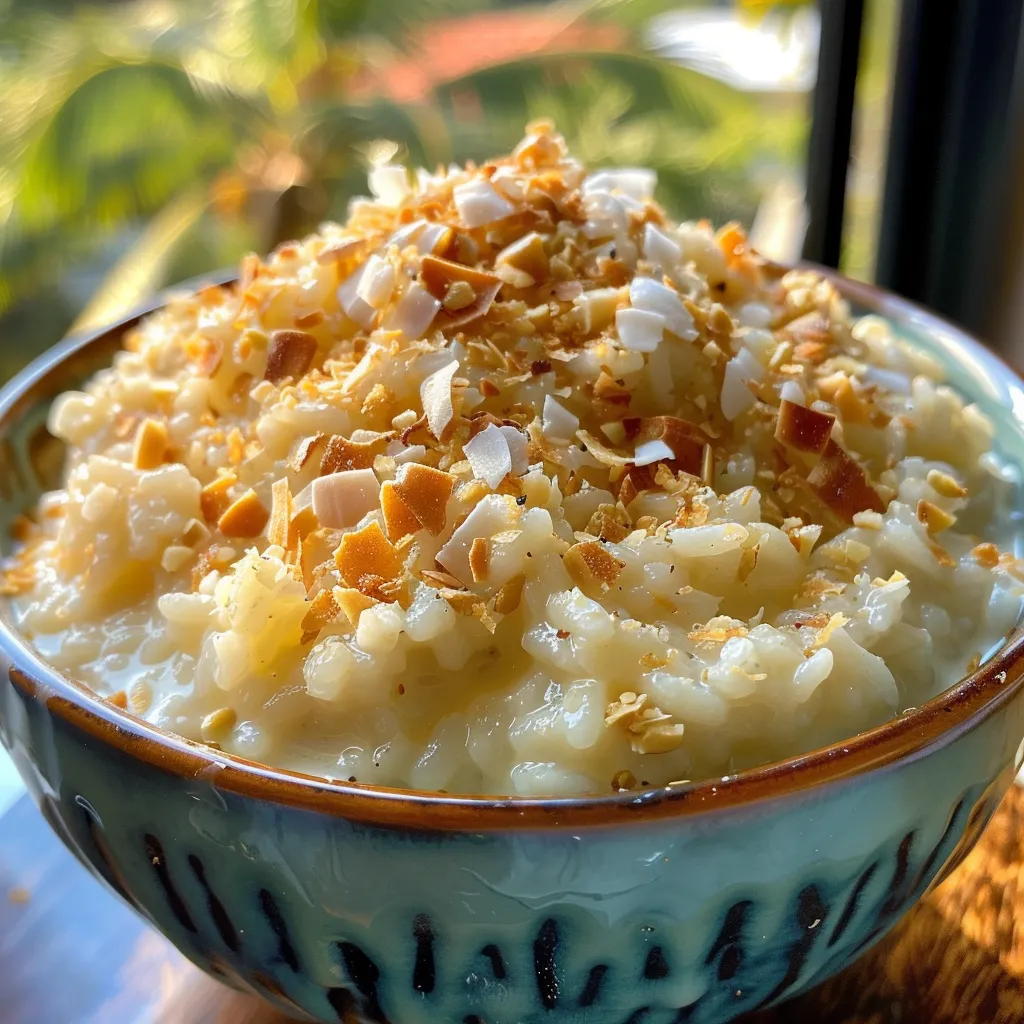
A delicious serving of Coconut Rice Pudding in a bowl, showcasing its rich, creamy texture.

Follow these easy steps to create your own creamy masterpiece:

  1. Cook the Rice: In a medium pot over medium heat, combine the rice and water. Bring to a boil, then cover and reduce heat to low. Cook until the water is fully absorbed and the rice is tender, about 5 to 15 minutes, depending on the rice variety.
  2. Combine Ingredients: Stir in the canned coconut milk, sugar, and shredded coconut to the cooked rice. Cook over medium heat, stirring constantly to prevent sticking, until the mixture comes to a gentle boil and thickens, about 5 to 10 minutes.
  3. Toast Coconut Flakes (Optional): In a dry pan over medium-high heat, toast 2 tablespoons of coconut flakes, stirring frequently until golden brown, approximately 2 to 4 minutes. Remove from heat.
  4. Serve: Enjoy your coconut rice pudding warm immediately, or let it cool to room temperature and refrigerate for a chilled version. Top with toasted coconut flakes before serving, if desired.

Storage and Make-Ahead Instructions

This pudding is perfect for meal prep! Here’s how to store it:

  • Refrigeration: Store leftovers in an airtight container in the refrigerator for up to 4 days.
  • Freezing: You can also freeze the pudding for up to 2 months. Thaw in the refrigerator overnight before serving.
  • Serving Cold or Warm: You can enjoy it straight from the fridge or warm it up on the stove or in the microwave.

Common Mistakes and Troubleshooting

Let’s ensure your coconut rice pudding turns out perfectly every time! Here are some common issues and how to avoid them:

  • Too Runny: If your pudding is too watery, let it simmer a bit longer to thicken.
  • Sticky Rice: Make sure to use long-grain rice for the best texture; if using short-grain, it may become mushy.
  • Not Sweet Enough: Taste and adjust the sugar to your preference during cooking.
  • Coconut Flakes Burning: Keep an eye on your coconut flakes while toasting; they can burn quickly.

Variations to Try

Want to mix things up? Here are some fun variations you can try:

  • Chocolate Coconut Rice Pudding: Stir in cocoa powder or chocolate chips for a rich twist.
  • Fruit-Infused Coconut Rice Pudding: Add diced mango, pineapple, or berries for a fruity delight.
  • Spiced Coconut Rice Pudding: Add a pinch of cinnamon or nutmeg for a warm, spiced flavor.
  • Vegan Coconut Rice Pudding: Use plant-based milk alternatives like almond or oat milk for a lighter version.

FAQ

Got questions? We’ve got answers! Here are some frequently asked questions about coconut rice pudding:

  • Can I use different types of rice? Yes! Medium or short-grain rice can be used, but adjust cooking time accordingly.
  • How long does coconut rice pudding last? It can last up to 4 days in the fridge and up to 2 months in the freezer.
  • Can I make this recipe sugar-free? Absolutely! You can substitute sugar with your favorite sweetener.
  • What can I serve with coconut rice pudding? It pairs well with fresh fruits, whipped cream, or a sprinkle of nuts.
  • Is coconut rice pudding gluten-free? Yes, this dessert is naturally gluten-free!
  • Can I double the recipe? Definitely! Just make sure to use a larger pot to accommodate the extra ingredients.
  • Can I reheat coconut rice pudding? Yes! Warm it gently on the stove or in the microwave, adding a splash of coconut milk if needed.
  • Can I use unsweetened coconut flakes? Yes, just adjust the sugar to your liking.

Nutrition Tips and Dietary Adaptations

Here are a few tips to make your coconut rice pudding even healthier:

  • Lower Calorie Option: Use light coconut milk instead of full-fat for a lower-calorie pudding.
  • Incorporate Seeds: Add chia seeds for added fiber and nutrition.
  • Go Organic: Choose organic coconut milk and rice for a cleaner option.

Equipment Recommendations

Having the right tools can make your cooking experience smoother:

  • Medium-sized Pot: Essential for cooking the rice and mixing the ingredients.
  • Wooden Spoon: Great for stirring to prevent sticking.
  • Measuring Cups and Spoons: Accurate measurements ensure perfect results.
  • Airtight Container: For storing leftovers or make-ahead portions.

Serving Suggestions

Now that you’ve made this delicious coconut rice pudding, here are some serving ideas:

  • Garnish with Fresh Fruit: Slices of banana or mango complement the creamy pudding.
  • Add a Drizzle of Honey or Maple Syrup: For an extra touch of sweetness.
  • Serve with a Side of Whipped Cream: Light and fluffy, it adds a delightful contrast.
  • Top with Toasted Nuts: Almonds or pistachios add a crunchy element.

Cooking is all about exploration and enjoyment, and this coconut rice pudding is a canvas for your creativity. Remember, even if things don’t turn out perfect, it’s all about having fun in the kitchen. So grab your ingredients and get ready to create a dessert that’s sure to impress! Happy cooking!

Coconut Rice Pudding Recipe

Prep Time 5 minutes
Cook Time 20 minutes
Total Time 25 minutes
Servings 4 servings
Calories 250
A creamy and fragrant coconut rice pudding that's easy to make and perfect for a comforting dessert or snack.

Ingredients

Main

  • 1 cup long-grain white rice such as Basmati (do not wash or soak)
  • 2 cups water
  • 2 cups canned coconut milk (such as Goya or Arroy-D)
  • 2 cups coconut flakes or shredded coconut (or to taste)
  • 1/3 cup white granulated sugar
  • 2 tbsp coconut flakes (for toasting)

Instructions 

  • Combine rice and water in a medium pot, bring to a boil, then cover and simmer until water is absorbed and rice is tender, about 5-15 minutes.
  • Stir in coconut milk, sugar, and shredded coconut. Cook over medium heat, stirring until mixture boils and thickens, about 5-10 minutes.
  • Optional: toast coconut flakes in a dry pan over medium-high heat until golden, about 2-4 minutes.
  • Serve warm or chilled, topping with toasted coconut flakes if desired.

Notes

Stir frequently to prevent sticking and ensure even cooking.
Calories: 250kcal
Cost: $10
Course: Dessert
Cuisine: fusion
Keyword: coconut, rice pudding

Welcome to your new obsession! Our Mango Coconut Chia Pudding is not just a treat; it’s a tropical escape in a bowl, bursting with flavor and health benefits. Chia pudding is the perfect solution for busy days when you crave something delicious yet nutritious. Made with simple ingredients like creamy coconut milk and fresh mango, this guilt-free dessert is a breeze to whip up, whether you’re looking for a quick breakfast, a snack, or a delightful dessert. Let’s dive into the creamy goodness of this coconut chia pudding!

Why You’ll Love This Recipe

  • Quick and Easy: Ready in just 10 minutes, plus chilling time, this pudding is perfect for last-minute cravings.
  • Healthy Ingredients: Packed with omega-3 fatty acids from chia seeds and natural sweetness from honey or maple syrup, it’s a nutritious choice.
  • Customizable: Feel free to swap in your favorite fruits or sweeteners, making it versatile for any palate.
  • Vegan-Friendly: Use plant-based milk and sweeteners to cater to your dietary preferences.
  • Meal Prep Champion: Make it ahead of time for a delicious breakfast or snack ready for up to five days in the fridge!

Ingredient Breakdown

Let’s take a closer look at the ingredients that make this mango coconut chia pudding shine:

  • 1 cup Coconut Milk: For a lighter flavor, you can substitute with almond milk or oat milk.
  • 1/4 cup Chia Seeds: Acts as a thickening agent, giving that perfect pudding texture. They also add fiber and protein!
  • 2 tablespoons Honey or Maple Syrup: Sweeten to taste with these natural options.
  • 1 teaspoon Vanilla Extract: A splash of vanilla adds depth; fresh vanilla bean works wonders for a gourmet touch.
  • 1 ripe Mango: Diced into small cubes; you can also substitute with berries or bananas for variety.

How to Make Mango Coconut Chia Pudding

Making your coconut chia pudding is as easy as 1-2-3. Follow these simple steps:

  1. In a mixing bowl, combine the coconut milk, chia seeds, honey or maple syrup, and vanilla extract. Stir well.
  2. Add the diced mango and gently mix to incorporate.
  3. Cover the bowl and refrigerate for at least 2 hours, or overnight for best results, until the pudding thickens and the chia seeds expand.

And voilà! You have a luscious dessert ready to enjoy.

Pro Tips for Perfect Pudding

Close-up of a cup filled with mango coconut chia pudding, garnished with fresh mango cubes on top.
  • Whisk Thoroughly: Ensure there are no clumps of chia seeds by whisking the mixture thoroughly.
  • Chill Overnight: For the best texture, let it chill overnight to allow the chia seeds to absorb the liquid.
  • Adjust Sweetness: Taste your mixture before refrigerating and adjust the sweetness according to your preference.
  • Experiment with Flavors: Add spices like cinnamon or ginger for extra warmth and flavor.
  • Use Fresh Ingredients: Fresh, ripe mangoes will elevate your pudding; frozen can be used but may alter texture.
  • Layer It Up: Serve in layers with granola or nuts for added crunch and visual appeal.
  • Mix and Match: Try different fruits like kiwi, strawberries, or pineapple for a fruity twist.
  • Store Properly: Use an airtight container to keep your pudding fresh in the fridge for up to five days.

Common Mistakes and Troubleshooting

Even the best of us make mistakes in the kitchen, but fear not! Here are some common hiccups with solutions:

  • Clumpy Pudding: If your pudding is clumpy, it might be due to not whisking the chia seeds well. Just whisk again and let it sit longer.
  • Too Thick: If it’s thicker than you’d like, stir in a bit more coconut milk until you reach your desired consistency.
  • Not Sweet Enough: Simply add more honey or maple syrup after the pudding has thickened, and mix well.
  • Flavor Lacking: If you find the flavor a bit bland, add a pinch of salt to enhance the sweetness.

Variations on Mango Coconut Chia Pudding

Get creative! Here are four fun variations to keep things exciting:

  • Cocoa Delight: Add 2 tablespoons of cocoa powder for a chocolatey twist.
  • Berry Bliss: Substitute mango with a mix of your favorite berries for a colorful treat.
  • Matcha Magic: Stir in a teaspoon of matcha powder for a green tea flavor and extra antioxidants.
  • Tropical Paradise: Mix in shredded coconut and top with pineapple for a tropical explosion.

Storage and Make-Ahead Instructions

Want to enjoy this pudding throughout the week? Here’s how:

  • Make Ahead: Prepare your pudding the night before and let it chill overnight for a quick breakfast.
  • Storage: Store in an airtight container in the fridge for up to five days. Just give it a good stir before serving!

Comprehensive FAQ

Got questions? We’ve got answers!

  • How long does chia pudding last in the fridge?
    Chia pudding can last up to five days when stored in an airtight container.
  • Can I use frozen mango?
    Yes, you can use frozen mango, just make sure to thaw it and cut it into small pieces.
  • Is chia pudding vegan?
    Absolutely! Just use plant-based milk and sweeteners.
  • Can I use other sweeteners?
    Yes, feel free to substitute honey with agave syrup or stevia to keep it vegan.
  • What if I don’t like coconut?
    You can use almond or oat milk instead for a different flavor.
  • How do I make it creamier?
    For a creamier texture, blend the pudding mixture before refrigerating.
  • Can I add protein powder?
    Yes, adding a scoop of protein powder can enhance the nutritional profile.
  • What can I serve with this pudding?
    Top with nuts, granola, or fresh fruits for added texture and flavor.

Nutrition Tips and Dietary Adaptations

Our mango coconut chia pudding is not only delicious but also nutritious! Here are some tips:

  • Low-Calorie Option: Use unsweetened almond milk and reduce the sweetener for a lower-calorie version.
  • Protein Boost: Add Greek yogurt or protein powder for an extra boost.
  • Fiber-Rich: Chia seeds are a great source of fiber, promoting digestive health.
  • Gluten-Free: Naturally gluten-free, making it suitable for those with gluten sensitivities.

Equipment Recommendations

Here are a few kitchen essentials to make your pudding-making experience seamless:

  • Mixing Bowl: A medium-sized bowl for combining ingredients.
  • Whisk: For thoroughly mixing the chia seeds with the liquid.
  • Airtight Container: Essential for storing your pudding in the fridge.
  • Measuring Cups and Spoons: Accurate measurements make for perfect pudding every time!

Serving Suggestions

How you serve your coconut chia pudding can elevate the experience:

  • Layer with Granola: Add a crunchy layer of granola on top for texture.
  • Top with Fresh Fruits: Fresh mango slices, berries, or a sprinkle of nuts can enhance flavor.
  • Drizzle with Honey: A light drizzle of honey or maple syrup on top can make it even sweeter.
  • Garnish with Mint: A sprig of fresh mint adds a refreshing touch.

So there you have it! Your ultimate guide to creating a delicious and healthy mango coconut chia pudding that’s sure to impress. Remember, cooking is all about having fun, experimenting, and enjoying the process. You’ve got this, and I can’t wait for you to enjoy every spoonful of this tropical delight. Happy cooking!

Delicious Mango Coconut Chia Pudding for a Guilt-Free Treat

Prep Time 10 minutes
Total Time 10 minutes
Servings 2 servings
Calories 250
Enjoy a creamy, tropical chia pudding made with fresh mango and coconut milk, perfect for a healthy snack or breakfast.

Ingredients

Liquid

  • 1 cup Coconut Milk (For a lighter flavor, try almond milk or oat milk.)
  • 1/4 cup Chia Seeds (Acts as a thickening agent for that perfect pudding texture.)
  • 2 tablespoons Honey or Maple Syrup (Options for natural sweetness.)
  • 1 teaspoon Vanilla Extract (Fresh vanilla bean works wonders for a gourmet touch.)

Fruit

  • 1 ripe Mango (Diced into small cubes; can substitute with berries or bananas.)

Instructions 

  • Mix coconut milk, chia seeds, honey or maple syrup, and vanilla extract in a bowl.
  • Stir well and let sit for 5 minutes, then stir again to prevent clumping.
  • Cover and refrigerate for at least 4 hours or overnight.
  • Top with diced mango before serving.

Notes

For added flavor, sprinkle with shredded coconut or nuts.
Calories: 250kcal
Cost: $8
Course: Breakfast, Dessert
Cuisine: Tropical
Keyword: chia, coconut, Mango

Delight in the Comfort of Easy Baked Apples

Nothing quite captures the essence of cozy fall evenings like the aroma of baked apples wafting through your kitchen. This easy baked apples recipe transforms simple ingredients into a heartwarming dessert that’s perfect for family gatherings or a quiet night in. With just a handful of items and minimal prep, you’ll have a stunning dish that not only tastes divine but also fills your home with nostalgia and warmth.

Why You’ll Love This Recipe

Here are just a few reasons why this easy baked apples recipe will become your go-to dessert:

  • Quick and Simple: With just a few ingredients and straightforward steps, this recipe is perfect for busy weeknights.
  • Versatile: Enjoy these baked apples as a dessert or breakfast treat—just add yogurt or oatmeal!
  • Customizable: Tailor the filling to your taste with different nuts, fruits, or spices to make it your own.
  • Perfect for Fall: The warm spices and sweet apples create a comforting dish that embodies the flavors of the season.
  • Deliciously Healthy: Packed with vitamins and fiber, baked apples are a wholesome treat that can satisfy your sweet tooth without guilt.

Ingredients Breakdown

Let’s dive into the components that make this dish shine:

  • 6 medium baking apples*: Choose from varieties like Granny Smith, Jonagold, or Honeycrisp for their perfect balance of sweetness and tartness.
  • ½ cup brown sugar: This adds a rich caramel flavor; feel free to adjust depending on your sweetness preference.
  • 1 tsp ground cinnamon: A must-have spice that complements the apples beautifully.
  • ⅛ tsp ground nutmeg: Just a pinch enhances the warm, cozy flavor profile.
  • ⅓ cup dried cranberries (or raisins): These add chewiness and a burst of flavor; substitute with your favorite dried fruit.
  • 3 Tbsp unsalted butter: A little decadence goes a long way in enhancing flavor.
  • ¼ cup finely chopped walnuts (optional): For added crunch and nuttiness.
  • 1 cup hot water: This creates steam in the oven, ensuring the apples cook evenly and remain juicy.
  • To Serve (Optional): Top with unsweetened whipped cream, vanilla ice cream, or drizzle with caramel sauce for an indulgent finish.

*When selecting apples, opt for varieties that hold their shape well when baked, like Braeburn or Jonagold.

Step-by-Step Instructions

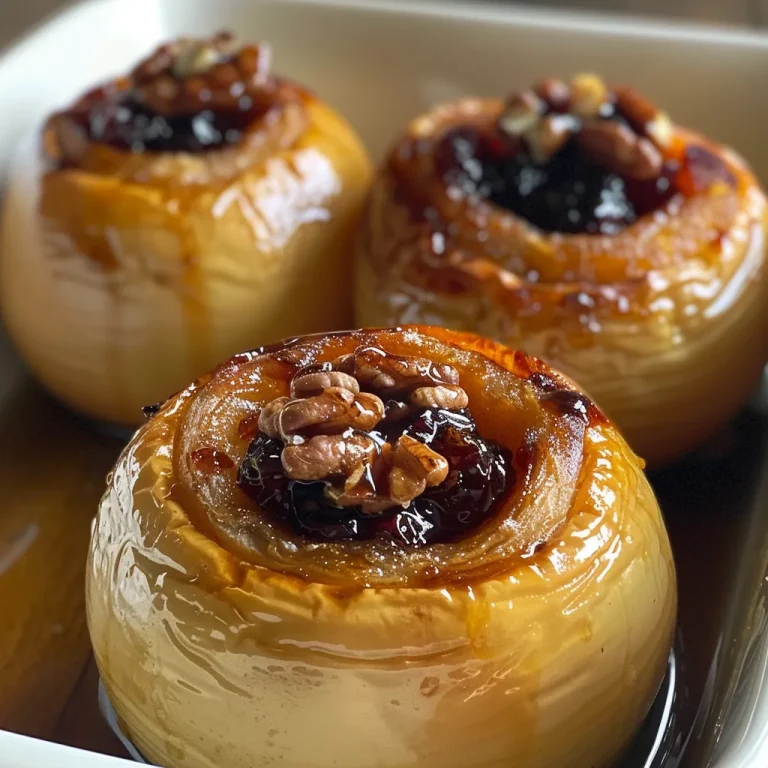
Juicy baked apples topped with cinnamon and walnuts.

Ready to get baking? Follow these simple steps for perfect baked apples:

  • Preheat Oven: Preheat your oven to 375°F (190°C).
  • Prepare the Filling: In a small bowl, combine the brown sugar, cinnamon, and nutmeg. Stir in the dried cranberries and set aside.
  • Core the Apples: Wash and core each apple using a melon baller or paring knife, ensuring you don’t cut through the bottom. Leave about ½ inch at the base to hold the filling.
  • Stuff the Apples: Place the apples upright in a baking dish. Fill each apple with the prepared mixture, top with butter, and sprinkle with walnuts if desired. Add any leftover sugar mixture over the tops.
  • Add Water and Bake: Pour 1 cup of hot water into the bottom of the baking dish. Bake uncovered for 45 minutes to 1 hour, or until apples are tender yet hold their shape. (Note: Jonagold apples may take closer to 45 minutes, while larger varieties like Braeburn may need up to an hour.)

Pro Tips for Perfect Baked Apples

To ensure your baked apples are nothing short of spectacular, consider these expert tips:

  • Choose the Right Apples: Opt for firm, tart apples that will hold their shape when baked. Granny Smith and Honeycrisp are excellent choices.
  • Experiment with Spices: Don’t hesitate to add your favorite spices—think ginger or allspice—for a unique twist.
  • For Extra Flavor: Add a splash of vanilla extract or a sprinkle of citrus zest to the filling for added depth.
  • Don’t Skip the Resting Time: Allow the baked apples to rest for about 10 minutes after baking to let the flavors meld.
  • Make Ahead: Prepare the apples and filling ahead of time, then bake when you’re ready for dessert.
  • Serving Temperature: These baked apples are delightful warm, but they can also be enjoyed cold for a refreshing snack.
  • Try Different Toppings: Top with granola, yogurt, or a drizzle of honey for a breakfast twist!
  • Watch the Baking Time: Keep an eye on your apples to prevent overcooking; you want them tender but not mushy.

Common Mistakes and Troubleshooting

Even the best chefs make mistakes! Here are some common pitfalls and how to avoid them:

  • Overstuffing: Avoid packing too much filling into the apples, as this can cause them to burst.
  • Using Soft Apples: Soft apples can turn mushy; stick to firmer varieties for the best results.
  • Not Baking Long Enough: Ensure the apples are fully tender before removing them from the oven; they should be easy to pierce with a fork.
  • Skipping the Water: The hot water in the baking dish is crucial for steaming; don’t skip this step!

Variations to Try

Feeling adventurous? Here are some delicious variations to personalize your baked apples:

  • Nut-Free Version: Omit the walnuts and replace them with sunflower seeds or simply leave them out for a nut-free option.
  • Chocolate Lovers: Add a few dark chocolate chips to the filling for a decadent treat.
  • Caramel Swirl: Drizzle caramel sauce over the tops of the apples before baking for a sweet surprise.
  • Spiced Rum or Bourbon: Incorporate a splash of your favorite spirit into the filling for an adult twist.

Storage and Make-Ahead Instructions

Want to enjoy these baked apples later? Here’s how to store and reheat:

  • Storing: Keep any leftovers in an airtight container in the fridge for up to 3 days.
  • Reheating: Gently reheat in the microwave or oven until warmed through, adding a splash of water if they seem dry.
  • Make-Ahead: Prepare the apples and filling in advance, then bake when ready for a fresh dessert.

Comprehensive FAQ

Got questions? Here are some common inquiries about baked apples:

  • Can I use other fruits? Absolutely! Pears or peaches can also work beautifully with this recipe.
  • What’s the best way to core apples? A melon baller or apple corer works best, but a paring knife can also do the trick.
  • Can I make this recipe vegan? Yes! Substitute the butter with coconut oil or vegan butter, and use maple syrup instead of brown sugar.
  • What should I serve with baked apples? They pair wonderfully with vanilla ice cream, yogurt, or even a drizzle of cream.
  • How do I know when they’re done? Insert a fork to check for tenderness; they should be soft yet hold their shape.
  • Can I freeze baked apples? Yes, freeze them in an airtight container for up to 3 months. Thaw and reheat before serving.
  • What’s the best way to peel apples? Peeling is optional; the skin adds texture and nutrients, but if you prefer, use a vegetable peeler.
  • How do I prevent browning? If prepping apples in advance, toss them with a bit of lemon juice to keep them fresh.

Nutritional Tips and Dietary Adaptations

Looking to make this recipe fit your dietary needs? Here are some adaptations:

  • Gluten-Free: This recipe is naturally gluten-free, making it suitable for those with gluten sensitivities.
  • Low Sugar: Reduce the brown sugar or use a sugar substitute to lower the sweetness.
  • High Fiber: Add more dried fruits or nuts to increase the fiber content for a healthier dessert.

Essential Equipment Recommendations

Before you begin, make sure you have these kitchen essentials:

  • Baking Dish: A medium-sized, oven-safe dish is perfect for holding your apples snugly.
  • Melon Baller or Paring Knife: Essential for coring the apples safely and effectively.
  • Mixing Bowl: A small bowl for combining your filling ingredients.

Serving Suggestions

Ready to serve? Here are some delightful ways to enjoy your baked apples:

  • With Ice Cream: A scoop of vanilla ice cream or whipped cream makes for a classic pairing.
  • Over Oatmeal: Chop leftover baked apples and add them to your morning oatmeal for a sweet start.
  • As a Topping: Use them as a topping for pancakes or waffles for a delicious brunch treat.

Conclusion

There you have it—your definitive guide to making easy baked apples that are sure to impress! Whether you’re bringing a dish to a gathering or treating yourself after a long day, this recipe is a sweet reminder that delicious food can be simple and rewarding. So roll up your sleeves, embrace the joy of cooking, and enjoy every warm, flavorful bite of your baked apples. Happy cooking!

Easy Baked Apples Recipe

Prep Time 15 minutes
Cook Time 45 minutes
Total Time 1 hour
Servings 6 pieces
Calories 250
Enjoy a warm, comforting dessert with tender baked apples filled with sweet and spicy goodness, topped with optional nuts and served with whipped cream or ice cream.

Ingredients

For the Baked Apples

  • 6 medium baking apples (*Recommende)
  • 0.5 cup brown sugar
  • 1 tsp ground cinnamon
  • 1/8 tsp ground nutmeg
  • 1/3 cup dried cranberries (or raisins)
  • 3 Tbsp unsalted butter, cut into 6 pieces
  • 0.25 cup finely chopped walnuts (optional)
  • 1 cup hot water

To Serve (Optional)

  • Unsweetened whipped cream or vanilla ice cream
  • Caramel sauce (try our homemade caramel sauce recipe)

Instructions 

  • Preheat your oven to 375°F (190°C).
  • Mix brown sugar, cinnamon, and nutmeg; stir in cranberries.
  • Core apples, leaving ½ inch at the bottom. Fill with sugar mixture, top with butter and walnuts.
  • Pour hot water into dish; bake for 45-60 minutes until tender.

Notes

Use firm apples like Jonagold or Braeburn for best results.
Calories: 250kcal
Cost: $15
Course: Dessert
Keyword: apples

Deliciously Simple Baked Apple Slices: Your Ultimate Guide

Welcome, friends! If you’re looking for a comforting, easy-to-make dessert that warms your kitchen and your heart, you’ve landed in the right place. Today, we’re diving into the world of baked apple slices with cinnamon. This recipe is not just about deliciousness; it’s about creating a cozy experience in your home. With just a handful of ingredients, you can whip up this delightful treat that’s perfect for any occasion, whether it’s a weeknight dessert or a special gathering. Let’s get started!

Why You’ll Love This Recipe

Here are a few reasons why this recipe for baked apple slices will quickly become a favorite:

  • Quick and Easy: With minimal prep time, you can have a warm dessert ready in under 30 minutes.
  • Perfectly Caramelized: The combination of sugar and spices creates a mouthwatering caramelization that brings out the apples’ natural sweetness.
  • Healthy Indulgence: Made with simple ingredients, this dish offers a sweet treat without overwhelming your diet.
  • Versatile Serving Options: Enjoy them warm on their own, atop ice cream, or as a topping for pancakes or waffles!
  • Kid-Friendly Fun: Involve your little ones in the preparation process for a family bonding experience.

Ingredients Breakdown

Let’s gather what we need for our baked apple slices:

  • 4 large baking apples (about 2 pounds): Choose firm varieties like Honeycrisp, Granny Smith, Braeburn, or Gala for the best texture.
  • 2 tablespoons unsalted butter (or coconut oil): This adds richness and helps the apples caramelize beautifully.
  • 3 tablespoons maple syrup (or brown sugar/coconut sugar): Provides a nuanced sweetness that perfectly complements the apples.
  • 1 ½ teaspoons ground cinnamon: The quintessential spice that brings warmth and flavor to your dish.
  • ¼ teaspoon ground nutmeg: Adds depth and a hint of classic autumn warmth.
  • Pinch of salt: Enhances flavors and balances sweetness.
  • 1 tablespoon lemon juice (optional): Helps prevent browning and adds brightness to the dish.

How to Make Baked Apple Slices

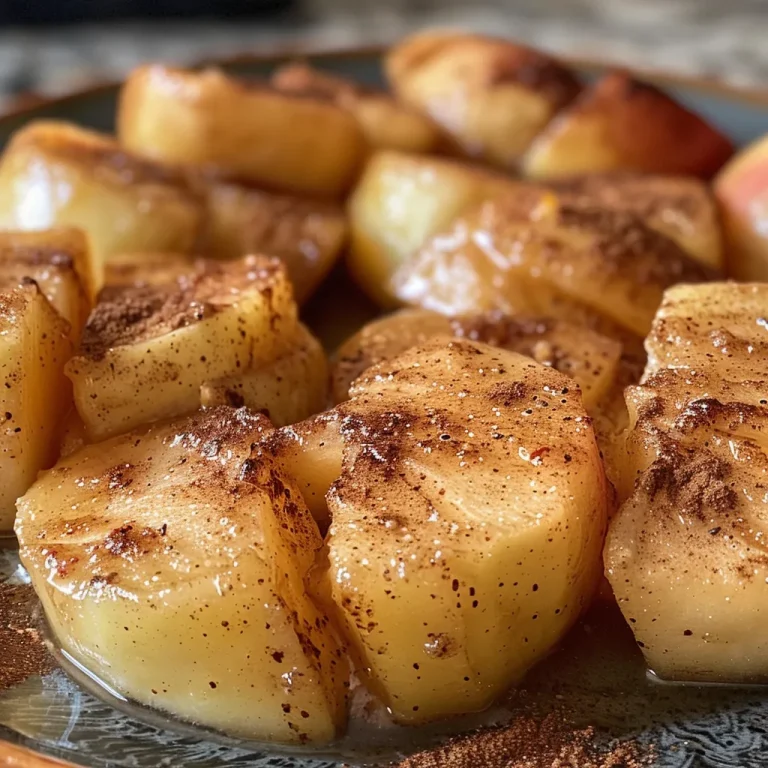
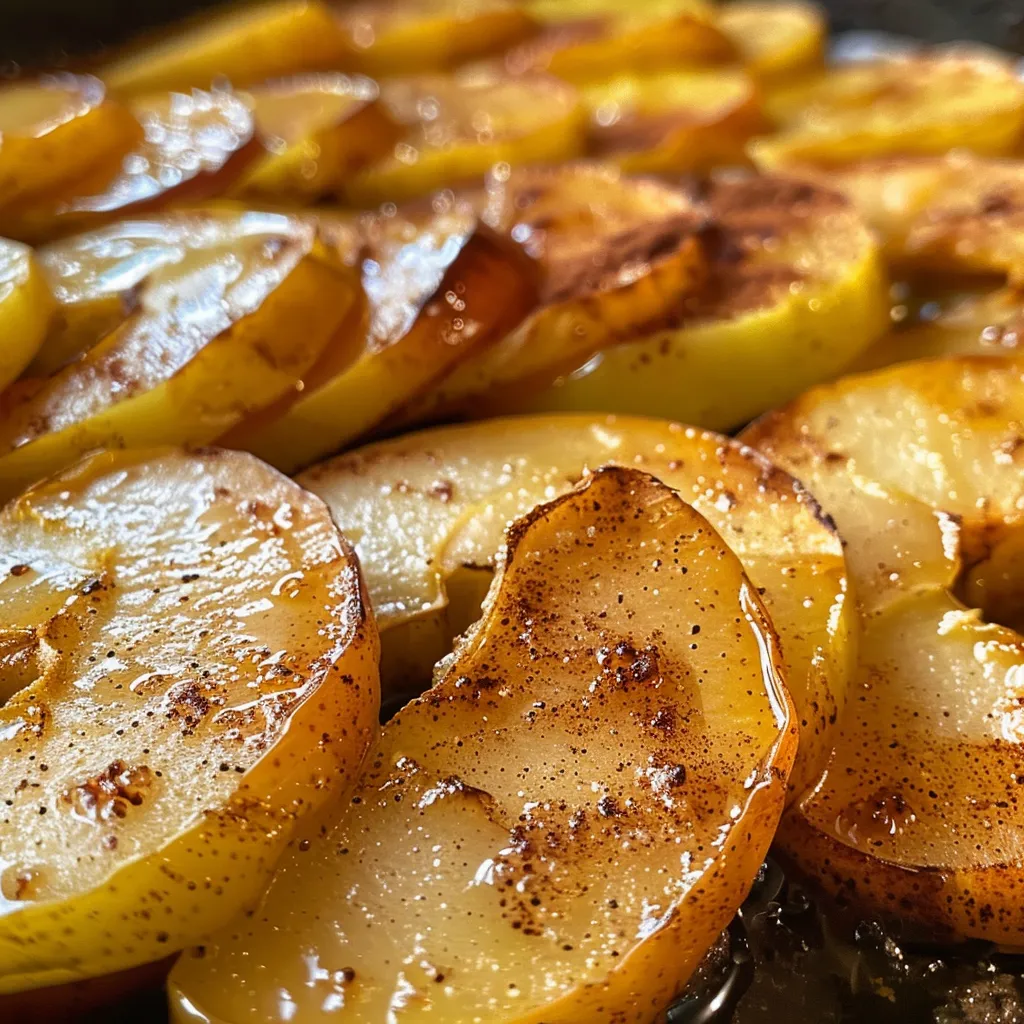
Side view of warm baked apple slices with a cinnamon dusting on a plate.

Ready to get your hands a little messy? Let’s walk through the steps:

  • Preheat Your Oven: Set your oven to 400°F (200°C) so it’s hot and ready to work its magic on the apples.
  • Wash and Core the Apples: Give those apples a good wash and dry, then use a corer or knife to remove the core, keeping the skin on for added nutrients and structure.
  • Slice the Apples: Cut the apples into uniform slices, about ¼ to ½ inch thick, to ensure even cooking. If you’re working slowly, toss them with lemon juice to keep them from browning.
  • Mix the Flavorful Coating: In a small bowl, whisk together melted butter (or coconut oil), maple syrup, cinnamon, nutmeg, and salt to create a fragrant mixture.
  • Coat the Apples: Pour the mixture over your apple slices in the baking dish. Toss them gently to ensure every slice is coated evenly. Spread them out in a single layer for the best caramelization.
  • Bake to Perfection: Place the dish in the oven and bake for 20-25 minutes. Halfway through, give the apples a gentle stir to redistribute the delicious juices.
  • Check for Doneness: They’re ready when they’re tender enough to pierce with a fork yet still hold their shape, glistening in their syrupy sauce.
  • Rest and Serve: Allow the dish to cool for a few minutes before serving. This lets the flavors meld beautifully!

Pro Tips for Success

Before you dive in, here are some expert insights to elevate your baking game:

  • Choose the Right Apples: Opt for firm apples that hold their shape well when cooked. Avoid mealy varieties!
  • Uniform Thickness: Make sure your apple slices are of equal thickness to cook uniformly.
  • Experiment with Spices: Feel free to add other spices like ginger or allspice for a unique twist.
  • Don’t Overcrowd: Make sure the apple slices aren’t piled too high, or they’ll steam instead of bake.
  • Adjust Sweetness: Taste the apple mixture before baking and adjust the sweetness to your liking.
  • Use Fresh Spices: Freshly ground spices can enhance flavor significantly.
  • Let the Apples Rest: Allowing the baked apple slices to rest helps the flavors to deepen.
  • Use a Glass Dish: It’s easier to monitor the caramelization and prevents sticking.

Common Mistakes and Troubleshooting

Even the best of us make mistakes in the kitchen! Here are some common pitfalls and how to avoid them:

  • Apples Turn to Mush: Ensure you’re using the right variety and that your slices are thick enough to hold their shape.
  • Not Sweet Enough: Adjust the sweetness before baking by adding more maple syrup or sugar to taste.
  • Uneven Cooking: Make sure the apples are sliced evenly and spread out in a single layer.
  • Burnt Edges: If your apples start browning too quickly, cover the dish loosely with foil.
  • Sticky Cleanup: Grease your baking dish thoroughly to prevent sticking and make cleaning easier.

Creative Variations

Feeling adventurous? Try these fun variations on your baked apple slices:

  • Peanut Butter Delight: Drizzle a little peanut butter over the apples before baking for a protein-packed twist.
  • Nutty Crunch: Top with chopped nuts like pecans or walnuts before baking for added texture.
  • Cranberry Burst: Toss in some dried cranberries for a pop of tartness that complements the sweetness.
  • Air Fryer Option: Cook in an air fryer at 350°F for about 15 minutes for a quick and crispy alternative.

Storage and Make-Ahead Instructions

Want to prepare your baked apple slices in advance? Here’s how:

  • Make Ahead: You can prepare the apples and the coating a few hours in advance. Just cover and refrigerate until ready to bake.
  • Storage: Store leftovers in an airtight container in the fridge for up to 3 days.
  • Reheating: Gently reheat in the oven or microwave until warmed through; the texture may soften slightly.
  • Freezing: Freeze baked apple slices in a single layer on a baking sheet before transferring to a freezer bag. They’ll keep for about 2 months.

Frequently Asked Questions

Here are some common questions about making baked apple slices:

  • Can I use different types of apples? Absolutely! Just ensure they’re firm and not too sweet or mealy.
  • What can I serve with baked apple slices? They’re fantastic on their own, but try them with ice cream, yogurt, or oatmeal!
  • Can I make this recipe vegan? Yes! Substitute the butter with coconut oil and use maple syrup as a sweetener.
  • How do I know when the apples are done? They should be tender but still hold their shape and be lightly caramelized.
  • Can I add other fruits? Sure! Pears or peaches can complement the apples beautifully.
  • Is there a way to make this dish healthier? Reduce the sugar or use a sugar substitute to lower the sweetness.
  • What’s the best way to store leftovers? Keep them in an airtight container in the fridge for up to three days.
  • Can I bake these in an air fryer? Yes! Cook them at 350°F for about 15 minutes for a quick version.

Nutritional Tips and Dietary Adaptations

This recipe can easily be tailored to fit various dietary needs:

  • Gluten-Free: Naturally gluten-free, just ensure your sweeteners are also certified gluten-free.
  • Low-Sugar Option: Use a sugar substitute or reduce the amount of maple syrup for a healthier version.
  • Dairy-Free: Substitute butter with coconut oil or a vegan butter alternative.
  • High-Fiber Boost: Keep the skins on the apples for added fiber, or serve with a sprinkle of chia seeds on top.

Equipment Recommendations

Here’s what you’ll need to make this recipe:

  • Baking Dish: A 9×13 inch dish works perfectly for this recipe.
  • Apple Corer or Paring Knife: Essential for removing the cores without making a mess.
  • Mixing Bowls: For combining your ingredients smoothly.
  • Whisk: To mix the coating ingredients effectively.
  • Spatula: For tossing the apple slices and ensuring they are well-coated.

Serving Suggestions

Now that your baked apple slices are perfect, here are some delightful ways to serve them:

  • On Top of Ice Cream: Serve warm apple slices over vanilla ice cream for a delightful contrast.
  • With Yogurt: Pair with Greek yogurt and a drizzle of honey for a wholesome breakfast.
  • As a Topping: Use them as a topping for pancakes, waffles, or oatmeal.
  • Garnished with Nuts: Sprinkle with toasted nuts for an added crunch and flavor.

Remember, the only limit is your creativity! Enjoy the process and the delightful aroma that fills your kitchen while these apples bake. You’re not just making a dessert; you’re creating memories. Happy cooking!

Easy Baked Apple Slices with Cinnamon

Prep Time 10 minutes
Cook Time 25 minutes
Total Time 35 minutes
Servings 4 servings
Calories 150
Enjoy warm, tender apple slices infused with cinnamon and a touch of sweetness, perfect for a cozy treat or healthy dessert.

Ingredients

Apples

  • 4 large baking apples (Firm, crisp apples like Honeycrisp, Granny Smith, Braeburn, or Gala)
  • 2 tablespoons unsalted butter (or coconut oil for dairy-free)
  • 3 tablespoons maple syrup (or brown sugar/coconut sugar)
  • 1.5 teaspoons ground cinnamon (essential warm spice)
  • 0.25 teaspoon ground nutmeg (adds depth and warmth)
  • Pinch salt (to enhance flavors)
  • 1 tablespoon lemon juice (optional, prevents browning)

Instructions 

  • Preheat oven to 400°F (200°C) and grease a 9×13 inch baking dish.
  • Wash, core, and slice apples into ¼-½ inch thick slices; toss with lemon juice if desired.
  • Mix melted butter, maple syrup, cinnamon, nutmeg, and salt in a bowl.
  • Pour mixture over apple slices, toss to coat evenly, and spread in a single layer.
  • Bake for 20-25 minutes, stirring halfway through, until apples are tender and caramelized.

Notes

Serve warm for the best flavor and aroma.
Calories: 150kcal
Cost: $10
Course: Dessert
Cuisine: American
Keyword: Apple, Cinnamon

Welcome to a slice of paradise right in your kitchen! If you’re looking for a refreshing treat that’s as easy to make as it is delicious, you’ve come to the right place. Today, we’re diving into the world of Mango Chia Seed Pudding, a delightful dish that combines the creamy richness of coconut milk with the natural sweetness of ripe mangoes. Whether it’s breakfast, a snack, or a light dessert, this pudding is the perfect way to brighten your day!

In this article, we’ll explore everything you need to know about making this tropical delight. From the ingredients and step-by-step instructions to pro tips and troubleshooting advice, I’ll guide you through the process. Let’s jump in!

Why You’ll Love This Recipe

  • Quick and Easy: This pudding takes no more than 10 minutes to prepare, making it a perfect option for busy mornings or last-minute desserts.
  • Nutritious Ingredients: Packed with chia seeds and mango, this dish is loaded with fiber, antioxidants, and healthy fats. It’s a guilt-free pleasure!
  • Make-Ahead Friendly: Prepare it in advance and store it in the fridge for a quick grab-and-go breakfast or dessert throughout the week.
  • Customizable Flavors: With just a few tweaks, you can make this pudding uniquely yours! Add spices or swap out fruits based on your preferences.
  • Diet-Friendly: This recipe is vegan, gluten-free, and can easily fit into paleo diets, making it suitable for a variety of dietary needs.

Ingredients: Tropical Blend for Mango Chia Seed Pudding

Before we get cooking, let’s gather our ingredients. Here’s what you’ll need:

  • 2 cups coconut milk (full-fat for creaminess or light for a lighter version)
  • ½ cup chia seeds
  • 1 tablespoon maple syrup (optional, adjust to taste)
  • 1 teaspoon vanilla extract
  • 2 cups mango chunks (fresh or frozen and thawed)
  • 1 tablespoon lime juice (optional, for a zesty kick)
  • ½ cup mango chunks (diced for topping)
  • 2 tablespoons toasted coconut flakes (for garnish)

Feel free to adjust the sweetness or add any other ingredients you enjoy!

Step-by-Step Guide to Creamy Mango Chia Seed Pudding

Ready to get started? Let’s make this mango chia seed pudding step by step.

Step 1: Blend the Mango

In a blender, combine the mango chunks and lime juice. Blend until smooth. This will be the fruity layer of your pudding!

Step 2: Mix the Chia Base

In a large bowl, whisk together the coconut milk, chia seeds, maple syrup, and vanilla extract. Make sure everything is well combined.

Step 3: Let It Set

Cover the bowl and refrigerate for at least 2 hours or overnight. This allows the chia seeds to absorb the liquid and thicken into a pudding-like consistency.

Step 4: Choose Your Style—Layer or Blend

Once set, you can either layer the mango puree and chia pudding in serving glasses or blend them together for a smooth texture. Both styles are delicious!

Pro Tips for Perfecting Your Pudding

Side view of creamy mango chia seed pudding featuring fresh mango chunks and sprinkled coconut on top.
  • Stir twice in the first hour: Give the chia seed mixture a stir a couple of times during the first hour to prevent clumping.
  • Check consistency: If it’s too thick for your liking, stir in a bit more coconut milk until you reach your desired texture.
  • Use ripe mango: The riper the mango, the sweeter and more flavorful your pudding will be. Look for bright color and a slight give when you squeeze.
  • Experiment with sweetness: Taste the pudding before serving and adjust the sweetness with more maple syrup if desired.
  • Enhance with toppings: Top with additional mango chunks, toasted coconut, or even nuts for added texture and flavor.

Common Mistakes and Troubleshooting

Even the best cooks encounter hiccups. Here are some common mistakes to avoid:

  • Using old chia seeds: Ensure your chia seeds are fresh for the best texture and nutritional value.
  • Not letting it set: Patience is key! Allow the pudding to set properly for the best results.
  • Overmixing: Once the chia seeds have absorbed the moisture, avoid overmixing to maintain a pleasant texture.

Variations: Customize Your Pudding

The beauty of this pudding is its versatility! Here are some fun variations to try:

  • Berry Bliss: Swap out mango for a mix of berries like strawberries, blueberries, or raspberries.
  • Chocolate Delight: Add cocoa powder to the chia mixture and top with chocolate shavings for a chocolaty twist.
  • Tropical Paradise: Mix in pineapple or passion fruit for an exotic flair.
  • Nutty Flavor: Add almond milk instead of coconut milk and top with chopped nuts for a crunch.

How to Store Leftovers

Your Mango Chia Seed Pudding can be stored in an airtight container in the refrigerator for up to five days. The flavors will meld and enhance over time, making it even tastier!

Frequently Asked Questions

Let’s tackle some common questions that pop up:

  • Can I use other types of milk? Absolutely! Almond milk, oat milk, or any other plant-based milk works well.
  • How long does it take to set? Ideally, let it set for at least 2 hours, but overnight is best for a thicker pudding.
  • Can I make this recipe ahead of time? Yes! This pudding is perfect for meal prep and can last up to five days in the fridge.
  • Is it necessary to add sweetener? Not at all! If your mangoes are sweet enough, you can skip it or use a natural sweetener of your choice.
  • Can I freeze this pudding? While it’s best enjoyed fresh, you can freeze it for up to a month. Just remember to let it thaw in the fridge before serving.
  • What can I use as toppings? Get creative! Fresh fruits, nuts, seeds, or even a drizzle of honey or maple syrup work great.
  • Is this pudding healthy? Yes! It’s rich in nutrients, fiber, and healthy fats, making it a wholesome choice.
  • Can I use frozen mango? Definitely! Just make sure to thaw and drain excess water before blending.

Nutrition Tips and Dietary Adaptations

This Mango Chia Seed Pudding is naturally rich in fiber and healthy fats, making it a great option for a balanced diet. Here are some tips to enhance its nutritional profile:

  • Add protein: Mix in some protein powder or Greek yogurt for an extra boost.
  • Boost with greens: Blend in a handful of spinach for added vitamins without affecting the taste.
  • Mind the sugar: Choose unsweetened coconut milk and adjust sweetness to your preference to control sugar intake.

Equipment Recommendations

To make your preparation easier, here are some kitchen tools you might find handy:

  • High-speed blender: For a smooth mango puree.
  • Mixing bowls: One large for mixing and one for serving.
  • Measuring cups and spoons: To get those ingredient ratios just right!

Serving Suggestions

This pudding is not just a standalone treat! Here are some creative serving ideas:

  • Layer it with granola for a nutritious breakfast parfait.
  • Serve in small jars for a delightful picnic treat.
  • Pair with a tropical fruit salad for a colorful dessert spread.

And there you have it! A comprehensive guide to making Mango Chia Seed Pudding that’s not only delicious but also packed with nutrients. Remember, cooking is about joy and exploration, so don’t be afraid to experiment and make it your own! Enjoy your tropical delight, and happy cooking!

Mango Chia Seed Pudding

Prep Time 10 minutes
Total Time 10 minutes
Servings 4 servings
Calories 250
A creamy and refreshing vegan dessert or breakfast featuring ripe mango and chia seeds, perfect for a quick healthy treat.

Ingredients

Liquid

  • 2 cups coconut milk (full-fat or light)

Seeds

  • ½ cup chia seeds

Sweetener

  • 1 tablespoon maple syrup (optional, adjust to taste)

Flavorings

  • 1 teaspoon vanilla extract

Fruits

  • 2 cups mango chunks (fresh or frozen and thawed)
  • 1 tablespoon lime juice (optional)
  • ½ cup mango chunks (diced)

Toppings

  • 2 tablespoons toasted coconut flakes

Instructions 

  • In a bowl, whisk together coconut milk, chia seeds, maple syrup, and vanilla extract.
  • Let the mixture sit for 5-10 minutes, then stir again to prevent clumping.
  • Divide the pudding into serving jars or bowls and refrigerate for at least 2 hours or overnight.
  • Top with fresh mango chunks, a squeeze of lime juice, and toasted coconut flakes before serving.

Notes

For extra flavor, add a dash of cinnamon or a few mint leaves.
Calories: 250kcal
Cost: $10
Course: Breakfast, Dessert
Cuisine: fusion
Keyword: Mango