Author

michael

Browsing

Welcome, food lovers! Are you ready to embark on a delightful culinary adventure that will warm your heart and fill your belly? Today, we’re diving into the world of creamy coconut rice pudding. This dish is not just a dessert; it’s a comforting hug in a bowl that you can whip up in just 20 minutes! With simple ingredients that you likely already have, you’ll discover how easy it is to transform plain rice into a sweet, creamy delight that the whole family will adore.

This recipe is perfect for busy days when you crave something special without the fuss. Let’s get started and make magic happen in your kitchen!

Why You’ll Love This Recipe

  • Quick & Easy: In just 20 minutes, you can create a delicious dessert that feels indulgent without spending hours in the kitchen.
  • Versatile Ingredients: This recipe uses simple pantry staples like coconut milk and cooked jasmine rice, making it easy to whip up whenever a sweet craving strikes.
  • Customizable: Whether you want to add fruits, nuts, or spices, this pudding is a blank canvas that you can tailor to your liking.
  • Gluten-Free Option: Made with coconut milk and rice, this dessert is naturally gluten-free, making it a great option for those with dietary restrictions.
  • Comforting Flavor: The combination of coconut, vanilla, and a hint of cinnamon creates a rich and satisfying flavor profile that’s hard to resist!

Ingredients Breakdown

Let’s take a closer look at the ingredients you’ll need for this delightful pudding and a few substitutions if you’ve got some dietary restrictions or preferences.

  • Cooked Jasmine Rice: 2 cups. If you don’t have jasmine rice, feel free to use short-grain or any leftover cooked rice you have on hand.
  • Canned Full-Fat Coconut Milk: 13.5 ounces. This is the star of the show! For a lighter version, you can use light coconut milk or a mix of coconut and almond milk.
  • Granulated Sugar: ⅓ cup. Adjust to your taste; you can use honey or maple syrup for a natural sweetener.
  • Salt: ¼ teaspoon. Enhances the flavors beautifully.
  • Additional Milk: ¾ cup. This can be regular milk or more coconut milk for extra flavor.
  • Large Egg: 1. This helps thicken the pudding; if you prefer a vegan option, you can skip it or use a flaxseed egg.
  • Butter: 1 tablespoon. Adds richness; you can substitute with coconut oil for a dairy-free option.
  • Coconut Extract: 1 teaspoon. This boosts the coconut flavor; vanilla extract works well too.
  • Ground Spices: ½ teaspoon cinnamon and ¼ teaspoon ground nutmeg. Feel free to add more if you like your pudding spiced!
  • Optional Toppings: ½ cup sweetened shredded coconut for serving, along with whipped cream for that extra touch of indulgence.

How to Make Coconut Rice Pudding

Now that we have our ingredients ready, let’s roll up our sleeves and get cooking!

  • Step 1: In a medium saucepan, combine cooked rice, coconut milk, sugar, and salt. Stir well and bring the mixture to a gentle boil over medium heat.
  • Step 2: Once boiling, lower the heat and let it simmer gently for about 5 minutes. Stir occasionally until the pudding thickens and becomes creamy.
  • Step 3: In a small bowl, whisk together the egg with additional milk. Gradually stir this mixture into the rice pudding. Cook for another 2 minutes, stirring constantly to ensure the egg is fully incorporated.
  • Step 4: Remove the saucepan from heat and add in the butter, coconut extract, vanilla extract, cinnamon, and nutmeg. Stir until everything is well combined.
  • Step 5: Let the pudding cool slightly before serving. You can enjoy it warm or chilled, and don’t forget the optional toppings of whipped cream and toasted coconut!

Pro Tips for the Perfect Pudding

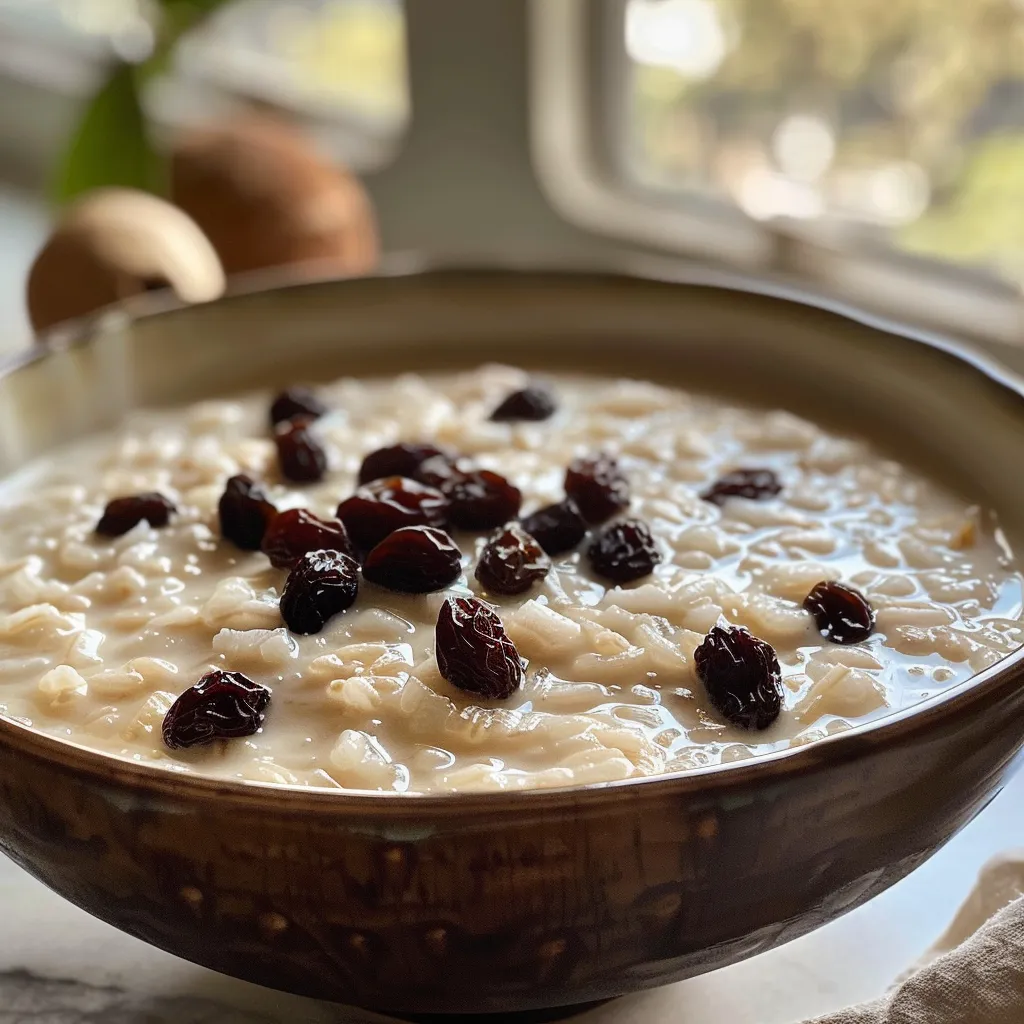
Side view of luscious coconut rice pudding garnished with shredded coconut.
  • Use Quality Ingredients: The flavor of your pudding relies heavily on the quality of your coconut milk. Always opt for full-fat for the best results.
  • Don’t Rush the Cooking: Allow the pudding to simmer gently; high heat can cause it to curdle.
  • Stir Often: This prevents sticking and ensures even cooking, resulting in a creamy texture.
  • Experiment with Flavors: Add a splash of almond extract or a few drops of rum extract for a different twist.
  • Serve Hot or Cold: This pudding is delightful at any temperature! Try it warm with a sprinkle of cinnamon or chilled topped with fresh fruit.
  • Make It Ahead: This pudding stores well in the fridge, making it a great option for meal prep.
  • Garnish Wisely: Toasted coconut or nuts add crunch and a lovely visual appeal.
  • Experiment with Sweetness: Adjust sugar levels based on your preference and the sweetness of your coconut milk.

Common Mistakes and Troubleshooting

Even the best cooks encounter a mishap now and then! Here are some common pitfalls and how to avoid them:

  • Too Runny? If your pudding is too thin, continue to simmer it until it thickens to your desired consistency.
  • Too Thick? Stir in a little extra milk to reach your preferred texture.
  • Egg Curdled? Make sure to whisk the egg thoroughly before adding it to the hot mixture, and stir constantly to avoid cooking it too quickly.
  • Flavor Too Mild? Don’t hesitate to add a bit more cinnamon or vanilla to enhance the flavor.

Variations & Substitutions

The beauty of rice pudding lies in its versatility. Here are some variations to inspire your creativity:

  • Chocolate Coconut Rice Pudding: Add cocoa powder to the mixture for a chocolatey twist.
  • Fruit-Infused: Stir in fresh or frozen fruits like mango or berries for a burst of flavor and color.
  • Nutty Delight: Toss in chopped nuts such as almonds or pistachios for added crunch.
  • Spiced Pumpkin: Mix in pumpkin puree and pumpkin spice for a seasonal variation.

Storage and Make-Ahead Instructions

This pudding is perfect for meal prep! Here’s how to store it:

  • Refrigeration: Store in an airtight container in the refrigerator for up to 4 days.
  • Freezing: While it’s best enjoyed fresh, you can freeze for up to 1 month. Thaw in the fridge overnight and reheat gently on the stovetop.
  • Make Ahead: Prepare a batch ahead of time for a quick dessert option during the week!

Frequently Asked Questions (FAQs)

  • Can I use other types of rice? Yes! While jasmine rice works beautifully, you can use arborio or short-grain rice.
  • How do I make it dairy-free? Simply use coconut milk and omit the butter or substitute it with coconut oil.
  • Can I double the recipe? Absolutely! Just make sure to use a larger pot to accommodate the extra volume.
  • What can I serve with coconut rice pudding? It pairs wonderfully with fresh fruits, nuts, or a dollop of whipped cream.
  • How long does it take to set? The pudding thickens as it cools, so allow it to rest for about 10 minutes before serving.
  • Can I add flavors like almond or lemon? Yes! Feel free to experiment with different extracts to customize your pudding.
  • Is this recipe kid-friendly? Yes! Kids love the sweet, creamy texture and can help with mixing.
  • What’s the best way to reheat leftovers? Gently warm it on the stove with a splash of milk or coconut milk to restore its creaminess.

Nutritional Tips and Dietary Adaptations

This rice pudding can easily be adapted to suit various dietary needs:

  • Low Sugar Option: Reduce the sugar or use a sugar substitute like stevia or erythritol.
  • Vegan Option: Omit the egg and use a plant-based milk and butter substitute.
  • High Protein Boost: Stir in some protein powder or Greek yogurt before serving for a nutritional upgrade.

Equipment Recommendations

To make your cooking experience smoother, here are some essential tools:

  • Medium Saucepan: For cooking the pudding.
  • Whisk: Essential for mixing the egg and avoiding lumps.
  • Measuring Cups and Spoons: For precise ingredient measurements.
  • Spatula: To scrape the sides of the pan and ensure even cooking.

Serving Suggestions

To elevate your rice pudding experience, consider these serving ideas:

  • Top with Whipped Cream: A dollop of lightly sweetened whipped cream adds a decadent touch.
  • Fresh Fruits: Sliced bananas, mangoes, or berries add freshness and color.
  • Toasted Coconut: Sprinkle some toasted coconut flakes on top for extra texture and flavor.
  • Chocolate Drizzle: For a sweet twist, drizzle melted chocolate over the top!

And there you have it! A comprehensive guide to creating the perfect creamy coconut rice pudding. Remember, the kitchen is a space for creativity, so don’t hesitate to make this recipe your own. Enjoy the process and the delicious results!

20-Minute Creamy Coconut Rice Pudding Recipe

Prep Time 5 minutes
Cook Time 15 minutes
Total Time 20 minutes
Servings 4 servings
Calories 350
A quick and delicious rice pudding infused with coconut flavor, perfect for a comforting dessert in just 20 minutes.

Ingredients

Rice and liquids

  • 2 cups cooked Jasmine rice
  • 13.5 ounce canned full-fat coconut milk
  • ¾ cup milk or additional coconut milk

Dry ingredients

  • cup granulated sugar
  • ¼ teaspoon salt

Egg and flavorings

  • 1 large egg
  • 1 tablespoon butter
  • 1 teaspoon coconut extract
  • ½ teaspoon vanilla extract

Spices and toppings

  • ½ teaspoon cinnamon
  • ¼ teaspoon ground nutmeg
  • ½ cup sweetened shredded coconut (optional) (for serving)
  • 1 cup heavy cream
  • ¼ cup powdered sugar
  • ½ teaspoon vanilla extract

Instructions 

  • Add cooked rice, coconut milk, sugar, and salt to a saucepan. Bring to a boil, then simmer for 5 minutes until thick and creamy.
  • Whisk egg with additional milk, then stir into the rice mixture. Cook for 2 minutes, stirring constantly.
  • Remove from heat and stir in butter, coconut extract, vanilla, cinnamon, and nutmeg. Cool slightly before serving.

Notes

For extra flavor, top with toasted coconut and whipped cream.
Calories: 350kcal
Cost: $12
Course: Dessert
Cuisine: fusion
Keyword: rice pudding

Discover the Joy of Baking: Effortless Baked Cinnamon Apples

There’s something magical about the aroma of baked cinnamon apples wafting through your home. If you’ve ever wondered how to create a cozy dessert that feels like a warm hug, you’re in the right place! This recipe for baked cinnamon apples is simple yet delightful, making it a perfect treat for any day of the week. With just a handful of ingredients, you can transform ordinary apples into a sweet, comforting dish that’s sure to impress your family and friends.

Whether you’re looking for a quick dessert idea or a way to use up those apples sitting in your fruit bowl, this recipe is here to save the day. Let’s dive into why you’ll absolutely love these baked apples and how to make them your own!

Why You’ll Love This Recipe

  • Quick and Easy: With just 6 ingredients and 40 minutes, you can whip up this delicious dessert in no time!
  • Versatile Serving Options: Enjoy them warm on their own, or elevate your experience by serving with a scoop of ice cream, yogurt, or atop oatmeal.
  • Perfect for All Occasions: Whether it’s a cozy family dinner or a festive gathering, these cinnamon apples are a hit!
  • Healthier Twist: Baked with minimal added sugars, this dish offers a sweet treat without the guilt.
  • Customizable Recipe: Adjust spices and toppings to suit your taste; the possibilities are endless!

Ingredient Breakdown

Let’s take a closer look at the ingredients you’ll need to create these delightful baked cinnamon apples:

  • Apples (6 medium): Choose firm varieties like Honeycrisp or Granny Smith for the best results. They hold their shape well and provide a perfect balance of sweetness and tartness.
  • Brown Sugar (1/3 cup): Adds a rich, caramel-like flavor. You can substitute with coconut sugar for a healthier option.
  • Granulated Sugar (2 tablespoons): Enhances sweetness; feel free to reduce for less sweetness or use a sugar substitute.
  • Ground Cinnamon (2 teaspoons): The star of the show! You can also add nutmeg for a spiced twist.
  • Nutmeg (1/4 teaspoon): A pinch adds warmth and depth to the flavor.
  • Butter (4 tablespoons): Use unsalted butter, cut into small cubes. For a dairy-free option, coconut oil works well.
  • Vanilla Extract (1 teaspoon): A splash of vanilla elevates the overall flavor.
  • Salt (1/8 teaspoon): Balances sweetness and enhances flavors.

Ingredient Substitutions

Juicy baked cinnamon apples in a serving dish, showcasing their caramelized edges.

Don’t have all the ingredients? No problem! Here are a few substitutions you can make:

  • Apples: Other great options include Fuji or Braeburn apples.
  • Brown Sugar: Maple syrup can be used in place of brown sugar for a unique flavor.
  • Butter: For a vegan alternative, use margarine or a plant-based butter.
  • Vanilla Extract: Almond extract can be a lovely alternative for a different flavor profile.

Step-by-Step Instructions

Now, let’s get to the fun part! Here’s how to make your baked cinnamon apples:

  1. Preheat your oven to 375°F (190°C) and lightly grease a baking dish.
  2. In a large bowl, toss the apple slices with brown sugar, granulated sugar, cinnamon, nutmeg, vanilla, and salt until evenly coated.
  3. Transfer the apples to the baking dish and dot the top with cubes of butter.
  4. Spread apples into an even layer, ensuring they’re snug but not overcrowded.
  5. Bake uncovered for 35–40 minutes, stirring once halfway through, until apples are tender and the sauce is bubbling.
  6. Let cool slightly to allow the sauce to thicken.
  7. Serve warm as is, or with a scoop of ice cream, on pancakes, or over oatmeal.

Pro Tips for Perfect Results

To ensure your baked cinnamon apples turn out perfectly, keep these expert tips in mind:

  • Choose the right apples: Firm, tart-sweet varieties like Honeycrisp or Granny Smith hold their shape best during baking.
  • Slice evenly: Ensure apple slices are uniform in thickness for consistent cooking; aim for about 1/4 inch thick.
  • Layer flavors: Combine cinnamon with nutmeg or allspice for added warmth.
  • Don’t skip the salt: A pinch of salt elevates sweetness and enhances the overall flavor profile.
  • Experiment with spices: Try adding ginger or cardamom for a unique twist.
  • Use a glass baking dish: This allows you to monitor the browning of the apples as they bake.
  • Cover for a softer texture: If you prefer softer apples, cover the dish with foil for the first 20 minutes of baking.
  • Check for doneness: The apples should feel tender when gently pressed with a fork.

Common Mistakes and Troubleshooting

Even seasoned cooks can run into a few hiccups. Here’s how to avoid common mistakes:

  • Overbaking: Keep an eye on the apples; overbaking will lead to mushy apples. You want them tender but still holding their shape.
  • Too sweet: If you find the dish too sugary, reduce the amount of granulated sugar in the recipe next time.
  • Flavorless apples: Using fresh, ripe apples is key; avoid old or overly soft apples.

Variations to Try

Feeling creative? Here are a few variations you can try:

  • Nutty Delight: Add chopped nuts like walnuts or pecans for crunch.
  • Caramel Drizzle: Drizzle with caramel sauce before serving for a decadent treat.
  • Spiced Up: Add a tablespoon of bourbon or rum for an adult twist.
  • Berry Bliss: Add a cup of fresh or frozen berries for a fruity burst.

Storage and Make-Ahead Instructions

Want to prepare these delicious baked apples ahead of time? Here’s how:

  • Make-Ahead: You can prep the apple mixture a day in advance and store it in the fridge until you’re ready to bake.
  • Storage: Store leftovers in an airtight container in the fridge for up to 3 days.
  • Reheating: Reheat in the oven at 350°F (175°C) for about 10-15 minutes or in the microwave for a quick warm-up.

Frequently Asked Questions

Got questions? We’ve got answers! Here are some common queries about this recipe:

  • Can I use frozen apples? Fresh apples yield the best results, but you can use frozen if necessary. Just thaw and drain excess moisture.
  • Can I double the recipe? Absolutely! Just use a larger baking dish and adjust baking time as necessary.
  • What type of apples are best? Firm apples like Granny Smith, Honeycrisp, or Fuji work best for baking.
  • Can I make this gluten-free? Yes! This recipe is naturally gluten-free as it contains no flour.
  • How can I make this vegan? Substitute butter with coconut oil or a plant-based butter and skip the dairy toppings.
  • Can I add other fruits? Certainly! Pears or berries complement the dish beautifully.
  • How do I know when the apples are done? They should be tender but not mushy; test with a fork.
  • What should I serve with baked apples? Delicious on their own or pair with ice cream, yogurt, or pancakes for a delightful treat.

Nutritional Tips and Dietary Adaptations

If you’re mindful of your dietary needs, here are some helpful tips:

  • Reduce Sugar: Use less sugar or substitute with natural sweeteners like honey or maple syrup.
  • Increase Fiber: Serve with a scoop of oatmeal or sprinkle chia seeds for added nutrition.
  • Dairy-Free Options: Use plant-based ice cream or yogurt to keep it dairy-free.

Equipment Recommendations

For this recipe, you’ll need:

  • Baking Dish: A 9×13 inch glass or ceramic baking dish is perfect.
  • Mixing Bowl: A large mixing bowl for tossing the apples and ingredients.
  • Measuring Cups and Spoons: Essential for accurate ingredient measurements.

Serving Suggestions

To make your dessert even more special, here are some serving ideas:

  • À la Mode: Serve warm baked apples with a scoop of vanilla ice cream for a classic pairing.
  • With Yogurt: Top with Greek yogurt and a drizzle of honey for a healthier option.
  • Pancake Topping: Use as a topping for pancakes or waffles for a delicious breakfast treat.
  • Oatmeal Addition: Stir into oatmeal for a comforting breakfast.

In conclusion, these baked cinnamon apples are not just a recipe; they are an opportunity to create warmth, comfort, and joy in your kitchen. With simple steps and delightful variations, you can make this dish your own. So go ahead, gather your ingredients, and embrace the joy of baking! Remember, cooking is as much about the journey as it is about the destination. Happy baking!

Baked Cinnamon Apples

Prep Time 10 minutes
Cook Time 40 minutes
Total Time 50 minutes
Servings 4 servings
Calories 180
Enjoy warm, tender apples infused with cinnamon and nutmeg, perfect for a cozy dessert or snack.

Ingredients

Fruits

  • 6 medium Apples (Honeycrisp or Granny Smith) (peeled and sliced)
  • 1/3 cup Brown Sugar
  • 2 tablespoons Granulated Sugar
  • 2 teaspoons Ground Cinnamon
  • 1/4 teaspoon Nutmeg
  • 4 tablespoons Butter (cut into small cubes)
  • 1 teaspoon Vanilla Extract
  • 1/8 teaspoon Salt

Instructions 

  • Preheat oven to 375°F (190°C) and grease a baking dish.
  • Toss apple slices with sugars, cinnamon, nutmeg, vanilla, and salt until coated.
  • Transfer apples to dish, dot with butter cubes.
  • Bake for 35–40 minutes, stirring halfway, until tender and bubbling.
  • Let cool slightly before serving warm.

Notes

This simple baked apple recipe is perfect for a comforting dessert or snack.
Calories: 180kcal
Cost: $10
Course: Dessert
Cuisine: American
Keyword: apples

Discover the Joy of Easy Baked Apples

Welcome to a cozy corner of culinary delight! Today, we’re diving into the heartwarming world of baked apples. Perfectly sweet and tender, these baked beauties are not only delicious but also incredibly easy to whip up. In under an hour, you can have a delightful dessert that evokes the essence of fall—no matter the season. Let’s explore how to make this classic treat that pairs beautifully with a scoop of vanilla ice cream.

Why You’ll Love This Recipe

  • Quick and Easy: With just a handful of ingredients and minimal prep time, you can create a heartwarming dessert that everyone will love.
  • Customizable: Whether you prefer a sprinkle of nuts, a dash of spice, or a drizzle of caramel sauce, this recipe allows you to personalize it to your taste.
  • Perfect for All Occasions: From family dinners to festive gatherings, these baked apples are a crowd-pleaser.
  • Healthy Dessert Option: Made with fresh apples and minimal sugar, they offer a wholesome alternative to traditional desserts.
  • Great for Leftovers: Any leftovers can be easily stored and enjoyed later, making this dish a convenient choice.

Ingredient Breakdown

Now, let’s get to the good stuff! Here’s what you’ll need to create your own batch of easy baked apples:

  • Apples: 3 medium firm, sweet apples, like Honeycrisp or Fuji. You can also use Granny Smith for a tart contrast.
  • Cinnamon: 1/2 teaspoon ground cinnamon, divided, to enhance the natural sweetness of the apples.
  • Brown Sugar: 1/2 cup (100g) brown sugar, plus 1 tablespoon for the apples, to create a lovely caramelized topping.
  • Unsalted Butter: 8 tablespoons (113g), melted, for richness and flavor.
  • All-Purpose Flour: 3/4 cup (98g) for the topping’s texture.
  • Old-Fashioned Rolled Oats: 3/4 cup (84g) to add a delightful crunch.
  • Fine Sea Salt: 1/8 teaspoon, to balance the sweetness.
  • Optional for Serving: Vanilla ice cream and homemade caramel sauce for that extra indulgence.

How to Make the Best Baked Apples

Juicy baked apples topped with a scoop of vanilla ice cream.

Ready to get baking? Follow these simple steps for a delightful dessert!

  • Preheat the Oven: Set your oven to 375°F (190°C). Butter or spray a baking dish large enough to fit 6 apple halves with non-stick cooking spray.
  • Prepare the Apples: Cut each apple in half from stem to end and use a spoon to scoop out the core, seeds, and stem.
  • Arrange the Apples: Place the apple halves in the baking dish with the flesh facing up.
  • Add Sugar and Spice: Scatter over 1 tablespoon of brown sugar and 1/4 teaspoon of cinnamon over the apples to enhance their natural sweetness.
  • Make the Topping: Melt the butter in a pan over medium heat. Remove it from the heat, then stir the flour, oats, brown sugar, remaining 1/4 teaspoon of cinnamon, and salt into the melted butter until well combined.
  • Top the Apples: Divide the topping between the apples, lightly pressing it down onto the fruit.
  • Bake: Cover with aluminum foil and bake for 25 minutes. Then uncover the apples, and bake for another 20 to 30 minutes until the apples are soft and the topping has browned.
  • Serve and Enjoy: Serve warm with a scoop of ice cream or a drizzle of caramel sauce, or enjoy them plain for a lighter option.

Pro Tips for Perfect Baked Apples

  • Choose the Right Apples: Firm apples hold up better during baking and provide the perfect texture.
  • Experiment with Spices: Try adding nutmeg or allspice for a little twist on traditional cinnamon.
  • Go Nutty: Add chopped nuts to the topping for an extra crunch and flavor boost.
  • Make it Vegan: Substitute the butter with coconut oil and use a plant-based ice cream to keep it dairy-free.
  • Don’t Overbake: Keep an eye on your apples; they should be tender but not mushy.
  • Check for Doneness: Use a fork to test the apples; they should be easily pierced but still hold their shape.
  • Serve Warm: Baked apples are best enjoyed warm, right out of the oven.
  • Pair with Ice Cream: A scoop of vanilla ice cream melts beautifully over the warm apples, creating a delectable contrast.

Common Mistakes and Troubleshooting

Even the best cooks make mistakes! Here’s how to avoid common pitfalls:

  • Overcooking: If your apples turn mushy, reduce baking time next time.
  • Underseasoning: Don’t skimp on the cinnamon or sugar; they enhance the flavor tremendously.
  • Wrong Apple Variety: Avoid using soft apples like Red Delicious; they won’t hold up during baking.
  • Not Covering: Cover with foil initially to trap steam and ensure even cooking.

Delicious Variations

Looking to mix things up? Here are some fun variations to try:

  • Caramel Apple Baked Apples: Drizzle caramel sauce over the apples before baking for a decadent touch.
  • Nutty Oat Topping: Add a mix of chopped pecans or walnuts to the topping for a crunch.
  • Chocolate Chip Baked Apples: Sprinkle mini chocolate chips over the topping for a sweet surprise.
  • Stuffed Baked Apples: Fill the center with a mixture of oats, nuts, and dried fruits before baking.

Storage and Make-Ahead Instructions

Want to prepare ahead? Here’s how to store your baked apples:

  • Storing: Keep baked apples in an airtight container in the fridge for up to 5 days.
  • Reheating: Reheat in the microwave for a quick treat, or pop them back in the oven to warm and crisp up the topping.
  • Make-Ahead: You can prepare the apples and topping separately, then assemble and bake them when you’re ready to serve.

Frequently Asked Questions

Here are some common questions you might have:

  • Can I use different types of apples? Absolutely! Just make sure they are firm varieties for the best results.
  • What can I use instead of brown sugar? You can substitute with white sugar or coconut sugar, but the flavor will vary slightly.
  • How long do baked apples last? Stored in an airtight container, they can last up to 5 days in the fridge.
  • Can I freeze baked apples? Yes, they freeze well! Just make sure to cool them completely before freezing.
  • What’s the best way to serve baked apples? They are delightful warm, served with vanilla ice cream or a drizzle of caramel.
  • Can I make this recipe gluten-free? Yes, simply substitute all-purpose flour with a gluten-free flour blend.
  • How do I know when they are done? The apples should be tender but still hold their shape, and the topping should be golden brown.
  • Can I add other fruits? Yes, consider adding cranberries or raisins for added flavor and texture.

Nutritional Tips and Dietary Adaptations

For those watching their diet, here are some tips:

  • Reduce Sugar: You can cut back on the brown sugar for a lighter dessert.
  • Healthy Fats: Use coconut oil instead of butter for a dairy-free option.
  • Increase Fiber: Add chia seeds or flaxseeds to the topping for a nutrient boost.

Recommended Equipment

To make your baking experience smooth, here’s what you need:

  • Baking Dish: A medium-sized dish works best for this recipe.
  • Mixing Bowls: A couple of mixing bowls for the topping and apples.
  • Measuring Cups and Spoons: Accurate measurements are key for great results.
  • Spoon: To scoop out the apple cores easily.

Serving Suggestions

Finally, here are some serving ideas to elevate your baked apples:

  • Drizzle of Caramel: A drizzle of homemade or store-bought caramel sauce takes it to the next level.
  • Whipped Cream: A dollop of whipped cream adds an indulgent touch.
  • Fresh Nuts: Top with toasted nuts for added crunch and nutrition.
  • Warm Spices: Serve with a sprinkle of nutmeg or ginger for extra warmth.

So there you have it! A comprehensive guide to crafting easy baked apples that are not only simple but also incredibly satisfying. Remember, cooking should be fun and enjoyable—so gather your ingredients, invite your family to help, and create something delicious together. Happy baking!

Easy Baked Apples

Prep Time 10 minutes
Cook Time 45 minutes
Total Time 55 minutes
Servings 6 servings
Calories 250
Delight in these warm, tender baked apples topped with a sweet cinnamon-oat crumble, perfect for a cozy dessert.

Ingredients

Apples

  • 3 medium firm, sweet apples (like Honeycrisp or Fuji)
  • 1/2 teaspoon ground cinnamon, divided
  • 1/2 cup brown sugar (plus 1 tablespoon for apples)
  • 8 tablespoons unsalted butter
  • 3/4 cup all-purpose flour
  • 3/4 cup old-fashioned rolled oats
  • 1/8 teaspoon fine sea salt
  • as needed Vanilla ice cream and homemade caramel sauce (optional for serving)

Instructions 

  • Preheat oven to 375°F (190°C). Prepare a baking dish with non-stick spray.
  • Cut apples in half, core, and arrange in dish flesh side up.
  • Sprinkle 1 tablespoon brown sugar and 1/4 teaspoon cinnamon over apples.
  • Melt butter, then stir in flour, oats, remaining cinnamon, salt, and brown sugar to make topping.
  • Divide topping over apples, cover with foil, and bake 25 minutes. Uncover and bake 20-30 minutes until tender and browned.

Notes

Serve warm with ice cream and caramel for extra indulgence.
Calories: 250kcal
Cost: $15
Course: Dessert
Keyword: apples

Heavenly Coconut Milk Rice Pudding: A Comforting Delight

Welcome to a cozy corner of the culinary world where simplicity meets flavor! This easy Coconut Milk Rice Pudding recipe is the perfect antidote to busy days, offering a creamy texture and comforting warmth that feels like a hug in a bowl. Made with just a handful of ingredients, you’ll find that this delightful dessert is not only incredibly satisfying but also a breeze to whip up. Whether you enjoy it warm or chilled, this pudding will surely become a family favorite.

Why You’ll Love This Recipe

  • Quick and Easy: With minimal prep time and straightforward instructions, you can have this pudding ready in under an hour!
  • Versatile Flavor: Customize your pudding with various toppings or mix-ins, making it a delightful treat for everyone.
  • Healthy Ingredients: Made with wholesome coconut milk and optional natural sweeteners, you can indulge without the guilt.
  • Perfect for Any Occasion: Whether it’s a weeknight dessert or a fancy dinner party treat, this pudding fits the bill.
  • Family-Friendly: Kids and adults alike will love the creamy texture and sweet flavor — it’s a great way to introduce new tastes!

Ingredients Breakdown

Let’s dive into the star players of this coconut rice pudding. Understanding each ingredient will help you appreciate the flavors and make substitutions if needed.

  • 1/2 cup white rice: Ideally soaked in water for several hours before cooking. This helps ensure a creamy consistency. You can use medium-grain rice like arborio for an even richer texture.
  • 2 cups full-fat coconut milk: This ingredient is responsible for the pudding’s luscious creaminess. I often recommend using this brand for the best flavor.
  • 1/2 cup raisins (optional): For a touch of sweetness and texture, add raisins. You can also substitute with dried cranberries or leave them out entirely for a simpler dish.
  • 1 tablespoon coconut oil: Adds rich flavor and enhances the pudding’s silkiness. Again, I prefer this brand for quality.
  • 1 teaspoon ground cinnamon: A warm, comforting spice that elevates the flavor profile. Don’t be shy with the cinnamon, as it creates a lovely aroma!
  • 1/4 teaspoon cardamom: This aromatic spice adds depth; a little goes a long way.
  • 1/2 teaspoon lemon juice: Brightens the flavor and balances the sweetness.
  • Sugar or raw honey to taste: Sweeten your pudding to your preference. I love using this brand of honey for a unique flavor.

Step-by-Step Instructions

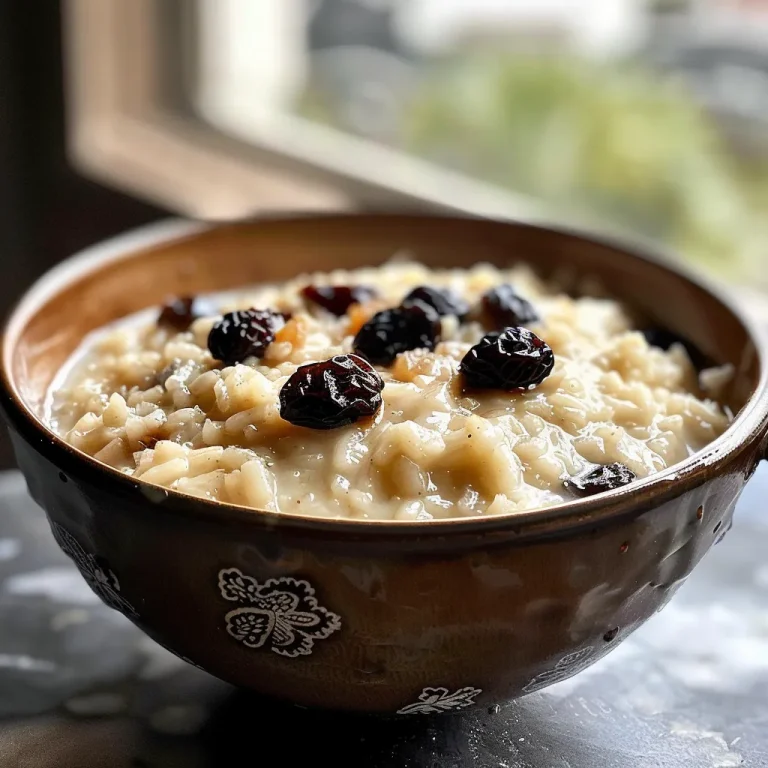
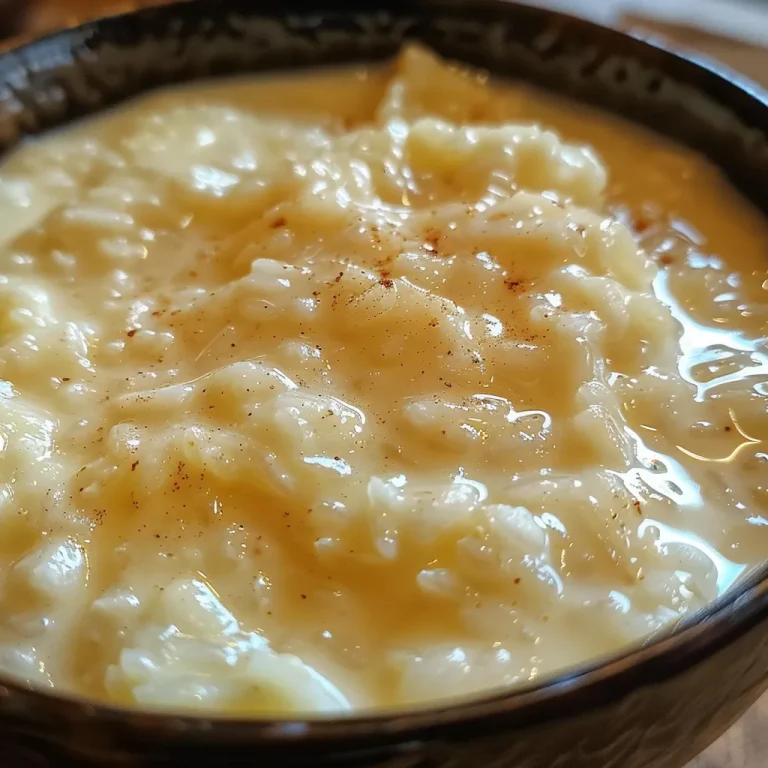
Side view of rice pudding made with coconut milk, showing a smooth, luscious texture.

Now, let’s get cooking! Follow these simple steps to create your heavenly coconut rice pudding.

  • In a large saucepan, combine all of the ingredients except for the honey.
  • Bring the mixture to a gentle boil over medium-high heat, stirring occasionally to prevent sticking.
  • Reduce heat to low, cover, and cook for about 30 minutes, stirring frequently until the pudding thickens and the rice becomes tender. Keep an eye on it!
  • Once thickened, stir in raw honey to taste. I find that the natural sweetness of the coconut milk often suffices.

Expert Tips for Perfect Pudding

To elevate your coconut rice pudding to the next level, consider these pro tips:

  • Soaking rice: Soak your rice for at least a few hours or overnight. This not only helps with cooking but also enhances the overall creaminess.
  • Consistency matters: If your pudding is too thick after cooling, stir in a bit of warm coconut milk to reach your desired consistency before serving.
  • Flavor enhancers: Consider adding a splash of vanilla extract for a fragrant twist, or a pinch of nutmeg for extra warmth.
  • Storage tips: Store leftovers in an airtight container in the fridge for up to 3 days. The pudding will thicken as it cools, so add a little coconut milk when reheating.
  • Garnish wisely: Top with toasted coconut flakes, fresh fruit, or a dollop of whipped cream for added flair!
  • Experiment: Don’t hesitate to try different rice varieties! Jasmine rice adds a floral note, while short-grain sushi rice creates an even creamier pudding.
  • Chill out: If you prefer a chilled dessert, let the pudding cool at room temperature before transferring it to the fridge. It’s just as delicious cold!
  • Watch the heat: Keep the heat low while cooking to prevent the pudding from scalding, which can ruin the flavor.
  • Use high-quality ingredients: It’s worth investing in good coconut milk and honey to enhance the flavor of your pudding.

Common Mistakes and Troubleshooting

Even the best of us can make a mistake in the kitchen. Here are some common pitfalls and how to avoid them:

  • Overcooking the rice: Keep an eye on your pudding as it cooks. Overcooked rice can become mushy, ruining the texture.
  • Too much sweetness: Start with less sugar or honey and adjust to your taste. You can always add more, but it’s tricky to fix an overly sweet pudding!
  • Not stirring enough: Regular stirring prevents the rice from sticking to the bottom of the pan and ensures even cooking.
  • Forgetting to soak the rice: If time is short, you can skip soaking, but the pudding may not be as creamy. Soaking is highly recommended for the best results.

Variations to Try

Feeling adventurous? Here are some delightful variations of coconut rice pudding to mix things up:

  • Chocolate Coconut Rice Pudding: Stir in cocoa powder or melted dark chocolate for a decadent twist.
  • Tropical Paradise: Add pineapple chunks and garnish with toasted coconut for a tropical vibe.
  • Spiced Coconut Rice Pudding: Incorporate spices like ginger or clove for a warming, aromatic version.
  • Nutty Delight: Mix in chopped nuts such as almonds or pistachios for added crunch and flavor.

Storage and Make-Ahead Instructions

Planning ahead? Here’s how to store and prepare your pudding in advance:

  • Store leftovers in airtight containers in the fridge for up to 3 days. Reheat gently on the stovetop or in the microwave, adding a splash of coconut milk if needed.
  • For make-ahead options, prepare the pudding a day in advance and store it in the fridge. Let it cool completely before covering.
  • Freeze portions in freezer-safe containers for up to 3 months. Thaw in the fridge overnight before reheating.

Frequently Asked Questions

Here’s a collection of common questions about coconut rice pudding:

  • Can I use brown rice instead? Yes, but be aware that brown rice will require a longer cooking time and may result in a chewier texture.
  • Is this recipe gluten-free? Absolutely! This coconut rice pudding is naturally gluten-free, making it a great option for those with dietary restrictions.
  • What’s the best way to serve coconut rice pudding? Serve it warm in bowls, topped with fresh fruit, nuts, or a sprinkle of cinnamon for a delightful presentation.
  • Can I make this vegan? Yes! As written, the recipe is already vegan-friendly if you use plant-based sweeteners.
  • How can I thicken the pudding? If your pudding isn’t thickening, cook it a little longer, stirring frequently until it reaches your desired consistency.
  • Can I use light coconut milk? You can, but the pudding may not be as rich and creamy. Full-fat coconut milk is recommended for the best flavor.
  • What’s the nutritional information? The nutritional information varies based on the ingredients used. For a rough estimate, consider the calories, fats, and sugars involved in the recipe.
  • Can I make this ahead of time? Yes! You can prepare the pudding in advance and store it in the fridge until you’re ready to serve.

Nutritional Information and Dietary Adaptations

This coconut rice pudding is not just delicious; it can also be tailored to meet various dietary needs:

  • Low-Fat Option: Use light coconut milk or substitute some of the coconut milk with almond milk.
  • Refined Sugar-Free: Sweeten your pudding with mashed bananas or dates instead of sugar or honey.
  • Nut-Free Version: Omit any nuts from the recipe or toppings to make it safe for those with nut allergies.

Equipment Recommendations

To make this coconut rice pudding, you’ll need:

  • Medium saucepan: A good-quality saucepan is essential for even cooking.
  • Wooden spoon or spatula: Ideal for stirring the pudding without scratching your cookware.
  • Measuring cups and spoons: Accurate measurements are key to ensuring the best results.

Serving Suggestions

Finally, let’s talk about how to serve your creamy coconut rice pudding:

  • Warm or Chilled: Enjoy it straight from the stove or let it cool and serve it cold — both options are delightful!
  • Toppings Galore: Go wild with toppings! Fresh berries, chocolate shavings, or a drizzle of caramel sauce can elevate your dessert.
  • Pairing: Serve alongside a cup of herbal tea or a scoop of vanilla ice cream for an indulgent treat.

Final Thoughts

Cooking should be a joyful experience, and this coconut milk rice pudding embodies that spirit. With its comforting flavors and simple preparation, it’s a dish that brings people together around the table. So, roll up your sleeves and dive into this heavenly recipe — deliciousness is just a few steps away! Remember, cooking doesn’t have to be perfect; it just has to be made with love. Happy cooking!

Easy Coconut Milk Rice Pudding

Prep Time 10 minutes
Cook Time 30 minutes
Total Time 40 minutes
Servings 4 servings
Calories 250
A creamy and comforting rice pudding made with coconut milk, perfect for a quick dessert or snack.

Ingredients

Rice

  • 0.5 cup white rice (preferably soaked in water for several hours)
  • 2 cups full-fat coconut milk (I like this brand)
  • 0.5 cup raisins (optional)
  • 1 tablespoon coconut oil (I like this brand)
  • 1 teaspoon ground cinnamon (this is a great buy)
  • 0.25 teaspoon cardamom
  • 0.5 teaspoon lemon juice
  • to taste none sugar or raw honey (I love this brand)

Instructions 

  • Combine all ingredients except honey in a large saucepan.
  • Bring to a gentle boil over medium-high heat.
  • Reduce heat, cover, and simmer for 30 minutes, stirring frequently.
  • Stir in honey to taste if desired.

Notes

Adjust sweetness to your preference by adding honey gradually.
Calories: 250kcal
Cost: $10
Course: Dessert
Cuisine: fusion
Keyword: coconut, Rice

Discover the Magic of Mango Matcha Chia Pudding

If you’re on the hunt for a deliciously refreshing and nutritious treat, look no further than this Mango Matcha Chia Pudding! Combining the tropical sweetness of ripe mangoes with the earthy notes of matcha, this pudding is not just easy to make, it’s also a feast for your taste buds. Perfect for meal prep, breakfast, or a delightful snack, this pudding is here to elevate your culinary game without any fuss!

Imagine digging into a bowl of creamy, vibrant pudding that’s not only good for you but also satisfies your sweet cravings. Let’s dive into why this recipe deserves a top spot in your kitchen repertoire!

Why You’ll Love This Mango Matcha Chia Pudding

  • Quick & Easy: With just a few simple ingredients and minimal prep time, you can whip up this delightful pudding in no time, making it a fantastic option for busy mornings or last-minute desserts.
  • Nutritious Powerhouse: Packed with nutrients from chia seeds, matcha, and mango, this pudding provides a healthy dose of antioxidants, fiber, and vitamins to keep you energized throughout the day.
  • Versatile & Customizable: Feel free to play around with ingredients! Swap in your favorite non-dairy milk or add nuts and seeds for extra crunch. The possibilities are endless!
  • Perfect for Meal Prep: This pudding keeps well in the fridge, making it an ideal choice for those who like to prepare meals ahead of time. Just store it in individual jars for easy grab-and-go snacks.
  • Kid-Friendly: With its sweet taste and fun texture, this pudding is a hit among kids! It’s a great way to sneak in some healthy ingredients without them even noticing.

Key Ingredients for Mango Matcha Chia Pudding

Let’s break down the ingredients you’ll need to create this delightful pudding:

  • 1 cup coconut milk: Use unsweetened coconut milk for the best flavor, or substitute with almond milk for a lighter option.
  • 1/4 cup chia seeds: These tiny seeds are the secret to achieving that perfect thick pudding consistency.
  • 2-3 tablespoons maple syrup or honey: Adjust the sweetness to your taste; both sweeteners work beautifully in this recipe.
  • 1 teaspoon matcha powder: Opt for culinary-grade matcha for the best taste and vibrant color.
  • 1/2 teaspoon vanilla extract: A touch of vanilla enhances the overall flavor profile.
  • 1 ripe mango: Diced mango adds natural sweetness and texture; reserve some for topping!

How to Make Mango Matcha Chia Pudding

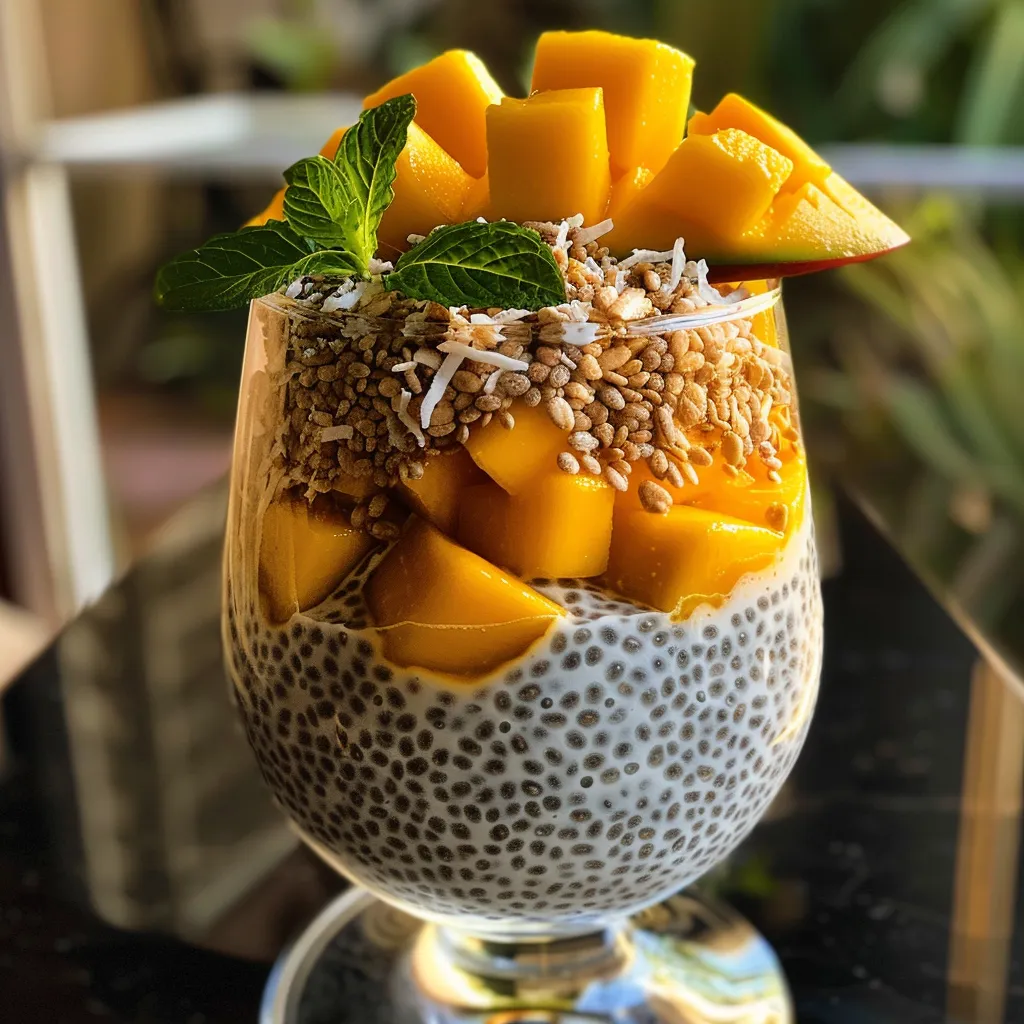
A vibrant layer of Mango Matcha Chia Pudding in a glass, highlighting the green and orange colors.

Now that you have your ingredients ready, let’s get into the step-by-step process of making this delicious pudding:

  • Step 1: In a mixing bowl, combine the coconut milk, chia seeds, maple syrup or honey, matcha powder, and vanilla extract. Whisk until well combined.
  • Step 2: Allow the mixture to sit for about 5 minutes, then whisk again to prevent clumping. This will help the chia seeds absorb the liquid.
  • Step 3: Cover the bowl and refrigerate for at least 2 hours or overnight for the best results. The longer it sits, the thicker it will become!
  • Step 4: Once the pudding has set, give it a good stir and layer it into serving bowls or jars. Top with diced mango and any other toppings you desire.
  • Step 5: Enjoy your delicious Mango Matcha Chia Pudding! It can be served chilled or at room temperature.

Expert Tips for Perfecting Your Pudding

  • Quality Ingredients: Choose high-quality matcha for better flavor and color. Look for brands that are vibrant green and have a fine texture.
  • Don’t Rush the Setting: Allow adequate time for the chia seeds to expand and absorb the liquid for a creamy texture.
  • Adjust Sweetness: Taste the pudding before serving and add more sweetener if desired; everyone’s taste buds are different!
  • Experiment with Flavors: Add a pinch of cinnamon or cardamom for a unique twist on flavor.
  • Chill Before Serving: This pudding tastes best when served cold, so make sure to refrigerate it well before enjoying.
  • Layering Fun: Get creative with your layers! Add granola, nuts, or even a dollop of yogurt between layers for added texture.
  • Serving Size: This recipe yields about two servings, perfect for sharing or enjoying later!
  • Garnishing: Fresh mint leaves or toasted coconut flakes make excellent garnishes that elevate the dish.

Common Mistakes and Troubleshooting

Even the best chefs have mishaps! Here are some common mistakes to avoid:

  • Clumpy Chia Seeds: If you forget to whisk the mixture after a few minutes, the chia seeds may clump together. Make sure to stir well!
  • Too Thick: If your pudding turns out thicker than you prefer, simply whisk in a bit more coconut milk until you reach your desired consistency.
  • Not Sweet Enough: If you find it’s lacking sweetness, don’t hesitate to add more syrup or honey after it has set; just mix it in well.
  • Underestimating Chill Time: Allowing less time than recommended can result in a runny pudding. Aim for at least a couple of hours to let those chia seeds work their magic!

Variations of Mango Matcha Chia Pudding

Want to switch things up? Here are some fun variations to try:

  • Berry Bliss: Replace mango with mixed berries for a tart and refreshing twist.
  • Coconut-Lime: Add lime zest and a splash of lime juice for a zesty tropical flavor.
  • Chocolate Matcha: Stir in cocoa powder alongside matcha for a chocolatey delight.
  • Nuts Over Chia: Top with your favorite nuts and seeds for added crunch and nutrition.

Storage and Make-Ahead Instructions

This pudding is perfect for meal prep! Here’s how to store it:

  • Refrigerate: Store in airtight containers in the fridge for up to 4-5 days.
  • Make-Ahead: Prepare the pudding the night before for an easy grab-and-go breakfast or snack the next day.
  • Freezing: While not ideal for texture, you can freeze the pudding in ice cube trays and blend into smoothies later!

Frequently Asked Questions

  • Can I use other types of milk? Yes! Almond, oat, or cashew milk are great alternatives to coconut milk.
  • Is matcha safe for kids? Yes, matcha is generally safe for children in moderation.
  • Can I make this recipe vegan? Absolutely! Just use maple syrup instead of honey.
  • What can I use instead of mango? Try peaches, bananas, or any seasonal fruit you enjoy!
  • How do I know if my chia pudding is set? It should have a thick, gel-like consistency and not be runny.
  • Can I add protein powder? Yes! Stir in a scoop of your favorite protein powder for an extra boost.
  • How can I make it lower in calories? Use unsweetened almond milk and reduce the amount of sweetener.
  • Is it okay to eat chia pudding every day? Yes! Chia seeds are packed with nutrients, making them a healthy addition to your daily diet.

Nutrition Tips and Dietary Adaptations

This Mango Matcha Chia Pudding is not only delicious but also nutritious! Here are some tips to enhance its health benefits:

  • Incorporate Superfoods: Add a scoop of spirulina or hemp seeds for an extra nutritional punch.
  • Gluten-Free: This recipe is naturally gluten-free, making it a safe choice for those with gluten sensitivities.
  • Dairy-Free: Using coconut or almond milk ensures this pudding is dairy-free and suitable for lactose intolerant individuals.
  • Low-Sugar Option: Adjust the amount of sweetener to cater to low-sugar diets, or use a sugar substitute.

Equipment Recommendations

To make this recipe, you’ll need the following:

  • Mixing Bowl: For combining all the ingredients.
  • Whisk: Essential for mixing the pudding ingredients smoothly.
  • Airtight Containers: For storing your pudding in the fridge.
  • Measuring Cups and Spoons: To ensure perfect ingredient ratios.

Serving Suggestions

Here are some creative ideas for serving your Mango Matcha Chia Pudding:

  • Layered Parfaits: Create beautiful layers with granola and yogurt for a visually stunning dessert.
  • Breakfast Bowl: Serve it as a breakfast option topped with sliced fruits and nuts.
  • Smoothie Bowl: Blend it with some ice and serve as a smoothie bowl for a refreshing treat.
  • Snack Jars: Pack it in jars for a healthy snack on the go, perfect for kids and adults alike!

In conclusion, this Mango Matcha Chia Pudding is a delightful blend of flavors and textures that’s easy to make and even easier to enjoy. Whether you’re preparing it for breakfast, dessert, or a midday snack, it’s a treat that’s sure to please your taste buds and nourish your body. So, grab those ingredients and get ready to indulge in a bowl of deliciousness — because cooking should be fun and enjoyable!

Mango Matcha Chia Pudding

Prep Time 10 minutes
Total Time 10 minutes
Servings 2 servings
Calories 250
Enjoy a vibrant and nutritious vegan pudding combining the tropical sweetness of mango with the earthy flavor of matcha, perfect for a healthy breakfast or snack.

Ingredients

Liquid

  • 1 cup coconut milk (or almond milk for a lighter option) (Ensure it's unsweetened for best flavor.)
  • 1/4 cup chia seeds (These will thicken the pudding.)
  • 2-3 tablespoons maple syrup or honey (Adjust sweetness to taste.)
  • 1 teaspoon matcha powder (Use culinary grade for the best flavor.)
  • 1/2 teaspoon vanilla extract (Halal certified.)
  • 1 ripe mango diced (Reserve some for topping.)

Instructions 

  • In a bowl, whisk together coconut milk, chia seeds, matcha powder, vanilla extract, and sweetener until well combined.
  • Let the mixture sit for 5-10 minutes, then stir again to prevent clumping.
  • Cover and refrigerate for at least 2 hours or overnight to allow the pudding to set.
  • Before serving, top the pudding with diced mango and reserved mango slices.

Notes

For added flavor, sprinkle with toasted coconut or nuts.
Calories: 250kcal
Cost: $10
Course: Breakfast, Dessert
Cuisine: fusion
Keyword: chia, Mango, matcha

Welcome to the World of Lemon Curd Tartlets

Are you ready to dive into a delightful culinary adventure? Today, we’re exploring the wonderful realm of lemon curd tartlets. These mini masterpieces are not only a feast for the eyes but also a burst of sunshine for your taste buds. In this post, I’ll guide you through the process of whipping up these scrumptious tartlets, with all the tips and tricks you need to make them perfect every time. Let’s get started!

Why You’ll Love This Recipe

There are countless reasons to adore these lemon curd tartlets, but here are a few that stand out:

  • Quick and Easy: With minimal fuss, you can whip up these tartlets in no time, making them perfect for any occasion, even on busy days.
  • Customizable Flavor: Feel free to play around with different citrus fruits or add a hint of vanilla to the lemon curd for a unique twist.
  • Beautiful Presentation: These mini tartlets are as beautiful as they are delicious, making them a stunning addition to any dessert table.
  • Make Ahead: You can prepare the tart shells and lemon curd in advance, saving you time when you’re ready to serve.
  • Perfect for Sharing: Each tartlet is a single serving, making them ideal for parties or family gatherings.

Ingredients Breakdown

Let’s get all your ingredients ready to make these lemon curd tartlets. Here’s what you’ll need:

  • 250 gr All-Purpose / Plain Flour: This forms the base of our tartlet crust.
  • 50 gr Icing Sugar (sifted): Adds sweetness to the crust without the graininess of granulated sugar.
  • 1 pinch Fine Salt: Enhances the flavors in the pastry.
  • 120 gr Unsalted Butter (cold): Cold butter is key for achieving a flaky texture in your tart crust.
  • 1 large Egg (at room temperature): A binding agent that helps bring the dough together.
  • 4 Egg Yolks: Essential for the rich, creamy lemon curd filling.
  • 100 gr Caster Sugar: For sweetness in the lemon curd.
  • 125 ml Lemon Juice (about 3 large lemons): This is where the magic happens—fresh lemon juice makes all the difference!
  • 75 gr Unsalted Butter (at room temperature): Creates a luscious, smooth curd.
  • 1 Lemon Zest (optional): A little zest adds an extra punch of citrus flavor.

Pro Tips for Success

Side angle of a lemon curd tartlet, highlighting the smooth yellow curd and golden crust.

To ensure your lemon curd tartlets turn out perfectly, keep these expert tips in mind:

  • Chill Your Dough: Let your tartlet crust chill in the fridge for at least 30 minutes before baking. This helps prevent shrinking.
  • Use Fresh Ingredients: Fresh lemons yield the best flavor for both the tart and the curd.
  • Watch the Baking Time: Tartlet shells can brown quickly. Keep an eye on them to prevent over-baking.
  • Strain the Curd: For an ultra-smooth lemon curd, strain it through a fine-mesh sieve to remove any lumps.
  • Don’t Rush the Cooling: Allow both the tart shells and curd to cool completely before assembling.
  • Experiment with Garnishes: Top with fresh berries, whipped cream, or edible flowers for a decorative touch.
  • Try Different Zests: Mixing lemon with lime or orange zest can create a delightful flavor profile.
  • Store Properly: Keep your tartlets in the fridge until ready to serve to maintain freshness.

Avoiding Common Mistakes

Even the best of us can make a few blunders in the kitchen. Here are some common mistakes to avoid when making lemon curd tartlets:

  • Overworking the Dough: This can lead to a tough crust. Mix until just combined.
  • Using Bottled Lemon Juice: It lacks the vibrant flavor of freshly squeezed juice.
  • Skipping the Chilling Step: Not chilling the dough can result in a crust that shrinks during baking.
  • Not Monitoring Heat: If your heat is too high, the curd can curdle. Keep it low and stir constantly.

Variations to Try

Feeling adventurous? Here are some fun variations on the classic lemon curd tartlets:

  • Mixed Citrus Tartlets: Combine lemon, lime, and orange juice for a zesty mix.
  • Berry Topped Tartlets: Add a layer of fresh berries on top of the lemon curd for a pop of color and flavor.
  • Chocolate Drizzle: Drizzle melted dark chocolate over the top for a decadent twist.
  • Herbed Curd: Infuse the lemon curd with herbs like basil or thyme for an unexpected flavor.

Storage and Make-Ahead Instructions

Want to prepare these tartlets ahead of time? Here’s how to store them:

  • Fridge Storage: Keep the assembled tartlets in an airtight container in the fridge for up to 3 days.
  • Make-Ahead Curd: Lemon curd can be made up to a week in advance and stored in the fridge.
  • Freezing Tart Shells: Bake and freeze the tart shells for up to 2 months. Just thaw them in the fridge before filling.

Frequently Asked Questions

Here are some common questions about lemon curd tartlets:

  • Can I make these tartlets gluten-free? Yes, substitute with a gluten-free flour blend.
  • How long do the tartlets last? They can be kept in the fridge for about 3 days.
  • Can I use other fruits for curd? Absolutely! You can make curd from almost any citrus fruit.
  • What can I do with leftover curd? Use it as a filling for cakes, a topping for pancakes, or swirl into yogurt.
  • Is it possible to make mini tartlets? Yes! Use a mini muffin tin for smaller portions.
  • How can I tell when the curd is done? It should coat the back of a spoon and not run off easily.
  • Can I use a store-bought crust? Definitely! For a quicker option, store-bought crusts can save time.
  • Should I serve these warm or cold? They are best served chilled for the most refreshing experience.

Nutrition Tips and Dietary Adaptations

These lemon curd tartlets can easily fit into various dietary preferences:

  • Lower Sugar Option: Reduce the sugar in the curd for a less sweet version.
  • Dairy-Free: Substitute dairy butter with coconut oil or a plant-based butter.
  • Low-Calorie Variants: Use a sugar substitute suitable for baking to lower calorie content.

Recommended Equipment

Here’s what you’ll need to make these tartlets:

  • Mixing Bowls: For combining your ingredients.
  • Whisk: Essential for beating eggs and mixing curd.
  • Pie Weights: To prevent your crust from puffing up while baking.
  • Fine-Mesh Sieve: For straining your lemon curd.
  • Tartlet Pan: A non-stick tartlet pan will help your shells release easily.

Serving Suggestions

Now that your lemon curd tartlets are ready, how can you serve them? Here are some ideas:

  • Garnish with Berries: Fresh raspberries or blueberries add a beautiful touch and flavor.
  • Top with Whipped Cream: A dollop of whipped cream balances the tartness of the lemon.
  • Mint Leaves: Fresh mint leaves make a lovely garnish that enhances the flavor.

In conclusion, making lemon curd tartlets is not just an opportunity to create a delightful dessert; it’s a way to embrace the joy of cooking and share delicious moments with loved ones. So gather your ingredients, don your apron, and let’s make some magic in the kitchen! Remember, cooking is about connection, creativity, and having fun. Happy baking!

Lemon Curd Tartlets

Prep Time 20 minutes
Cook Time 15 minutes
Total Time 35 minutes
Servings 8 pieces
Calories 250
Delight in these tangy and sweet lemon curd tartlets, perfect for a sophisticated dessert or afternoon treat.

Ingredients

Dough

  • 250 g All-Purpose / Plain Flour
  • 50 g Icing Sugar (sifted)
  • 1 pinch Fine Salt
  • 120 g Unsalted Butter (cold)
  • 1 large Egg (at room temperature)
  • 4 Egg Yolks Egg Yolks
  • 100 g Caster Sugar (or fine white granulated sugar)
  • 125 ml Lemon Juice (about 3 large lemons)
  • 75 g Unsalted Butter (at room temperature)
  • 1 lemon Lemon Zest (optional)

Instructions 

  • Prepare the tart crust by mixing flour, icing sugar, salt, and cold butter until crumbly. Add egg and mix until dough forms. Chill for 30 minutes.
  • Roll out the dough and cut into small tartlet shells. Bake at 180°C (350°F) for 15 minutes until golden. Let cool.
  • In a saucepan, whisk together egg yolks, sugar, lemon juice, and lemon zest. Cook over low heat, stirring constantly until thickened.
  • Remove from heat and stir in room temperature butter until smooth. Pour lemon curd into cooled tart shells.
  • Chill the tartlets for at least 2 hours before serving. Garnish with lemon zest if desired.

Notes

For a richer flavor, use high-quality butter and fresh lemons.
Calories: 250kcal
Cost: $12
Course: Dessert
Cuisine: French
Keyword: Lemon

Welcome to the World of Baked Cinnamon Apples

If you’re looking for a delightful treat that’s incredibly simple to make, then you’ve come to the right place! This recipe for Baked Cinnamon Apples is not just a dessert—it’s a cozy hug in a bowl, perfect for those busy days when you still want to impress. With just a handful of ingredients, you can create a deliciously warm dish that fills your home with irresistible aromas and satisfies your sweet tooth. Let’s dive into why you’ll love this recipe, how to make it, and all the tips and tricks to make it your own!

Why You’ll Love This Recipe

  • Quick and Easy: With just a few simple steps, you can have these apples ready for the oven in no time—perfect for busy families or spontaneous dessert cravings!
  • Comforting Flavors: The combination of cinnamon and sugar transforms ordinary apples into something truly special, evoking feelings of nostalgia and warmth.
  • Versatile Serving Options: Serve these baked apples as a stand-alone dessert, top with a scoop of vanilla ice cream, or even alongside pancakes for a delightful breakfast twist.
  • Healthy Indulgence: Made with fresh apples, this dish is a healthier alternative to many desserts, allowing you to enjoy something sweet without the guilt.
  • Perfect for All Seasons: Whether it’s a chilly fall evening or a summer night, baked cinnamon apples are a treat that fits any occasion.

Ingredients Needed

Gathering your ingredients is a breeze! Here’s what you’ll need to whip up this delicious recipe:

  • 3 large apples: Peeled, cored, and sliced (about 4-5 cups). Choose a mix of sweet and tart varieties for depth of flavor.
  • ¼ cup brown sugar: This adds a rich, caramel-like sweetness to your apple slices.
  • 1 teaspoon cornstarch: Helps to thicken the juices and keeps your apples from becoming overly juicy.
  • 1 ½ tablespoons cinnamon: The star of the show! It brings warmth and depth to the dish.
  • ½ teaspoon nutmeg: Optional but highly recommended for an added layer of flavor.
  • 1 ½ tablespoons lemon juice: Brightens the flavor and balances the sweetness.
  • 3 tablespoons butter: Cut into small cubes (use vegan butter if desired).

How to Make Baked Cinnamon Apples

Side view of a plate filled with steaming baked cinnamon apples, sprinkled with cinnamon.

Ready to bring these baked beauties to life? Follow these simple steps:

  1. Preheat the oven to 400 degrees F (200 degrees C). Grease a medium baking dish (I used a 2 quart, 8×6 inch dish) with cooking spray.
  2. In a large bowl, combine your sliced apples with brown sugar, cornstarch, cinnamon, nutmeg, and lemon juice. Toss until the apples are evenly coated.
  3. Transfer the apple mixture to the prepared baking dish. Evenly distribute the butter cubes on top.
  4. Cover the dish with foil and bake for 30-40 minutes, or until the apples are tender and the juices are bubbly.
  5. Once out of the oven, stir the apples to coat them in the delicious juices. Serve warm and ENJOY!

Pro Tips for Perfect Baked Cinnamon Apples

  • Choose the Right Apples: Opt for a mix of tart (like Granny Smith) and sweet (like Honeycrisp) apples for the best flavor balance.
  • Don’t Skip the Cornstarch: It prevents your baked apples from becoming too soupy, ensuring a nice texture.
  • Check for Doneness: The apples should be tender but still hold their shape. A gentle press with a fork should feel soft.
  • Experiment with Spices: Feel free to add other spices like ginger or allspice for a unique twist!
  • Top with Toppings: A drizzle of caramel or a sprinkle of chopped nuts can add a delightful crunch.
  • Use Fresh Ingredients: Fresh apples will always yield the best taste—avoid those that are mealy.
  • Make it Vegan: Substitute butter with coconut oil or a plant-based spread for a vegan-friendly version.
  • Serve Warm: Baked cinnamon apples are best served warm, especially with ice cream!

Common Mistakes & Troubleshooting

Even the best cooks have moments in the kitchen! Here are some common pitfalls and how to avoid them:

  • Apples are too mushy: If your apples turn out mushy, they may have been overcooked or you used a softer variety. Stick to firmer apples for baking.
  • Too much liquid: This could be due to not using cornstarch or using overly ripe apples. Ensure your apples are fresh and firm.
  • Not enough flavor: Make sure to coat the apples thoroughly with sugar and spices. Taste the mixture before baking.
  • Burnt topping: If your apples are browning too quickly, cover them with foil during the last part of baking.

Delicious Variations

Want to switch things up? Here are some tasty variations you can try:

  • Maple Baked Apples: Replace brown sugar with maple syrup for a unique flavor profile.
  • Cranberry Apple Bake: Add a handful of fresh cranberries for a tart contrast to the sweet apples.
  • Nutty Delight: Mix in some chopped walnuts or pecans for extra crunch and flavor.
  • Spiced Apple Cider: Add a splash of apple cider for even more apple flavor and warmth.

Storage & Make-Ahead Instructions

These baked cinnamon apples can be enjoyed at a later time with proper storage:

  • Refrigerator: Store leftovers in an airtight container in the fridge for up to 3 days.
  • Freezer: Freeze in an airtight container for up to 2 months. Thaw before reheating.
  • Reheating: Warm in the oven at 350 degrees F until heated through, or microwave for a quick option.

Frequently Asked Questions

Here are some common questions about baked cinnamon apples:

  • Can I use other fruits? Absolutely! Pears or peaches can also be delicious when baked with cinnamon.
  • Is this recipe gluten-free? Yes, it is naturally gluten-free as it doesn’t contain any flour.
  • What apples are best for baking? Firm varieties like Granny Smith, Honeycrisp, and Fuji are ideal for baking.
  • Can I make this in advance? Yes! Prepare and bake the apples, then store them in the fridge and reheat before serving.
  • How can I make this healthier? Reduce the sugar or substitute with a natural sweetener like honey or maple syrup.
  • What should I serve with baked apples? They’re great on their own, but pair beautifully with vanilla ice cream, yogurt, or even oatmeal.
  • Can I add more spices? Definitely! Experiment with cloves, cardamom, or ginger for a unique flavor.
  • Are baked apples suitable for kids? Yes! This recipe is perfect for kids and can be a fun way to get them involved in the kitchen.

Nutritional Tips & Dietary Adaptations

This recipe is not only delicious but can also be tailored to fit various dietary needs:

  • Low Sugar: Substitute brown sugar with a sugar alternative like stevia or erythritol.
  • Vegan: Use plant-based butter and ensure your sugar is vegan-friendly.
  • Nut-Free: This recipe is nut-free, but always check for cross-contamination if allergies are a concern.

Equipment Recommendations

Here’s what you’ll need to get started:

  • Baking Dish: A medium-sized 2 quart, 8×6 inch baking dish works perfectly for this recipe.
  • Mixing Bowl: A large bowl for mixing your ingredients is essential.
  • Measuring Cups & Spoons: Accurate measurements ensure perfect results every time!
  • Knife & Peeler: For prepping your apples—sharp and efficient tools make the process easier.

Serving Suggestions

Wondering how to serve these baked cinnamon apples? Here are a few ideas:

  • A La Mode: Serve warm with a scoop of vanilla ice cream for an indulgent treat.
  • On Pancakes: Top your pancakes with baked apples for a delicious breakfast or brunch.
  • With Yogurt: Pair with Greek yogurt for a healthy snack or breakfast option.
  • As a Side: Serve alongside savory dishes like pork or chicken for a sweet contrast.

Conclusion

There you have it—your ultimate guide to making Baked Cinnamon Apples! Whether it’s for a special occasion or just a cozy night in, this recipe is sure to become a favorite in your home. Remember, cooking is about enjoying the process and connecting with those around you, so have fun and don’t be afraid to make it your own. Happy baking!

Baked Cinnamon Apples

Prep Time 10 minutes
Cook Time 35 minutes
Total Time 45 minutes
Servings 4 servings
Calories 220
A warm and comforting dessert featuring tender baked apples infused with cinnamon and nutmeg, topped with buttery cubes.

Ingredients

Fruits

  • 3 large apples (peeled, cored, and sliced) (about 4-5 cups)
  • 0.25 cup brown sugar
  • 1 teaspoon cornstarch
  • 1.5 tablespoons cinnamon
  • 0.5 teaspoon nutmeg (optional, but recommended)
  • 1.5 tablespoons lemon juice
  • 3 tablespoons butter (cut into small cubes) (vegan, as desired)

Instructions 

  • Preheat oven to 400°F (200°C) and grease a baking dish.
  • Mix apple slices with sugar, cornstarch, cinnamon, nutmeg, and lemon juice.
  • Transfer apples to dish, top with butter cubes, cover with foil, and bake for 30-40 minutes.
  • Remove from oven, stir to coat in juices, and serve.

Notes

Serve warm with a scoop of ice cream or a dollop of whipped cream for extra indulgence.
Calories: 220kcal
Cost: $10
Course: Dessert
Keyword: apples

Welcome to the Sweet World of Healthy Cinnamon Apples!

If you’re looking for a delightful and healthy dessert, snack, or even breakfast option, you’ve come to the right place! Today, we’re diving into the world of Healthy Cinnamon Apples. This simple and scrumptious recipe is perfect for busy days when you want to whip up something quick and satisfying. With just a handful of ingredients, you’ll have a warm, comforting treat that is sure to please everyone in your home. So, let’s get started!

Why You’ll Love This Recipe

Here are some reasons why this recipe for Healthy Cinnamon Apples is a must-try:

  • Quick to prepare: Ready in just 15 minutes from start to finish!
  • Minimal ingredients: Uses simple ingredients you likely have on hand.
  • Versatile: Great for breakfast, as a snack, or even as a dessert.
  • Family-friendly: Kids love these sweet apples, making them a hit for family meals.
  • Customizable: Easily adapt the recipe to suit your taste preferences!

Ingredients Breakdown

Let’s take a closer look at what you’ll need and some potential substitutions:

  • 4 pounds apples: Choose your favorite variety—Granny Smith, Honeycrisp, or Fuji work beautifully! Just be sure to core and slice them into wedges (not too thin, or they will break up!).
  • 2 tablespoons butter: For a dairy-free option, you can use coconut oil instead.
  • 1/4 cup apple juice: Freshly squeezed is best, but store-bought works too.
  • 1/4 cup sugar-free sweetener or honey: Use your preferred sweetener, like stevia or maple syrup, for a touch of sweetness.
  • 2 teaspoons cinnamon: The star of this recipe! You can adjust to taste.
  • 1/2 teaspoon allspice: Adds a warm, aromatic flavor.
  • 1/4 teaspoon salt: Enhances the sweetness of the apples.
  • 2-3 teaspoons arrowroot or organic cornstarch: For thickening the mixture. You can also use 1 teaspoon of glucomannan as an alternative.
  • 1 teaspoon apple cider vinegar: This adds a touch of tanginess!

Step-by-Step Instructions

Side view of healthy cinnamon apples arranged in a bowl.

Ready to make your delicious Healthy Cinnamon Apples? Follow these simple steps:

  1. Place the apples and butter in a large skillet over medium-high heat. Toss until the butter has melted and is coating the apples.
  2. Mix together the apple juice, sweetener, cinnamon, allspice, and salt, then pour this mixture over the apples. Toss to coat.
  3. Cover with a lid and let it simmer on medium-low heat for about 5 minutes.
  4. After 5 minutes, uncover and toss the apples again. You can either let them simmer until thickened or add arrowroot/cornstarch/glucomannan and toss quickly to thicken.
  5. Finally, stir in the apple cider vinegar and serve hot. Enjoy!

Pro Tips for Perfect Cinnamon Apples

To ensure your Healthy Cinnamon Apples turn out perfectly every time, consider these expert tips:

  • Slice apples evenly: Aim for uniform sizes to ensure even cooking.
  • Don’t stir too much: Stirring too often can break the apples up. Let them cook undisturbed for a few minutes!
  • Adjust sweetness: If you prefer a sweeter taste, feel free to increase the amount of sweetener.
  • Use a mix of apples: Combining tart and sweet apples can enhance the flavor profile.
  • Experiment with spices: Add nutmeg or ginger for extra warmth!

Common Mistakes and Troubleshooting

Even the best cooks make mistakes! Here’s how to troubleshoot:

  • Apples are too mushy: Avoid overcooking. Keep an eye on them and test for doneness.
  • Too sweet: If it’s overly sweet, add a splash more apple cider vinegar to balance the flavors.
  • Thickening issues: If the mixture isn’t thickening, ensure you’re using enough arrowroot or cornstarch and add it at the right time.

Delicious Variations

Make this recipe your own with these exciting variations:

  • Nutty addition: Stir in chopped nuts like walnuts or pecans for a crunchy texture.
  • Caramel twist: Drizzle with caramel sauce for a decadent dessert.
  • Chocolate lover’s version: Sprinkle some dark chocolate chips on top before serving.
  • Spiced apples: Add cloves or cardamom for a spicier kick.

Storage and Make-Ahead Instructions

Want to prep ahead? Here’s how to make the most of your Healthy Cinnamon Apples:

  • Make ahead: You can prepare the apples a day in advance. Store them in an airtight container in the refrigerator.
  • Storage: Leftover apples can be stored in the fridge for up to 3 days.
  • Reheating: Simply warm them in the microwave or on the stovetop until heated through.

Frequently Asked Questions

Here are some common questions about making Healthy Cinnamon Apples:

  • Can I freeze cinnamon apples? Yes! Allow them to cool completely, then store in a freezer-safe container for up to 3 months.
  • What’s the best type of apple to use? Tart varieties like Granny Smith or sweet ones like Fuji work well!
  • Can I use less sugar? Absolutely! Adjust the sweetener according to your taste.
  • How do I serve them? They’re delicious on their own, or you can serve them over oatmeal, yogurt, or ice cream!
  • Can I make them vegan? Yes! Substitute butter with coconut oil or vegan margarine.
  • What if I don’t have apple juice? You can use water or a different fruit juice as a substitute.
  • Can I add other fruits? Yes! Pears or berries can be delicious additions.
  • How long do they take to cook? The cooking process takes about 10 minutes total.

Nutritional Tips and Dietary Adaptations

Looking to make this dish even healthier? Here are some suggestions:

  • Low-carb option: Use a sugar substitute like erythritol to keep it low-carb.
  • Boost fiber: Serve with chia seeds for added fiber and nutrients.
  • Gluten-free: This recipe is naturally gluten-free, making it safe for those with gluten sensitivities.

Essential Equipment

Before you start cooking, ensure you have these items on hand:

  • Large skillet: A good-quality non-stick skillet works best.
  • Wooden spoon: For gently tossing the apples.
  • Measuring cups and spoons: Accurate measurements ensure success!

Serving Suggestions

These Healthy Cinnamon Apples are incredibly versatile! Here are some tasty serving ideas:

  • Over yogurt: Spoon them over Greek yogurt for a healthy breakfast.
  • As a topping: Use them as a topping for pancakes or waffles.
  • With ice cream: Serve warm with a scoop of vanilla ice cream for a delicious dessert.

Conclusion

And there you have it! Making Healthy Cinnamon Apples is not only easy but also a wonderful way to bring a bit of warmth and comfort into your kitchen. With this recipe, you can create a dish that’s both satisfying and wholesome. I hope you enjoy making and sharing this delightful treat with your loved ones! Remember, cooking should be fun, so don’t stress the small stuff. Happy cooking!

Healthy Cinnamon Apples

Prep Time 5 minutes
Cook Time 10 minutes
Total Time 15 minutes
Servings 4 servings
Calories 150
A delicious and healthy way to enjoy sweet, spiced apples with minimal added sugar. Perfect for a quick dessert or snack.

Ingredients

Fruits

  • 4 pounds apples (cored and sliced) (not too thin to prevent breaking)
  • 2 tablespoons butter
  • 1/4 cup apple juice
  • 1/4 cup sugar-free sweetener or honey
  • 2 teaspoons cinnamon
  • 1/2 teaspoon allspice
  • 1/4 teaspoon salt
  • 2-3 teaspoons arrowroot or organic cornstarch (or 1 teaspoon glucomannan (optional))
  • 1 teaspoon apple cider vinegar

Instructions 

  • Place apples and butter in a skillet over medium-high heat; toss until butter melts and coats apples.
  • Mix apple juice, sweetener, cinnamon, allspice, and salt; pour over apples. Cover and simmer for 5 minutes.
  • Uncover and toss; simmer until thickened or add arrowroot/cornstarch and toss quickly.
  • Stir in apple cider vinegar and serve hot.

Notes

Use firm apples to prevent breaking during cooking.
Calories: 150kcal
Cost: $10
Course: Dessert
Cuisine: American
Keyword: apples, Cinnamon

Brighten Your Day with a Chia Pudding Parfait

Welcome to the delightful world of chia pudding parfait! If you’re looking for a nutritious and satisfying treat that combines the creamy goodness of coconut milk with the tropical sweetness of mango, you’re in the right place. This easy recipe will not only make your taste buds dance but will also provide you with a powerful kick of health benefits. So, roll up your sleeves and let’s dive into this easy-to-follow guide to making a scrumptious chia pudding parfait!

Why You’ll Love This Recipe

This chia pudding parfait is not just another recipe; it’s a celebration of flavors and a powerhouse of nutrition. Here are five reasons you’re going to love it:

  • Quick and Easy: With just a few simple ingredients, you can whip this up in no time, making it perfect for busy mornings or last-minute snacks.
  • Nutritious: Packed with chia seeds, which are rich in omega-3 fatty acids, fiber, and antioxidants, this parfait fuels your body right.
  • Versatile: Customize your parfait with your favorite fruits, nuts, or toppings to keep things exciting!
  • Make-Ahead Friendly: Prep it the night before, and you’ll have a delicious breakfast ready to go in the morning.
  • Visually Stunning: Layered with vibrant mango and sprinkled with shredded coconut, this parfait looks as good as it tastes!

Ingredients Breakdown

Let’s gather our ingredients for this delightful chia pudding parfait. Feel free to swap out any items based on your dietary needs or preferences.

  • For the Chia Pudding: 1/2 cup chia seeds
  • Coconut Milk: 2 cups unsweetened coconut milk (can substitute with almond or oat milk for a different flavor profile)
  • Sweetener: 2 tablespoons honey or maple syrup (adjust to taste)
  • Flavoring: 1/2 teaspoon vanilla extract
  • For the Parfait Layers: 1 ripe mango, peeled and diced
  • Toppings: 1/4 cup shredded coconut (unsweetened), optional: granola, fresh berries, or mint for garnish

Step-by-Step Instructions

A delicious chia pudding parfait with visible layers of diced mango and shredded coconut.

Now, let’s roll up our sleeves and get started on this delicious journey!

  1. In a bowl, whisk together the chia seeds, coconut milk, honey, and vanilla extract.
  2. Let sit for 5 minutes, whisking again to prevent clumping.
  3. Cover and refrigerate for 2–4 hours or overnight until thickened.
  4. Peel and dice your mango into small cubes.
  5. In clear cups or jars, layer the chia pudding, diced mango, and shredded coconut.
  6. Repeat layers until your cups are filled, finishing with mango and coconut on top.
  7. Optional: Top with granola, fresh berries, or mint for an extra burst of flavor and texture.
  8. Serve chilled and enjoy your creation!

Pro Tips for Perfecting Your Parfait

Here are some expert insights to help you nail this recipe:

  • Chia Seed Quality: Use high-quality chia seeds for the best texture and flavor.
  • Adjust Consistency: For a thicker pudding, use less milk; for a thinner one, add more.
  • Sweetness Level: Taste as you go! Adjust the sweetness with more honey or maple syrup if needed.
  • Layer Strategically: For the best presentation, layer slowly and carefully to create beautiful visuals.
  • Mix it Up: Experiment with other fruits like bananas, berries, or even tropical fruits like pineapple for different flavor profiles.
  • Make Ahead: Chia pudding can last up to a week in the fridge, making it perfect for meal prep.
  • Use Clear Containers: For a stunning presentation, use clear jars or cups to showcase the colorful layers.
  • Garnish Wisely: Fresh herbs like mint or a sprinkle of nuts can elevate the presentation and flavor.

Avoiding Common Mistakes

Even the best cooks make mistakes! Here are some common pitfalls to watch out for:

  • Clumping Chia Seeds: If your pudding is clumpy, it’s likely because it wasn’t whisked enough. Make sure to whisk well after adding the seeds.
  • Too Watery: Not letting the pudding sit long enough can lead to a watery consistency. Patience is key!
  • Over-Sweetening: Start with less sweetener and add more to taste. It’s easier to add than to subtract!
  • Skipping Refrigeration: Let the pudding set in the fridge for at least 2 hours for the best texture.

Variations to Try

Stir things up with these fun variations:

  • Pineapple Chia Pudding: Substitute diced pineapple for mango to create a tropical twist.
  • Chocolate Lover’s Delight: Add cocoa powder or chocolate chips to your chia pudding for a chocolatey treat.
  • Berry Burst: Layer with mixed berries instead of mango for a colorful and tangy parfait.
  • Nutty Banana: Add sliced bananas and a sprinkle of chopped nuts for a satisfying crunch.

Storage and Make-Ahead Instructions

This chia pudding parfait is perfect for meal prep! Here’s how to store it:

  • Refrigeration: Store the chia pudding in an airtight container in the refrigerator for up to a week.
  • Layering: If making in advance, layer just before serving to keep the fruit fresh and vibrant.
  • Freezing: While not recommended for the parfaits, the base chia pudding can be frozen. Just thaw in the refrigerator before serving.

Frequently Asked Questions

Let’s tackle some common questions about chia pudding parfaits:

1. Can I use other types of milk?

Absolutely! Almond, oat, or even soy milk can be great alternatives to coconut milk.

2. How long do chia puddings last?

Stored properly, they can last up to 5-7 days in the refrigerator.

3. Can I use flavored milk?

Yes, flavored milk can add an extra dimension to your pudding, just adjust the sweetener accordingly.

4. Is this recipe vegan?

Yes, if you use maple syrup instead of honey, the recipe is entirely vegan!

5. Can I make this gluten-free?

Yes, all ingredients are gluten-free, making it a perfect option for those with gluten sensitivities.

6. What can I top my parfait with?

Granola, nuts, fresh berries, or a drizzle of honey or maple syrup are all fantastic options!

7. How can I make it more filling?

Add layers of yogurt or nut butter between the chia pudding layers for added protein and richness.

8. Can I add protein powder to the chia pudding?

Yes, adding protein powder is a great way to boost the nutritional value of your parfait!

Nutritional Tips and Dietary Adaptations

This chia pudding parfait is not only versatile but also nutritious. Here are a few tips to keep it healthy:

  • Reduce Sweetener: If you’re watching your sugar intake, consider reducing the honey or using a sugar substitute.
  • Add Superfoods: Mix in a scoop of your favorite superfood powder like spirulina or matcha for an extra health boost.
  • Protein Punch: Incorporate Greek yogurt or a scoop of protein powder for added protein content.
  • Fiber Focus: Pair with high-fiber toppings like nuts or seeds to keep you feeling full longer.

Essential Equipment Recommendations

No fancy kitchen gadgets needed! Here’s what you’ll need:

  • Mixing Bowl: For whisking together your pudding ingredients.
  • Whisk: Essential for blending the chia seeds and milk smoothly.
  • Measuring Cups and Spoons: Accurate measurements ensure the right consistency.
  • Clear Cups or Jars: Perfect for layering and displaying your beautiful parfait.

Serving Suggestions

This chia pudding parfait is incredibly versatile. Here are some serving ideas:

  • Breakfast Treat: Serve it as a filling breakfast alongside some toast or a smoothie.
  • Snack Time: A great midday snack to keep your energy up without the crash.
  • Party Delight: Impress guests at brunch with these gorgeous layered parfaits.
  • Kids’ Favorite: The fun layers make it a hit with little ones, especially when they get to customize their toppings!

In conclusion, this Chia Pudding Parfait with Mango and Coconut is not only simple to prepare but also a delightful way to enjoy nutritious ingredients. Remember, cooking is about enjoying the process and connecting with what you eat. So grab your ingredients, and let’s make some magic in the kitchen!

Chia Pudding Parfait with Mango and Coconut

Prep Time 10 minutes
Total Time 2 hours 30 minutes
Servings 4 servings
Calories 250
A delicious and healthy layered parfait combining creamy chia pudding, fresh mango, and shredded coconut for a tropical treat.

Ingredients

For the Chia Pudding

  • 0.5 cup chia seeds
  • 2 cups unsweetened coconut milk
  • 2 tablespoons honey or maple syrup
  • 0.5 teaspoon vanilla extract

For the Parfait Layers

  • 1 ripe mango mango, peeled and diced
  • 0.25 cup shredded coconut (unsweetened)

Optional toppings

  • to taste granola, fresh berries, or mint (for garnish)

Instructions 

  • Whisk chia seeds, coconut milk, honey, and vanilla in a bowl.
  • Let sit for 5 minutes, then whisk again. Refrigerate for 2–4 hours until thickened.
  • Dice the mango into small cubes.
  • Layer chia pudding, mango, and shredded coconut in cups. Repeat layers and top with optional garnishes.
  • Serve chilled and enjoy!

Notes

This parfait is best enjoyed within 24 hours for optimal freshness.
Calories: 250kcal
Cost: $15
Course: Breakfast, Dessert
Cuisine: Tropical
Keyword: Chia Seeds, coconut, Mango

Unleashing the Sunshine: The Joy of Mini Lemon Meringue Tarts

Welcome to your new favorite dessert adventure! If you’re looking to brighten up your dessert table, look no further than these delightful mini lemon meringue tarts. They are the perfect combination of zesty lemon filling, fluffy meringue, and a buttery tart shell. Plus, they’re a fantastic way to impress friends and family without spending all day in the kitchen! This guide will walk you through every step, ensuring that even novice cooks can create these heavenly treats. Let’s dive in!

Why You’ll Love This Recipe

These mini lemon meringue tarts are not just visually appealing; they offer a myriad of reasons to fall in love with them:

  • Adorable Presentation: Their mini size makes them a charming addition to any dessert spread, perfect for parties or casual gatherings.
  • Bright, Refreshing Flavor: The combination of tangy lemon and sweet meringue provides a delightful taste experience that’s refreshing and satisfying.
  • Easy to Customize: This recipe allows for various fillings and crust options, letting you experiment according to your taste preferences.
  • Make-Ahead Friendly: You can prepare the tart shells and lemon filling in advance, saving you time when it’s time to serve.
  • Fun to Make: The process of whipping up meringue and assembling the tarts is enjoyable and rewarding, perfect for cooking with family or friends.

Ingredient Breakdown

Let’s explore the ingredients you’ll need to make these mini lemon meringue tarts:

  • Unsalted Butter: 170 g (softened) for the tart shell and 100 g (cubed) for the filling. If you’re looking for a dairy-free option, you can substitute with margarine.
  • Powdered Sugar: 120 g to sweeten the tart shell, giving it a melt-in-your-mouth texture.
  • All-Purpose Flour: 350 g provides the structure of the tart shell. For a gluten-free version, consider using a gluten-free flour blend.
  • Eggs: You’ll need 1 large egg (room temperature) for the tart shell and 3 large whole eggs plus 3 egg yolks for the lemon filling. Remember to save the egg whites for the meringue!
  • Lemon Juice: Freshly squeezed juice from 2 lemons brings the vibrant flavor to the filling.
  • Granulated Sugar: 150 g for the filling and 125 g for the meringue, which helps create that perfect sweetness without being overwhelming.
  • Vanilla Extract: 1 teaspoon for added depth of flavor in both the tart and meringue.
  • Salt: A pinch to enhance the flavors in the tart shell.

Essential Equipment

Side view of delectable Mini Lemon Meringue Tarts showcasing the lemon filling and meringue.

Before you start, gather the following kitchen tools:

  • Mixing Bowls: For combining ingredients.
  • Whisk: Essential for whipping the meringue to perfection.
  • Rolling Pin: To roll out the tart dough.
  • Tartlet Pan: For shaping those delightful mini tarts.
  • Electric Mixer: A must for making meringue fluffy. You could also use a handheld mixer if that’s what you have.
  • Measuring Cups and Spoons: For precise ingredient measurements.
  • Plastic Wrap: To cover your tart shells while chilling in the fridge.

Pro Tips for Perfect Mini Lemon Meringue Tarts

To ensure your mini tarts turn out beautifully, consider these expert insights:

  • Chill Your Dough: After mixing your tart dough, let it chill in the fridge for at least 30 minutes. This helps prevent shrinking during baking.
  • Pre-Bake Tart Shells: Blind bake your tart shells until lightly golden for a crisp texture. This prevents a soggy bottom later.
  • Fresh Lemon Juice Only: Always opt for fresh lemon juice for the best flavor; bottled lemon juice tends to taste artificial.
  • Room Temperature Eggs: Using eggs at room temperature helps them whip better, especially for meringue.
  • Whip Meringue Properly: Ensure your mixing bowl and whisk are completely clean and dry before whipping egg whites for meringue.
  • Toast the Meringue: For a beautiful finish, use a kitchen torch to lightly toast the meringue after assembling your tarts.
  • Watch Your Time: Keep an eye on the meringue as it bakes; you want it golden but not burned!
  • Assemble Just Before Serving: For the best texture, assemble your mini tarts just before serving to keep the crust crisp.

Recipe Variations and Substitutions

Feel free to get creative! Here are some variations you can try:

  • Fruit Variations: Swap out lemon juice for lime, orange, or even berry juices for different flavor profiles.
  • Chocolate Ganache Filling: Create a decadent twist by using chocolate ganache as the filling instead of lemon curd.
  • Nut Crust: Replace part of the flour in the tart crust with ground nuts (like almonds or hazelnuts) for added flavor and texture.
  • Herbal Infusion: Infuse your lemon curd with herbs like basil or thyme for a sophisticated and unexpected flavor.

Common Mistakes and Troubleshooting

Even the best cooks face challenges! Here are some common pitfalls and how to avoid them:

  • Runny Lemon Curd: Ensure you cook the lemon curd until it thickens properly. If it’s too runny, continue cooking while whisking until it thickens.
  • Deflated Meringue: If your meringue collapses, it may be due to overmixing or not using room temperature egg whites. Always whip until stiff peaks form.
  • Soggy Tart Shells: Blind bake your tart shells until golden brown to ensure they stay crisp when filled.
  • Overbaked Meringue: Keep a close eye on the oven; meringue can quickly go from perfectly toasted to burnt.

Storage and Make-Ahead Instructions

Planning ahead? Here’s how to keep your mini tarts fresh:

  • Chill Tart Shells: Prepare and blind bake the tart shells, then store them in the fridge for up to 2 days before filling.
  • Store Filling Separately: Keep the lemon filling in an airtight container in the fridge for up to 3 days.
  • Meringue Lasts: Meringue can be made a few hours ahead and stored in the fridge. However, it’s best when freshly whipped.
  • Assembled Tarts: Once assembled, mini lemon meringue tarts should be enjoyed within 24 hours for the best texture.

Frequently Asked Questions

Have questions? Here are some common queries answered:

  • Can I make mini lemon meringue tarts ahead of time? Yes, you can prepare the tart shells and lemon filling a day in advance, but assemble them just before serving for the best results.
  • Can I freeze lemon meringue tartlets? Freezing is not recommended for assembled tarts, as the meringue does not freeze well. You can freeze tart shells, though!
  • Why is my lemon curd too runny? This often occurs if it hasn’t been cooked long enough. Make sure to whisk continuously until it thickens.
  • Is Italian meringue necessary? While it provides stability, you can use Swiss or French meringue for a simpler option.
  • How do I keep the crust crisp? Blind bake your tart shell until golden and avoid adding the filling until just before serving.
  • What can I substitute for egg whites in meringue? Aquafaba (the liquid from canned chickpeas) can be whipped as a vegan alternative to egg whites.
  • Do I have to use fresh lemon juice? For the best flavor, yes! Bottled lemon juice can taste artificial.
  • Can I use a store-bought crust? Absolutely! For a quicker option, store-bought tart shells can be a great time-saver.

Nutrition Tips and Dietary Adaptations

Want to make these mini tarts a bit healthier? Here are some tips:

  • Reduce Sugar: You can cut back on sugar in the filling without sacrificing flavor; try reducing by 25%.
  • Whole Wheat Flour: Substitute half of the all-purpose flour with whole wheat flour for added fiber.
  • Lower-Fat Options: Use light butter or margarine to lower the fat content.
  • Vegan Adaptations: Use vegan butter and aquafaba for meringue to make this recipe completely plant-based.

Serving Suggestions

Here are some delightful ways to present your mini lemon meringue tarts:

  • Garnish with Zest: A sprinkle of lemon zest on top adds a fresh pop of color and flavor.
  • Pair with Fresh Berries: Serve alongside fresh strawberries or raspberries for a beautiful contrast.
  • Add Whipped Cream: A dollop of lightly sweetened whipped cream can enhance the overall experience.
  • Serve on a Delightful Platter: Arrange the mini tarts on a pretty serving platter for an elegant touch.

In conclusion, these mini lemon meringue tarts are not just a treat for the taste buds but also a joyful experience for any home cook. With the right ingredients and a sprinkle of love, you can create a dessert that delights everyone. So gather your ingredients, roll up your sleeves, and let’s make some sunshine in a tart! You’ve got this!

Mini Lemon Meringue Tarts

Prep Time 30 minutes
Cook Time 15 minutes
Total Time 45 minutes
Servings 8 pieces
Calories 250
Delight in these tangy lemon tarts topped with fluffy meringue, perfect for a sweet and citrusy treat.

Ingredients

Dough

  • 120 g powdered sugar
  • 170 g unsalted butter (softened)
  • 1/2 teaspoon salt
  • 1 large egg (room temperature)
  • 1 teaspoon vanilla extract
  • 350 g all-purpose flour
  • 3 large whole eggs
  • 3 large egg yolks (save the egg whites for meringue)
  • 150 g granulated sugar
  • 2 lemons juice of lemons
  • 100 g unsalted butter (softened & cubed)
  • 3 large egg whites (for meringue)
  • 125 g granulated sugar (for meringue)
  • 1 teaspoon vanilla extract (for meringue)

Instructions 

  • Prepare the tart crust by mixing softened butter, powdered sugar, salt, egg, vanilla, and flour. Press into tart molds and bake at 180°C (350°F) for 15 minutes.
  • Mix lemon juice, softened butter, and egg yolks to make the lemon filling. Pour into baked crusts.
  • Bake the filled tarts at 180°C (350°F) for 10 minutes until set.
  • Whip egg whites with vanilla and sugar until stiff peaks form. Spread or pipe meringue over the cooled tarts.
  • Broil or torch the meringue until golden brown. Serve immediately.

Notes

Ensure the meringue is fully cooked to prevent any raw egg whites.
Calories: 250kcal
Cost: $15
Course: Dessert
Cuisine: American
Keyword: Lemon