Author

michael

Browsing

Welcome to a delicious morning with Almond Butter Banana Toast! Whether you’re rushing out the door or enjoying a lazy weekend, this simple yet delightful recipe is your go-to for a quick energy boost. Packed with flavor and nutrition, this toast transforms your mornings into something special. Let’s dive into the world of almond butter and banana goodness!

Why You’ll Love This Recipe

  • Quick and Easy: This recipe takes just 10 minutes to prepare! Perfect for busy mornings.
  • Nutritious Fuel: With healthy fats from almond butter and fiber from whole grain bread, you’ll stay full longer.
  • Deliciously Versatile: Customize with your favorite toppings to keep things exciting every day.
  • Kid-Friendly: A fun way to introduce kids to healthy eating without sacrificing taste!
  • Great for Any Meal: Enjoy it for breakfast, a snack, or even dessert — it’s that versatile!

Ingredients Breakdown

Here’s what you’ll need to whip up this tasty toast:

  • 2 slices Bread: Choose your favorite! Whole grain or sourdough adds great flavor and texture.
  • 2 tablespoons Almond Butter: Opt for creamy or crunchy based on your preference.
  • 1 medium Banana: Use a ripe banana for natural sweetness and a creamy texture.
  • 1 teaspoon Honey or Maple Syrup: Perfect for an added touch of sweetness.
  • 1 tablespoon Chia seeds or Flaxseeds: These superfoods add extra crunch and nutrients.
  • 1/4 teaspoon Cinnamon: This spice enhances the flavor beautifully.
  • 2 tablespoons Crushed Walnuts or Almonds: For that delightful extra crunch and healthy fats.

Expert Tips for Perfect Almond Butter Banana Toast

  • Use Fresh Ingredients: Fresh bread and ripe bananas make a world of difference in flavor.
  • Toast Your Bread: A quick toast in a toaster or skillet adds a lovely crunch.
  • Layer Smartly: Spread almond butter evenly for the best taste experience.
  • Experiment with Flavors: Try adding a sprinkle of nutmeg or a dash of vanilla extract for extra flair.
  • Mind Your Portions: Keep an eye on the almond butter and toppings to avoid making it too rich.
  • Try Different Breads: Rye or gluten-free options can be equally delicious!
  • Storage Tip: If you have leftover ingredients, store almond butter in an airtight container to keep it fresh.
  • Prep Ahead: You can slice bananas and store them in the fridge to save time in the morning!

Common Mistakes and Troubleshooting
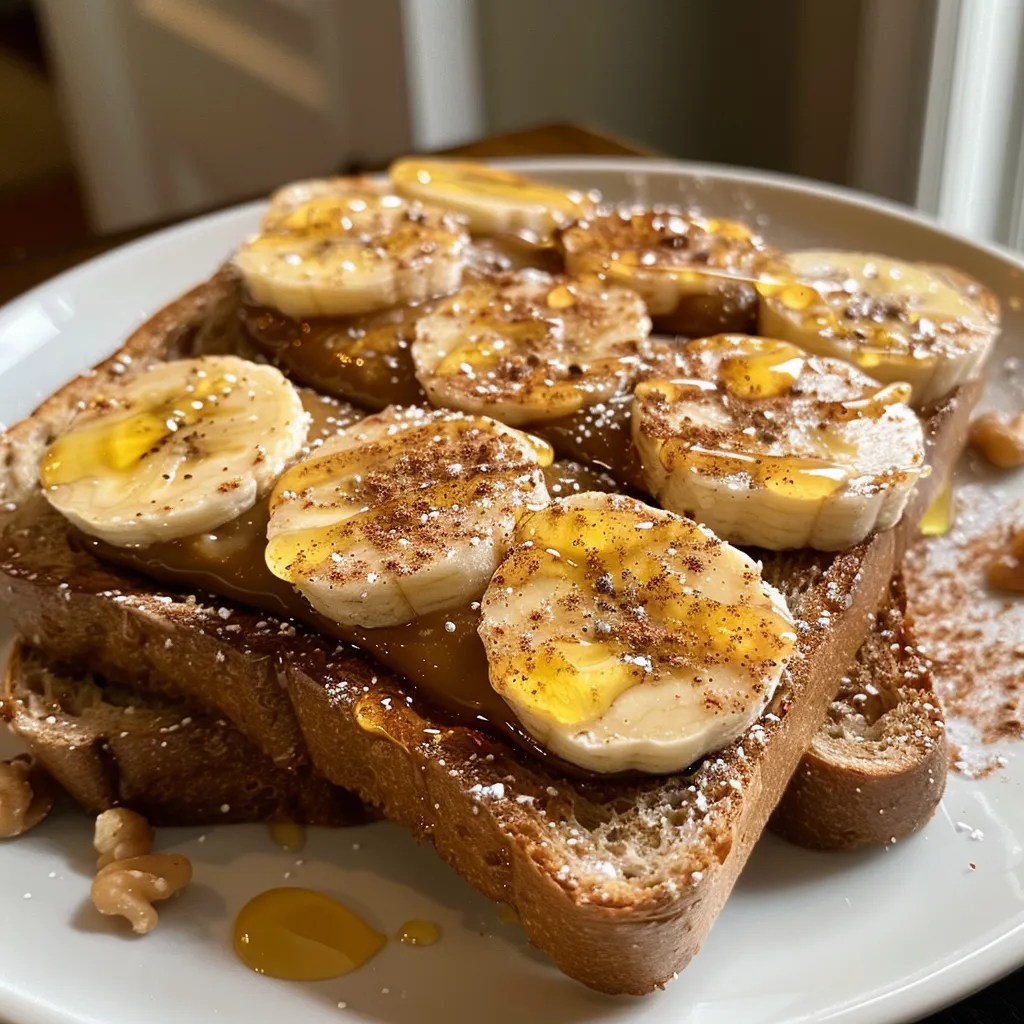
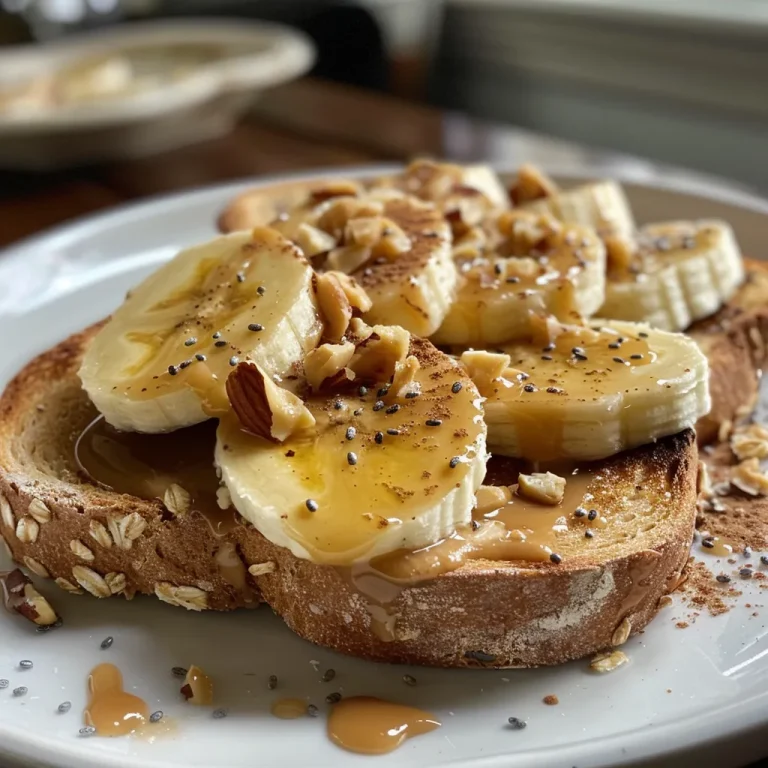
Side view of two slices of bread spread with almond butter and banana slices.

Even the best of us make mistakes in the kitchen! Here are some common pitfalls and how to avoid them:

  • Banana Browning: To keep banana slices fresh, add a bit of lemon juice to prevent browning.
  • Overloading Toppings: Too many toppings can make your toast soggy. Start simple and build up!
  • Ignoring Texture: Make sure to toast the bread for that perfect crunch that contrasts with the creamy almond butter.
  • Skimping on Almond Butter: Don’t be afraid to slather on enough almond butter for flavor; it’s what makes this toast special!

Delicious Variations

Feeling adventurous? Here are some fun variations to try:

  • Berry Bliss: Top your toast with mixed berries for a fruity twist.
  • Nutty Chocolate: Drizzle melted dark chocolate over almond butter for a decadent treat.
  • Savory Spin: Add a sprinkle of sea salt and a dash of pepper for a savory vibe.
  • Protein Power: Mix in a scoop of protein powder into your almond butter for a post-workout snack!

Storage and Make-Ahead Instructions

If you want to enjoy this recipe later, here’s how:

  • Storing Almond Butter: Keep it in an airtight container in a cool, dry place. It can last several months!
  • Banana Prep: Slice bananas ahead of time and store them in an airtight container in the fridge for up to 3 days.
  • Toast Storage: While toast is best fresh, you can store prepared almond butter toast in the fridge for a few hours before eating.

Comprehensive FAQ

  • Can I use other nut butters?
    Absolutely! Peanut butter, cashew butter, or sunflower seed butter work just as well.
  • Is this recipe gluten-free?
    Yes, if you use gluten-free bread.
  • Can I add protein powder?
    Yes, you can mix protein powder into the almond butter for a protein boost.
  • How can I make this vegan?
    Use maple syrup instead of honey and ensure the bread is vegan-friendly.
  • How do I make this toast sweeter?
    Add more honey or maple syrup, or top with sweet fruits like strawberries or peaches.
  • Can I prepare this for meal prep?
    Yes! Prepare the ingredients ahead of time and assemble the toast when ready to eat.
  • How long can I store leftover almond butter?
    It can last several months if stored properly in an airtight container.
  • What’s the best way to serve this toast?
    Serve immediately for the best taste and texture. Enjoy it with a side of yogurt or fresh fruit for a complete meal!

Nutrition Tips and Dietary Adaptations

This toast is not only delicious but also nutritious! Here’s how to make it fit your dietary needs:

  • For Protein Boost: Add protein powder or Greek yogurt on the side.
  • For Lower Sugar: Skip the honey or syrup and rely on the natural sweetness of ripe bananas.
  • For Fiber: Include chia seeds or flaxseeds to enhance the fiber content.

Essential Equipment Recommendations

To get the best results from this recipe, consider having these kitchen tools handy:

  • Toaster: For perfectly toasted bread that adds texture.
  • Spreading Knife: A good knife makes spreading almond butter a breeze.
  • Measuring Spoons: To ensure you get the right amount of toppings.

Serving Suggestions

Looking to round out your meal? Here are some ideas:

  • Pair with a Smoothie: A green smoothie complements the flavors and adds more nutrients!
  • Enjoy with Yogurt: A side of yogurt can add creaminess and protein to your meal.
  • Serve with Fresh Juice: A glass of fresh orange juice is refreshing and energizing!

In conclusion, Almond Butter Banana Toast is a delightful, easy-to-make breakfast that you’ll love. With its endless customization options, you can make it your own every day. So grab those ingredients and get started on your delicious morning boost. Remember, cooking is all about enjoying the process and connecting with food, so have fun in the kitchen! Bon appétit!

Easy Almond Butter Banana Toast That Transforms Your Morning Boost

Prep Time 5 minutes
Total Time 5 minutes
Servings 2 slices
Calories 350
Start your day with this quick and nutritious almond butter banana toast, perfect for a morning energy boost.

Ingredients

Bread

  • 2 slices Bread (Choose your favorite: whole grain or sourdough.)

Almond Butter

  • 2 tablespoons Almond Butter (Creamy or crunchy.)

Banana

  • 1 medium Banana (Ripe and sweet.)

Honey or Maple Syrup

  • 1 teaspoon Honey or Maple Syrup (For natural sweetness.)

Chia seeds or Flaxseeds

  • 1 tablespoon Chia seeds or Flaxseeds (For extra crunch.)

Cinnamon

  • 1/4 teaspoon Cinnamon (For enhanced flavor.)

Crushed Walnuts or Almonds

  • 2 tablespoons Crushed Walnuts or Almonds (For added texture.)

Instructions 

  • Toast the bread slices until golden brown.
  • Spread almond butter evenly on each slice.
  • Slice the banana and place on top of the almond butter.
  • Drizzle honey or maple syrup over the banana slices.
  • Sprinkle chia seeds or flaxseeds, cinnamon, and crushed nuts on top.

Notes

For extra flavor, add a dash of vanilla extract or a sprinkle of cocoa powder.
Calories: 350kcal
Cost: $4
Course: Breakfast
Cuisine: American
Keyword: Almond Butter, banana

Welcome to a delightful culinary adventure! If you’re looking to whip up a delicious, restaurant-quality dish that’s quick and easy, then you’ve landed in the right spot. This lemon butter chicken recipe is not just a meal; it’s a celebration of flavor, simplicity, and the joy of cooking. With just a handful of ingredients and about 25 minutes, you can turn your weeknight dinner into something extraordinary. Let’s dive into why you’ll absolutely love this recipe!

Why You’ll Love This Recipe

  • Quick and Easy: Perfect for busy weeknights, this lemon butter chicken comes together in just 25 minutes, allowing you to enjoy a homemade meal without the fuss.
  • Flavor Explosion: The combination of lemon and butter creates a rich, tangy sauce that elevates the chicken to a new level of deliciousness.
  • One-Skillet Wonder: Less cleanup is always a win! This recipe uses only one skillet, making it easy to cook and serve.
  • Customizable: With simple substitutions and variations, you can easily adapt this recipe to suit your taste or dietary needs.
  • Impressive Presentation: Serve it up with a sprinkle of fresh parsley and watch your family or guests marvel at your culinary skills!

What You Need to Make Lemon Butter Chicken

Ingredients

Here’s what you’ll need to create this delicious dish:

  • 4 boneless, skinless chicken breasts (1½ to 2 lbs total)
  • ½ cup all-purpose flour
  • 1 teaspoon salt
  • ½ teaspoon black pepper
  • ½ teaspoon garlic powder
  • 2 tablespoons olive oil
  • 2 tablespoons butter
  • 3 cloves garlic (minced)
  • 1 cup chicken broth (low sodium)
  • Juice of 1 large lemon (about 3 tablespoons)
  • Zest of 1 lemon
  • 4 tablespoons cold butter (cut into pieces)
  • 2 tablespoons fresh parsley (chopped)
  • Salt and pepper to taste

Substitutions

  • Chicken Thighs: Feel free to swap out chicken breasts for thighs if you prefer a juicier cut of meat.
  • Gluten-Free Option: Substitute all-purpose flour with a gluten-free flour blend for dredging.
  • Vegetarian Version: Use tofu or seitan instead of chicken for a plant-based alternative.
  • Herb Variations: Experiment with herbs like thyme or rosemary for an added flavor twist.

How to Make Lemon Butter Chicken

Now, let’s get cooking! Follow these simple steps for a mouthwatering lemon butter chicken.

Step 1: Prepare the Chicken

Place chicken breasts between plastic wrap or parchment paper. Pound them to an even thickness of about ½ to ¾ inch. This helps them cook evenly.

Step 2: Dredge the Chicken

In a shallow dish, mix the flour, salt, pepper, and garlic powder. Pat the chicken dry and dredge it in the flour mixture, coating both sides. Shake off any excess flour.

Step 3: Sear the Chicken

Heat olive oil and 2 tablespoons of butter in a large skillet over medium-high heat. Add the chicken and cook for about 5 to 6 minutes on each side until golden brown and cooked through (internal temperature should reach 165°F). Transfer to a plate and tent with foil to keep warm.

Step 4: Make the Lemon Butter Sauce

Reduce the heat to medium. Add minced garlic to the same skillet and sauté for about 30 seconds until fragrant. Pour in the chicken broth and scrape up the browned bits from the bottom of the pan with a wooden spoon. Add the lemon juice and bring to a simmer. Cook for 2 minutes, stirring occasionally, until the sauce has reduced by half.

Step 5: Finish the Sauce

Remove the skillet from heat. Stir in the cold butter pieces and lemon zest, swirling until the butter melts and the sauce becomes glossy. Taste and adjust seasoning as needed.

Step 6: Serve

Return the chicken to the skillet, spoon the lemon butter sauce over it to coat, sprinkle with fresh parsley, and serve immediately!

Serving Suggestions

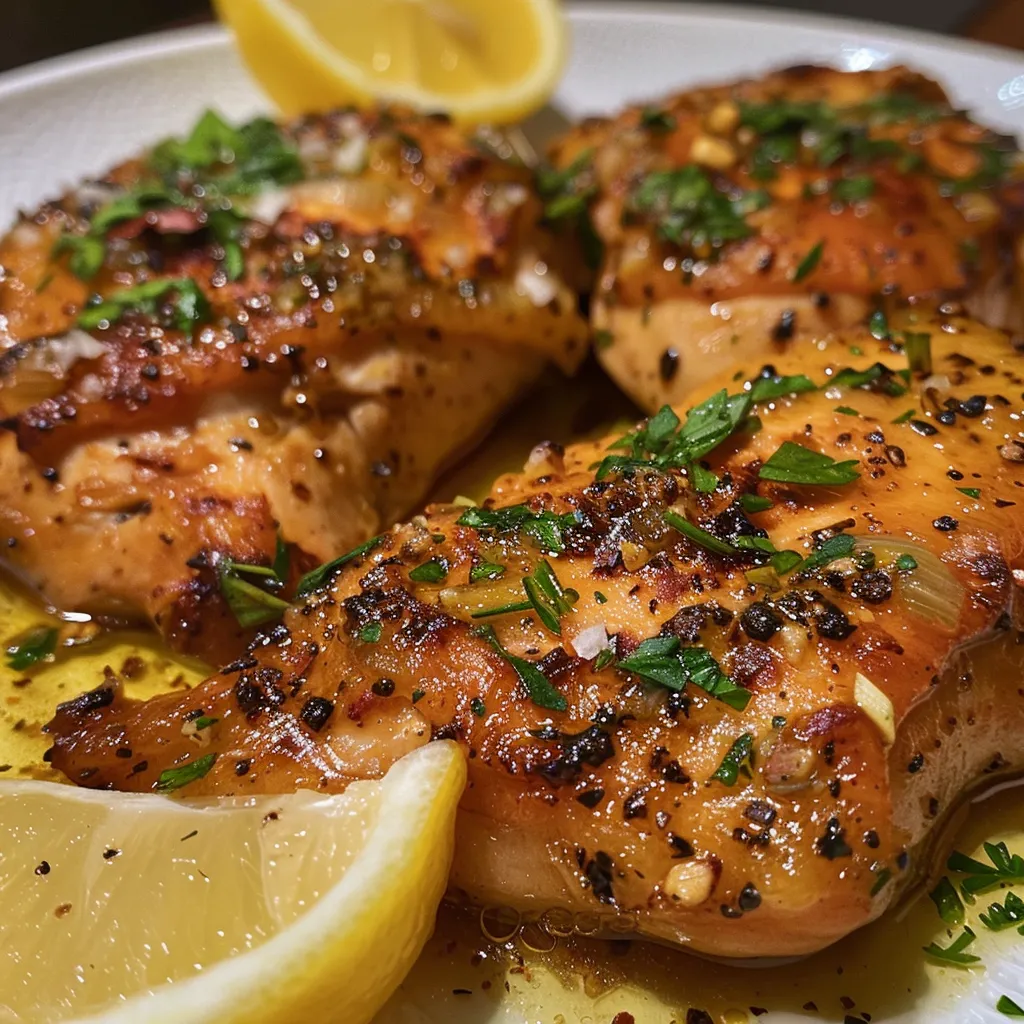
A close-up view of golden-browned chicken breasts soaked in lemon butter sauce.

This lemon butter chicken pairs beautifully with a variety of sides. Here are some tasty ideas:

  • Rice: Serve over fluffy white rice or brown rice to soak up the delicious sauce.
  • Pasta: Toss with your favorite pasta for a hearty meal.
  • Vegetables: Steamed broccoli or green beans add a fresh touch.
  • Salad: A crisp garden salad balances the richness of the dish.

Pro Tips for Perfect Lemon Butter Chicken

  • Don’t Overcook: Keep an eye on the chicken to avoid overcooking, which can make it dry.
  • Use Fresh Ingredients: Fresh lemon juice and zest make a noticeable difference in flavor.
  • Scrape the Pan: Make sure to scrape up all the browned bits for added depth in the sauce.
  • Let it Rest: Allow the chicken to rest after cooking for juicier results.
  • Adjust Seasoning: Always taste your sauce and adjust the seasoning to your preference.
  • Use Cold Butter: Adding cold butter at the end helps to emulsify the sauce for a silky texture.
  • Garnish Wisely: Fresh parsley adds not only color but also a fresh flavor to the dish.
  • Clean Up the Mess: A quick soak in hot, soapy water will make cleaning the skillet a breeze.

Common Mistakes and Troubleshooting

Even the best cooks make mistakes, but don’t worry! Here’s how to troubleshoot common issues:

  • Chicken is Dry: This can happen if it’s overcooked. Use a meat thermometer to ensure it reaches 165°F.
  • Sauce is Thin: If the sauce is too thin, simmer it longer to reduce and thicken it.
  • Flavor is Bland: Always season your chicken and sauce properly. Adjust with salt, pepper, or more lemon juice.

Storage and Make-Ahead Instructions

This lemon butter chicken can be made ahead of time and stored in the fridge for up to 3 days. To reheat, simply warm it in a skillet over medium heat until heated through. You can also freeze the cooked chicken in an airtight container for up to 3 months. Thaw in the fridge overnight before reheating.

Frequently Asked Questions (FAQ)

  • Can I use chicken thighs instead of breasts? Yes, chicken thighs work well and add extra juiciness!
  • Is this recipe gluten-free? You can make it gluten-free by using a gluten-free flour alternative.
  • Can I add vegetables to this dish? Absolutely! Add veggies like spinach or bell peppers to the skillet during cooking.
  • What can I serve with lemon butter chicken? It pairs well with rice, pasta, or a fresh salad.
  • Can I make this dish ahead of time? Yes, it stores well in the fridge for up to 3 days.
  • How do I keep the chicken moist? Avoid overcooking and let the chicken rest after cooking.
  • Can I use frozen chicken? Yes, but ensure it’s fully thawed before cooking for even results.
  • What’s the best way to reheat leftovers? Gently warm in a skillet over medium heat for best results.

Nutritional Tips and Dietary Adaptations

This recipe is naturally low in carbohydrates and can be made healthier by using less butter or substituting with olive oil. For dairy-free options, replace butter with vegan butter. Always remember to adjust portion sizes and ingredient choices according to your dietary needs.

Equipment Recommendations

For this recipe, you’ll need:

  • Skillet: A large skillet is essential for cooking the chicken and making the sauce.
  • Meat Thermometer: To ensure your chicken is cooked perfectly every time.
  • Wooden Spoon: Great for scraping up those delicious browned bits from the pan.

Conclusion

And there you have it—an easy, delicious lemon butter chicken recipe that’s perfect for any night of the week! The bright flavors and comforting textures will surely impress your family or guests, while the simplicity of the recipe will keep you coming back for more. Remember, cooking is all about enjoying the process and creating connections, so grab your apron and get cooking! You’ve got this!

Lemon Butter Chicken Recipe

Prep Time 10 minutes
Cook Time 15 minutes
Total Time 25 minutes
Servings 4 servings
Calories 450
A flavorful and easy lemon butter chicken that combines tender chicken breasts with a zesty, buttery sauce. Perfect for a quick weeknight dinner.

Ingredients

Chicken

  • 4 pieces boneless (skinless chicken breasts (1½ to 2 lbs total))
  • 0.5 cup all purpose flour
  • 1 teaspoon salt
  • 0.5 teaspoon black pepper
  • 0.5 teaspoon garlic powder
  • 2 tablespoons olive oil
  • 2 tablespoons butter
  • 3 cloves garlic (minced)
  • 1 cup chicken broth (low sodium)
  • 3 tablespoons juice of 1 large lemon
  • 1 lemon zest of 1 lemon
  • 4 tablespoons cold butter (cut into pieces)
  • 2 tablespoons fresh parsley (chopped)
  • to taste Salt and pepper

Instructions 

  • Cook chicken in oil and butter until golden and cooked through, about 5-6 minutes per side. Set aside.
  • Sauté garlic, add broth and lemon juice, simmer until reduced by half, then stir in cold butter and lemon zest.
  • Return chicken to skillet, spoon sauce over, garnish with parsley, and serve immediately.

Notes

For extra flavor, add a pinch of red pepper flakes to the sauce.
Calories: 450kcal
Cost: $15
Course: Main Course
Cuisine: American
Keyword: chicken, Lemon

Why Teriyaki Chicken Lettuce Cups Are Your New Favorite Meal

Are you looking for a meal that combines ease, flavor, and health? Look no further than teriyaki chicken lettuce cups! These delightful bites are perfect for busy weeknights, light lunches, or even a fun appetizer at your next gathering. Not only are they delicious, but they also come together in a flash, allowing you to enjoy a homemade meal without spending hours in the kitchen. In this guide, we’ll walk through everything you need to know about making teriyaki chicken lettuce cups, from ingredients to serving suggestions. Let’s dive in!

Why You’ll Love This Recipe

  • Quick Cooking Time: With a prep and cook time of under 30 minutes, these lettuce cups are ideal for those hectic evenings when you need a fast, satisfying meal.
  • Health-Conscious Option: Packed with fresh veggies and lean chicken, these cups are a light yet filling choice that doesn’t compromise on flavor.
  • Customizable Ingredients: Feel free to swap in your favorite proteins or veggies. This recipe is as flexible as your creativity allows!
  • Minimal Cleanup: Since everything is made in one skillet, cleanup is a breeze. Say goodbye to piles of dirty dishes!
  • Fun to Eat: Eating with your hands is always more enjoyable! These lettuce cups are not only tasty but also provide a delightful crunch.

Ingredients You’ll Need

Let’s gather our ingredients for these tasty teriyaki chicken lettuce cups. Here’s what you need:

  • 1 pound boneless, skinless chicken breasts
  • 2 tablespoons vegetable oil (for cooking)
  • 1/4 cup teriyaki sauce (key flavoring)
  • 1 tablespoon soy sauce
  • 1 teaspoon garlic (minced)
  • 1 teaspoon ginger (minced)
  • Salt and pepper to taste
  • 1 head butter lettuce (or iceberg lettuce)
  • 1/2 cup shredded carrots
  • 1/2 cup diced cucumber
  • 1/4 cup sliced green onions
  • Sesame seeds (for garnish, optional)

How to Make Teriyaki Chicken Lettuce Cups

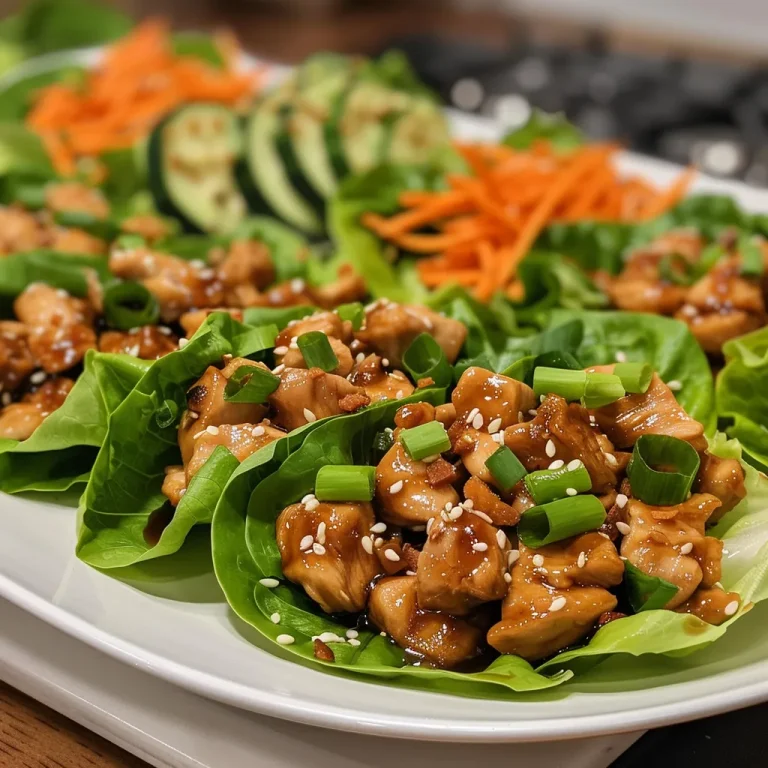
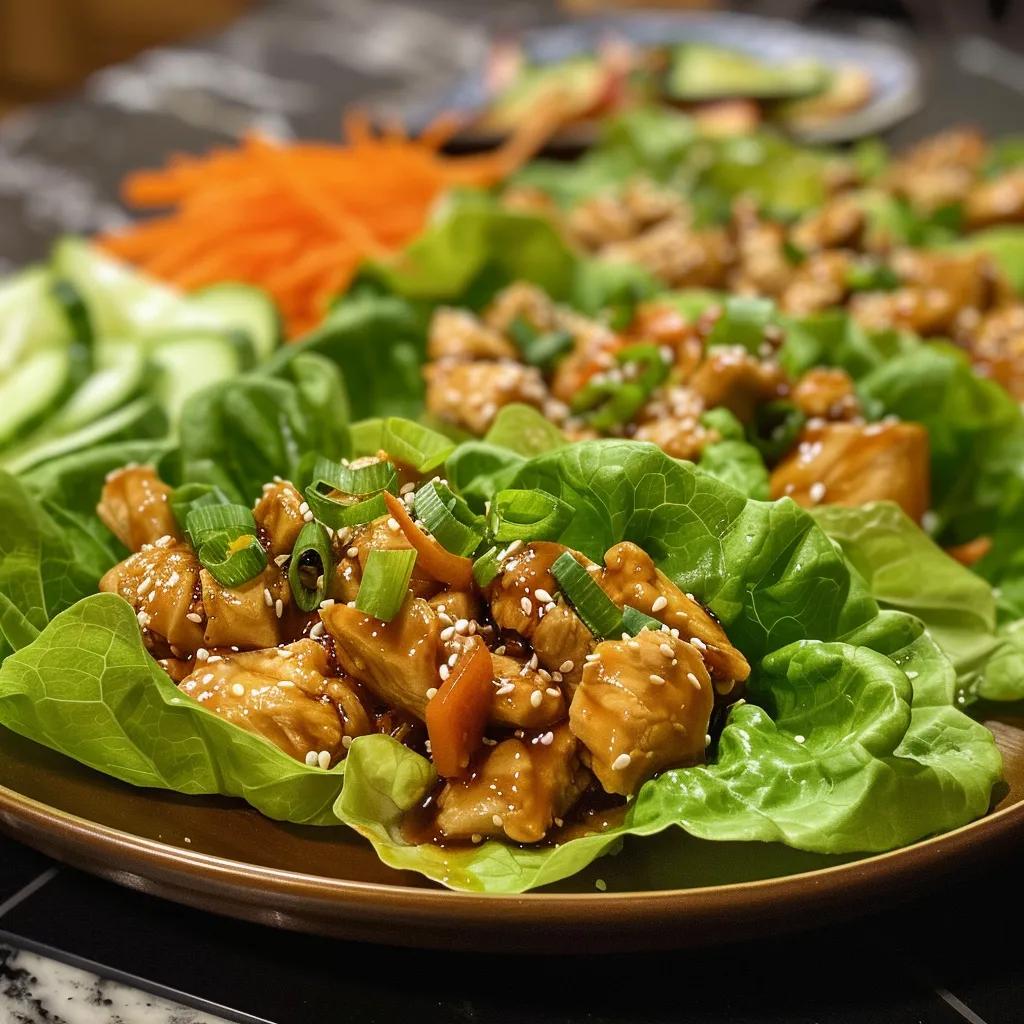
Side view of Teriyaki Chicken Lettuce Cups featuring vibrant vegetables and glistening sauce.

Now that we have our ingredients, let’s walk through the steps to create these delicious cups:

  1. Start by heating the vegetable oil in a large skillet over medium heat.
  2. Once hot, add the minced garlic and ginger, sautéing for about 30 seconds until fragrant.
  3. Next, add the chicken breasts to the skillet. Cook for about 5-7 minutes on each side, or until fully cooked through.
  4. Remove the chicken from the skillet and let it rest for a few minutes before dicing it into bite-sized pieces.
  5. In the same skillet, add the teriyaki sauce and soy sauce to the chicken. Stir until the chicken is well-coated and heated through.
  6. Prepare your lettuce cups by carefully separating the leaves. Place a generous spoonful of the chicken mixture into each leaf.
  7. Top with shredded carrots, diced cucumber, and sliced green onions. Sprinkle sesame seeds on top if desired.
  8. Enjoy these cups fresh or chill for a bit for a refreshing take!

Pro Tips for Success

  • Chicken Cooking Tip: Ensure the chicken is cooked through to an internal temperature of 165°F for safety.
  • Perfect Sauce Blend: Adjust the amount of teriyaki sauce according to your taste. You can add a bit of honey for extra sweetness!
  • Fresh Ingredients Matter: Choose fresh, crisp lettuce for the best texture. Butter lettuce is ideal due to its soft leaves.
  • Meal Prep Friendly: Prepare the chicken mixture ahead of time and store it in the fridge for up to 3 days.
  • Spice It Up: If you enjoy heat, add sriracha or chili flakes to the chicken mixture for a spicy twist!
  • Storage Tip: Store any leftovers in an airtight container in the refrigerator and consume within 2 days.
  • Freezing Guidelines: You can freeze the cooked chicken mixture for up to 3 months. Just thaw before serving!
  • Serving Suggestions: Pair your cups with jasmine rice or a light miso soup for a complete meal.

Common Mistakes and Troubleshooting

Even the best of us can make mistakes in the kitchen. Here are some common pitfalls and how to avoid them:

  • Overcooking the Chicken: Keep an eye on the chicken while it cooks. Overcooked chicken can become dry.
  • Too Much Sauce: If you find the teriyaki flavor too strong, balance it out with additional veggies or a squeeze of lime.
  • Messy Lettuce Cups: If the cups are tearing, you might need to choose sturdier lettuce, like iceberg, to better hold the filling.

Variations to Try

Feeling adventurous? Here are some fun variations to make your teriyaki chicken lettuce cups unique:

  • Vegetarian Option: Substitute chicken with tofu or tempeh, marinating it in teriyaki sauce for extra flavor.
  • Asian-Inspired Slaw: Mix in a slaw of shredded cabbage, carrots, and a little rice vinegar for tanginess.
  • Crunchy Add-Ins: Add chopped nuts like peanuts or cashews for an extra crunch and flavor contrast.
  • Fruit Fusion: Incorporate diced pineapple or mango into the chicken mixture for a sweet and savory twist.

How to Store and Make Ahead

To ensure your teriyaki chicken lettuce cups stay fresh and tasty:

  • Refrigeration: Store any leftover chicken mixture in an airtight container in the fridge for up to 2-3 days.
  • Freezing: You can freeze the chicken mixture. Thaw it in the fridge overnight before reheating.
  • Make Ahead Option: Prepare the chicken and chop your veggies ahead of time, so assembly is quick at mealtime.

Frequently Asked Questions

Here are some common questions about teriyaki chicken lettuce cups:

  • Can I use ground chicken instead of whole breasts? Absolutely! Ground chicken is a great alternative and cooks faster.
  • What other sauces can I use? You can experiment with hoisin or sweet chili sauce for a different flavor profile.
  • How do I make this gluten-free? Use gluten-free soy sauce or tamari instead of regular soy sauce.
  • Can I add more vegetables? Yes! Feel free to include bell peppers, broccoli, or snap peas for extra nutrition.
  • What’s the best way to serve leftovers? Reheat the chicken mixture and serve in fresh lettuce cups for a quick meal.
  • How can I make this spicy? Add fresh chilies or a dash of hot sauce to the chicken mixture.
  • Is this recipe kid-friendly? Definitely! Kids love the fun of assembling their own lettuce cups.
  • Can I use a different type of lettuce? Yes! Romaine or even collard greens work well if you want something sturdier.

Nutritional Tips and Dietary Adaptations

For those mindful of their nutritional intake, here are some helpful tips:

  • Low-Carb Option: Skip the rice and serve your cups with a side salad for a low-carb meal.
  • Protein Boost: Add edamame to the chicken mixture for an extra protein punch.
  • Vegan Option: Use a plant-based teriyaki sauce and substitute chicken with jackfruit or mushrooms.
  • Whole30 Approved: Ensure all sauces are compliant with Whole30 guidelines by checking for added sugars.

Essential Equipment You’ll Need

To make your cooking experience seamless, here’s a list of equipment you should have:

  • Skillet: A non-stick or cast-iron skillet works wonderfully for this recipe.
  • Sharp Knife: For dicing the chicken and chopping vegetables.
  • Cutting Board: A clean surface is essential for food prep.
  • Measuring Cups and Spoons: Ensure accurate measurements for sauces and ingredients.

Serving Suggestions

To round off your meal, consider pairing your teriyaki chicken lettuce cups with any of the following:

  • Jasmine Rice: Light and fluffy, it’s a classic accompaniment that soaks up the teriyaki sauce beautifully.
  • Roasted Vegetables: Seasonal veggies like carrots and zucchini add color and nutrition to your plate.
  • Miso Soup: A light broth that complements the sweetness of the teriyaki chicken nicely.
  • Cucumber Salad: A refreshing side that enhances the overall meal experience.

In conclusion, teriyaki chicken lettuce cups are not just a meal; they are a celebration of flavors and textures! With their quick prep time and delightful crunch, they easily become a family favorite. So gather your ingredients, unleash your inner chef, and enjoy making this wonderful recipe. Remember, great cooking doesn’t have to be complicated — it should be fun! Happy cooking!

Teriyaki Chicken Lettuce Cups

Prep Time 10 minutes
Cook Time 15 minutes
Total Time 25 minutes
Servings 4 cups
Calories 350
Enjoy these flavorful and healthy lettuce cups filled with tender teriyaki chicken and fresh vegetables.

Ingredients

Protein

  • 1 pound boneless, skinless chicken breasts
  • 2 tablespoons vegetable oil (for cooking)
  • 1/4 cup teriyaki sauce (key flavoring)
  • 1 tablespoon soy sauce
  • 1 teaspoon garlic (minced)
  • 1 teaspoon ginger (minced)
  • to taste salt
  • to taste pepper

Vegetables

  • 1 head butter lettuce (or iceberg lettuce)
  • 1/2 cup shredded carrots
  • 1/2 cup diced cucumber
  • 1/4 cup sliced green onions
  • to taste sesame seeds (for garnish)

Instructions 

  • Cook chicken with garlic, ginger, soy sauce, and teriyaki sauce until cooked through.
  • Shred the cooked chicken into small pieces.
  • Separate lettuce leaves and fill with chicken, carrots, cucumber, and green onions.
  • Garnish with sesame seeds and serve.

Notes

For extra flavor, marinate the chicken in teriyaki sauce for 30 minutes before cooking.
Calories: 350kcal
Cost: $15
Course: Appetizer
Cuisine: Japanese
Keyword: chicken

Why This Lemon Herb Chicken Recipe Will Become Your Go-To

Are you ready to elevate your weeknight dinners with a dish that’s not only easy to prepare but also bursting with flavor? This easy crispy lemon herb chicken with vibrant spring veggies is exactly what you need. It’s the perfect balance of crispy skin, zesty lemon, and fresh herbs that will make your taste buds sing. Plus, it’s a meal that comes together quickly, making it ideal for busy evenings. Let’s dive into why you’ll love this recipe!

  • Quick Preparation: Whip this up in about 40 minutes, perfect for those hectic weeknights when you need something delicious but don’t have hours to spend in the kitchen.
  • Simple Ingredients: You won’t need to hunt for exotic spices or rare produce. Just grab some fresh lemon, herbs, and seasonal veggies from your local market!
  • Healthy and Flavorful: Packed with lean protein and colorful vegetables, this dish is not only comforting but also nutritious.
  • Versatile and Adaptable: Whether you want to switch up the veggies or try different herbs, this recipe is flexible to suit your taste.
  • Impressive Presentation: Serve this dish at your next family gathering or dinner party, and watch your guests marvel at the beautiful colors and aroma!

Ingredient Breakdown: What You’ll Need

Before we get cooking, let’s take a closer look at the ingredients that make this recipe shine. Each one plays a vital role in creating that mouthwatering flavor.

  • 4 boneless, skin-on chicken breasts: The star of our dish! Skin-on ensures you achieve that crispy skin everyone loves.
  • 1 large lemon: We’ll use both the zest and juice for a vibrant citrusy punch that brightens the chicken and adds refreshing tang.
  • 2 tablespoons fresh thyme: This herb brings an earthy flavor that complements the lemon beautifully.
  • 2 tablespoons fresh rosemary: Rosemary adds a fragrant touch that enhances the overall aroma of the dish.
  • 3 cloves garlic: Minced garlic is a flavor powerhouse, bringing depth and richness to the marinade.
  • 3 tablespoons extra virgin olive oil: Essential for moisture and helps achieve that perfect golden-brown crust.
  • Salt and black pepper: Essential seasonings that elevate the dish’s overall flavor.
  • 1 cup asparagus: Tender and vibrant, asparagus adds a lovely crunch and color to your plate.
  • 1 cup sugar snap peas: Sweet and crisp, these peas are a delightful addition.
  • 1 cup baby carrots: Their natural sweetness pairs wonderfully with the lemon and herbs.
  • 1 cup baby potatoes (Yukon Gold): Creamy and tender, they soak up the flavors of the dish.
  • Optional: red pepper flakes: For those who enjoy a bit of heat, sprinkle some on for an extra kick!

Step-by-Step Preparation Method

Now that we have our ingredients ready, let’s break down the steps to create this delicious meal.

  1. In a mixing bowl, combine lemon zest, lemon juice, minced garlic, chopped thyme and rosemary, olive oil, salt, and pepper.
  2. Toss the chicken breasts in the marinade, ensuring the skin side is well coated. Let it sit at room temperature for 10 minutes to soak up those flavors.
  3. Preheat your oven to 400°F (200°C).
  4. In another bowl, toss asparagus, sugar snap peas, carrots, and baby potatoes with a drizzle of olive oil, salt, and pepper. Set aside.
  5. Heat a cast-iron skillet over medium-high heat. Place the chicken breasts, skin side down, and press gently with tongs to keep the skin flat.
  6. Sear the chicken until the skin is golden brown and crispy, about 5-7 minutes. Flip and sear the other side for 1 minute.
  7. Nestle the prepared vegetables around the chicken breasts in the skillet.
  8. Transfer the skillet to the oven and roast for 20-25 minutes until the chicken reaches an internal temperature of 165°F (74°C) and the veggies are tender.
  9. Remove the skillet from the oven and let the chicken rest for 5 minutes before slicing.
  10. Serve the chicken alongside the roasted vegetables, spooning pan juices over the top for added flavor.

Pro Tips for Perfect Crispy Lemon Herb Chicken

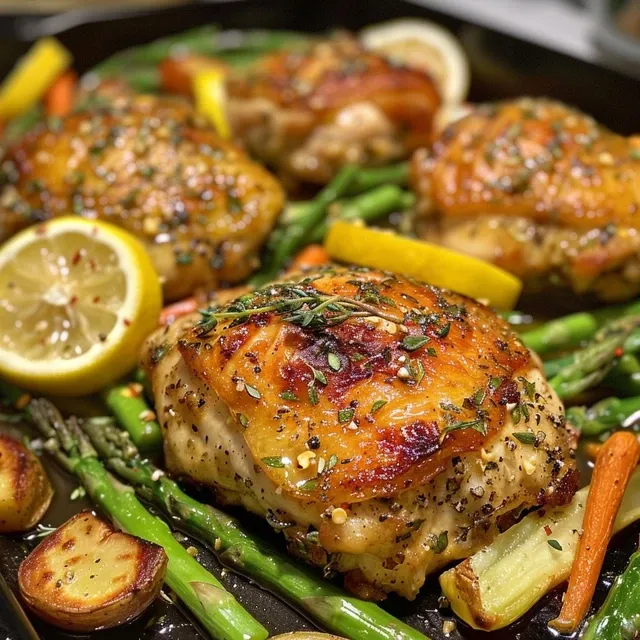
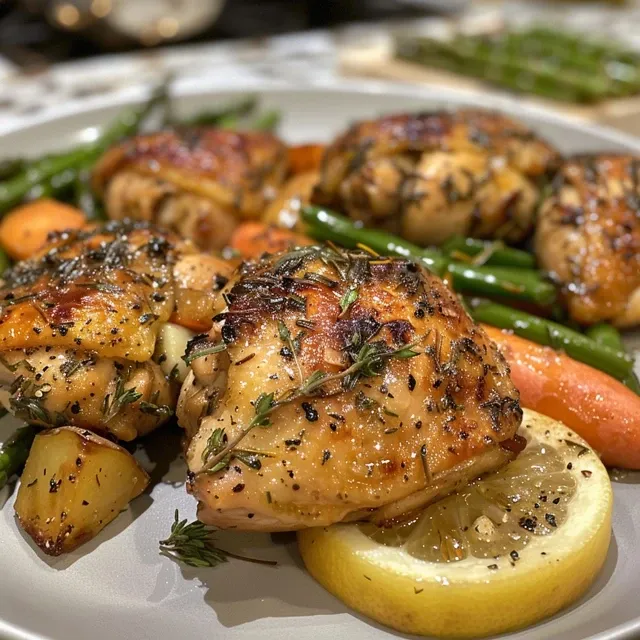
Juicy chicken breast garnished with herbs and surrounded by vibrant vegetables.

Want to take your dish to the next level? Here are some expert tips to ensure you nail this recipe every time:

  • Pat the chicken dry: For ultimate crispiness, make sure to pat the skin dry before marinating.
  • Let it marinate: If you have time, marinate the chicken for a few hours or overnight for even deeper flavor.
  • Use a meat thermometer: To avoid overcooking, use a meat thermometer to check that your chicken reaches 165°F (74°C).
  • Rest the chicken: Letting the chicken rest after cooking helps keep it juicy and tender.
  • Don’t crowd the pan: Ensure there’s enough space around the chicken and vegetables in the skillet for even cooking.
  • Experiment with herbs: Feel free to swap thyme and rosemary for your favorite herbs like oregano or basil!
  • Use seasonal veggies: Substitute or add any spring vegetables you love—zucchini, bell peppers, or even mushrooms!
  • Make it a one-pan meal: Roast everything together in the same skillet for easy cleanup and maximum flavor.

Common Mistakes and Troubleshooting

Even the best of us make mistakes in the kitchen! Here are some common pitfalls and how to avoid them:

  • Overcooking the chicken: Keep an eye on the cooking time and use a thermometer to check for doneness.
  • Not enough seasoning: Don’t be shy with the salt and pepper! It makes all the difference.
  • Skipping the sear: Searing the chicken skin side down is crucial for that crispy texture.
  • Not letting it rest: Resist the urge to cut into your chicken right away; resting is key to juicy meat.

Delicious Variations to Try

If you’re looking to switch things up, here are some variations that can put a fun spin on this classic dish:

  • Crispy Lemon Herb Chicken Thighs: Swap chicken breasts for thighs for an even more flavorful and juicy option.
  • Garlic Butter Chicken: Add a few tablespoons of garlic butter to the skillet for an extra indulgent flavor.
  • Honey Mustard Glaze: Drizzle honey mustard over the chicken before roasting for a sweet and tangy finish.
  • Spicy Lemon Herb Chicken: Add crushed red pepper flakes to the marinade for a spicy kick.

Storage and Make-Ahead Instructions

This recipe is great for meal prep! Here’s how to store and reheat:

  • Refrigerator: Store leftovers in an airtight container in the fridge for up to 3 days.
  • Freezer: You can freeze the cooked chicken and veggies for up to 3 months. Just make sure to cool completely before freezing.
  • Reheating: Reheat in the oven at 350°F (175°C) until warmed through, about 15-20 minutes.

Frequently Asked Questions

Here are some common questions to help you get the most out of this recipe:

  • Can I use chicken thighs instead of breasts? Yes! Chicken thighs are a great alternative and add even more flavor.
  • What if I don’t have fresh herbs? Dried herbs can be used, but remember to use about one-third of the amount since dried herbs are more potent.
  • Can I make this gluten-free? Absolutely! This recipe is naturally gluten-free as long as you use gluten-free chicken broth.
  • How do I make it dairy-free? This recipe is already dairy-free, so you can enjoy it without worry!
  • Can I use frozen vegetables? Fresh is best, but if you’re in a pinch, you can use frozen veggies. Just thaw and drain them before adding to the dish.
  • What’s the best way to serve this dish? Serve it family-style on a large platter for a beautiful presentation, drizzling the pan juices over everything!
  • How can I make this a complete meal? Pair with a side salad or some crusty bread to round out the meal!
  • Can I use a different protein? Absolutely! This marinade works well with salmon or pork chops, too!

Nutritional Tips and Dietary Adaptations

This dish is not only delicious but also packed with nutrients!

  • High in Protein: Chicken is an excellent source of lean protein, which is essential for muscle repair and growth.
  • Loaded with Vitamins: The variety of vegetables adds a wealth of vitamins and minerals to your meal, supporting overall health.
  • Heart-Healthy Fats: Extra virgin olive oil provides healthy fats that promote heart health.
  • Low-Carb Option: Skip the potatoes if you’re looking for a low-carb version; load up on more veggies instead!

Recommended Equipment

To make this recipe a breeze, here are a few kitchen tools you might need:

  • Cast Iron Skillet: Ideal for achieving that perfect sear and can go from stovetop to oven.
  • Meat Thermometer: Ensures your chicken is cooked perfectly every time.
  • Mixing Bowls: For preparing your marinade and tossing the vegetables.
  • Tongs: Perfect for flipping and handling chicken without damaging the skin.

Serving Suggestions

Now that your crispy lemon herb chicken is ready, here are some great ways to serve it:

  • Alongside a fresh salad: A simple arugula salad with a lemon vinaigrette pairs beautifully.
  • With crusty bread: Serve with a loaf of warm crusty bread to soak up those delicious pan juices.
  • Over rice or quinoa: For added texture and heartiness, serve your chicken over a bed of rice or quinoa.
  • With a side of roasted vegetables: Keep the veggie theme going with a medley of seasonal roasted vegetables.

Conclusion

Cooking should be a joyous experience, and with this crispy lemon herb chicken recipe, you can create a delicious and satisfying meal without stress. Remember, it’s all about enjoying the process and connecting with your food. So roll up your sleeves, grab your ingredients, and let’s make some magic happen in the kitchen! You’ll impress your family and friends, and maybe even yourself, with this delightful dish. Happy cooking!

Easy Crispy Lemon Herb Chicken Recipe with Spring Vegetables

Prep Time 10 minutes
Cook Time 25 minutes
Total Time 35 minutes
Servings 4 servings
Calories 450
A flavorful and healthy chicken dish featuring crispy skin, fresh herbs, and vibrant spring vegetables, perfect for a quick weeknight dinner.

Ingredients

Protein

  • 4 pieces boneless, skin-on chicken breasts
  • 1 large lemon, zested and juiced
  • 2 tablespoons fresh thyme, chopped
  • 2 tablespoons fresh rosemary, chopped
  • 3 cloves garlic, minced
  • 3 tablespoons extra virgin olive oil
  • to taste salt Salt (kosher recommended)
  • to taste black pepper Black pepper
  • 1 cup asparagus, trimmed and cut into 2-inch pieces
  • 1 cup sugar snap peas, ends trimmed
  • 1 cup baby carrots, halved lengthwise
  • 1 cup baby potatoes (Yukon Gold), halved
  • Optional to taste red pepper flakes

Instructions 

  • Combine lemon zest, juice, garlic, herbs, olive oil, salt, and pepper in a bowl. Marinate chicken for 10 minutes.
  • Preheat oven to 400°F (200°C). Sear chicken skin-side down until crispy, then flip.
  • Toss vegetables with olive oil, salt, and pepper. Arrange around chicken in skillet.
  • Roast in oven for 20-25 minutes until chicken reaches 165°F and vegetables are tender. Rest before serving.

Notes

Ensure chicken skin is pressed flat during searing for maximum crispiness.
Calories: 450kcal
Cost: $15
Course: Main Course
Cuisine: American
Keyword: chicken, Herbs, Lemon, Vegetables

Welcome to your new favorite breakfast delight! If you’re seeking a way to kickstart your day with a burst of flavor, protein, and a little sweetness, you’re in the right place. These baked blueberry cottage cheese bowls are not only simple to whip up but also packed with nutrition. Ideal for busy mornings or as a satisfying snack, this recipe will quickly become a staple in your home. Let’s dive into why you’ll love these bowls!

Why You’ll Love This Recipe

Here are just a few reasons why these baked blueberry cottage cheese bowls will win your heart:

  • Protein-packed goodness: Each bowl boasts a whopping 15g of protein, thanks to the cottage cheese and eggs, making it a fulfilling choice.
  • Kid-approved: With their sweet blueberry flavor and custardy texture, even the pickiest eaters will think they’re indulging in dessert.
  • Meal prep friendly: Make a batch on Sunday and enjoy them all week long—just grab and go!
  • Versatile options: Perfect for breakfast, as a snack, or a light dessert, these bowls fit various meal occasions.
  • Quick and easy: With just a handful of ingredients and minimal prep time, you can have a wholesome meal ready in under an hour.

Ingredients for Baked Blueberry Cottage Cheese Bowls

Let’s gather our ingredients! Here’s what you need to create these delicious bowls:

  • 360 g cottage cheese (1½ cups, full fat recommended): Provides a creamy base rich in protein.
  • 4 large eggs (brought to room temperature): This helps create a fluffy texture.
  • 90 g old-fashioned rolled oats (1 cup, not quick oats): Adds fiber and a hearty texture.
  • 1 ripe banana (the spottier the better): This naturally sweetens the batter.
  • 80 ml maple syrup (⅓ cup): For a touch of sweetness—feel free to adjust to taste.
  • 1 tsp baking soda: Helps the bowls rise and gives them a lovely texture.
  • 150 g fresh blueberries (1 cup, frozen works too): Bursting with flavor and antioxidants.

Equipment You’ll Need

Before we get cooking, gather these kitchen essentials:

  • High-speed blender: For smoothly combining your ingredients.
  • Oven-safe bowls: Four 2-cup bowls work perfectly for this recipe.
  • Baking sheet: To hold your bowls while they’re baking.
  • Measuring cups and spoons: For accurate ingredient measurements.

How to Make Baked Blueberry Cottage Cheese Bowls

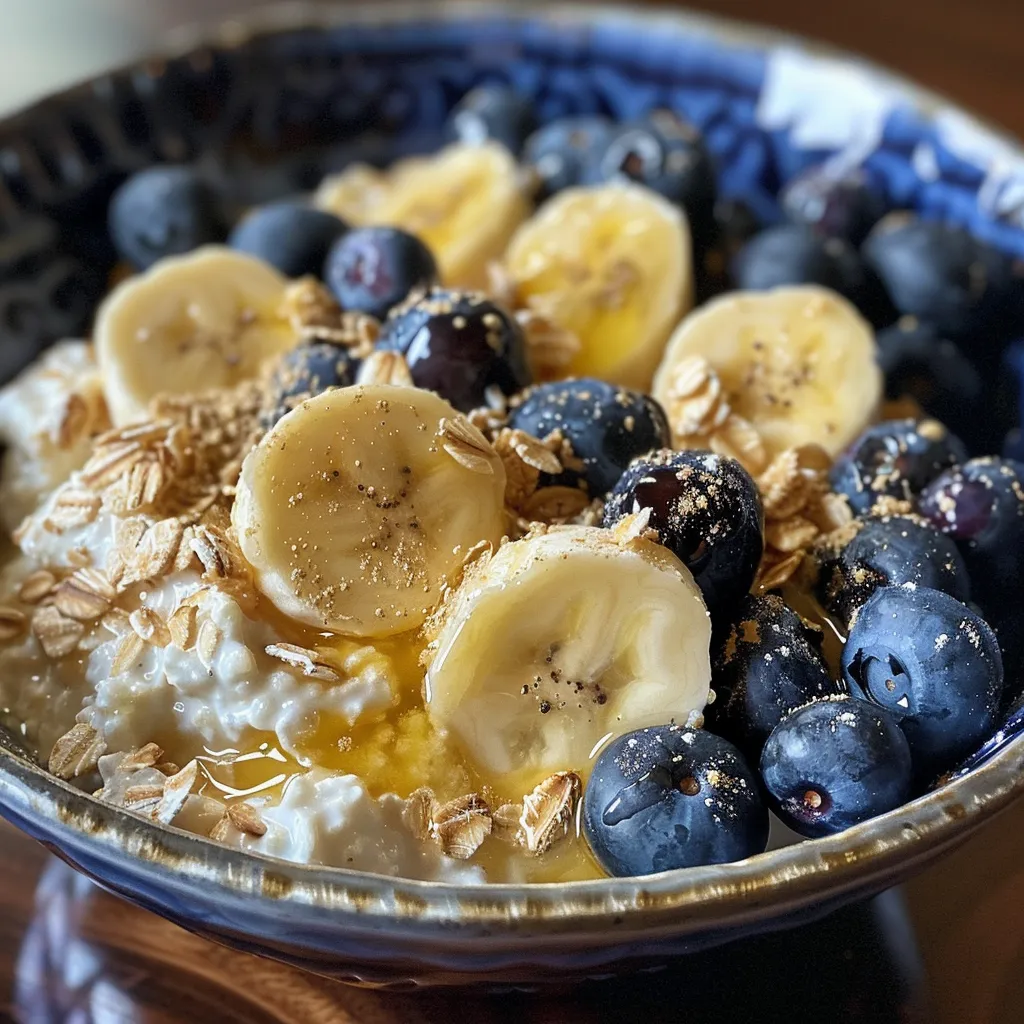
Side angle of a cottage cheese bowl with blueberry topping, highlighting its creamy texture.

Now, let’s get to the fun part! Follow these simple steps to create your bowls:

Step 1: Prep the Bowls and Oven

Preheat your oven to 350°F (180°C). Generously spray the four 2-cup oven-safe bowls with non-stick cooking spray and place them on a large baking sheet.

Step 2: Blend the Batter

In your high-speed blender, combine the cottage cheese, eggs, oats, banana, maple syrup, and baking soda. Blend for 30 to 45 seconds until the mixture is completely smooth with no visible oat pieces. If it seems too thick, add a splash of milk and pulse briefly.

Step 3: Fill and Top the Bowls

Pour the batter evenly into your prepared bowls, filling each about two-thirds full to leave room for rising. Top each bowl with fresh blueberries, pressing some berries down into the batter to create pockets of jammy sweetness.

Step 4: Bake and Cool

Bake for 35 to 40 minutes until the tops are golden brown and firm to the touch. Start checking at 35 minutes to avoid overbaking. Once done, remove from the oven and let cool for at least 10 minutes before digging in. This cooling time is crucial for achieving that perfect custardy texture!

Pro Tips for Perfect Baked Blueberry Cottage Cheese Bowls

Want to take these bowls to the next level? Here are some expert insights:

  • Use fresh ingredients: The freshness of your blueberries and cottage cheese will significantly impact the flavor.
  • Adjust sweetness to taste: Feel free to modify the amount of maple syrup based on your sweetness preference.
  • Experiment with toppings: Try adding nuts, seeds, or a dollop of Greek yogurt on top for extra flavor and texture.
  • Don’t skip the cooling time: Allowing the bowls to cool helps set the texture!
  • Make them ahead: These bowls store well, so prepare them for busy mornings!
  • Mind the baking time: Start checking for doneness at 35 minutes to ensure they don’t overbake.
  • Freeze for later: If you want to prepare a larger batch, freeze individual portions for quick breakfasts.
  • Customize flavors: Swap blueberries for other fruits like raspberries or strawberries for a new twist.

Common Mistakes and Troubleshooting

Even the best of us can have kitchen mishaps! Here are some common mistakes to avoid:

  • Using quick oats: Quick oats can create a gummy texture; stick with old-fashioned rolled oats.
  • Not blending enough: Ensure the batter is completely smooth—no chunky bits!
  • Overbaking: Keep an eye on the time; overbaking can dry out the bowls.
  • Skipping the cooling time: This step is crucial for achieving the right texture—don’t rush it!

Variations on Baked Blueberry Cottage Cheese Bowls

Feeling adventurous? Here are some fun variations to try:

  • Mixed berry bowl: Swap blueberries for a mix of raspberries, strawberries, and blackberries.
  • Chocolate chip delight: Add a handful of dark chocolate chips for a sweet treat.
  • Nutty banana bowl: Stir in your favorite nuts or seeds for added crunch and nutrition.
  • Spiced pumpkin bowl: Add pumpkin puree and spices (like cinnamon and nutmeg) for a fall-inspired twist.

Storage and Make-Ahead Instructions

Want to prep these bowls for the week? Here’s how to store and reheat:

  • Refrigeration: Store in the fridge for up to one week in an airtight container. Reheat in the microwave for a minute or two.
  • Freezing: Freeze individual servings in freezer-safe containers for up to three months. Thaw overnight in the fridge before reheating.

Frequently Asked Questions

Got questions? We’ve got answers! Here are some common queries about baked blueberry cottage cheese bowls:

  • Can I use low-fat cottage cheese?: Yes, but full-fat gives a creamier texture.
  • Are these bowls gluten-free?: Use certified gluten-free oats to make them gluten-free.
  • Can I use frozen blueberries?: Absolutely! Just fold them in gently from frozen.
  • What can I substitute for eggs?: You can use flax eggs or applesauce for a vegan option.
  • How do I know when they’re done?: They should be golden brown and firm to the touch.
  • Can I add protein powder?: Yes, incorporating protein powder can boost the protein content!
  • What if my batter is too thick?: Add a splash of milk to thin it out to your desired consistency.
  • How should I serve them?: You can serve them warm or chilled, topped with yogurt, nuts, or more berries!

Nutrition Tips and Dietary Adaptations

These baked blueberry cottage cheese bowls are not only delicious but also nutritious! Here’s how to adapt them for various dietary needs:

  • High-protein diet: Keep the full-fat cottage cheese and eggs for maximum protein.
  • Low-sugar option: Reduce the maple syrup and opt for sugar-free sweeteners.
  • For dairy-free: Substitute cottage cheese with a dairy-free alternative like almond or soy yogurt.
  • For a lower-carb version: Replace oats with almond flour or coconut flour.

Serving Suggestions

Pair your baked blueberry cottage cheese bowls with these delicious ideas:

  • Fresh fruit: Serve with sliced bananas or berries for extra freshness.
  • Yogurt: Top with a dollop of Greek yogurt for added creaminess.
  • Nuts and seeds: Sprinkle with chopped nuts or seeds for an extra crunch.
  • Honey or additional maple syrup: Drizzle on top for an extra touch of sweetness.

Conclusion

There you have it—your guide to making the most delightful baked blueberry cottage cheese bowls! They’re nutritious, easy to make, and wonderfully versatile. Remember, cooking is all about having fun and experimenting, so feel free to make these bowls your own. Enjoy every bite, and happy cooking!

Baked Blueberry Cottage Cheese Bowls

Prep Time 10 minutes
Cook Time 40 minutes
Total Time 50 minutes
Servings 4 bowls
Calories 350
A nutritious and delicious baked breakfast featuring cottage cheese, oats, bananas, and fresh blueberries, perfect for a wholesome start to your day.

Ingredients

Dairy

  • 360 g cottage cheese (full fat recommended)
  • 4 large eggs (brought to room temperature)
  • 90 g old fashioned rolled oats (not quick oats)
  • 1 ripe banana (the spottier the better)
  • 80 ml maple syrup (⅓ cup)
  • 1 tsp baking soda
  • 150 g fresh blueberries (frozen works too)

Instructions 

  • Preheat oven to 350°F (180°C). Spray four bowls and place on a baking sheet.
  • Add cottage cheese, eggs, oats, banana, maple syrup, and baking soda to a blender. Blend until smooth.
  • Pour batter into bowls, top with blueberries, pressing some in.
  • Bake for 35-40 minutes until golden and firm. Cool for 10 minutes before serving.

Notes

This cooling time helps achieve a custardy texture.
Calories: 350kcal
Cost: $15
Course: Breakfast
Keyword: Baking, Blueberry, Healthy

Blend Your Day with a Delightful Blueberry Banana Smoothie

Are you ready to transform your mornings and lift your spirits with a delicious Blueberry Banana Smoothie? This recipe is not just a drink; it’s a burst of energy, flavor, and nutrition that you can whip up in just minutes! With simple ingredients that are likely already in your kitchen, this smoothie is perfect for busy parents, working professionals, or anyone needing a quick pick-me-up. Let’s dive in and discover why this smoothie is the ideal choice for breakfast, a snack, or a post-workout treat!

Why You’ll Love This Recipe

This Blueberry Banana Smoothie is a powerhouse of flavor and nutrition, and here’s why you’ll absolutely love it:

  • Quick and easy: With just five main ingredients and a blender, you can have this smoothie ready in under 5 minutes!
  • Nutritious goodness: Packed with antioxidants from blueberries and the energy boost of bananas, this drink is a great way to start your day.
  • Customizable sweetness: Adjust the sweetness to your liking with honey or maple syrup, or skip it for a healthier option.
  • Perfect for any time: Whether it’s breakfast, a refreshing afternoon snack, or a post-workout recovery drink, this smoothie fits the bill!
  • Kid-friendly: Kids love the sweet taste and vibrant color, making it an easy way to sneak in some fruit into their diet.

Ingredient Breakdown and Substitutions

Let’s take a closer look at the ingredients that make this smoothie so special, and explore some substitution options if you’re looking to mix things up!

  • Frozen blueberries: These tiny powerhouses are packed with antioxidants. If you don’t have frozen, fresh blueberries work too, but you may want to add ice for thickness.
  • Ripe banana: A medium ripe banana adds creaminess and natural sweetness. For a different flavor, try using mango or avocado instead.
  • Plain Greek yogurt: This adds protein and creaminess to the smoothie. You can swap it for dairy-free yogurt or even cottage cheese for a protein boost!
  • Milk: Use any milk you prefer—dairy, almond, coconut, or oat milk all work beautifully. For a richer smoothie, opt for coconut milk.
  • Honey or maple syrup (optional): Sweeten it up if needed! Agave syrup is a good alternative for a vegan option.
  • Ice: For a thicker consistency, especially in warmer months, add ice. If you skip ice, just use extra frozen blueberries!

How to Make Your Blueberry Banana Smoothie

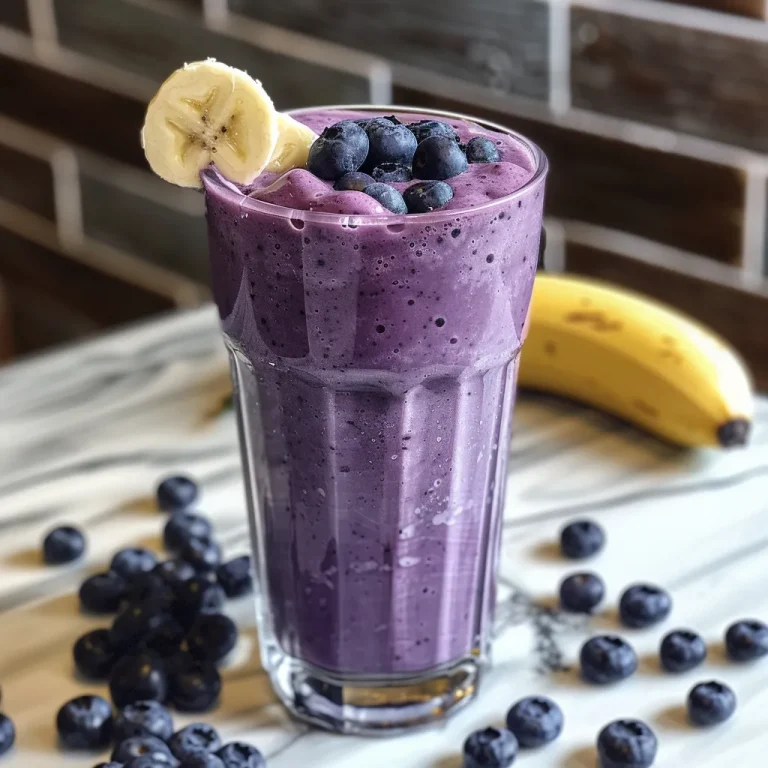
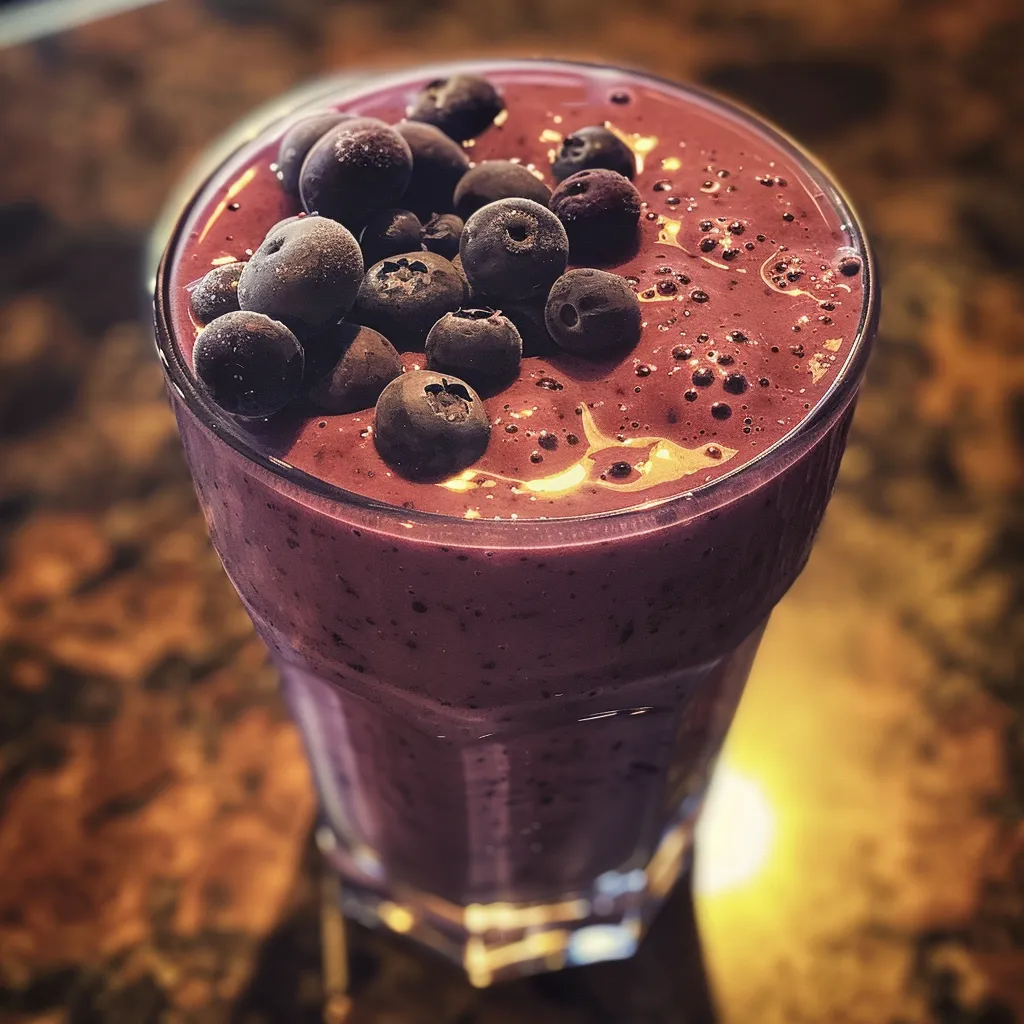
Side view of a Blueberry Banana Smoothie with a straw, showcasing its rich purple color and garnishes.

Ready to blend? Follow these simple steps to create your refreshing smoothie:

  1. Add the frozen blueberries, sliced banana, Greek yogurt, milk, honey, and ice to a blender.
  2. Blend on high until smooth, about 30-60 seconds, stopping once to scrape down the sides if needed.
  3. Check the thickness and add up to 2 tablespoons more milk if you want a thinner consistency; blend briefly to combine.
  4. Taste and adjust sweetness if necessary, then pour into a glass and serve immediately.

Pro Tips for the Ultimate Smoothie

To ensure your smoothie is the best it can be, consider these expert tips:

  • Choose ripe bananas: The riper the banana, the sweeter your smoothie will be, adding natural sweetness without the need for extra sugar.
  • Use frozen fruit: Frozen fruit not only thickens the smoothie but also keeps it cold and refreshing without watering it down with ice.
  • Experiment with greens: For a nutritious boost, toss in a handful of spinach or kale. You won’t taste it, but you’ll reap the benefits!
  • Blend in protein powder: If you’re looking for a post-workout boost, add a scoop of your favorite protein powder for extra sustenance.
  • Use flavored yogurt: If you’re feeling adventurous, try flavored Greek yogurt to elevate the taste experience.
  • Don’t skip the scraping: Stop the blender midway to scrape down the sides to ensure everything gets blended evenly.
  • Consider the serving size: This recipe makes about 2 servings, perfect for sharing or saving for later!
  • Chill your glass: If you want an extra refreshing drink, chill your glasses in the freezer before pouring in the smoothie.

Avoiding Common Mistakes

Even the best recipes can go awry! Here’s how to avoid common pitfalls:

  • Too thick? If your smoothie is thicker than you’d like, simply add a splash more milk and blend again.
  • Too sweet? If your smoothie is too sweet for your taste, add a squeeze of lemon juice to cut the sweetness and add brightness.
  • Not blending well? Make sure to add enough liquid; if your blender struggles, stop and stir before blending again.
  • Flavor flat? If the flavor isn’t popping, a pinch of salt can enhance the overall taste!

Delicious Variations to Try

Feeling adventurous? Here are some delightful variations to experiment with:

  • Chocolate Banana Blueberry Smoothie: Add a tablespoon of cocoa powder for a chocolatey twist that pairs beautifully with the banana and blueberry flavors.
  • Peanut Butter Banana Blueberry Smoothie: Add a tablespoon of peanut butter for a creamy, nutty flavor that also boosts protein content.
  • Green Smoothie: Toss in a handful of spinach or kale for extra nutrients without compromising on flavor!
  • Coconut Blueberry Smoothie: Substitute coconut milk for regular milk and add a sprinkle of shredded coconut for a tropical vibe.

Storage and Make-Ahead Instructions

This smoothie is best enjoyed fresh, but if you need to prepare it ahead of time, here’s how:

  • Make-ahead: You can pre-pack your smoothie ingredients in a freezer bag (minus the yogurt and milk) for a quick blend in the morning.
  • Storage: If you have leftovers, store them in an airtight container in the fridge for up to 24 hours. Shake or stir before drinking, as separation may occur.

Frequently Asked Questions

Got questions? We’ve got answers! Here are some common queries about the Blueberry Banana Smoothie:

  • Can I use fresh blueberries instead of frozen? Yes, but you might want to add ice to achieve the desired thickness.
  • Is this smoothie vegan? To make it vegan, use plant-based yogurt and a non-dairy milk option.
  • How can I make this smoothie lower in calories? Use less yogurt or opt for low-fat yogurt, and skip the added sweetener.
  • Can I add protein powder? Absolutely! It’s a great way to boost the smoothie’s protein content!
  • What can I serve with this smoothie? It pairs wonderfully with a slice of whole-grain toast or a handful of nuts for a balanced meal.
  • Can I add other fruits? Yes! Strawberries, raspberries, or peaches can complement the blueberry and banana flavors beautifully.
  • How often can I enjoy this smoothie? You can enjoy this smoothie daily as part of a balanced diet!
  • What’s the best time to drink this smoothie? It’s fantastic for breakfast, as a mid-day snack, or post-workout recovery!

Nutritional Tips and Dietary Adaptations

When it comes to nutrition, this smoothie is packed with benefits! Here’s how to adapt it to fit various dietary needs:

  • High-protein option: Use Greek yogurt and add protein powder to increase the protein content.
  • Low-carb option: Replace banana with avocado for a creamier, lower-carb alternative.
  • Gluten-free: This recipe is naturally gluten-free, making it a great option for those with gluten sensitivities.
  • Nut-free: Replace nut-based milks with oat or soy milk to ensure it’s nut-free.

Equipment Recommendations

To make your smoothie experience smoother, here’s some equipment you might need:

  • Blender: A high-speed blender works best for a silky-smooth consistency.
  • Measuring cups: For accurate ingredient measurements, especially if you are making multiple servings.
  • Spatula: Useful for scraping down the sides of the blender to ensure all ingredients are blended.
  • Glass or mason jar: Perfect for serving your smoothie and taking it on the go!

Serving Suggestions

This Blueberry Banana Smoothie can stand alone, but pairing it with the right foods can make it even better!

  • Whole grain toast: Top with avocado or nut butter for a balanced breakfast.
  • Granola or cereal: Sprinkle on top for added crunch and fiber.
  • Fruit salad: Complement with seasonal fruits for a refreshing burst of flavor.

In conclusion, this Blueberry Banana Smoothie is more than just a recipe; it’s a canvas for your culinary creativity. With its easy-to-follow steps, delicious flavor profile, and endless customization options, you’ll find it’s the perfect addition to your daily routine. So grab your blender and start blending — deliciousness is just a sip away!

Blueberry Banana Smoothie

Prep Time 5 minutes
Total Time 5 minutes
Servings 2 cups
Calories 210
A delicious and healthy smoothie perfect for breakfast or a quick snack, combining the sweetness of blueberries and banana with creamy Greek yogurt.

Ingredients

Fruits and Dairy

  • 1 cup frozen blueberries
  • 1 medium ripe banana, sliced
  • ½ cup plain Greek yogurt
  • ¾ cup milk
  • 1 tablespoon honey or maple syrup (optional)
  • ½ cup ice

Instructions 

  • Add blueberries, banana, yogurt, milk, honey, and ice to a blender.
  • Blend until smooth, about 30-60 seconds.
  • Check consistency; add up to 2 tbsp more milk if thinner, then blend briefly.
  • Taste and adjust sweetness if needed, then pour into glasses and serve.

Notes

For a creamier texture, use full-fat Greek yogurt.
Calories: 210kcal
Cost: $8
Course: Breakfast, Snack
Cuisine: American
Keyword: banana, Blueberry, Smoothie

Whether it’s a busy weekday lunch or a weekend gathering, this Creamy Cucumber Shrimp Salad is your go-to dish that combines freshness, flavor, and simplicity. Bursting with vibrant ingredients, it features tender shrimp, crunchy cucumbers, and a zesty creamy dressing that will make your taste buds dance. Let’s dive into why this salad is not just a meal, but a delightful experience!

Why You’ll Love This Recipe

This salad isn’t just delicious; it’s packed with benefits that will have you coming back for more. Here are five reasons to love this dish:

  • Quick & Easy Preparation: With minimal cooking required, you can whip this up in under 30 minutes, perfect for busy days.
  • Nutritious Ingredients: Loaded with protein from shrimp and healthy fats from avocado, this salad makes for a wholesome meal.
  • Versatile Serving Options: Serve it on its own, in lettuce wraps, or stuffed in avocados for an elegant twist!
  • Perfect for Meal Prep: Make it ahead of time and store it in the fridge—great for lunches throughout the week.
  • Customizable to Your Taste: Feel free to swap ingredients to suit your preferences, making it a dish that’s truly yours.

Ingredients You’ll Need

This recipe is all about simplicity and fresh flavors. Here’s what you’ll need:

  • 1 lb (450g) cooked shrimp: Peeled and deveined for ease.
  • 2 large cucumbers: Thinly sliced for that refreshing crunch.
  • 1 cup cherry tomatoes: Halved for sweetness and color.
  • 1/2 red onion: Thinly sliced for a touch of sharpness.
  • 1 avocado: Diced for creaminess.
  • 2 tbsp fresh dill: Chopped to add a burst of herbal flavor.
  • 2 tbsp fresh parsley: For an extra layer of flavor.
  • Salt and pepper: To taste.
  • 1/2 cup mayonnaise (or Greek yogurt for a lighter option): The creamy base of the dressing.
  • 1/4 cup sour cream: Adds richness and tang.
  • 2 tbsp lemon juice: For zesty brightness.
  • 1 tbsp Dijon mustard: For a subtle kick.
  • 1 garlic clove: Minced for depth of flavor.
  • 1 tsp honey: To balance the acidity.

Steps to Create Your Salad

Let’s get cooking! Follow these simple steps to create your Creamy Cucumber Shrimp Salad:

  1. Start by slicing the cucumbers and red onion, halving the cherry tomatoes, and dicing the avocado.
  2. In a large bowl, mix the shrimp, cucumbers, tomatoes, avocado, red onion, dill, and parsley. Season lightly with salt and pepper.
  3. In a separate bowl, whisk together the mayonnaise, sour cream, lemon juice, mustard, garlic, and honey. Adjust seasoning to your liking.
  4. Pour the dressing over the salad and gently toss until everything is evenly coated. Chill for at least 30 minutes before serving.
  5. For a pop of color and flavor, sprinkle with extra fresh herbs or a pinch of paprika just before serving.

Pro Tips for the Best Cucumber Shrimp Salad

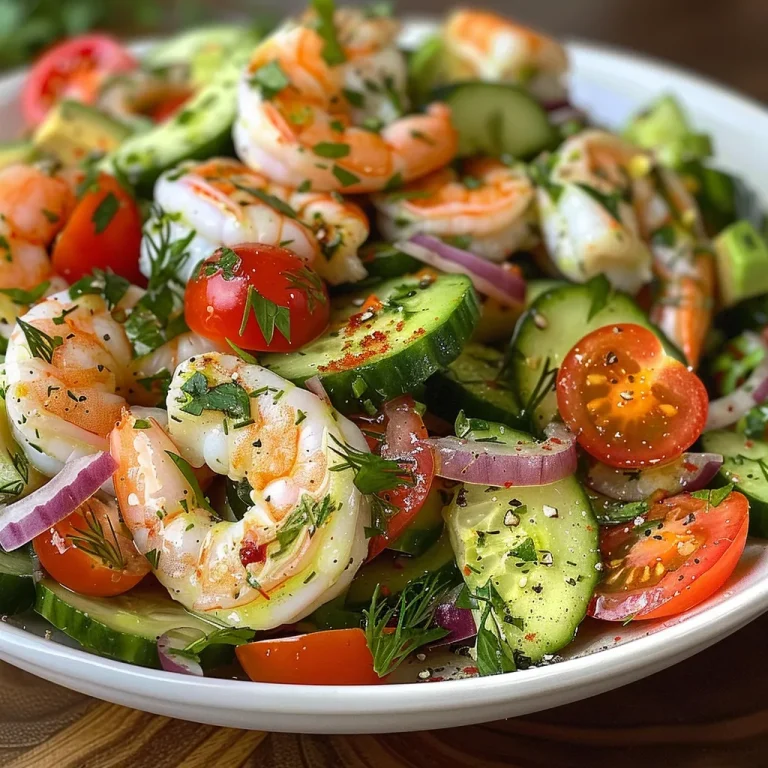
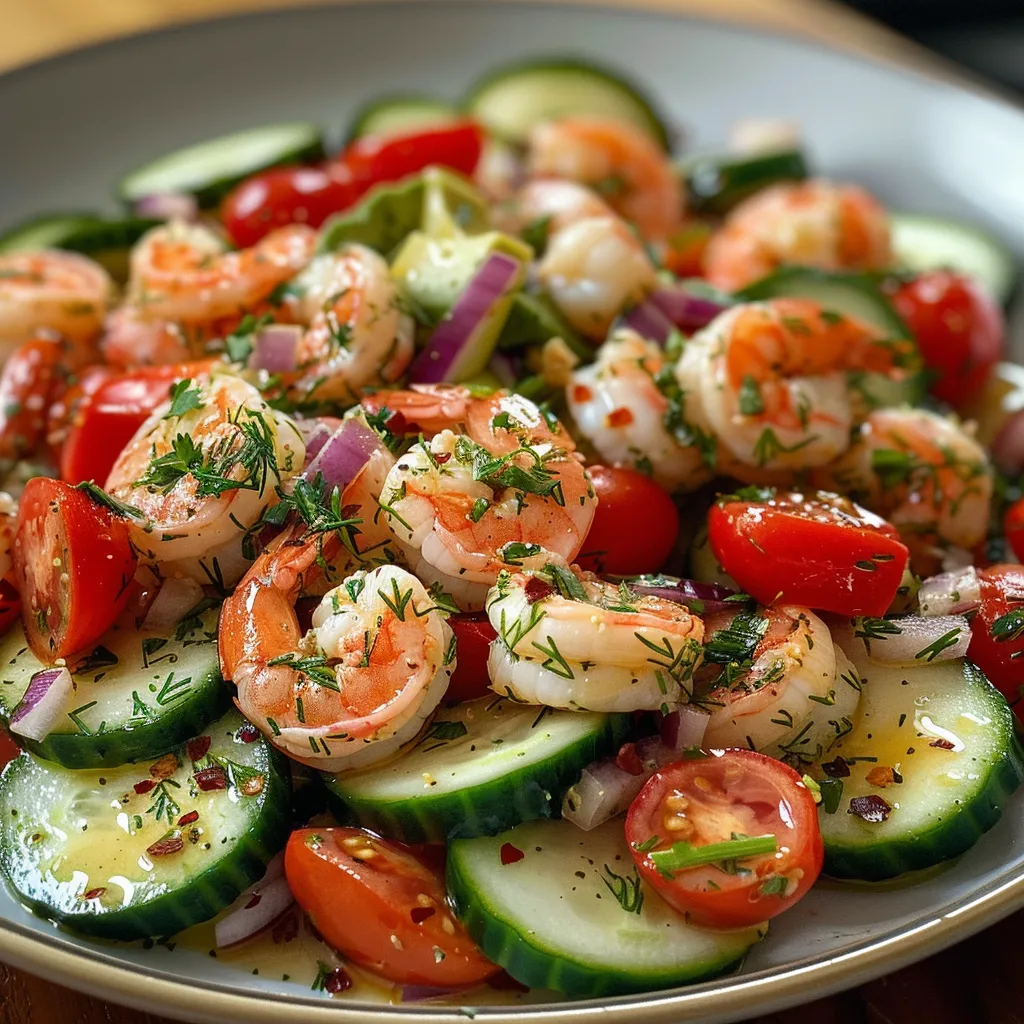
A side view of a vibrant shrimp salad featuring cucumber slices and cherry tomatoes.

Want to take your salad to the next level? Here are some expert insights:

  • Texture Matters: Ensure your cucumbers are sliced thinly for a satisfying crunch. If you prefer, deseeding them first can reduce excess moisture.
  • Freshness is Key: Use the freshest shrimp you can find for the best flavor and texture. If using frozen, make sure they are fully thawed and drained.
  • Chill Out: Letting the salad chill allows the flavors to meld beautifully, enhancing the overall taste.
  • Customize Your Ingredients: If you’re not a fan of dill, try using chives or basil instead for a twist!
  • Perfectly Balanced Dressing: Adjust the creaminess by using more or less mayonnaise or sour cream to suit your taste.
  • Make It a Meal: Pair with crusty bread or serve on a bed of greens for a fuller meal.
  • Leftover Love: This salad keeps well for a couple of days in the fridge, making it a great option for meal prep.

Common Mistakes and Troubleshooting

Even the best cooks can run into hiccups. Here are some common pitfalls and how to avoid them:

  • Watery Salad: If your cucumbers release too much water, consider salting them before mixing. This draws out moisture and keeps the salad crisp.
  • Overseasoning: Start with a little salt and pepper, and adjust gradually. It’s easier to add than to take away!
  • Unbalanced Dressing: If your dressing tastes too tangy, add a bit more honey or a splash of vinegar to balance it out.

Delicious Variations to Try

Want to mix things up? Here are four tasty variations of this salad:

  • Spicy Kick: Add diced jalapeños or a dash of hot sauce for a spicy version.
  • Greek Style: Toss in some feta cheese and olives for a Mediterranean twist.
  • Asian-Inspired: Replace the dressing with a sesame vinaigrette and add snap peas and carrots for a fresh crunch.
  • Quinoa Base: Serve the salad over a bed of quinoa for added texture and nutrition.

Storage and Make-Ahead Instructions

This salad is perfect for meal prep! Here’s how to store it:

  • Refrigerate: Store leftovers in an airtight container for up to 3 days. The flavors will continue to meld, making it even tastier!
  • Make Ahead: You can prepare the salad a day in advance, but add the avocado just before serving to avoid browning.

Frequently Asked Questions

Got questions? We’ve got answers!

  • Can I use raw shrimp? Yes! Just ensure it’s cooked thoroughly before adding it to the salad.
  • What can I substitute for mayonnaise? Greek yogurt is a great alternative for a lighter take.
  • Can I make this salad vegan? Substitute shrimp with chickpeas or tofu and use vegan mayo.
  • How do I make it gluten-free? This recipe is naturally gluten-free, just ensure your dressing ingredients are also gluten-free.
  • What if I don’t have fresh herbs? Dried herbs can work in a pinch, but fresh is always best for flavor.
  • How spicy is this salad? It’s mild, but you can easily adjust the spice level by adding hot sauce or chili flakes.
  • Can I freeze this salad? It’s best enjoyed fresh, but you can freeze the shrimp separately if needed.
  • Is this suitable for kids? Absolutely! Adjust the seasoning to cater to young taste buds.

Nutrition Tips and Dietary Adaptations

This Creamy Cucumber Shrimp Salad is not only tasty but also nutritious. Here are some tips to enhance its health benefits:

  • Boost Fiber: Add in some black beans or chickpeas for extra fiber and protein.
  • Keep It Light: Opt for low-fat mayonnaise or Greek yogurt to cut down on calories.
  • Fresh Veggies: Incorporate a variety of colorful vegetables to increase nutrient density.

Equipment Recommendations

To make your cooking experience smoother, here are some handy tools:

  • Sharp Knife: A good knife will help you slice the vegetables quickly and safely.
  • Cutting Board: A sturdy cutting board is essential for prep work.
  • Mixing Bowls: Use large bowls for mixing your salad without making a mess.

Serving Suggestions

Now that your salad is ready, here are a few creative ways to serve it:

  • On Lettuce Leaves: Serve scoops of the salad in crisp lettuce cups for a fun, handheld meal.
  • Stuffed Avocados: Hollow out avocado halves and fill them with salad for a beautiful presentation.
  • With Crackers: Pair with whole-grain crackers for a crunchy bite.

In conclusion, this Creamy Cucumber Shrimp Salad is a fantastic way to enjoy fresh ingredients with minimal fuss. Remember, cooking is about connection and creativity, so feel free to experiment and make it your own. Happy cooking, and enjoy every delicious bite!

Creamy Cucumber Shrimp Salad

Prep Time 15 minutes
Total Time 15 minutes
Servings 4 servings
Calories 350
A refreshing and creamy salad combining succulent shrimp with crisp cucumbers and a tangy dressing, perfect for a light meal or appetizer.

Ingredients

Protein

  • 1 lb cooked shrimp, peeled and deveined

Vegetables

  • 2 large cucumbers, thinly sliced
  • 1 cup cherry tomatoes, halved
  • 1/2 red onion red onion, thinly sliced
  • 1 avocado avocado, diced

Herbs

  • 2 tbsp fresh dill, chopped
  • 2 tbsp fresh parsley, chopped

Seasonings

  • to taste Salt and pepper
  • 1/2 cup mayonnaise (or Greek yogurt)
  • 1/4 cup sour cream
  • 2 tbsp lemon juice
  • 1 tbsp Dijon mustard
  • 1 clove garlic, minced
  • 1 tsp honey

Instructions 

  • Slice cucumbers and red onion, halve cherry tomatoes, and dice avocado.
  • Mix shrimp, cucumbers, tomatoes, avocado, onion, dill, and parsley; season lightly.
  • Whisk together mayonnaise, sour cream, lemon juice, mustard, garlic, and honey to make dressing.
  • Pour dressing over salad and toss gently; chill for 30 minutes before serving.
  • Garnish with extra herbs or paprika if desired.

Notes

For a lighter version, substitute Greek yogurt for mayonnaise.
Calories: 350kcal
Cost: $15
Course: Salad
Cuisine: American
Keyword: Shrimp

Transform Your Dinner: Easy Sheet Pan Steak Fajitas

If you’re looking for a quick, delicious, and satisfying meal that the whole family will love, you’re in the right place! These sheet pan steak fajitas are not only a breeze to make, but they also deliver bold flavors and vibrant colors that make your dinner table come alive. In just 30 minutes, you can whip up a delicious dinner with minimal cleanup, making it perfect for busy weeknights or relaxed weekends. Let’s dive into why you’ll adore this recipe and how to make it shine in your kitchen!

Why You’ll Love This Recipe

  • Quick and Easy: With just a few simple steps, you’ll have a flavorful meal ready in about 30 minutes. Say goodbye to long prep times!
  • One Pan Wonder: Everything cooks on a single sheet pan, which means less mess and easier cleanup. More time for you to enjoy your meal!
  • Healthful Ingredients: Packed with lean protein and colorful veggies, these fajitas are a nutritious choice that doesn’t compromise on taste.
  • Customizable: Adjust the recipe to suit your family’s tastes. Whether you want extra spice or different veggies, this recipe is versatile and forgiving.
  • Perfect for Meal Prep: These fajitas store well and can easily be reheated for quick lunches or dinners throughout the week.

Ingredient Breakdown for Sheet Pan Steak Fajitas

To create the perfect sheet pan steak fajitas, you’ll need the following ingredients. Let’s break them down and explore some possible substitutions!

  • Flank Steak (1.5 lbs): This cut is tender and flavorful, but you can substitute with skirt steak or sirloin if you prefer.
  • Olive Oil (3 tablespoons): This helps the spices adhere to the meat and veggies. You can use avocado oil for a higher smoke point.
  • Lime Juice (2 tablespoons): Fresh lime juice brightens up the dish. If you’re out of limes, lemon juice works as well.
  • Spices: You’ll need chili powder (2 tsp), cumin (1 tsp), garlic powder (1 tsp), onion powder (1/2 tsp), and smoked paprika (1/2 tsp) to create a rich flavor profile.
  • Salt and Pepper: Season to taste. Don’t be shy with the seasoning!
  • Bell Peppers: Use 2 bell peppers (any color), sliced thinly. Red, yellow, or green will add color and sweetness.
  • Red Onion: One large onion, sliced, brings a nice bite and sweetness to the mix.
  • Flour Tortillas (8 small): For serving. Feel free to swap in corn tortillas for a gluten-free option.
  • Fresh Cilantro and Lime Wedges: Optional garnishes that add freshness and a pop of flavor.

Step-by-Step Instructions for Sheet Pan Steak Fajitas

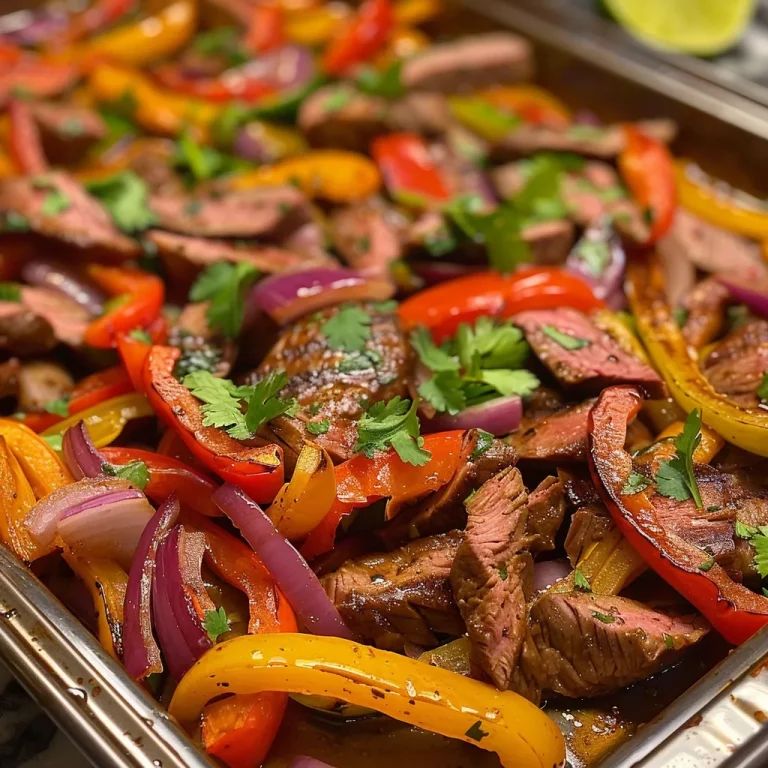
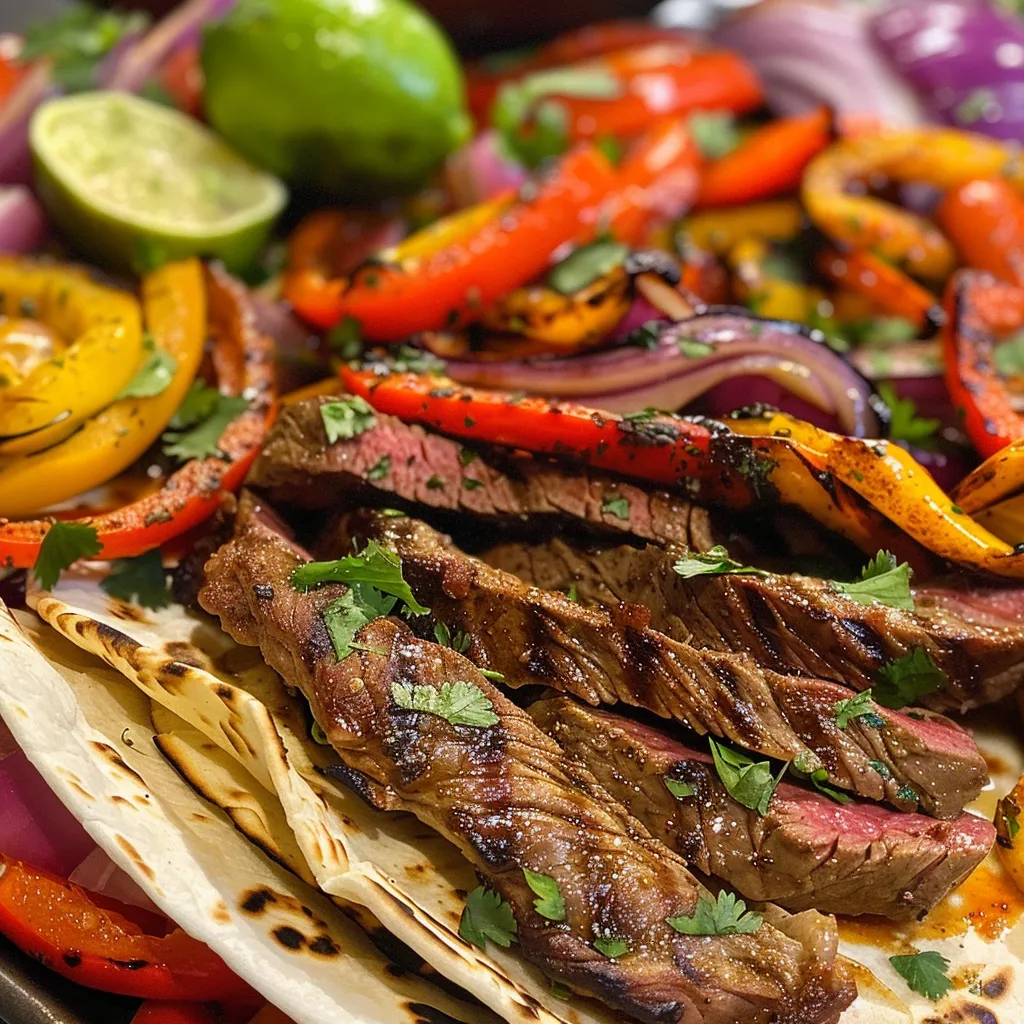
A vibrant assortment of steak fajitas arranged on a sheet pan, showcasing sliced meat and vegetables.

Ready to get cooking? Here’s how to make your sheet pan steak fajitas:

  1. Preheat the Oven: Set your oven to 425°F (220°C) to get it nice and hot.
  2. Prepare the Marinade: In a large mixing bowl, combine olive oil, lime juice, chili powder, cumin, garlic powder, onion powder, smoked paprika, salt, and pepper. Mix well.
  3. Marinate the Steak: Add the flank steak to the marinade, ensuring it’s well-coated. Let it sit for at least 10 minutes while you prep the veggies.
  4. Prep the Veggies: Slice the bell peppers and red onion into thin strips. Toss them in the remaining marinade in the mixing bowl.
  5. Assemble on Sheet Pan: Spread the marinated steak in the center of a sheet pan, arranging the veggies on the sides.
  6. Bake: Place the sheet pan in the preheated oven and bake for 20-25 minutes, or until the steak reaches your desired doneness (145°F for medium-rare).
  7. Rest and Slice: Remove from the oven and let the steak rest for 5 minutes before slicing against the grain into thin strips.
  8. Warm the Tortillas: Heat the tortillas in a dry skillet or microwave for a few seconds until pliable.
  9. Serve: Fill the warmed tortillas with steak and veggies, and top with fresh cilantro and lime wedges if desired.

Pro Tips for Perfect Sheet Pan Steak Fajitas

  • Marinate Longer: For even deeper flavor, marinate the steak for up to 2 hours in the refrigerator.
  • Cut Against the Grain: Always slice the steak against the grain to ensure tenderness.
  • Experiment with Veggies: Feel free to add or substitute with other vegetables like zucchini or mushrooms for extra nutrition.
  • Watch the Oven: Keep an eye on the baking time as ovens can vary. You want the steak tender but not overcooked.
  • Use a Meat Thermometer: To ensure the steak is cooked perfectly, use a meat thermometer for precise results.
  • Keep it Warm: If serving for a group, consider wrapping the tortillas in foil to keep them warm until everyone is ready to eat.
  • Try Different Proteins: Chicken or shrimp can easily replace steak if you’re looking for a change!
  • Save the Juices: Drizzle any leftover juices from the pan over your fajitas for added flavor.

Common Mistakes and Troubleshooting

Even the best chefs can make mistakes! Here are some common pitfalls and how to avoid them:

  • Overcooking the Steak: Use a meat thermometer to check for doneness and avoid tough meat.
  • Not Enough Marinade: Make sure to coat both the steak and the veggies thoroughly for maximum flavor.
  • Skipping the Resting Step: Allowing the steak to rest helps retain juices, so don’t skip this crucial step!

Delicious Variations of Sheet Pan Steak Fajitas

Love to mix things up? Here are some tasty variations to try:

  • Spicy Kick: Add sliced jalapeños to the veggies for a spicy twist!
  • Veggie-Heavy: Increase the amount of veggies and decrease meat for a plant-forward version.
  • Southwestern Style: Incorporate black beans and corn for a heartier dish.
  • Breakfast Fajitas: Use scrambled eggs instead of steak for a fun breakfast option!

Storage and Make-Ahead Instructions

Want to make your life even easier? Here’s how to store and prep ahead!

  • Refrigeration: Store leftovers in an airtight container in the refrigerator for up to 3 days.
  • Freezing: You can freeze cooked fajitas for up to 2 months. Thaw in the fridge before reheating.
  • Meal Prep: Marinate the steak and chop the veggies a day in advance for a quick dinner option!

Frequently Asked Questions

  • Can I use chicken instead of steak? Absolutely! Chicken works beautifully in this recipe.
  • What should I serve with fajitas? Guacamole, salsa, and sour cream are excellent accompaniments.
  • How do I know when my steak is done? For medium-rare, aim for an internal temperature of 145°F.
  • Can I make these fajitas gluten-free? Yes! Use corn tortillas instead of flour tortillas.
  • How long should I marinate the steak? A minimum of 10 minutes is great, but up to 2 hours will yield even better flavor.
  • What if I don’t have flank steak? Skirt steak or sirloin can be used as substitutes.
  • Can I add more vegetables? Yes! Feel free to add your favorite vegetables.
  • How do I reheat leftovers? Warm them in the microwave or on the stove until heated through.

Nutrition Tips and Dietary Adaptations

These sheet pan steak fajitas can easily adapt to fit various dietary needs:

  • Low-Carb Option: Skip the tortillas and serve the steak and veggies over a bed of greens.
  • Vegan Version: Use marinated tofu or tempeh instead of steak and add extra veggies.
  • Low-Calorie: Use lean cuts of meat and load up on veggies to keep meals light.

Essential Equipment for Making Fajitas

  • Sheet Pan: A good-quality sheet pan is essential for even cooking.
  • Mixing Bowl: For marinating your steak and mixing spices.
  • Meat Thermometer: Ensure perfect doneness every time!
  • Sharp Knife: For slicing steak and veggies with ease.

Serving Suggestions for Sheet Pan Steak Fajitas

These fajitas shine when served with a few key accompaniments:

  • Fresh Toppings: Chopped cilantro, diced tomatoes, and avocado add freshness and flavor.
  • Sides: Consider serving with Mexican rice or refried beans for a complete meal.
  • Dipping Sauces: Offer sour cream and salsa for added richness and flavor.

So there you have it! Easy, flavorful, and satisfying sheet pan steak fajitas that you can whip up any night of the week. Cooking doesn’t have to be complicated or time-consuming — with this recipe, you’ll feel like a kitchen pro in no time. Enjoy the process, savor the flavors, and remember that good food brings people together. Happy cooking!

sheet pan steak fajitas

Prep Time 10 minutes
Cook Time 25 minutes
Total Time 35 minutes
Servings 4 servings
Calories 450
Enjoy flavorful and easy-to-make steak fajitas cooked on a sheet pan for a quick and delicious meal.

Ingredients

Meat

  • 1.5 lbs flank steak (Can substitute with skirt steak or sirloin)
  • 3 tablespoons olive oil
  • 2 tablespoons lime juice
  • 2 teaspoons chili powder
  • 1 teaspoon cumin
  • 1 teaspoon garlic powder
  • 1/2 teaspoon onion powder
  • 1/2 teaspoon smoked paprika
  • to taste salt salt
  • to taste pepper pepper
  • 2 any color bell peppers (sliced)
  • 1 large red onion (sliced)
  • 8 small flour tortillas
  • to taste fresh cilantro cilantro (for garnish (Optional))
  • to taste lime wedges lime wedges (for serving (Optional))

Instructions 

  • Preheat oven to 425°F (220°C).
  • Mix olive oil, lime juice, spices, salt, and pepper. Marinate steak 10 minutes.
  • Slice peppers and onion, toss with remaining marinade.
  • Spread steak and vegetables on a sheet pan; bake 20-25 minutes.
  • Rest steak, slice against the grain, warm tortillas, and serve with cilantro and lime wedges.

Notes

For extra flavor, marinate the steak longer or add your favorite toppings.
Calories: 450kcal
Cost: $15
Course: Main Course
Cuisine: Mexican
Keyword: fajitas, Steak

Start Your Day Right with Strawberries and Cream Overnight Oats

Breakfast can sometimes feel like a race against the clock, but it doesn’t have to be! Our Strawberries and Cream Overnight Oats are the perfect solution for busy mornings. With just a few simple ingredients, you can whip up a nutritious and delicious meal that you can grab on your way out the door. Let’s dive into why this recipe will become a staple in your breakfast routine!

Why You’ll Love This Recipe

This recipe isn’t just about convenience; it’s about flavor and health too! Here are five reasons why you’ll fall in love with these overnight oats:

  • Quick and Easy: Preparation takes only 10 minutes. Mix, refrigerate, and you’re all set!
  • Nutritious Ingredients: Packed with rolled oats, Greek yogurt, and fresh strawberries, this breakfast is a powerhouse of nutrients.
  • Customizable: Add your favorite toppings or substitute ingredients to match your dietary needs.
  • Make-Ahead Friendly: Prepare multiple servings at once, so you have breakfast ready for the week!
  • Deliciously Satisfying: The combination of creamy yogurt and sweet strawberries creates a delightful flavor that will keep you coming back for more.

Ingredients for Strawberries and Cream Overnight Oats

Here’s what you’ll need to get started:

  • 1 cup old-fashioned rolled oats
  • 1 cup milk (dairy or non-dairy)
  • 1/2 cup plain Greek yogurt
  • 1 cup fresh strawberries, diced
  • 2 tablespoons chia seeds
  • 2 teaspoons honey or maple syrup
  • 1/2 teaspoon vanilla extract
  • Pinch of salt

Feel free to mix and match ingredients based on your preferences or what you have available at home!

How to Make Strawberries and Cream Overnight Oats

Close-up of strawberries and cream overnight oats in a clear glass, showcasing ingredients.

Follow these simple steps for a scrumptious breakfast:

  1. In a mixing bowl or jar, combine the rolled oats, milk, and Greek yogurt.
  2. Add the diced strawberries, chia seeds, honey or maple syrup, vanilla extract, and a pinch of salt.
  3. Stir well to combine all ingredients. Cover the bowl or jar with a lid or plastic wrap.
  4. Refrigerate overnight (or for at least 4 hours) to allow the oats to soften and flavors to meld.
  5. Before serving, give the oats a good stir and top with additional strawberries if desired.

Pro Tips for Perfection

To ensure your overnight oats turn out perfectly every time, consider these expert tips:

  • Oat Type: Use old-fashioned rolled oats for the best texture; quick oats may become too mushy.
  • Liquid Adjustments: If you prefer creamier oats, add a little more milk. Adjust based on your taste!
  • Chia Seeds: These are optional, but they add fiber and help thicken the mixture.
  • Sweetness: Taste your mixture before refrigerating; adjust sweetness by adding more honey or maple syrup as needed.
  • Flavor Boost: Mix in a dash of cinnamon or nutmeg for extra flavor.
  • Storage: Store in airtight containers in the refrigerator for up to 5 days.
  • Toppings: Get creative! Nuts, seeds, or other fruits can make delicious additions.
  • Make It Vegan: Substitute dairy milk with almond, oat, or soy milk and use maple syrup for sweetness.

Common Mistakes and Troubleshooting

Even the best cooks encounter hiccups! Here are a few common mistakes and how to avoid them:

  • Too Thick: If your oats are too thick after refrigeration, simply stir in more milk until you reach your desired consistency.
  • Too Sweet: If you’ve added too much sweetener, balance it out with additional yogurt or unsweetened milk.
  • Uneven Flavor: Make sure to mix your ingredients thoroughly before refrigerating to ensure an even flavor.
  • Not Enough Strawberries: Always feel free to add more fruit! Fresh or even frozen strawberries work beautifully.

Variations to Try

Here are four delicious variations to keep your breakfast exciting:

  • Berry Blast: Swap strawberries for a mix of blueberries, raspberries, and blackberries.
  • Nutty Banana: Add sliced bananas and a tablespoon of peanut butter for a protein boost.
  • Chocolate Lovers: Add a tablespoon of cocoa powder and top with chocolate chips for a decadent treat.
  • Spiced Apple: Substitute diced apples and sprinkle with cinnamon for a cozy fall flavor.

Storage and Make-Ahead Instructions

To make your mornings even smoother, consider prepping several servings ahead of time:

  • Store overnight oats in individual jars or containers.
  • Keep them in the refrigerator for up to 5 days.
  • Top with fresh fruit or nuts just before eating for the best texture.

Frequently Asked Questions

Here are some common questions about Strawberries and Cream Overnight Oats:

  • Can I use instant oats? Yes, but reduce the liquid to prevent them from becoming too mushy.
  • How long do they last in the fridge? They can last up to 5 days in the refrigerator.
  • Can I freeze overnight oats? Yes, but the texture may change upon thawing.
  • What can I use instead of Greek yogurt? You can use regular yogurt, dairy-free yogurt, or cottage cheese.
  • Can I eat them warm? Absolutely! You can warm them up in the microwave before serving.
  • What are the health benefits? They are high in fiber, protein, and vitamins from the fruit, making for a balanced meal.
  • Can I make these without chia seeds? Yes, simply omit them or substitute with flaxseeds.
  • Can I add protein powder? Yes, adding protein powder is a great way to increase the protein content!

Nutrition Tips and Dietary Adaptations

Feeling good about what you eat is key! Here are some nutrition tips:

  • Protein Boost: Consider adding protein powder to enhance your meal.
  • Low-Calorie Option: Use unsweetened almond milk and skip the sweetener for a lower-calorie breakfast.
  • Fiber Focus: Chia seeds and oats are great sources of fiber, which can help keep you full longer.
  • Dairy-Free: Use plant-based yogurt and milk to make this recipe completely dairy-free.

Equipment Recommendations

To make your cooking experience smooth and enjoyable, here’s what you’ll need:

  • Mixing Bowl: A large bowl is perfect for combining your ingredients.
  • Measuring Cups and Spoons: Accurate measurements ensure your oats turn out just right.
  • Storage Containers: Glass jars or airtight containers work great for storing your overnight oats.

Serving Suggestions

These oats are versatile and can be served in various ways:

  • Top with extra fresh strawberries, nuts, or a dollop of yogurt.
  • Pair with a side of scrambled eggs for a heartier breakfast.
  • Serve alongside a smoothie for a refreshing start to your day.

With our Strawberries and Cream Overnight Oats, you’re not just preparing a meal; you’re creating a delightful morning ritual. So, roll up your sleeves, gather your ingredients, and let’s make breakfast something you look forward to every day!

Strawberries and Cream Overnight Oats

Prep Time 10 minutes
Total Time 10 minutes
Servings 2 servings
Calories 250
A delicious and healthy make-ahead breakfast featuring oats, fresh strawberries, and creamy Greek yogurt.

Ingredients

Base

  • 1 cup old-fashioned rolled oats
  • 1 cup milk (dairy or non-dairy)
  • 1/2 cup plain Greek yogurt
  • 1 cup fresh strawberries, diced
  • 2 tablespoons chia seeds
  • 2 teaspoons honey or maple syrup
  • 1/2 teaspoon vanilla extract
  • Pinch salt

Instructions 

  • Combine oats, milk, and Greek yogurt in a jar or bowl.
  • Add strawberries, chia seeds, honey, vanilla, and salt; stir well.
  • Cover and refrigerate overnight or at least 4 hours.
  • Stir before serving and top with extra strawberries if desired.

Notes

Use fresh strawberries for best flavor and texture.
Calories: 250kcal
Cost: $10
Course: Breakfast
Cuisine: American
Keyword: Healthy, Oats, strawberries

Why You’ll Fall in Love with This Creamy Garlic Chicken Recipe

If you’re on the hunt for a dish that combines simplicity with rich, comforting flavors, look no further! This creamy garlic chicken recipe is a delightful blend of tender chicken, a luscious garlic-infused sauce, and the nutty goodness of freshly grated Parmesan cheese. Perfect for busy weeknights or special family dinners, this dish is not only easy to prepare but also guarantees to have everyone asking for seconds!

In this article, we’ll explore everything you need to know to master this garlic parmesan chicken skillet recipe: from ingredients and cooking steps to tips for perfection and serving suggestions. Let’s dive into the delicious world of creamy garlic chicken!

Why You’ll Love This Recipe

  • Quick Preparation: Made in under 30 minutes, this dish is perfect for those hectic weeknights when you want something satisfying without a long cooking time.
  • Family Favorite: With its creamy texture and rich flavor, this chicken skillet recipe is sure to become a go-to for your family.
  • Versatile Pairings: Serve it with rice, pasta, or even mashed potatoes to soak up that delicious sauce!
  • Easy Cleanup: Cooking everything in one skillet means less mess to clean up afterward. Win-win!
  • Impressive Presentation: This dish looks stunning on the table, perfect for impressing guests or treating your family to something special.

Ingredients for Creamy Garlic Chicken

Here’s what you’ll need to whip up this fantastic dish:

  • 2 large boneless skinless chicken breasts: The star of the show! Feel free to substitute with thighs for a juicier option.
  • Salt and Pepper: Essential seasonings to enhance the flavor of the chicken.
  • 2 teaspoons parsley: Fresh parsley adds a lovely color and flavor boost!
  • 1-2 tablespoons olive oil: For sautéing the chicken and building flavor.
  • ¾ cup chicken broth: This is the base for the creamy sauce. Use low-sodium if you’re watching your salt intake.
  • 4 cloves garlic, minced: The star flavor of this dish – don’t skimp!
  • 3 tablespoons butter: Adds richness to the sauce.
  • 3 tablespoons flour: Helps thicken the sauce for that creamy texture.
  • ½ cup freshly grated Parmesan cheese: The key ingredient for that classic garlic Parmesan flavor.
  • 1 tablespoon fresh lemon juice: Brightens up the dish beautifully!
  • 1 ¾ cups chicken broth: Additional broth to adjust consistency as needed.
  • ¼ cup heavy cream: Makes the sauce luxuriously creamy.
  • 1 teaspoon Worcestershire sauce: Adds depth of flavor.
  • 1 teaspoon mustard powder: A subtle kick that complements the garlic.
  • 1 teaspoon honey: Balances the savory flavors.
  • ½ chicken bouillon cube: For added flavor if you’re using water instead of broth.
  • ½ teaspoon onion powder: Enhances the overall flavor profile.
  • ½ teaspoon oregano: Adds a touch of herby goodness.
  • ½ teaspoon basil: Complements the garlic and cheese perfectly.

Step-by-Step Instructions

Juicy, golden-brown chicken breast drenched in creamy garlic sauce with herbs.

Now that you have your ingredients ready, let’s get cooking!

  1. Combine the sauce ingredients in a measuring cup (chicken broth, heavy cream, Worcestershire sauce, mustard powder, honey, and bouillon cube) and set aside.
  2. Slice the chicken breasts in half lengthwise to create thinner cutlets. Cover with saran wrap and pound them to about ½ inch thick for even cooking.
  3. Season each side of the chicken with salt, pepper, and parsley.
  4. Heat olive oil in a skillet over medium-high heat. Sear the chicken for 4-5 minutes per side until golden brown. Remove the chicken from the skillet and set aside.
  5. Turn the heat down to medium. Add the chicken broth to the skillet, using a spatula to scrape up any browned bits from the bottom. Bring to a gentle bubble and reduce for about 2 minutes.
  6. Add the minced garlic and cook for 2-3 more minutes, allowing the flavors to meld.
  7. Add the butter and flour to the skillet, stirring to combine. Cook for 1-2 minutes to eliminate the raw flour taste.
  8. Gradually add the sauce mixture in small splashes, stirring continuously. Bring to a boil, then reduce to a simmer. Let it simmer for about 8 minutes until thickened.
  9. Reduce the heat to low and gradually sprinkle in the Parmesan cheese while stirring continuously until melted. Stir in the lemon juice.
  10. Return the chicken to the skillet, spooning the sauce over the top. Heat through for 5 minutes or until the sauce reaches your desired thickness. Garnish with fresh parsley before serving.

Pro Tips for the Perfect Creamy Garlic Chicken

  • Don’t rush the browning: Take your time to get a nice golden crust on the chicken for maximum flavor.
  • Adjust the thickness: If the sauce is too thick, add a little more chicken broth or cream until you reach your desired consistency.
  • Use freshly grated cheese: Pre-grated cheese often contains anti-caking agents that can affect the melting quality.
  • Experiment with spices: Feel free to add a pinch of red pepper flakes for heat or Italian seasoning for extra flavor.
  • Let it rest: Allow the dish to sit for a few minutes off the heat before serving to let the flavors develop.
  • Meal prep: You can prepare the sauce in advance and store it in the fridge for up to 3 days. Just reheat and add the chicken when you’re ready to serve.
  • Pair wisely: Consider serving with fresh vegetables or a salad to balance the richness of the dish.
  • Don’t forget the garnish: Fresh herbs can brighten up the dish and add a pop of color.

Common Mistakes and Troubleshooting

Even the best cooks run into hiccups now and then. Here are some common mistakes to avoid:

  • Overcooking the chicken: Keep an eye on your cooking time to prevent dry, tough chicken. Aim for an internal temperature of 165°F.
  • Burning the garlic: Garlic can burn quickly, turning bitter. Add it only after deglazing the pan.
  • Too much liquid in the sauce: If your sauce is too runny, let it simmer longer to thicken.
  • Not enough seasoning: Taste as you go! Adjust salt and pepper to enhance the flavors.

Delicious Variations of Creamy Garlic Chicken

Feel free to mix things up! Here are some delicious variations you can try:

  • Mushroom Garlic Chicken: Add sliced mushrooms to the skillet when you cook the chicken for an earthy flavor.
  • Spinach and Artichoke: Stir in fresh spinach and artichoke hearts for a creamy, decadent twist.
  • Sun-Dried Tomato Garlic Chicken: Add chopped sun-dried tomatoes for a burst of tangy flavor.
  • Herb-Infused Chicken: Experiment with different herbs like thyme or rosemary for a unique taste!

Storage and Make-Ahead Instructions

This creamy garlic chicken is perfect for meal prep! Here’s how to store it:

  • Refrigerator: Store in an airtight container for up to 3 days.
  • Freezer: Freeze in an airtight container for up to 2 months. Thaw in the refrigerator overnight before reheating.
  • Reheating: Reheat in a skillet over low heat, adding a splash of chicken broth to loosen the sauce if needed.

FAQ: Your Creamy Garlic Chicken Questions Answered

  • Can I use frozen chicken? Yes! Just ensure it’s fully thawed before cooking for even results.
  • How can I make this dish lighter? Substitute half-and-half for heavy cream and use less butter.
  • What can I serve with creamy garlic chicken? It pairs wonderfully with rice, pasta, or a fresh green salad.
  • Can I make this recipe dairy-free? Use coconut milk and nutritional yeast for a dairy-free version!
  • How spicy is this dish? It’s not spicy at all, but you can add chili flakes for heat!
  • How do I know when the chicken is cooked? Use a meat thermometer to ensure it reaches 165°F internally.
  • Can I double this recipe? Absolutely! Just ensure your skillet is large enough to accommodate the extra chicken.
  • What’s the best way to thicken the sauce? If it’s too thin, let it simmer longer or add a slurry of flour and water.

Nutrition Tips and Dietary Adaptations

This creamy garlic chicken is not only delicious but can also be adapted to fit various dietary preferences:

  • Low-Carb Option: Skip the flour and serve with zucchini noodles instead of pasta or rice.
  • Gluten-Free: Use gluten-free flour or cornstarch as a thickener.
  • Dairy-Free: Substitute heavy cream with coconut milk and cheese with nutritional yeast.
  • Paleo-Friendly: Use almond flour instead of regular flour and omit the dairy.

Essential Equipment for Your Kitchen

To make this recipe, you’ll need:

  • Heavy-bottomed skillet: A good quality skillet ensures even cooking and perfect browning.
  • Measuring cups and spoons: For precise ingredient measurements.
  • Spatula: For stirring and scraping the skillet.
  • Meat thermometer: To check for doneness in the chicken.

Serving Suggestions

Here are some fantastic ways to serve your creamy garlic chicken:

  • With Pasta: Toss with fettuccine or spaghetti and a sprinkle of extra Parmesan for a hearty meal.
  • On Rice: Serve over fluffy white rice or brown rice to soak up the sauce.
  • With Vegetables: Pair with steamed broccoli or sautéed green beans for a balanced plate.
  • In a Wrap: Use leftovers in a wrap with fresh veggies for a tasty lunch option.

Conclusion

Now that you have all the tips, tricks, and details for making the best creamy garlic chicken, it’s time to get cooking! This dish is not just about satisfying hunger — it’s about enjoying the process and sharing a delicious meal with your loved ones. Remember, cooking is a journey, and every step is an opportunity to learn, create, and connect. So roll up your sleeves, have fun in the kitchen, and enjoy the smiles that come with serving this delightful dish!

Creamy Garlic Chicken: Family's Unforgivable Obsession

Prep Time 10 minutes
Cook Time 20 minutes
Total Time 30 minutes
Servings 4 servings
Calories 550
A rich and flavorful creamy garlic chicken dish that's perfect for a comforting family dinner.

Ingredients

Main Ingredients

  • 2 large boneless skinless chicken breasts
  • Salt Salt
  • Pepper Pepper
  • 2 teaspoons teaspoons parsley
  • 1-2 tablespoons tablespoons olive oil
  • ¾ cup cups chicken broth
  • 4 cloves cloves garlic, minced
  • 3 tablespoons tablespoons butter
  • 3 tablespoons tablespoons flour
  • ½ cup cups freshly grated Parmesan cheese
  • 1 tablespoon tablespoon fresh lemon juice
  • ¼ cup cups heavy cream
  • 1 teaspoon teaspoon Worcestershire sauce
  • 1 teaspoon teaspoon mustard powder
  • 1 teaspoon teaspoon honey
  • ½ chicken bouillon cube chicken bouillon cube
  • ½ teaspoon teaspoon onion powder
  • ½ teaspoon teaspoon oregano
  • ½ teaspoon teaspoon basil

Instructions 

  • Mix sauce ingredients and set aside. Pound chicken to ½ inch and season with salt, pepper, and parsley.
  • Heat oil and sear chicken 4-5 minutes per side until golden. Remove and set aside.
  • Deglaze skillet with chicken broth, add garlic, and cook until reduced by half. Stir in butter and flour, cook 1-2 minutes.
  • Gradually add sauce mixture, bring to boil, then simmer for 8 minutes. Stir in Parmesan and lemon juice.
  • Return chicken to skillet, spoon sauce over, heat through 5 minutes, garnish with parsley, and serve.

Notes

Use fresh garlic for best flavor and adjust seasoning to taste.
Calories: 550kcal
Cost: $15
Course: Main Course
Cuisine: American
Keyword: chicken