Author

michael

Browsing

Kickstart Your Day with This High-Protein Breakfast Bowl

Welcome to your new favorite morning ritual! If you’re looking for a quick, delicious, and nutritious breakfast, you’ve come to the right place. This High-Protein Breakfast Bowl is your ticket to starting the day off right, providing a satisfying blend of flavors and nutrients that will keep you energized and focused. Plus, it’s incredibly easy to whip up, making it the perfect choice for busy mornings. So let’s dive into why you’ll love this recipe and how to make it your own!

Why You’ll Love This Recipe

Here are five reasons this breakfast bowl will quickly become a staple in your morning routine:

  • Quick and Easy: This recipe takes less than 10 minutes to prepare, ensuring you can enjoy a wholesome meal even on the busiest days.
  • Customizable: You can easily swap ingredients based on your preferences or what you have on hand, making it versatile and flexible.
  • High in Protein: Packed with Greek yogurt and protein powder, this bowl will keep you feeling full and satisfied until lunchtime.
  • Deliciously Nutritious: With a combination of fresh fruits, nut butter, and optional granola, this bowl is not only tasty but also rich in vitamins and minerals.
  • Meal Prep Friendly: Prepare ingredients ahead of time for a quick grab-and-go option during your busy mornings!

Gathering Your Ingredients

Let’s break down the ingredients you’ll need for your High-Protein Breakfast Bowl. This recipe is not just about getting the basics right; you can also make substitutions to suit your taste or dietary needs.

  • 200 g Plain Greek Yogurt: The foundation of your bowl. It’s creamy, high in protein, and adds a satisfying texture.
  • 1 scoop Protein Powder (vanilla): Choose your favorite flavor to enhance the bowl’s taste. If you prefer, you can use plant-based protein powder.
  • 1 Banana or Berries: Fresh fruit adds natural sweetness and a pop of color. Feel free to mix and match!
  • 1 tbsp Peanut Butter or Almond Butter: This adds healthy fats and creaminess. You can also try sunflower seed butter for a nut-free option.
  • Granola (optional): For those who love a little crunch, sprinkle some granola on top. Choose low-sugar varieties for a healthier option.

Step-by-Step Instructions
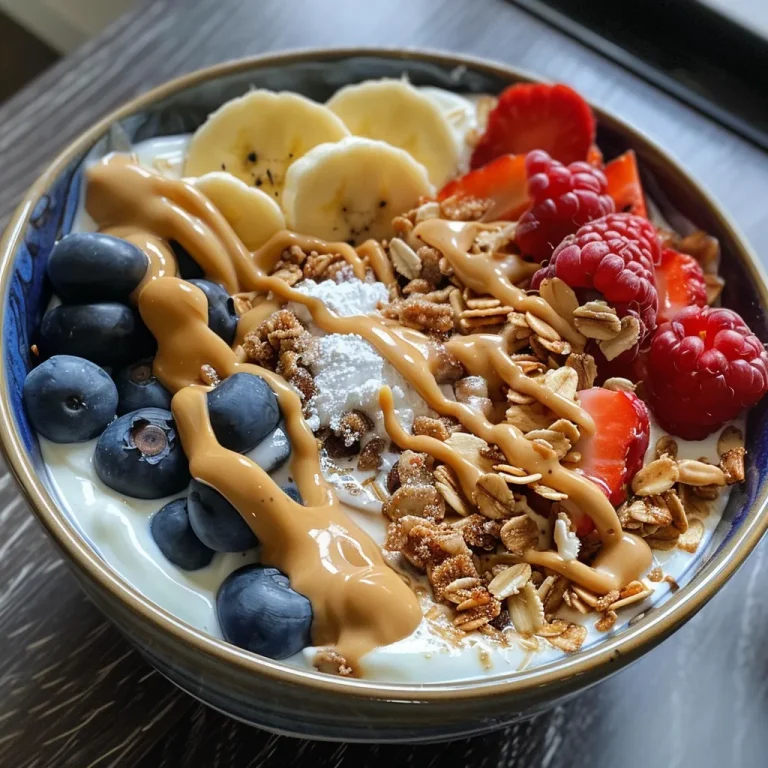
Side angle of a colorful breakfast bowl featuring Greek yogurt and peanut butter.

Now that we have our ingredients ready, let’s get to the fun part — making your breakfast bowl!

  1. Mix the Protein Base: In a bowl, stir the protein powder into the Greek yogurt until well blended and smooth.
  2. Add Your Fruit: Top the yogurt mixture with your choice of banana slices or berries, arranging them beautifully.
  3. Drizzle with Nut Butter: Add a generous drizzle of peanut or almond butter over the fruit and yogurt.
  4. Sprinkle Granola: If you’re using granola, sprinkle it on top for an added crunch.
  5. Serve or Store: Enjoy your bowl right away, or pack it in a container for a nutritious breakfast on the go!

Pro Tips for the Perfect Breakfast Bowl

Let’s take your breakfast bowl to the next level with these expert tips:

  • Experiment with Flavors: Try different flavored protein powders or add a splash of vanilla extract for an extra kick.
  • Texture Matters: If you prefer a thicker bowl, use less yogurt or add extra protein powder. For a thinner consistency, add a splash of milk.
  • Sweetness Control: If you find the bowl isn’t sweet enough, add a drizzle of honey or maple syrup, or use sweeter fruits like ripe bananas.
  • Add Seeds: For an extra nutritional boost, toss in some chia seeds or flaxseeds for healthy omega-3 fatty acids.
  • Keep It Fresh: To avoid browning, especially with bananas, squeeze a little lemon juice over them if you’re prepping in advance.
  • Vary Your Nuts: Switch up the nut butter with tahini or cashew butter for different flavor profiles.
  • Meal Prep Like a Pro: Prepare jars with yogurt and protein powder the night before, and just add fruits and nut butter in the morning.
  • Mind the Granola: If you’re meal prepping, keep granola separate until you’re ready to eat to maintain its crunchiness.

Common Mistakes and Troubleshooting

Even the best cooks make mistakes! Here are some common pitfalls and how to avoid them:

  • Too Thick? If your yogurt mixture is too thick, simply add a little milk or water to loosen it up.
  • Not Sweet Enough? Adjust sweetness with honey, maple syrup, or sweeter fruits like dates or figs.
  • Fruit Browning: To prevent bananas from browning, use them fresh or add lemon juice. Alternatively, use berries that don’t brown as easily.
  • Granola Sogginess: To keep granola crispy, store it separately until just before serving.

Delicious Variations to Try

Feeling adventurous? Here are some fun variations to keep your breakfast bowl exciting:

  • Tropical Twist: Use coconut yogurt, top with mango chunks and shredded coconut, and drizzle with honey for a beachy vibe.
  • Chocolate Delight: Mix chocolate protein powder into the yogurt, top with banana slices, and add a sprinkle of cacao nibs.
  • Nutty Banana: Use almond butter, add sliced almonds, and top with banana and a sprinkle of cinnamon for a comforting twist.
  • Savory Bowl: Replace yogurt with cottage cheese, add cherry tomatoes, cucumber, a drizzle of olive oil, and sprinkle with feta for a savory breakfast.

Storage and Make-Ahead Instructions

Want to prepare your breakfast bowl in advance? Here’s how:

  • Make Ahead: You can prepare the yogurt and protein powder mixture a day in advance. Store in an airtight container in the fridge.
  • Fruit Prep: Slice fruits the night before but add them to your bowl right before serving to keep them fresh.
  • Assemble and Store: For meal prep, layer yogurt, protein powder, and fruit in jars. Keep nut butter and granola separate until ready to eat.

Frequently Asked Questions

Here are some common questions about making this high-protein breakfast bowl:

  • Can I use a different type of yogurt? Absolutely! Feel free to use dairy-free yogurt or any other yogurt variety you prefer.
  • Is this bowl suitable for vegans? Yes, you can use plant-based protein powder and non-dairy yogurt to make it vegan-friendly.
  • How can I make this bowl lower in calories? Use low-fat Greek yogurt and skip the nut butter or granola.
  • What fruit can I use instead of bananas or berries? Try apples, peaches, or any seasonal fruit you enjoy!
  • Can I freeze this breakfast bowl? It’s best enjoyed fresh, but you can freeze the yogurt mixture. Thaw in the fridge overnight before serving.
  • What if I’m allergic to nuts? Substitute nut butters with sunflower seed butter or simply omit them.
  • How long does this bowl last in the fridge? You can store the yogurt mixture for up to 3 days, but it’s best fresh.
  • Can I add greens to the bowl? Yes! Spinach or kale can be blended into the yogurt for added nutrients without affecting the taste.

Nutritional Tips and Dietary Adaptations

This breakfast bowl can easily fit into various dietary plans:

  • High-Protein Diet: Stick with Greek yogurt and protein powder for a protein-packed meal.
  • Low-Carb Option: Swap fruit for low-carb toppings like nuts and seeds, focusing on healthy fats.
  • Gluten-Free: Ensure your granola and any additional ingredients are certified gluten-free.
  • Low-Sugar Diet: Use unsweetened yogurt and fresh fruits, and skip the added sweeteners.

Equipment Recommendations

Here’s what you’ll need to make your breakfast bowl:

  • Mixing Bowl: A medium-sized bowl for blending your yogurt and protein powder.
  • Measuring Cups and Spoons: For accurate ingredient measurements.
  • Spatula or Spoon: To mix and serve your delicious bowl.
  • Containers for Storage: Airtight containers or jars if you’re prepping in advance.

Serving Suggestions

Serve your breakfast bowl with a side of:

  • Herbal Tea: A soothing herbal tea pairs perfectly with this protein-packed meal.
  • Fresh Juice: A glass of fresh juice can add a delightful touch of sweetness.
  • Additional Toppings: Consider offering extra toppings on the side, like sliced fruits or seeds, for a fun DIY breakfast experience!

Conclusion

Your mornings just got a whole lot brighter with this High-Protein Breakfast Bowl! Packed with flavor, nutrition, and the power to keep you full, it’s sure to become your go-to breakfast option, especially on busy days. Remember, cooking is all about enjoying the process, so don’t be afraid to experiment and make this bowl uniquely yours. Happy cooking, and here’s to delicious mornings ahead!

High-Protein Breakfast Bowl for Busy Mornings

Prep Time 5 minutes
Total Time 5 minutes
Servings 1 bowl
Calories 350
A quick and nutritious breakfast perfect for busy mornings, packed with protein and flavor.

Ingredients

Dairy

  • 200 g Plain Greek yogurt
  • 1 scoop Protein powder (vanilla)
  • 1 piece Banana or berries
  • 1 tbsp Peanut butter or almond butter

Optional toppings

  • to taste Granola (Optional for crunch)

Instructions 

  • Stir protein powder into Greek yogurt until smooth.
  • Add fruit on top of the yogurt mixture.
  • Drizzle nut butter over the fruit and yogurt.
  • Sprinkle granola on top if desired.
  • Serve immediately or pack for later.

Notes

This breakfast is quick to prepare and provides a balanced mix of protein and carbs to keep you energized.
Calories: 350kcal
Cost: $8
Course: Breakfast
Cuisine: American
Keyword: High-Protein

Indulge in the Ultimate Chocolate Ganache Cake Experience

Welcome to your next baking adventure! If you’ve ever dreamt of creating a cake that’s rich, moist, and utterly satisfying, you’re in the right place. The Ultimate Chocolate Ganache Cake is here to fulfill your chocolate cravings without any fuss. With a combination of simple ingredients and straightforward steps, this cake is perfect for any occasion—birthdays, anniversaries, or just because you deserve a treat!

Let’s dive into why this cake is not just another dessert, but a delightful memory waiting to happen!

Why You’ll Love This Recipe

This cake isn’t just a feast for the eyes; it’s a celebration of flavor and texture. Here are five reasons you’ll want to add the Ultimate Chocolate Ganache Cake to your baking repertoire:

  • Irresistible Flavor: The combination of dark chocolate ganache and soft, moist cake layers creates a flavor explosion that chocolate lovers will adore.
  • Perfect for Any Occasion: Whether it’s a holiday gathering or a cozy family dinner, this cake fits right in, making it an ideal centerpiece for any celebration.
  • Simplified Baking: With straightforward steps and easy-to-find ingredients, even novice bakers can create a masterpiece without stress.
  • Customizable: Feeling adventurous? You can easily add your twist with flavor variations or toppings to suit your taste.
  • Make-Ahead Friendly: This cake stores beautifully, allowing you to prepare it in advance without compromising on taste or texture.

Ingredient Breakdown

Let’s talk ingredients! Here’s what you’ll need for the Ultimate Chocolate Ganache Cake:

  • 2 cups all-purpose flour: This forms the base of your cake. You can substitute with gluten-free flour for a gluten-free version.
  • 1 3/4 cups granulated sugar: Sweetens your cake; consider using coconut sugar for a lower glycemic index alternative.
  • 3/4 cup unsweetened cocoa powder: Ensure it’s high quality for the best flavor. Dutch-processed cocoa enhances the richness.
  • 2 teaspoons baking powder & 1 1/2 teaspoons baking soda: These leavening agents ensure your cake rises perfectly.
  • 1 teaspoon salt: Balances the sweetness and enhances flavors.
  • 2 large eggs: Provides structure and moisture. For a vegan option, use flax eggs!
  • 1 cup whole milk: Adds moisture; you can swap this for almond milk or oat milk for a dairy-free version.
  • 1/2 cup vegetable oil: For a moist cake; olive oil can be a flavorful alternative.
  • 2 teaspoons vanilla extract: Enhances the chocolate flavor. Homemade vanilla extract is a great choice!
  • 1 cup boiling water: This might seem unusual, but it helps the cocoa bloom, intensifying the chocolate flavor.
  • 2 cups dark chocolate ganache: The star of the show! You can make this with high-quality dark chocolate and heavy cream.
  • 1 cup chocolate shavings: For decoration and an extra touch of chocolatey goodness.

Steps to Create Your Chocolate Ganache Cake

Side view of an Ultimate Chocolate Ganache Cake showcasing rich layers and chocolate shavings.

Ready to bake? Follow these simple steps:

  1. Preheat your oven: Set it to 350°F (175°C) and grease two 8-inch cake pans.
  2. Mix dry ingredients: In a large bowl, combine flour, sugar, cocoa powder, baking powder, baking soda, and salt.
  3. Add wet ingredients: Mix in the eggs, milk, vegetable oil, and vanilla extract. Beat until smooth.
  4. Incorporate boiling water: Carefully stir this into the mixture—it will be thin, but that’s okay!
  5. Pour and bake: Divide the batter evenly between the prepared cake pans. Bake for 30-35 minutes or until a toothpick comes out clean.
  6. Cool: Let the cakes cool in the pans for about 10 minutes, then transfer them to a wire rack to cool completely.
  7. Layer with ganache: Once cooled, spread a layer of ganache between the cake layers and on top.
  8. Decorate: Top with chocolate shavings and chill for 1 hour before serving.

Pro Tips for the Perfect Cake

Here are some insider tips to ensure your cake turns out perfectly every time:

  • Room temperature ingredients: Using eggs and milk at room temperature helps create a smooth batter.
  • Don’t overmix: Once you’ve added wet ingredients to the dry, mix just until combined to avoid a dense cake.
  • Check for doneness: Use the toothpick test—insert it in the center, and if it comes out clean, your cake is ready!
  • Ganache consistency: For a perfect ganache, let it cool to room temperature before spreading. It should be thick, but pourable.
  • Chill before serving: Chilling the cake for at least an hour after decorating allows the ganache to set properly.
  • Use quality chocolate: The better the chocolate, the richer the flavor of your ganache and cake.
  • Experiment with flavors: Try adding a splash of espresso or orange zest to your batter for an extra flavor boost.
  • Store properly: Keep the cake in an airtight container in the refrigerator for up to 5 days, or freeze for longer storage.

Common Mistakes and Troubleshooting

Don’t worry, even the best bakers make mistakes! Here’s how to troubleshoot:

  • Dense cake: This usually happens from overmixing the batter. Mix just until combined!
  • Cake not rising: Check your baking powder and soda for freshness. Old leavening agents can lead to flat cakes.
  • Ganache too runny: If your ganache is too thin, try refrigerating it for a bit to thicken before spreading.
  • Cake sticking to pans: Ensure you grease and flour the pans adequately before pouring in the batter.

Variations on Your Ultimate Chocolate Ganache Cake

Feeling creative? Here are some fun variations to try:

  • Mint Chocolate Ganache: Add a few drops of mint extract to your ganache for a refreshing twist.
  • Peanut Butter Ganache: Stir in some creamy peanut butter for a chocolate-peanut butter delight!
  • Mocha Cake: Add a tablespoon of instant coffee to the dry mix for a mocha-flavored cake.
  • Fruit Toppings: Consider topping with fresh raspberries or strawberries for added freshness and a pop of color.

Storage and Make-Ahead Instructions

You can easily make this cake ahead of time:

  • Make-ahead: The cake layers can be made a day in advance. Just wrap them tightly in plastic wrap and store at room temperature.
  • Storing leftovers: Store the cake in an airtight container in the refrigerator for up to 5 days.
  • Freezing: This cake freezes well! Wrap tightly in plastic wrap and then aluminum foil for up to 3 months. Thaw in the fridge before serving.

Frequently Asked Questions

Here are some common questions about the Ultimate Chocolate Ganache Cake:

  • Can I use different types of chocolate for the ganache? Absolutely! You can mix dark, milk, or even white chocolate for different flavors.
  • What’s the best way to serve this cake? It’s delicious on its own, but a scoop of vanilla ice cream or a dollop of whipped cream pairs perfectly!
  • Can I make this cake gluten-free? Yes! Substitute all-purpose flour with a gluten-free blend.
  • Is it necessary to chill the ganache? Chilling helps it set, but you can use it at room temperature if you prefer a more flowing ganache.
  • How do I know when the cake is done? Use the toothpick test; it should come out clean or with a few moist crumbs.
  • Can I make this as a single layer cake? Yes! Just adjust the baking time accordingly, reducing it slightly.
  • How do I fix a dry cake? If your cake turns out dry, next time, try adding a bit more oil or using a combination of milk and yogurt.
  • Can I use oil instead of butter in the ganache? Yes, you can use oil for a dairy-free ganache, but it may alter the texture a bit.

Nutritional Tips and Dietary Adaptations

For those watching their diet, here are some tips:

  • Lower sugar: Reduce the sugar by 1/4 cup or substitute with a healthier sweetener.
  • Use whole grain flour: You can replace all-purpose flour with whole wheat flour for added fiber.
  • Egg replacements: Use applesauce or mashed bananas for an egg-free version.
  • Nut butter: Swap vegetable oil for nut butter for healthy fats.

Essential Equipment Recommendations

Before you start baking, here are some handy tools you’ll need:

  • Two 8-inch round cake pans: Essential for shaping your cake layers.
  • Mixing bowls: A few different sizes will help with your ingredient prep.
  • Electric mixer: A hand or stand mixer makes beating the batter a breeze.
  • Cooling rack: To cool your cake layers completely before frosting.
  • Spatula: Perfect for spreading ganache smoothly across the cake.
  • Measuring cups and spoons: Accurate measurements are key to successful baking!

Serving Suggestions

Now that your Ultimate Chocolate Ganache Cake is ready, here are some ways to serve it:

  • Classic: Serve plain with a dusting of powdered sugar.
  • With Ice Cream: A scoop of vanilla or mint chocolate chip ice cream makes for a heavenly pairing.
  • Fresh Berries: Top with berries for a tart contrast to the rich chocolate.
  • Coffee Pairing: Serve alongside a cup of coffee or espresso for the ultimate indulgence.

In conclusion, baking the Ultimate Chocolate Ganache Cake is not just about the final product; it’s about enjoying the process and creating lasting memories with loved ones. Remember, every great chef started as a beginner, and with this recipe, you’re well on your way to impressing everyone with your newfound baking skills. So grab those ingredients, roll up your sleeves, and let’s make something delicious together!

Ultimate Chocolate Ganache Cake

Prep Time 20 minutes
Cook Time 35 minutes
Total Time 55 minutes
Servings 12 pieces
Calories 450
A rich and decadent chocolate cake layered with smooth ganache and topped with chocolate shavings, perfect for special occasions.

Ingredients

Dry Ingredients

  • 2 cups all-purpose flour
  • 1 3/4 cups granulated sugar
  • 3/4 cup unsweetened cocoa powder
  • 2 teaspoons baking powder
  • 1 1/2 teaspoons baking soda
  • 1 teaspoon salt

Wet Ingredients

  • 2 large eggs
  • 1 cup whole milk
  • 1/2 cup vegetable oil
  • 2 teaspoons vanilla extract
  • 1 cup boiling water

Filling & Topping

  • 2 cups dark chocolate ganache
  • 1 cup chocolate shavings

Instructions 

  • Preheat oven to 350°F (175°C). Grease two 8-inch pans.
  • Mix dry ingredients, then add eggs, milk, oil, vanilla; beat until smooth.
  • Stir in boiling water until thin; pour into pans.
  • Bake 30-35 minutes; cool completely.
  • Spread ganache between layers and on top; decorate with shavings.

Notes

Ensure the ganache is at room temperature before spreading for best results.
Calories: 450kcal
Cost: $20
Course: Dessert
Cuisine: international
Keyword: chocolate

Start Your Day Right with High-Protein Scrambled Eggs

Are you looking for a breakfast that’s not only delicious but also packed with nutrition? Look no further! Our High-Protein Scrambled Eggs with Cottage Cheese is the perfect way to kickstart your morning. This easy recipe combines the richness of eggs with the creamy goodness of cottage cheese, making it a delightful and satisfying meal in just five minutes. Let’s dive into why you’ll love this recipe and how to whip it up effortlessly!

Why You’ll Love This Recipe

  • Quick and Easy: Whip up this high-protein breakfast in under five minutes, perfect for busy mornings.
  • Nutrient-Packed: Combining eggs with cottage cheese boosts your protein intake, keeping you full and energized.
  • Rich Creaminess: The addition of cottage cheese adds a luscious texture to your scramble without feeling heavy.
  • Versatile Dish: Customize your scramble with various add-ins and spices to suit your taste preferences.
  • Simple Ingredients: Made with just a few pantry staples, this recipe is accessible and affordable.

Ingredients You’ll Need

Gather these simple ingredients to make your high-protein scrambled eggs:

  • 3 large eggs
  • 1/2 cup low-fat cottage cheese
  • 1 tbsp butter or olive oil
  • Salt and pepper to taste
  • Fresh herbs (optional)

Step-by-Step Instructions for High-Protein Scrambled Eggs

Side view of protein-rich scrambled eggs with a creamy texture from cottage cheese.

Follow these easy steps to create your delicious high-protein scramble:

  • Whisk: In a mixing bowl, whisk together the eggs and cottage cheese until smooth and well combined.
  • Heat the Pan: Place a non-stick skillet over medium heat and add the butter or olive oil. Let it melt and coat the pan.
  • Cook: Pour in the egg mixture. Gently stir and scramble the eggs for 3-4 minutes until they are just set.
  • Season: Add salt, pepper, and fresh herbs to enhance the flavor before serving.

Pro Tips for Perfect High-Protein Scrambled Eggs

  • Use Fresh Ingredients: Fresh eggs and cottage cheese yield the best flavor and texture, so choose high-quality ingredients.
  • Don’t Overcook: To maintain a creamy texture, remove the eggs from the heat while they are slightly undercooked; they will continue to cook off the heat.
  • Add Flavor: Experiment with seasonings like garlic powder, onion powder, or even a dash of hot sauce for a flavor boost.
  • Mix It Up: Incorporate veggies like spinach, tomatoes, or bell peppers for added nutrition and flavor.
  • Cook in Batches: If you’re feeding a crowd, double the recipe and cook in batches to save time.
  • Perfect Pairings: Serve your scramble with whole-grain toast, avocado, or a side of fruit for a balanced breakfast.
  • Try Different Cheeses: If you want to mix it up, try adding feta or goat cheese for a tangy twist.
  • Make It Ahead: Prepare the egg mixture the night before and store it in the fridge for a quicker breakfast in the morning.

Common Mistakes and Troubleshooting

Even the best cooks make mistakes! Here are some common pitfalls and how to avoid them:

  • Overcooking: This can lead to rubbery eggs. Always remove them from heat while still slightly runny.
  • Not Whisking Enough: Ensure the eggs and cottage cheese are fully combined to achieve a uniform texture.
  • Using the Wrong Pan: A non-stick skillet is essential to prevent sticking and make cleanup easier.
  • Skipping Seasoning: Never underestimate the power of salt and pepper! Season your eggs for the best flavor.

Variations to Mix Up Your Scramble

Feeling adventurous? Here are some fun variations to try:

  • Vegetable Medley: Add sautéed spinach, diced tomatoes, and bell peppers for a colorful and nutritious twist.
  • Herb-Infused: Mix in fresh herbs like chives, parsley, or dill for a burst of freshness.
  • Greek Style: Incorporate olives, feta cheese, and a sprinkle of oregano for a Mediterranean flair.
  • Spicy Kick: Add jalapeños or your favorite hot sauce to give your scramble some heat.

Storage and Make-Ahead Instructions

If you want to enjoy these scrambled eggs later, here’s how to store them:

  • Store any leftovers in an airtight container in the refrigerator for up to 2 days.
  • Reheat in a microwave or skillet on low heat, adding a splash of water to keep them moist.
  • For meal prep, prepare the egg and cottage cheese mixture ahead of time and store it in the fridge for up to 24 hours.

Frequently Asked Questions About High-Protein Scrambled Eggs

  • Can I use egg whites? Yes! You can substitute whole eggs for egg whites for a lower-calorie option.
  • Is cottage cheese necessary? While it adds creaminess and protein, you can substitute Greek yogurt for a similar effect.
  • How much protein is in this dish? This recipe contains approximately 25 grams of protein, depending on the size of the eggs used.
  • Can I make this vegan? Yes! Use tofu instead of eggs and nutritional yeast for a cheesy flavor.
  • What’s the best way to serve this? Serve warm with toasted bread or alongside fresh fruit for a balanced meal.
  • How can I enhance the flavor? Experiment with spices like smoked paprika or add a dollop of salsa for extra zest.
  • Are there gluten-free options? Absolutely! This recipe is naturally gluten-free, just ensure your add-ins are gluten-free as well.
  • Can I freeze the scrambled eggs? It’s not recommended, as the texture may change; however, you can freeze the egg mixture before cooking.

Nutritional Tips and Dietary Adaptations

This recipe is versatile for various dietary needs:

  • For Low-Carb Diets: Stick to the basic recipe without bread or high-carb add-ins.
  • For High-Protein Diets: Consider adding extra protein sources like turkey bacon or sausage.
  • For Lactose Intolerance: Use lactose-free cottage cheese or Greek yogurt as an alternative.

Equipment Recommendations

Here’s what you’ll need to make this recipe:

  • A non-stick skillet for easy cooking and cleanup.
  • A whisk for blending the eggs and cottage cheese thoroughly.
  • A spatula to gently scramble and serve the eggs.

Serving Suggestions

Serve your high-protein scrambled eggs with:

  • Whole-grain toast: For a filling meal with added fiber.
  • Fresh fruit: A side of berries or sliced banana complements the dish beautifully.
  • Avocado slices: For healthy fats and a creamy texture.

Now that you know everything about making high-protein scrambled eggs with cottage cheese, there’s nothing stopping you from creating this delightful breakfast! Remember, cooking is all about experimenting and enjoying the process. So grab your ingredients and have fun in the kitchen!

High-Protein Scrambled Eggs with Cottage Cheese

Prep Time 5 minutes
Cook Time 5 minutes
Total Time 10 minutes
Servings 2 servings
Calories 250
A quick and nutritious breakfast option packed with protein, combining fluffy scrambled eggs with creamy cottage cheese.

Ingredients

Eggs

  • 3 large eggs

Dairy

  • 1/2 cup low-fat cottage cheese

Fats

  • 1 tbsp butter or olive oil

Seasonings

  • to taste Salt and pepper

Herbs

  • optional Fresh herbs

Instructions 

  • Whisk eggs and cottage cheese until well combined.
  • Heat butter in a non-stick pan over medium heat.
  • Pour in egg mixture and gently scramble for 3-4 minutes until just set.
  • Season with salt, pepper, and fresh herbs.

Notes

For extra flavor, add chopped chives or parsley.
Calories: 250kcal
Cost: $8
Course: Breakfast
Cuisine: American
Keyword: Cottage Cheese, Eggs, High-Protein

A Flavorful Journey Awaits with This One-Pan Cajun Sausage and Rice

Welcome to the heart of Southern cooking! If you’re looking for a simple yet delicious meal that brings the bold flavors of Cajun cuisine right to your kitchen, you’ve landed in the right place. In just 30 minutes, you can whip up this **Cajun Sausage and Rice Skillet**, perfect for busy weeknights or any time you crave a comforting dish. With smoky sausage, vibrant vegetables, and a delightful blend of spices, this recipe is sure to become a family favorite. Let’s dive into the deliciousness!

Why You’ll Love This Recipe

  • Quick and Easy: This dish comes together in just 30 minutes, making it perfect for those busy weeknights when you need a satisfying meal without the fuss.
  • One-Pan Wonder: Minimal cleanup! All the magic happens in one skillet, leaving you more time to enjoy your meal and less time washing dishes.
  • Bold Flavors: The combination of smoked sausage, Cajun seasoning, and fresh vegetables create a flavor explosion that will tantalize your taste buds.
  • Customizable: You can easily adjust ingredients to suit your preferences, whether you want to add more veggies, switch up the protein, or make it spicy!
  • Leftover Friendly: This dish tastes even better the next day, making it a great option for meal prep or leftovers.

Ingredients You’ll Need

Gathering your ingredients is the first step to creating this delicious Cajun dish. Here’s what you’ll need:

  • 12 oz Smoked Sausage: Choose your favorite, such as Andouille or Kielbasa, sliced into ½-inch rounds for that rich, smoky flavor.
  • 1 cup Rice: Long-grain white rice works best, but feel free to use brown rice for a healthier alternative. Remember to rinse it before cooking!
  • 1 Bell Pepper: Use a red bell pepper, diced, for sweetness and color.
  • 1 Bell Pepper: A green bell pepper, also diced, adds a nice crunch.
  • 1 medium Onion: Yellow or white onion, diced, for aromatic goodness.
  • 3 cloves Garlic: Minced for a burst of flavor.
  • 1 ½ cups Chicken Broth: This will infuse the rice with flavor as it cooks.
  • 2 tbsp Cajun Seasoning: Use store-bought or homemade for that authentic Cajun kick.
  • 1 tbsp Olive Oil: For sautéing the sausage and vegetables.
  • Salt and Pepper: To taste, of course!
  • Fresh Parsley: Optional, for garnish.
  • Green Onions: Optional, for garnish and extra flavor.
  • Hot Sauce: Optional, for those who like it spicy!

How to Make Your Cajun Sausage and Rice Skillet

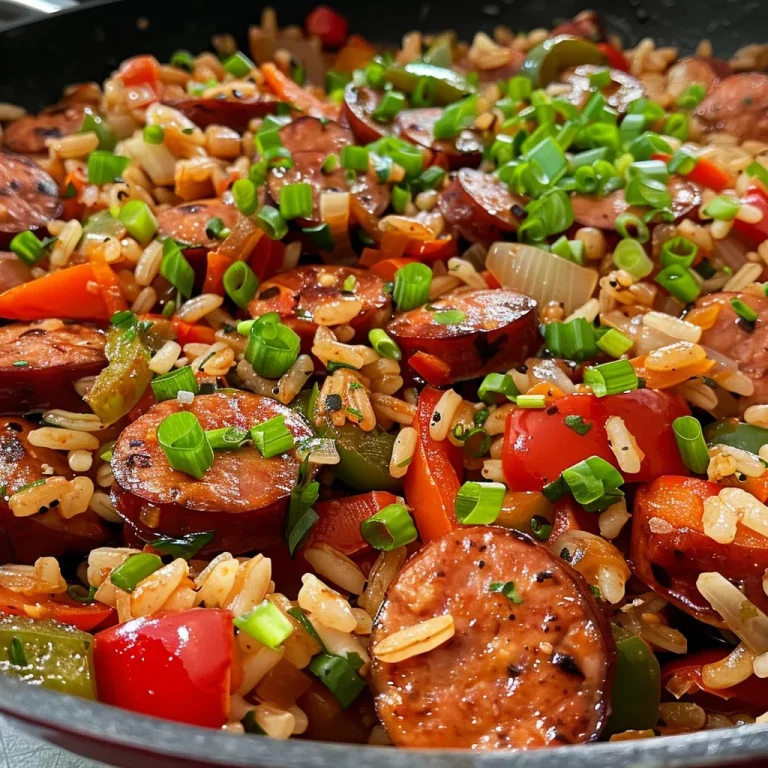
A vibrant Cajun sausage and rice dish in a skillet, featuring rice, sausage, and diced vegetables.

Ready to get cooking? Follow these simple steps to create your one-pan masterpiece:

  1. In a large skillet, heat the olive oil over medium heat. Add the sliced smoked sausage and cook until browned, about 5-7 minutes.
  2. Add the diced onion and bell peppers to the skillet, sautéing until softened, about 3-4 minutes.
  3. Stir in the minced garlic and cook for another minute, until fragrant.
  4. Pour in the rice and stir until it’s well coated with the oil and mixed with the sausage and veggies.
  5. Add the chicken broth and Cajun seasoning, stirring to combine. Bring to a boil.
  6. Once boiling, reduce the heat to low, cover, and let it simmer for about 18-20 minutes, or until the rice is tender and has absorbed the liquid.
  7. Remove from heat and let it sit covered for a few minutes. Fluff with a fork before serving.
  8. Garnish with fresh parsley, green onions, and serve hot, with hot sauce on the side for those who like it spicy!

Pro Tips for Perfecting Your Cajun Skillet

  • Choose the Right Sausage: The type of sausage you use will greatly affect the flavor. Andouille is traditional, but kielbasa or even chicken sausage can work too!
  • Rice Substitution: If you prefer brown rice, just remember it will take longer to cook. You may need to increase the broth and cooking time.
  • Extra Veggies: Feel free to add other vegetables like zucchini, corn, or even diced tomatoes for added texture and flavor.
  • Homemade Cajun Seasoning: Mix your own seasoning using paprika, cayenne, garlic powder, onion powder, and thyme for a personal touch.
  • Don’t Rush the Browning: Taking the time to brown the sausage will enhance the flavor of your dish, so don’t skip this step!
  • Cover the Skillet: Keeping the skillet covered while the rice cooks traps steam, ensuring perfectly cooked grains.
  • Let it Rest: Allowing the dish to sit after cooking helps the flavors meld together beautifully.
  • Garnish Generously: Fresh herbs like parsley or basil will brighten up the dish and make it visually appealing.

Common Mistakes and Troubleshooting

  • Rice Too Sticky: If your rice turns out sticky, it might have been overcooked. Ensure you’re using the right water-to-rice ratio and cooking time.
  • Too Spicy: If you find the dish too spicy, add a dollop of sour cream or Greek yogurt to balance the heat.
  • Uneven Cooking: Stir the rice occasionally during cooking to ensure even absorption of the broth.
  • Missing Flavor: If the dish seems bland, you may need to adjust the seasoning. A pinch more salt or a dash of hot sauce can do wonders!

Variations to Try

  • Cajun Shrimp Skillet: Swap out sausage for shrimp for a lighter, seafood twist. Just sauté the shrimp until pink, then follow the same steps.
  • Vegetarian Option: Replace sausage with your favorite plant-based protein and use vegetable broth instead of chicken broth.
  • Spicy Chicken Skillet: Add diced chicken breast instead of sausage and increase the Cajun seasoning for an extra kick.
  • Jambalaya Style: Toss in some diced tomatoes or tomato sauce for a saucy, jambalaya-inspired version.

Storage and Make-Ahead Instructions

This Cajun Sausage and Rice Skillet is perfect for leftovers! Here’s how to store and reheat:

  • Refrigerate: Store in an airtight container in the fridge for up to 3 days.
  • Freeze: This dish can be frozen for up to 2 months. Just make sure to cool it completely before transferring it to a freezer-safe container.
  • Reheating: To reheat, simply warm it in a skillet over medium heat, adding a splash of chicken broth to loosen it up.
  • Make-Ahead: You can prep all your ingredients in advance and store them separately in the fridge, making it super quick to throw together at mealtime.

Comprehensive FAQ

  • Can I use brown rice instead of white rice? Yes, you can! Just remember that brown rice takes longer to cook, so adjust the cooking time accordingly.
  • Can I make this dish ahead of time? Absolutely! You can prepare the ingredients in advance and store them separately or cook the dish and refrigerate it for later.
  • What if I don’t have Cajun seasoning? You can easily make your own with spices like paprika, cayenne, garlic powder, and dried herbs.
  • Can I use a different type of sausage? Yes! Feel free to substitute with your favorite type, such as chicken sausage or turkey sausage.
  • How do I store leftovers? Store in an airtight container in the fridge for up to 3 days, or freeze for up to 2 months.
  • Is it necessary to rinse the rice? Rinsing the rice removes excess starch, preventing it from becoming too sticky when cooked.
  • Can I add more vegetables? Definitely! Adding more vegetables like zucchini, corn, or peas can enhance the flavor and nutrition of the dish.
  • How can I make it spicier? If you like it hot, add more Cajun seasoning or a splash of your favorite hot sauce.

Nutritional Tips and Dietary Adaptations

This Cajun Sausage and Rice Skillet can be tailored to fit various dietary needs:

  • Low-Carb Option: Use cauliflower rice in place of traditional rice for a low-carb alternative.
  • Dairy-Free: This recipe is naturally dairy-free, so you can enjoy it without any concerns!
  • Gluten-Free: Ensure that your sausage and broth are gluten-free for a safe and tasty meal.
  • Protein-Packed: If you’re looking to add more protein, consider adding beans or lentils to the mix.

Recommended Equipment for Success

To make your cooking experience even smoother, consider using:

  • Non-Stick Skillet: A non-stick skillet ensures even cooking and easy cleanup.
  • Measuring Cups and Spoons: Accurate measurements lead to consistent results, so don’t skip these!
  • Cutting Board: A sturdy cutting board is essential for chopping your veggies and sausage.
  • Sharp Knife: A good quality knife makes prep work faster and safer.

Serving Suggestions

To round out your meal, consider serving this Cajun Sausage and Rice Skillet with:

  • Crispy Garlic Bread: A side of garlic bread is perfect for soaking up those flavorful juices.
  • Simple Salad: A fresh garden salad with a light vinaigrette complements the richness of the skillet.
  • Coleslaw: A tangy coleslaw adds a refreshing crunch to balance the dish.
  • Extra Hot Sauce: For those who love extra heat, don’t forget to serve with some hot sauce!

In conclusion, this **One-Pan Cajun Sausage and Rice Skillet** is not just a recipe; it’s an experience filled with flavor, warmth, and comfort. Perfect for any occasion, this dish brings people together around the dinner table. So grab your ingredients, put on your favorite tunes, and let’s get cooking! Remember, cooking should be fun, and with this recipe, you’re sure to impress your family and friends. Happy cooking, friend!

Cajun Sausage and Rice Skillet

Prep Time 10 minutes
Cook Time 20 minutes
Total Time 30 minutes
Servings 4 servings
Calories 550
A flavorful one-pan dish combining smoky sausage, colorful peppers, and seasoned rice for a quick and satisfying meal.

Ingredients

Meat

  • 12 oz Smoked Sausage such as Andouille or Kielbasa (sliced into ½-inch rounds)
  • 1 cup Long-grain white rice (rinsed)

Vegetables

  • 1 piece Red Bell Pepper (diced)
  • 1 piece Green Bell Pepper (diced)
  • 1 medium Onion (yellow or white, diced)
  • 3 cloves Garlic (minced)
  • 1.5 cups Chicken Broth
  • 2 tbsp Cajun Seasoning (store-bought or homemade)
  • 1 tbsp Olive Oil
  • to taste Salt and Pepper Salt and Pepper
  • optional Fresh Parsley (for garnish)
  • optional Green Onions (for garnish)
  • optional Hot Sauce (for serving)

Instructions 

  • Heat olive oil in a large skillet over medium heat. Add sliced sausage and cook until browned, about 5 minutes.
  • Add diced onions and peppers; cook until vegetables are tender, about 5 minutes.
  • Stir in garlic and Cajun seasoning; cook for 1 minute.
  • Add rice and chicken broth; bring to a boil, then reduce heat to low, cover, and simmer until rice is cooked, about 15 minutes.
  • Fluff rice with a fork, garnish with parsley and green onions if desired, and serve with hot sauce.

Notes

For extra flavor, let the rice rest for 5 minutes before serving.
Calories: 550kcal
Cost: $15
Course: Main Course
Cuisine: Cajun
Keyword: Rice, Sausage

Kickstart Your Mornings with Healthy Breakfast Egg Muffins

Are you ready to revolutionize your breakfast routine? These healthy breakfast egg muffins are not only packed with vibrant veggies but also incredibly easy to whip up! Perfect for busy mornings, they ensure you have a delicious, nutritious meal ready to go. Whether you’re feeding a family or just looking to make your mornings smoother, this recipe is your ticket to effortless mornings filled with flavor.

Why You’ll Love This Recipe

  • Meal Prep Champion: Bake a batch on Sunday, and you’ll have breakfast covered for the entire week. Easy to grab and go!
  • Customizable Goodness: Mix and match vegetables, cheeses, and proteins based on what you have on hand. No special trips to the store required!
  • Health-Conscious Choice: Packed with protein, fiber, and vitamins, these muffins are a filling yet light breakfast option.
  • Kid-Friendly: Even picky eaters will love these! Just let them pick their favorite fillings.
  • Quick and Easy: Prep time is minimal, making these muffins perfect for even the busiest of mornings.

Ingredient Breakdown

Let’s dive into what you’ll need to create these delicious muffins:

  • 10 large eggs: The star of the show! They provide protein and structure.
  • 1/3 cup milk: Use unsweetened dairy-free alternatives like almond or oat milk if preferred.
  • 1 cup baby spinach, chopped: Adds color and nutrients.
  • 1/2 cup red bell pepper, finely diced: Sweet and crunchy, it brightens up the muffins.
  • 1/2 cup zucchini, finely diced: Make sure to squeeze out excess moisture to avoid soggy muffins.
  • 1/4 cup red onion or green onion, finely chopped: For a savory kick!
  • 1/2 cup shredded cheese: Cheddar, feta, or mozzarella work beautifully. Omit for a dairy-free option.
  • 2 tablespoons fresh parsley or chives, chopped: Fresh herbs enhance flavor.
  • 1 clove garlic, minced (optional): For those who love a garlicky punch!
  • 1/2 teaspoon salt: Essential for flavor.
  • 1/4 teaspoon black pepper: A touch of spice.
  • 1/4 teaspoon smoked paprika or chili flakes (optional): Adds a hint of warmth.
  • Olive oil or nonstick cooking spray: To grease the muffin tin.

Feel free to swap in any of your favorite veggies or use leftover ingredients from your fridge. The flexibility of this recipe is what makes it so appealing!

How to Make Egg Muffins

Juicy egg muffins with spinach, red bell pepper, and zucchini displayed on a plate.

Ready to get cooking? Here’s a step-by-step guide to crafting these delightful muffins:

  1. Preheat your oven to 350°F (175°C). Generously grease a 12-cup muffin tin with olive oil or cooking spray.
  2. Chop the vegetables into small, uniform pieces for even cooking.
  3. Pat the zucchini dry with a paper towel to avoid watery muffins.
  4. In a large mixing bowl, whisk together the eggs, milk, salt, pepper, and any spices until smooth and slightly frothy.
  5. Stir in the spinach, bell pepper, zucchini, onion, herbs, garlic (if using), and cheese. Mix well to combine.
  6. Divide the mixture evenly among the muffin cups, filling each about 3/4 full.
  7. Gently tap the muffin tin on the counter to settle the mixture.
  8. Bake in the middle of the oven for 18–22 minutes, until the centers are just set and a toothpick inserted comes out clean.
  9. Let the muffins rest in the pan for about 5 minutes. Run a thin spatula or butter knife around the edges to release them.
  10. Enjoy warm, or cool completely for storage.

Pro Tips for Perfect Egg Muffins

  • Prepped Ingredients: Chop and prepare your vegetables the night before to save even more time in the morning!
  • Don’t Overfill: Leave some space in the muffin cups to allow for rising.
  • Try Different Cheeses: Experiment with different cheese types for varied flavors. Goat cheese or pepper jack can add a unique twist!
  • Freezer-Friendly: These muffins can be frozen! Just wrap them individually and pop them in the freezer for up to 3 months.
  • Microwave Reheat: When reheating, microwave for 30 seconds to 1 minute until warmed through.
  • Season to Taste: Don’t shy away from adjusting seasoning according to your taste. A pinch of cayenne can spice things up!
  • Use Silicone Molds: If you have silicone muffin molds, they make for easy removal and cleanup.
  • Check for Doneness: Keep an eye on them while baking; all ovens vary in temperature.

Common Mistakes and Troubleshooting

Even the best chefs make mistakes! Here are a few common pitfalls and how to avoid them:

  • Soggy Muffins: Ensure all vegetables are properly dried before mixing into the egg base.
  • Muffins Not Rising: Ensure your eggs are fresh and properly beaten to incorporate air.
  • Overcooked Centers: Check with a toothpick early; ovens can vary significantly.
  • Sticking to the Pan: Generously grease the muffin tin or use silicone molds to prevent sticking.

Delicious Variations

Why stick to the same recipe? Here are some tasty variations to try:

  • Southwestern Style: Add black beans, corn, and a sprinkle of taco seasoning for a fiesta in your mouth!
  • Italian Flair: Incorporate diced tomatoes, Italian sausage, and basil for a Mediterranean twist.
  • Greek-Inspired: Feta cheese, olives, and sun-dried tomatoes make for a flavorful take.
  • Sweet Potato and Spinach: Swap out zucchini for roasted sweet potatoes and add spinach for a hearty, nutrient-packed muffin.

Storage and Make-Ahead Instructions

Want to keep your morning routine seamless? Here’s how to store and prepare ahead:

  • Refrigeration: Store cooled muffins in an airtight container in the fridge for up to 5 days.
  • Freezing: Wrap individual muffins in plastic wrap and store in a freezer bag. They can be frozen for up to 3 months.
  • Make-Ahead: Prepare the egg and vegetable mixture the night before. Just pour into muffin tins and bake in the morning!

Frequently Asked Questions

Got questions? We’ve got answers! Here are some of the most common queries about these egg muffins:

  • Can I use egg whites instead of whole eggs? Yes, you can! Just remember that the muffins may be less rich.
  • Do I need to cook the vegetables first? Not necessarily! Just chop them finely to ensure even cooking in the oven.
  • How do I keep the muffins from collapsing? Make sure your eggs are well-whipped and avoid overfilling the muffin cups.
  • What’s the best cheese for these? Cheddar, mozzarella, or feta are excellent choices. Choose your favorite!
  • Can I add meat to these muffins? Absolutely! Cooked bacon, sausage, or ham can add delicious flavor.
  • How do I reheat them? Microwave for 30 seconds to 1 minute or reheat in the oven at 350°F until warm.
  • Are these gluten-free? Yes, as long as you use gluten-free cheese and ensure no cross-contamination occurs.
  • Can I make them dairy-free? Yes, just substitute the cheese with a dairy-free alternative and use almond or oat milk!

Nutritional Insights and Dietary Adaptations

These muffins are not just delicious; they can be part of a balanced diet. Each muffin is rich in protein and packed with vitamins from the veggies. Here are some tips for dietary adaptations:

  • Low-Carb Option: Skip the cheese and use more veggies to keep carbs low.
  • Vegan Version: Replace eggs with a chickpea flour batter or a commercial egg substitute.
  • Protein Boost: Add cooked quinoa or lentils to the mixture for extra protein.

Essential Equipment for Success

To make your egg muffins, here’s what you’ll need:

  • Muffin Tin: A standard 12-cup muffin tin is ideal.
  • Mixing Bowl: A large bowl for combining your ingredients.
  • Whisk: For beating the eggs and mixing ingredients smoothly.
  • Spatula: To help remove the muffins from the tin easily.
  • Measuring Cups and Spoons: For precise ingredient measurements.

Serving Suggestions

These muffins can be enjoyed on their own or paired with a variety of sides:

  • Fresh Fruit: Serve alongside a bowl of seasonal fruit for a refreshing contrast.
  • Yogurt: A dollop of Greek yogurt can add creaminess and extra protein.
  • Avocado Toast: Pair with avocado toast for a heartier breakfast.
  • Green Smoothie: Blend up your favorite greens and fruits for a nutritious beverage.

Conclusion

Now that you have the ultimate guide to making healthy breakfast egg muffins, it’s time to get creative and enjoy your culinary journey! Remember, cooking is about connection and fun. Don’t stress the small stuff—embrace the process, and you’ll have delicious muffins to enjoy all week long. Happy cooking, and may your mornings be bright and muffin-filled!

Healthy Breakfast Egg Muffins With Vegetables

Prep Time 10 minutes
Cook Time 20 minutes
Total Time 30 minutes
Servings 12 muffins
Calories 150
Start your day with these nutritious egg muffins packed with fresh vegetables and cheese, perfect for a quick and healthy breakfast.

Ingredients

Eggs and Dairy

  • 10 large large eggs
  • 1/3 cup milk or unsweetened dairy-free milk (almond, oat, or soy)

Vegetables

  • 1 cup baby spinach, chopped
  • 1/2 cup red bell pepper, finely diced
  • 1/2 cup zucchini, finely diced (squeeze out excess moisture)
  • 1/4 cup red onion or green onion, finely chopped
  • 1/2 cup shredded cheese (cheddar, feta, mozzarella, or dairy-free alternative)
  • 2 tablespoons fresh parsley or chives, chopped
  • 1 clove garlic, minced (optional)
  • 1/2 teaspoon salt
  • 1/4 teaspoon black pepper
  • 1/4 teaspoon smoked paprika or chili flakes (optional)

Cooking spray or oil

  • Olive oil or nonstick cooking spray (for greasing muffin tin)

Instructions 

  • Preheat oven to 350°F (175°C) and grease a 12-cup muffin tin.
  • Chop vegetables and pat zucchini dry.
  • Whisk eggs, milk, salt, pepper, and spices until smooth. Stir in vegetables, herbs, garlic, and cheese.
  • Divide mixture evenly into muffin cups, filling about 3/4 full. Bake for 18–22 minutes until set.
  • Let muffins rest 5 minutes, then run a spatula around edges to release. Serve warm or cooled.

Notes

Use fresh vegetables for best flavor. Store leftovers in an airtight container in the fridge.
Calories: 150kcal
Cost: $15
Course: Breakfast
Keyword: Eggs, Healthy, Vegetables

Kickstart Your Day with a Protein Powerhouse

Imagine waking up every morning feeling energized and ready to tackle whatever the day throws at you. Sounds great, right? That’s exactly what this 15-Minute Protein Breakfast Bowl delivers! Packed with nutritious ingredients like quinoa, eggs, avocado, and black beans, this breakfast bowl is not just a meal — it’s your secret weapon for lasting energy. Whether you’re running off to work, getting the kids ready for school, or just need a moment to yourself, this recipe is here to help you seize the day.

In this comprehensive guide, we’ll explore everything you need to know about creating the perfect breakfast bowl. From ingredient breakdowns to expert tips, we’re covering all bases to ensure you can whip this up with ease. So, let’s dive in!

Why You’ll Love This Recipe

This isn’t just any breakfast — it’s a protein breakfast bowl that’s simple, satisfying, and oh-so-delicious! Here are five reasons why you’ll adore this recipe:

  • Quick and Easy: Ready in just 15 minutes, you can have a wholesome meal on the table even on your busiest mornings.
  • Protein Packed: With quinoa and eggs, each bowl delivers a hearty dose of protein, keeping you full and focused until lunchtime.
  • Customizable: Adjust the ingredients based on what you have at home or your dietary preferences. This bowl is flexible!
  • Flavorful and Filling: The combination of creamy avocado, savory black beans, and fresh tomatoes creates a symphony of flavors that will satisfy your taste buds.
  • Meal Prep Friendly: Make components ahead of time for a quick assembly — a lifesaver for those hectic mornings!

Ingredient Breakdown

Let’s get into the details of what makes this bowl a winner. Here’s what you’ll need to create your own masterpiece:

  • 1 cup cooked quinoa: A fantastic source of protein and fiber. You can swap this for brown rice or even oats if you prefer.
  • 2 eggs: Your choice of cooking method — scrambled, fried, or poached! Eggs add a fluffy texture and richness.
  • 1/2 avocado, sliced: Creamy and full of healthy fats, avocado is a must for that luxurious mouthfeel.
  • 1/4 cup black beans: These beans are not only protein-packed but also add a delightful texture to your bowl.
  • 1/4 cup diced tomatoes: Freshness is key! Tomatoes bring acidity and sweetness to balance the dish.
  • 1 tbsp olive oil: Used to cook the eggs; it adds flavor and healthy fats to your breakfast bowl.
  • Salt and pepper to taste: Essential for bringing all the flavors together!

**Ingredient Substitutions:** Don’t have something on hand? No problem! Here are some easy swaps:

  • Swap quinoa for **brown rice** or **cauliflower rice** for a low-carb option.
  • Use **tofu** or **tempeh** instead of eggs for a vegan alternative.
  • Replace black beans with **chickpeas** or **kidney beans** if you prefer.
  • Add **spinach** or **kale** for extra greens and nutrients.

How to Make Your Protein Breakfast Bowl

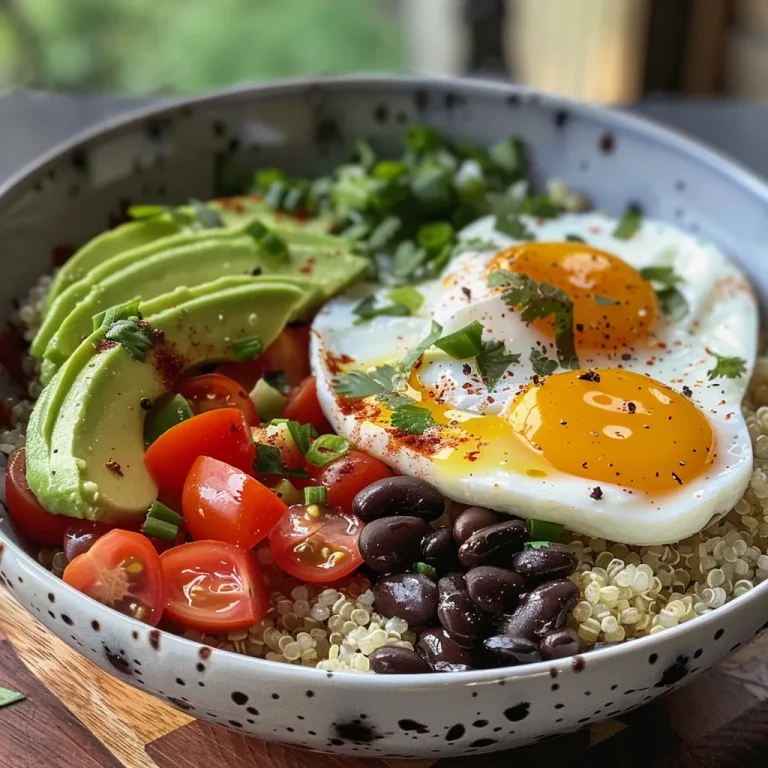
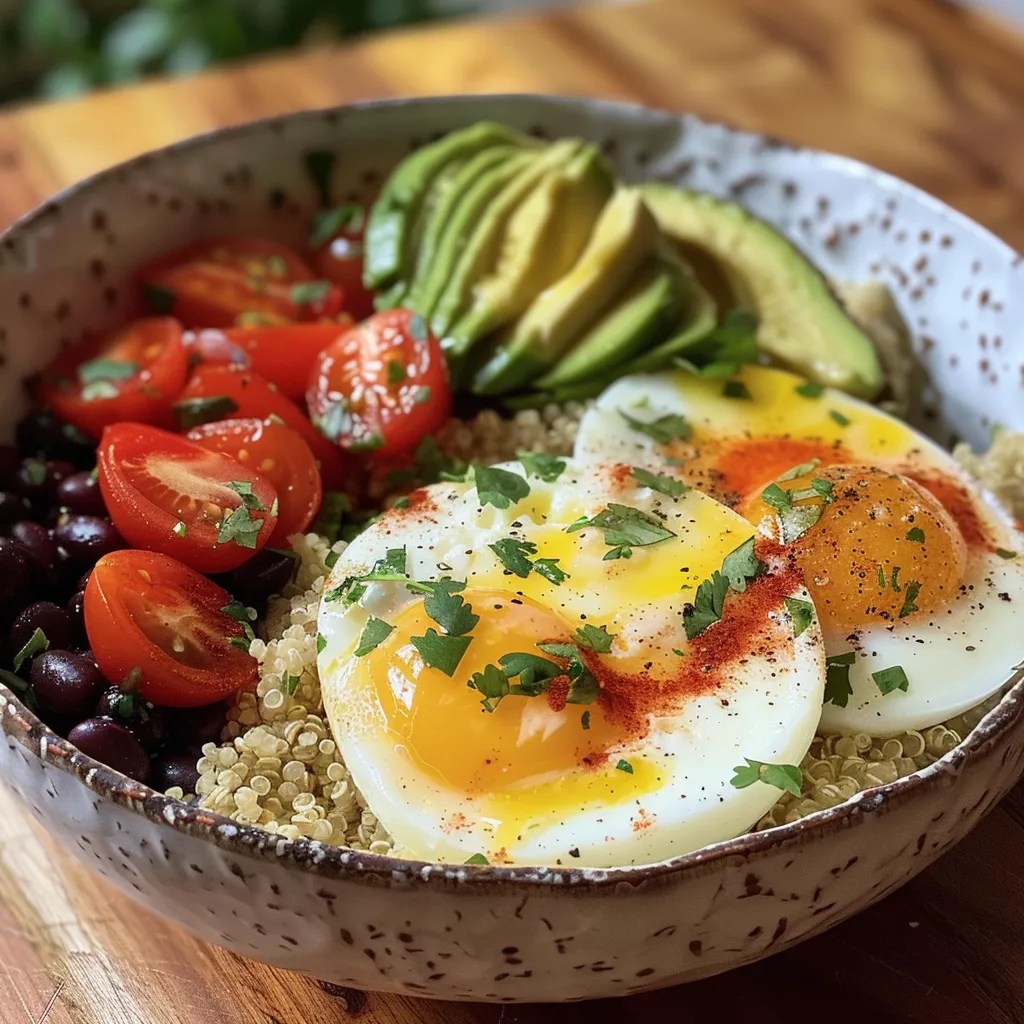
A vibrant protein breakfast bowl with cooked quinoa, sliced avocado, and a sunny-side-up egg.

Now that we have our ingredients ready, let’s walk through the steps to create this delicious breakfast:

  1. Heat the olive oil in a pan over medium heat.
  2. Cook the eggs to your preference (scrambled, fried, or poached).
  3. Place the cooked quinoa in a bowl.
  4. Top with your cooked eggs, avocado slices, black beans, and diced tomatoes.
  5. Season with salt and pepper to taste.
  6. Serve immediately and enjoy!

Pro Tips for the Best Breakfast Bowl

Want to elevate your breakfast bowl game? Here are some expert insights:

  • Perfect Texture: For scrambled eggs, cook on low heat for a fluffier result.
  • Prep Ahead: Cook quinoa and beans in advance to save time during busy mornings.
  • Layer Wisely: Arrange ingredients in layers for a beautiful presentation; it makes your bowl more Instagram-worthy!
  • Experiment with Toppings: Add a sprinkle of cheese, hot sauce, or fresh herbs for an extra kick.
  • Supercharge Your Bowl: Toss in some nuts or seeds for a delightful crunch and added nutrition.
  • Store Properly: If you have leftovers, store each component separately to maintain freshness.
  • Make it a Meal: This bowl is versatile enough to serve for lunch or dinner too!
  • Stay Balanced: Aim for a balance of proteins, carbs, and fats for sustained energy throughout the day.

Common Mistakes and Troubleshooting

Even the best of us make mistakes in the kitchen! Here are some common pitfalls and how to avoid them:

  • Overcooked Eggs: Keep an eye on the cooking time to ensure they’re fluffy and not rubbery.
  • Dry Quinoa: If your quinoa turns out dry, try cooking it in broth instead of water for added flavor.
  • Too Much Salt: Start with a little salt and adjust to taste to avoid over-seasoning.
  • Unripe Avocado: If your avocado isn’t ripe, try placing it in a paper bag for a day or two to speed up the ripening process.

Variations to Try

Want to mix things up? Here are some tasty variations you can try:

  • Tex-Mex Bowl: Add jalapeños, corn, and cilantro for a spicy twist.
  • Mediterranean Bowl: Swap black beans for chickpeas, and add feta and olives.
  • Sweet Breakfast Bowl: Replace savory toppings with Greek yogurt, berries, and a drizzle of honey.
  • Asian-Inspired Bowl: Add sesame oil, edamame, and a sprinkle of sesame seeds for a unique flavor.

Storage and Make-Ahead Instructions

This breakfast bowl can be a meal prep hero! Here’s how to store it for maximum freshness:

  • Refrigerate: Store cooked quinoa and beans in airtight containers for up to 5 days.
  • Freeze: Quinoa can be frozen for up to 3 months. Just thaw before using.
  • Assemble Fresh: For the best taste, assemble your bowl fresh right before you eat!

Frequently Asked Questions

Here are some common questions about our protein breakfast bowl and their answers:

  • Can I make this bowl vegan? Absolutely! Just replace the eggs with tofu or chickpeas.
  • How do I cook quinoa? Rinse it under cold water, then cook it with a 2:1 water-to-quinoa ratio until fluffy.
  • Can I use different beans? Yes! Feel free to use any canned beans you prefer.
  • What if I don’t like avocado? You can replace it with hummus or skip it altogether!
  • Is this bowl suitable for meal prep? Yes! Prepare individual components ahead of time for quick breakfasts.
  • How can I add more flavor? Consider spices like cumin, paprika, or even a splash of hot sauce.
  • What should I serve with it? This bowl pairs well with a side of fresh fruit or a smoothie.
  • Can I double the recipe? Absolutely! Just adjust your ingredient quantities as needed.

Nutritional Tips and Dietary Adaptations

This bowl isn’t just delicious; it’s also packed with nutrition. Consider these tips to adapt it to your dietary needs:

  • Gluten-Free: This recipe is naturally gluten-free if you use gluten-free grains.
  • Low-Carb: Substitute quinoa with cauliflower rice or skip grains altogether.
  • High-Fiber: Add more beans or fiber-rich vegetables to boost your fiber intake.

Equipment Recommendations

To make this bowl, you’ll need a few kitchen essentials:

  • Non-stick skillet: Perfect for cooking eggs without sticking.
  • Measuring cups: For accurate ingredient portions.
  • Mixing bowls: Great for prepping and assembling your bowl.

Serving Suggestions

Finally, let’s talk about serving! Here are some ideas to elevate your breakfast bowl experience:

  • Garnish: Top with fresh herbs like cilantro or parsley for a vibrant finish.
  • Accompaniments: Serve with a glass of fresh orange juice or a cup of herbal tea.
  • Sharing Style: Make it a family affair by creating a breakfast bowl bar where everyone can customize their own!

With this 15-Minute Protein Breakfast Bowl, you’re ready to conquer your mornings with energy and enthusiasm. Remember, cooking should be fun and stress-free. So gather your ingredients, and let’s make breakfast a celebration of deliciousness!

Happy cooking, friends! You’ve got this!

15-Minute Protein Breakfast Bowl Recipe for Lasting Energy

Prep Time 5 minutes
Cook Time 10 minutes
Total Time 15 minutes
Servings 1 bowl
Calories 400
This quick and nutritious breakfast bowl combines protein, healthy fats, and fresh vegetables to energize your morning.

Ingredients

Main

  • 1 cup cooked quinoa
  • 2 eggs eggs
  • 1/2 avocado avocado, sliced
  • 1/4 cup black beans
  • 1/4 cup diced tomatoes
  • 1 tbsp olive oil
  • to taste Salt and pepper

Instructions 

  • Heat olive oil in a pan over medium heat.
  • Cook eggs to your preference.
  • Place cooked quinoa in a bowl.
  • Top with eggs, avocado, black beans, and tomatoes.
  • Season with salt and pepper, then serve.

Notes

Feel free to customize with your favorite toppings or herbs.
Calories: 400kcal
Cost: $10
Course: Breakfast
Keyword: Healthy, Protein, Quinoa

Unveiling the Magic of Mini Black Forest Layer Cakes

Welcome to the delightful world of Mini Black Forest Layer Cakes! If you’re looking for a way to impress at your next gathering without spending hours in the kitchen, you’re in the right place. These charming little cakes are not only visually stunning but also pack a punch of flavor that will leave your friends and family coming back for seconds. Let’s dive into this recipe that combines rich chocolate sponge, luscious whipped cream, and sweet cherry filling, ensuring every bite is a little piece of heaven.

Why You’ll Love This Recipe

Here’s why these mini cakes are going to be your new go-to dessert:

  • Perfect Portion Control: Each mini cake is just the right size for a guilt-free indulgence, making them ideal for parties or family gatherings.
  • Easy to Customize: You can easily adapt the flavors with different fillings or toppings, making each batch unique!
  • Visually Stunning: The layers of chocolate, cream, and cherries create a beautiful presentation that’s sure to wow your guests.
  • Quick Assembly: With a straightforward recipe, you’ll spend less time baking and more time enjoying your company.
  • Kid-Friendly Fun: These mini cakes are perfect for involving kids in the kitchen. Let them decorate with whipped cream and cherries!

Ingredients for Mini Black Forest Layer Cakes

Gather these ingredients to create your mini masterpieces:

  • 1 cup all-purpose flour: The base of your cake, giving it the right structure.
  • ½ cup unsweetened cocoa powder: This adds a rich chocolate flavor that is essential for a true Black Forest cake.
  • 1 cup sugar: Sweetens the cake, balancing the flavors beautifully.
  • ½ tsp baking powder: Helps the cake rise and achieve that perfect fluffy texture.
  • ½ tsp baking soda: Works with the acidic ingredients to create lift.
  • ¼ tsp salt: Enhances all the flavors in the cake.
  • 1 large egg: Adds moisture and richness to the cake.
  • ½ cup milk: Keeps the cake moist.
  • ½ cup hot coffee (or hot water): Intensifies the chocolate flavor; coffee is magical for chocolate cake!
  • ⅓ cup vegetable oil: Ensures a moist texture.
  • 1 tsp vanilla extract: Adds a warm, aromatic flavor.
  • 1 ½ cups cherry pie filling or homemade: The sweet and tart component that embodies the Black Forest theme.
  • Optional: 1–2 tbsp Kirsch: For an authentic touch that enhances the cherry flavor.
  • 1 ½ cups cold heavy cream: The base for your fluffy frosting.
  • ¼ cup powdered sugar: Sweetens the whipped cream.
  • 1 tsp vanilla extract: For flavoring the whipped cream.
  • Optional: 2 tbsp cream cheese: For stability in the whipped cream.
  • Fresh cherries: For decoration—choose cherries with stems for an elegant look.
  • Chocolate shavings or curls: For that classic Black Forest finish.

How to Make Mini Black Forest Layer Cakes

Delicious mini black forest layer cakes presented with cherry toppings and cream.

Ready to embark on your baking adventure? Follow these easy steps:

  • Preheat and Prepare: Preheat your oven to 175°C (350°F). Prepare a sheet pan or two round cake tins lined with parchment paper.
  • Mix Dry Ingredients: In a large bowl, whisk together the flour, cocoa powder, sugar, baking soda, baking powder, and salt.
  • Combine Wet Ingredients: Add the egg, milk, oil, and vanilla extract to the dry mix, stirring until smooth.
  • Incorporate Hot Coffee: Slowly pour in the hot coffee, mixing until well combined. The batter will be thin but don’t worry—that’s how it should be!
  • Bake the Cakes: Spread the batter evenly on your prepared pan and bake for 12-15 minutes, or until the cake springs back when touched. Allow it to cool completely.
  • Cut Out Cake Circles: Use a 2.5–3 inch round cutter to cut out 12 small circles; each cake will use two circles (or three for extra tall cakes).
  • Prepare the Whipped Cream: In a mixing bowl, beat the cold heavy cream, powdered sugar, and vanilla until stiff peaks form. Optionally, add cream cheese for extra stability.
  • Assemble the Cakes: Place one chocolate circle on a plate, pipe or spoon a thick layer of whipped cream, and add cherry filling. Top with a second sponge circle, pipe more whipped cream, sprinkle with chocolate shavings, and finish with 3-4 fresh cherries on top.

Pro Tips for Success

To ensure your mini cakes turn out perfect every time, here are some expert insights:

  • Let the Cakes Cool Completely: This prevents the whipped cream from melting when you assemble the cakes.
  • Use Quality Ingredients: High-quality cocoa powder and chocolate will elevate the flavor of your cakes significantly.
  • Experiment with Flavors: Don’t hesitate to swap out cherry filling with raspberry or strawberry for a fun twist!
  • Stabilize Your Whipped Cream: If you’re making these for an event, consider using gelatin or cream cheese to keep the whipped cream firm.
  • Make Ahead: You can prepare the cakes a day in advance—just store the layers separated in an airtight container to maintain freshness.
  • Decorate with Abandon: Get creative with your toppings! Use nuts, more chocolate, or edible flowers for a unique touch.
  • Practice Layering Skills: If you’re unsure about layering, practice with a few extra sponge circles before assembling the final cakes.
  • Pair with Coffee or Tea: These mini cakes are perfect with a cup of coffee or tea—consider it a delightful afternoon treat!

Common Mistakes and Troubleshooting

Even the best bakers make mistakes! Here’s how to avoid common pitfalls:

  • Overmixing the Batter: This can lead to dense cakes. Mix just until combined!
  • Incorrect Oven Temperature: Ensure your oven is calibrated correctly. An oven thermometer can be a handy tool.
  • Using Cold Ingredients: Ensure eggs and milk are at room temperature for a smoother batter.
  • Skipping the Parchment Paper: This can cause your cakes to stick to the pan—don’t skip this step!
  • Not Allowing Cakes to Cool: As mentioned, this is crucial for successful assembly. Patience is key!

Variations to Try

Ready to get creative? Here are some variations to consider:

  • Chocolate Ganache Filling: Add a layer of chocolate ganache between the cake layers for an extra chocolatey experience.
  • Fruit Variations: Use different fruits like raspberries or blueberries in place of cherry for a seasonal twist.
  • Gluten-Free Option: Substitute all-purpose flour with gluten-free flour and ensure your baking powder is gluten-free.
  • Vegan Version: Replace the egg with a flax egg and use plant-based cream for the frosting.

Storage and Make-Ahead Instructions

These mini cakes can be made ahead of time! Here’s how to store them:

  • Refrigerate: Store assembled cakes in an airtight container in the refrigerator for up to 3 days.
  • Freeze Individual Layers: If you want to prep in advance, freeze the unassembled cake layers, wrapped tightly, for up to a month.
  • Thaw Slowly: When ready to use, thaw in the refrigerator overnight for best results.

FAQs About Mini Black Forest Layer Cakes

Got questions? Here are some answers to common queries:

  • Can I use store-bought whipped cream?: Absolutely! Just ensure it’s stable for stacking.
  • How do I keep my cakes from being dry?: Make sure not to overbake and consider adding a simple syrup soak before assembly.
  • Can I make these gluten-free?: Yes, use gluten-free flour and check all other ingredients are gluten-free.
  • What’s the best way to decorate?: Use a piping bag for decorative whipped cream and fresh cherries for a stunning look.
  • How long do these cakes last?: They are best enjoyed within 3 days, but can be stored up to a week if refrigerated.
  • Can I add alcohol to the cake?: Yes! Kirsch is traditional for a Black Forest cake, but you can leave it out if preferred.
  • What can I use instead of cherry filling?: You could use any fruit preserves or curds that you enjoy.
  • Is this recipe suitable for children?: Yes! Kids can help assemble and decorate, making it a fun family activity.

Nutrition Tips and Dietary Adaptations

While these mini cakes are a treat, here are some tips to make them a tad healthier:

  • Use Whole Wheat Flour: For added fiber and nutrients.
  • Reduce Sugar: You can cut back on sugar by about 25% without affecting texture too much.
  • Opt for Low-Fat Cream: If you’re looking to lighten it up, consider using low-fat whipped cream alternatives.

Equipment Recommendations

Here’s what you’ll need to get started:

  • Mixing Bowls: A set of varying sizes will make mixing easier.
  • Measuring Cups and Spoons: Accurate measurements are essential for baking success.
  • Whisk and Spatula: For mixing and folding ingredients smoothly.
  • Offset Spatula: Great for spreading whipped cream evenly on your cakes.
  • Piping Bag: Optional but useful for decorating your mini cakes beautifully.

Serving Suggestions

To elevate your dessert experience, consider these serving ideas:

  • Pair with Coffee: A rich coffee complements the chocolate beautifully.
  • Serve with Ice Cream: A scoop of vanilla or cherry ice cream alongside the cakes adds a delightful contrast.
  • Add a Dusting of Cocoa Powder: For an elegant touch, dust the plate with cocoa before placing the cake.

Final Thoughts

And there you have it—your ultimate guide to creating stunning Mini Black Forest Layer Cakes! Remember, cooking is about having fun and experimenting, so don’t stress if things don’t go perfectly. The end goal is deliciousness, and I have no doubt you’ll achieve that. So grab your ingredients, put on your favorite tunes, and enjoy the process. Happy baking!

Mini Black Forest Layer Cakes: A Delightful Recipe!

Prep Time 30 minutes
Cook Time 15 minutes
Total Time 45 minutes
Servings 6 pieces
Calories 350
These adorable mini Black Forest cakes combine rich chocolate, cherry filling, and whipped cream for a delightful treat perfect for any occasion.

Ingredients

Batter

  • 1 cup all-purpose flour
  • ½ cup unsweetened cocoa powder
  • 1 cup sugar
  • ½ tsp baking powder
  • ½ tsp baking soda
  • ¼ tsp salt
  • 1 large egg
  • ½ cup milk
  • ½ cup hot coffee (or hot water)
  • cup vegetable oil
  • 1 tsp vanilla extract

Filling & Topping

  • 1 ½ cups cherry pie filling or homemade
  • Optional: 1–2 tbsp Kirsch (traditional) (Optional)
  • 1 ½ cups cold heavy cream
  • ¼ cup powdered sugar
  • 1 tsp vanilla extract
  • Optional: 2 tbsp cream cheese for stability (Optional)
  • Fresh cherries with stems for the perfect look

Instructions 

  • Preheat oven to 175°C (350°F). Prepare a pan with parchment and whisk dry ingredients.
  • Add wet ingredients and hot coffee; mix until smooth. Bake for 12–15 minutes, then cool.
  • Use a round cutter to make 12 circles. Whip heavy cream with sugar and vanilla until stiff peaks form.
  • Assemble each cake: place a chocolate circle, add whipped cream and cherry filling, then top with another circle and more whipped cream. Decorate with chocolate shavings and cherries.

Notes

Ensure whipped cream is stiff for stability, and chill the assembled cakes before serving for best results.
Calories: 350kcal
Cost: $15
Course: Dessert
Cuisine: German-inspired
Keyword: cherry, chocolate, layer cake

Welcome to a bowl of warmth and rejuvenation! This Cabbage Detox Soup is not just any ordinary soup; it’s a delightful concoction packed with vibrant vegetables and spices that will make your heart sing and your taste buds dance. Whether you’re looking to cleanse after the holidays, boost your immune system, or simply enjoy a delicious meal, this recipe is here to help. Let’s dive into why this soup should be your go-to comfort food!

Why You’ll Love This Recipe

This detox cabbage soup is more than just a meal; it’s a nourishing experience. Here are five compelling reasons to whip up a pot:

  • Wholesome Ingredients: Made with fresh vegetables like cabbage, carrots, and tomatoes, this soup is a powerhouse of nutrients that support overall health.
  • Detox Benefits: Each ingredient contributes to a detoxifying effect, making it perfect for a reset after indulgent eating.
  • Quick and Easy: Ready in under an hour, this recipe is ideal for busy weeknights when you want something healthy without the fuss.
  • Flavorful and Satisfying: The combination of herbs and fresh produce creates a rich depth of flavor that will leave you craving more.
  • Versatile and Customizable: Add your favorite proteins or extra veggies to make it your own!

Ingredients Breakdown

Ready to gather your ingredients? Here’s what you’ll need, along with some handy substitutions:

  • 1 tablespoon olive oil: or use avocado oil for a different flavor boost.
  • 1 large yellow onion: shallots can be substituted for a milder taste.
  • 3 cloves garlic: minced garlic adds an aromatic touch; fresh or jarred works!
  • 2 large carrots: they add sweetness; feel free to swap in parsnips for a unique twist.
  • 2 celery stalks: essential for that classic soup flavor. Leeks can be a delightful alternative.
  • 1 small head of green cabbage: savoy cabbage works beautifully too!
  • 1 can diced tomatoes: crushed tomatoes or fresh diced tomatoes are great substitutes.
  • 8 cups vegetable broth: homemade or store-bought; chicken broth can be used for a non-vegetarian option.
  • 1 teaspoon dried oregano: fresh oregano can add a more vibrant flavor.
  • 1/2 teaspoon dried thyme: try fresh thyme if you have it on hand!
  • 1 bay leaf: don’t forget to remove it before serving!
  • Salt and freshly ground black pepper: to taste.
  • Fresh parsley: a sprinkle on top adds freshness and color.

How to Make Cabbage Detox Soup

Let’s get cooking! Follow these easy steps for a delightful soup experience:

  1. Heat the olive oil in your large stockpot or Dutch oven over medium heat. Once the oil shimmers, add the diced onion, carrots, and celery. Sauté this mixture for about 5-7 minutes until the onions turn translucent and the vegetables soften.
  2. Add the minced garlic and stir for about 60 seconds until fragrant—be careful not to burn it!
  3. Now, add all chopped cabbage to the pot. Stir everything together and cook for another 5-7 minutes until the cabbage wilts down significantly.
  4. Pour in the can of diced tomatoes with their juices and add the vegetable broth, dried oregano, thyme, bay leaf, and a good pinch of salt and pepper. Stir well!
  5. Bring the soup to a boil, then reduce the heat to low. Cover and let it simmer for 20-25 minutes, allowing all the flavors to meld.
  6. After simmering, taste the soup and adjust seasoning. Remove the bay leaf, garnish with fresh parsley, and serve warm!

Pro Tips for Perfect Soup

Side view of Cabbage Detox Soup, showcasing colorful vegetables and broth.

Want to elevate your soup-making game? Here are some expert tips:

  • Prep Ahead: Chop your vegetables in advance and store them in the fridge for a quick dinner solution.
  • Flavor Boost: Add a splash of lemon juice or a sprinkle of chili flakes for an extra kick.
  • Herb Infusion: Fresh herbs like basil or cilantro can be added at the end for a burst of freshness.
  • Protein Power: Toss in cooked chicken, beans, or lentils for a heartier meal.
  • Batch Cooking: Make a big pot and freeze leftovers for a rainy day!
  • Spice it Up: Experiment with different spices like cumin or paprika to change up the flavor profile.
  • Texture Play: For a creamy version, blend half the soup and mix it back in.
  • Topping Ideas: Serve with crusty bread, croutons, or a dollop of yogurt for added creaminess.

Common Mistakes and Troubleshooting

Even the best cooks make mistakes, but fear not! Here’s how to avoid common pitfalls:

  • Overcooking the Garlic: Keep an eye on it! Burnt garlic can ruin the flavor.
  • Skipping the Sauté: Don’t skip the sauté step; it builds the foundation of flavor.
  • Too Much Liquid: If your soup is too watery, let it simmer uncovered to reduce.
  • Seasoning Early: Wait until the end to adjust seasoning for the best flavor.
  • Ignoring Fresh Herbs: Fresh herbs are best added at the end to preserve flavor and color.

Delicious Variations

Feeling adventurous? Here are some tasty variations to try:

  • Spicy Detox Cabbage Soup: Add diced jalapeños or a pinch of cayenne pepper for heat.
  • Asian-Inspired Cabbage Soup: Incorporate ginger, soy sauce, and sesame oil for a unique twist.
  • Protein-Packed Cabbage Soup: Stir in cooked quinoa or lentils for an extra boost.
  • Herbed Cabbage Soup: Experiment with fresh dill or cilantro for a fresh flavor profile.

Storage and Make-Ahead Instructions

This soup is perfect for meal prep! Here’s how to store and reheat:

  • Refrigerator: Store in an airtight container for up to 5 days. Reheat on the stovetop or in the microwave.
  • Freezer: Freeze in portions for up to 3 months. Thaw in the fridge overnight before reheating.
  • Make-Ahead: Prepare the soup a day in advance; flavors will deepen and improve!

Nutrition Tips and Dietary Adaptations

This cabbage detox soup is naturally vegetarian and can easily be made vegan. Here are some tips for specific dietary needs:

  • Gluten-Free: Ensure your vegetable broth is gluten-free.
  • Low-Carb: Reduce the number of carrots or omit them for a lower-carb version.
  • High-Protein: Add beans or chicken for a protein boost.

Equipment Recommendations

To whip up this delicious soup, you’ll need:

  • Large Stockpot or Dutch Oven: A sturdy pot is essential for even cooking.
  • Cutting Board and Knife: For chopping all those fresh veggies!
  • Wooden Spoon: Perfect for stirring and scraping the bottom of the pot.

Serving Suggestions

To round out your meal, consider these serving ideas:

  • Crusty Bread: Serve with a side of artisan bread for dipping.
  • Salad: Pair with a fresh green salad for a light and healthy meal.
  • Cheese: A sprinkle of feta or Parmesan cheese adds a savory touch.

Frequently Asked Questions

Got questions? We’ve got answers!

  • Can I add meat to this soup? Absolutely! Cooked chicken, turkey, or sausage can be delicious additions.
  • How long does this soup last? It’ll stay fresh in the fridge for up to 5 days.
  • Can I freeze leftovers? Yes, this soup freezes well for up to 3 months.
  • What can I use instead of cabbage? Kale or Swiss chard can be great substitutes.
  • Is this soup vegan? Yes, as long as you use vegetable broth and skip any meat.
  • How can I make it spicier? Add some chili powder or fresh peppers to the mix!
  • What should I serve with this soup? Crusty bread, a simple salad, or even a grilled cheese sandwich!
  • Is it healthy? Absolutely! It’s packed with vegetables and low in calories, making it a nutritious meal choice.

Now that you have everything you need to create this delicious Cabbage Detox Soup, grab your ingredients and get cooking! Remember, cooking is about exploration and joy, so don’t stress if things get a little messy. Enjoy every spoonful of this comforting, revitalizing soup!

Cabbage Detox Soup

Prep Time 10 minutes
Cook Time 25 minutes
Total Time 35 minutes
Servings 6 servings
Calories 150
A healthy and flavorful vegetable soup perfect for detox and cleansing. Packed with cabbage, tomatoes, and herbs, it's easy to make and nourishing.

Ingredients

Oil

  • 1 tablespoon olive oil or avocado oil

Vegetables

  • 1 large yellow onion
  • 3 cloves garlic (minced)
  • 2 large carrots
  • 2 stalks celery
  • 1 small green cabbage (chopped)
  • 1 can diced tomatoes (with juice)
  • 8 cups vegetable broth
  • 1 teaspoon dried oregano
  • 0.5 teaspoon dried thyme
  • 1 bay leaf bay leaf
  • to taste Salt and freshly ground black pepper

Garnish

  • as desired Fresh parsley (chopped)

Instructions 

  • Heat oil in a large pot. Sauté onion, carrots, and celery for 5-7 minutes until softened.
  • Add garlic and cook for 1 minute until fragrant.
  • Stir in cabbage, cook for 5-7 minutes until wilted. Add tomatoes, broth, herbs, salt, and pepper. Bring to boil.
  • Reduce heat, cover, and simmer for 20-25 minutes. Adjust seasoning, remove bay leaf, garnish, and serve.

Notes

This soup is low in calories and high in fiber, making it perfect for detox and weight management.
Calories: 150kcal
Cost: $15
Course: Soup
Cuisine: Healthy
Keyword: Vegetables

Celebrate the Magic of Christmas with an Irresistible Red Velvet Cheesecake

Welcome to the festive season, where the aroma of baked goods fills the air and families gather around delicious treats! This Christmas Red Velvet Cheesecake is not just a dessert; it’s a celebration of flavors and textures that will impress your guests and satisfy your sweet tooth. Combining the rich, velvety goodness of red velvet cake with the creamy indulgence of cheesecake, this recipe is the perfect centerpiece for your holiday gatherings. Let’s dive into the delightful world of baking this festive treat!

Why You’ll Love This Recipe

  • Stunning Presentation: The vibrant red color and layered design make this cheesecake a showstopper at any holiday gathering.
  • Decadent Flavor: The combination of rich red velvet and creamy cheesecake creates a flavor explosion that’s both festive and comforting.
  • Simple Steps: With clear instructions and handy tips, this recipe is designed for bakers of all skill levels—yes, even you!
  • Make-Ahead Friendly: Prepare it a day in advance to allow the flavors to meld and save time on the big day.
  • Versatile Variations: Customize the recipe with toppings and flavor tweaks to suit your taste and impress your guests.

Ingredients You’ll Need

Gathering the right ingredients is key to achieving that perfect cheesecake. Here’s what you’ll need:

  • 2 1/2 cups all-purpose flour: The base for our cake layers, providing structure.
  • 2 tbsp unsweetened cocoa powder: Adds a hint of chocolate flavor to complement the red velvet.
  • 1 tsp baking powder: Helps the cake rise for a fluffy texture.
  • 1 tsp baking soda: Works with the vinegar to create a tender crumb.
  • 1/2 tsp salt: Enhances the overall flavor.
  • 1 3/4 cups granulated sugar: Sweetens the cake and cheesecake layers.
  • 3/4 cup vegetable oil: Keeps the cake moist and tender.
  • 1 cup buttermilk: Adds acidity for a rich flavor and tender texture.
  • 2 large eggs: Acts as a binder and adds richness.
  • 1-2 tbsp red food coloring: For that classic red velvet appearance.
  • 1 tsp vanilla extract: A must for flavor depth.
  • 1 tsp white vinegar: Reacts with baking soda for a lighter cake.
  • 16 oz cream cheese: The star of the cheesecake layer, providing creaminess.
  • 1/2 cup granulated sugar: Sweetens the cheesecake filling.
  • 1/2 cup sour cream: Adds tanginess and richness to the filling.
  • 8 oz cream cheese: For the frosting, making it luscious and smooth.
  • 1/2 cup unsalted butter: Adds richness to the frosting.
  • 3 cups powdered sugar: Sweetens the frosting for a perfect finish.
  • 1 tsp vanilla extract: Enhances the flavor of the frosting.

Feel free to substitute ingredients based on your dietary needs. For instance, you can use gluten-free flour for a gluten-free version or dairy-free cream cheese for a dairy-free option.

Step-by-Step Instructions: Making Your Cheesecake

Rich, creamy Red Velvet Cheesecake with vibrant red layers and white frosting detail.

Let’s bring this festive dessert to life in just a few easy steps!

1. Prepare the Cheesecake Layer

  • Preheat your oven to 325°F (163°C).
  • In a mixing bowl, beat together the 16 oz cream cheese, 1/2 cup sugar, 1/2 cup sour cream, 2 eggs, and 1 tsp vanilla extract until smooth.
  • Pour the cheesecake mixture into a greased 9-inch springform pan and bake for 40-45 minutes. The center should be set but slightly jiggly.
  • Once done, let it cool completely before removing it from the pan. Chill in the refrigerator for at least 4 hours or overnight for best results.

2. Bake the Red Velvet Cake Layers

  • Increase the oven temperature to 350°F (175°C).
  • In a large mixing bowl, combine 2 1/2 cups flour, 2 tbsp cocoa powder, 1 tsp baking powder, 1 tsp baking soda, and 1/2 tsp salt.
  • In another bowl, whisk together 1 3/4 cups sugar, 3/4 cup vegetable oil, 1 cup buttermilk, 2 eggs, 1-2 tbsp red food coloring, 1 tsp vanilla extract, and 1 tsp white vinegar.
  • Combine the wet and dry ingredients, mixing until just combined.
  • Divide the batter evenly into two greased 9-inch round cake pans and bake for 25-30 minutes. Allow to cool completely.

3. Make the Cream Cheese Frosting

  • In a mixing bowl, beat 8 oz cream cheese, 1/2 cup unsalted butter, and 1 tsp vanilla extract until creamy and smooth.
  • Gradually add the 3 cups powdered sugar until well combined and fluffy.

4. Assemble the Cheesecake

  • Place one red velvet cake layer on a serving platter.
  • Top it with the chilled cheesecake layer, then place the second red velvet layer on top.
  • Spread the cream cheese frosting generously over the top and sides of the cake.

5. Chill and Serve

  • Chill the assembled cake for at least 1 hour before serving to allow the flavors to meld.
  • Slice and serve with a dollop of whipped cream if desired!

Pro Tips for Success

  • Room Temperature Ingredients: Ensure all dairy ingredients are at room temperature for a smoother batter and filling.
  • Don’t Overmix: Mix just until combined to avoid a tough cake.
  • Chill Time: Giving your cheesecake enough time to chill is crucial for the best texture.
  • Use a Water Bath: For a creamier cheesecake, bake the cheesecake layer in a water bath by placing the springform pan in a larger pan filled with water.
  • Avoid Cracks: If you see cracks in your cheesecake, don’t fret! A generous layer of frosting will hide them perfectly.
  • Knife Technique: For neat slices, warm your knife under hot water, wipe between cuts.
  • Flavor Enhancements: Consider adding spices like cinnamon or nutmeg for a warm flavor twist.
  • Storage Tips: Store leftover cheesecake in an airtight container in the fridge for up to 5 days.

Common Mistakes and Troubleshooting

  • Overbaking: Keep an eye on your cheesecake; it should be slightly jiggly in the center when done.
  • Underbaking the Cake Layers: Ensure they are fully cooled before assembly to prevent sogginess.
  • Too Much Food Coloring: Start with less and add more until you reach your desired color.
  • Frosting Too Runny: If your frosting is too runny, add more powdered sugar until it thickens.

Delicious Variations

  • Chocolate Chip Red Velvet Cheesecake: Fold in mini chocolate chips into the red velvet batter for added sweetness.
  • Nutty Delight: Add chopped pecans or walnuts to the cake layers for a crunchy texture.
  • Fruit Topping: Top with fresh berries or a berry compote for a fruity twist.
  • Spiced Version: Incorporate spices like cinnamon and nutmeg into the batter for a seasonal flair.

Storage and Make-Ahead Instructions

This cheesecake can be made ahead of time and stored in the refrigerator for up to 5 days. It’s best to store it in an airtight container to keep it fresh. If you’re looking to freeze the cheesecake, wrap it tightly in plastic wrap and aluminum foil; it can last in the freezer for up to 3 months. Just remember to thaw it in the fridge overnight before serving.

FAQ: Your Burning Questions Answered

  • Can I use a different color for the cake? Absolutely! You can use any food coloring to create a fun twist.
  • What can I substitute for buttermilk? You can make your own buttermilk by adding 1 tbsp of vinegar or lemon juice to 1 cup of milk.
  • How do I know when the cheesecake is done? The edges should be set while the center remains slightly jiggly.
  • Is it necessary to chill the cake? Yes, chilling allows the flavors to meld and the texture to set properly.
  • Can I make this recipe gluten-free? Yes, just substitute all-purpose flour with a gluten-free blend.
  • What’s the best way to serve this cheesecake? It’s delightful served cold, topped with whipped cream or fresh fruit.
  • How long does this cheesecake last? It can last in the refrigerator for about 5 days.
  • Can I add a layer of ganache? Absolutely! A chocolate ganache layer can add a rich touch!

Nutrition Tips and Dietary Adaptations

This cheesecake can be adapted to fit various dietary needs. For a lower sugar version, you can use sugar substitutes like stevia or erythritol. If you’re looking for a dairy-free option, use cashew cream or dairy-free cream cheese in place of traditional cream cheese. Remember, while this cheesecake is indulgent, enjoying it in moderation as part of a balanced diet is key!

Equipment Recommendations

  • 9-inch Springform Pan: Essential for easy removal of the cheesecake.
  • Mixing Bowls: A set of various sizes will aid in mixing different components.
  • Electric Mixer: For smooth batter and frosting; a hand mixer works well too.
  • Offset Spatula: Ideal for spreading frosting smoothly on the cake.
  • Cooling Rack: Necessary for cooling your cake layers evenly.

Serving Suggestions

Serve your Christmas Red Velvet Cheesecake with a side of whipped cream or a drizzle of chocolate sauce for extra indulgence. Pair it with a warm cup of coffee or a festive spiced latte to elevate the experience. For a fun twist, serve slices with a scoop of vanilla ice cream for a delightful contrast!

Conclusion: Your Festive Baking Adventure Awaits!

Baking this Red Velvet Cheesecake is not just about creating a dessert; it’s about creating memories. Whether you’re sharing it with family or entertaining friends, this cake is sure to bring smiles and joy. So, gather your ingredients, embrace the process, and remember that every baking journey is perfect, even with a few hiccups! Happy baking and Merry Christmas!

Christmas Red Velvet Cheesecake Recipe

Prep Time 30 minutes
Cook Time 45 minutes
Total Time 1 hour 15 minutes
Servings 12 pieces
Calories 650
A festive and indulgent layered cheesecake combining rich red velvet cake with creamy cheesecake and frosting, perfect for holiday celebrations.

Ingredients

Cake Batter

  • 2 1/2 cups all-purpose flour
  • 2 tbsp unsweetened cocoa powder
  • 1 tsp baking powder
  • 1 tsp baking soda
  • 1/2 tsp salt
  • 1 3/4 cups granulated sugar
  • 3/4 cup vegetable oil
  • 1 cup buttermilk
  • 2 large eggs
  • 1–2 tbsp red food coloring
  • 1 tsp vanilla extract

Cheesecake Layer

  • 16 oz cream cheese
  • 1/2 cup granulated sugar
  • 1/2 cup sour cream
  • 2 large eggs
  • 1 tsp vanilla extract
  • 8 oz cream cheese
  • 1/2 cup unsalted butter
  • 3 cups powdered sugar

Frosting

  • 1 tsp vanilla extract

Instructions 

  • Bake the cheesecake layer at 325°F (160°C) for 40–45 minutes, then chill.
  • Prepare red velvet cake layers at 350°F (175°C) for 25–30 minutes and cool completely.
  • Make cream cheese frosting by beating cream cheese, butter, powdered sugar, and vanilla until smooth.
  • Assemble the cake by layering red velvet, cheesecake, and frosting. Cover with frosting and chill for 1 hour before serving.

Notes

Ensure thorough chilling for best texture and flavor.
Calories: 650kcal
Cost: $20
Course: Dessert
Cuisine: American
Keyword: cheesecake, holiday, red velvet

Indulge in Comfort: Creamy Herb Chicken with Mashed Potatoes & Glazed Carrots

Welcome to the ultimate comfort food experience! Today, we’re diving into a deliciously simple recipe for Creamy Herb Chicken paired perfectly with fluffy mashed potatoes and sweet glazed carrots. This meal is not just about filling your belly; it’s about warming your heart and bringing your family together around the dinner table. Whether you’re a busy parent juggling a million things or just someone who loves good food without the fuss, this dish will become your go-to for cozy nights.

Why You’ll Love This Recipe

This recipe is not just about great taste; it comes with a handful of perks that make it a must-try!

  • Quick and Easy: With straightforward steps, you can whip up this meal in about 30 minutes, making it perfect for weeknight dinners.
  • Family-Friendly: The creamy herb sauce and sweet glazed carrots appeal to both kids and adults, ensuring everyone leaves the table happy.
  • Versatile Ingredients: Most ingredients are pantry staples, and you can easily substitute based on what you have on hand.
  • Comforting Flavors: The combination of herbs, creamy sauce, and buttery mashed potatoes is the epitome of comfort food.
  • Meal Prep Friendly: You can make components in advance for a quick dinner solution on busy nights.

Ingredients You’ll Need

Gathering the right ingredients is key! Here’s what you’ll need along with some handy substitutions:

  • Chicken: 2–3 boneless, skinless chicken breasts (or thighs for a juicier option)
  • Seasoning: Salt & pepper to taste, 1/2 tsp garlic powder, 1/2 tsp dried thyme, 1/2 tsp dried rosemary
  • Cooking Fat: 1 tbsp olive oil and 1 tbsp butter
  • Flavor Boost: 3 cloves garlic, minced, 1/2 cup chicken broth
  • Creaminess: 1/2 cup heavy cream (or half-and-half for a lighter option), 1/3 cup grated Parmesan cheese
  • Optional Tang: 1/2 tsp Dijon mustard (adds depth to the sauce)
  • Garnish: 1 tbsp chopped parsley or chives
  • Potatoes: 1.5 lbs Yukon gold or russet potatoes, peeled and cubed
  • Dairy: 1/2 cup milk or cream, 2–3 tbsp butter for mashing
  • Carrots: 3 cups baby carrots or sliced carrots
  • Sweetness: 2 tbsp butter, 1 tbsp brown sugar or honey, pinch of cinnamon or thyme (optional)

How to Make the Dish

Side view of a dinner plate featuring juicy chicken in cream sauce, smooth mashed potatoes, and vibrant carrots.

Let’s get cooking! Follow these simple steps for a meal that’s sure to impress.

1. Start with the Mashed Potatoes

Boil your potatoes in salted water until fork-tender, about 15–20 minutes. Drain and mash with butter, milk, and salt until smooth. Keep warm while you prepare the rest!

2. Glaze the Carrots

In a saucepan over medium heat, combine carrots, butter, brown sugar, salt, and a splash of water. Cover and let simmer for 10–12 minutes until tender. Stir occasionally, removing the lid for the last 2–3 minutes to thicken the glaze.

3. Cook the Chicken

Pat chicken dry and season both sides generously with salt, pepper, garlic powder, thyme, and rosemary. Heat olive oil and butter in a skillet over medium-high heat. Sear the chicken for about 4–5 minutes on each side until golden and cooked through. Remove and set aside.

4. Make the Herb Cream Sauce

In the same pan, add minced garlic and sauté for 30 seconds. Deglaze with chicken broth, scraping up any browned bits. Stir in the cream, Parmesan, and Dijon mustard (if using), and let simmer until slightly thickened, about 3–5 minutes.

5. Return Chicken to the Pan

Place the chicken back into the pan and spoon the sauce over it. Allow it to simmer for an additional 2 minutes to meld the flavors together.

6. Assemble and Serve

Plate your mashed potatoes and glazed carrots alongside the chicken, generously spooning extra sauce over everything. Garnish with parsley or chives for a pop of color and freshness!

Pro Tips for Success

Want to elevate your cooking game? Here are some expert insights to make this dish even better:

  • Use Fresh Herbs: Fresh thyme and rosemary will enhance the flavor profile significantly compared to dried herbs.
  • Temperature Matters: Allow your chicken to come to room temperature before cooking for even cooking.
  • Don’t Rush the Sauce: Letting the sauce simmer allows the flavors to deepen and meld beautifully.
  • Mashed Potatoes Texture: For ultra-creamy mashed potatoes, use a potato ricer or food mill.
  • Experiment with Spices: Add a pinch of paprika or cayenne to the chicken seasoning for a little kick.
  • Gluten-Free Option: Substitute the flour in store-bought broth with cornstarch for a gluten-free sauce.
  • Make Ahead: Prepare the sauce and mash a day in advance to save time during the week.
  • Leftover Chicken: Use leftover chicken in salads or wraps for quick lunches!

Common Mistakes and Troubleshooting

No one wants to face culinary disasters! Here are some tips to avoid common pitfalls:

  • Overcooking Chicken: Use a meat thermometer to ensure it reaches 165°F for perfectly cooked chicken.
  • Lumpy Mashed Potatoes: Ensure potatoes are thoroughly drained before mashing to avoid lumps.
  • Thin Sauce: If the sauce is too thin, let it simmer longer to thicken or add a cornstarch slurry.
  • Burning Garlic: Keep an eye on the garlic—burnt garlic can turn bitter! Sauté just until fragrant.

Variations to Try

Looking to switch things up? Here are some fun variations:

  • One-Pan Wonder: Cook everything in one skillet for less cleanup. Start with the chicken, then add potatoes and carrots.
  • Herb Chicken Bake: Bake the chicken with the sauce in the oven instead of cooking on the stove for a hands-off approach.
  • Veggie Twist: Add broccoli or green beans to the glazed carrots for more color and nutrients.
  • Spicy Kick: Incorporate a splash of hot sauce or red pepper flakes into the herb sauce for extra heat.

Storage and Make-Ahead Instructions

This recipe is perfect for meal prep! Here’s how to store it:

  • Refrigeration: Store any leftovers in an airtight container in the fridge for up to 3 days.
  • Freezing: You can freeze the chicken and sauce in a tightly sealed container for up to 2 months. Mashed potatoes can also be frozen, but they may change texture.
  • Reheating: Gently reheat in the microwave or on the stove, adding a splash of milk to the mashed potatoes to restore creaminess.

Comprehensive FAQ

Got questions? We’ve got answers!

  • Can I use chicken thighs instead of breasts? Absolutely! Thighs offer more flavor and remain moist.
  • Are the mashed potatoes gluten-free? Yes, as long as you ensure your butter and milk are gluten-free!
  • Can I make this recipe dairy-free? Yes! Substitute the cream with coconut milk and use dairy-free butter.
  • How can I add more vegetables? Consider adding sautéed spinach or roasted zucchini alongside the carrots.
  • What can I serve with this dish? A simple green salad or some crusty bread would complement this meal perfectly.
  • How do I know when the chicken is done? Use a meat thermometer; it should read 165°F at the thickest part.
  • Can I prepare the dish ahead of time? Yes! You can prep the chicken and sauces a day in advance and cook the day of serving.
  • What if I don’t have Dijon mustard? You can skip it or use a little yellow mustard or leave it out entirely.

Nutritional Tips and Dietary Adaptations

This dish can accommodate various dietary needs:

  • Low-Carb Option: Swap mashed potatoes for cauliflower mash for a lower-carb alternative.
  • Increase Fiber: Add lentils or chickpeas to the creamy herb sauce for added fiber and protein.
  • Whole30 Compliant: Use coconut milk, leave out the cheese, and ensure the broth is compliant.

Equipment Recommendations

Here are a few kitchen tools to help you create this dish:

  • High-Quality Skillet: A non-stick skillet is ideal for cooking the chicken and sauce.
  • Potato Masher or Ricer: For perfectly smooth mashed potatoes, invest in a good masher or ricer.
  • Meat Thermometer: Essential for ensuring your chicken is cooked safely and perfectly.
  • Cutting Board and Knives: A sturdy cutting board and sharp knives make prep work a breeze.

Serving Suggestions

To make this meal even more delightful, consider serving:

  • Crusty Bread: Freshly baked bread to soak up the creamy sauce.
  • Simple Salad: A light arugula or spinach salad with lemon vinaigrette for a fresh contrast.
  • Wine Pairing: A crisp white wine like Sauvignon Blanc complements the creamy herb chicken beautifully.

In conclusion, this Creamy Herb Chicken with Mashed Potatoes & Glazed Carrots is more than just a recipe; it’s a way to create cherished moments around the dinner table. So roll up your sleeves, gather your loved ones, and enjoy the process of cooking and sharing good food. Remember, cooking is about connection and joy, and with this dish, you’re bound to create some wonderful memories. Happy cooking!

Creamy Herb Chicken with Mashed Potatoes & Glazed Carrots: A Complete Comfort Food Dinner

Prep Time 15 minutes
Cook Time 30 minutes
Total Time 45 minutes
Servings 4 servings
Calories 650
A hearty and comforting dinner featuring tender herb-seasoned chicken, creamy mashed potatoes, and sweet glazed carrots.

Ingredients

Protein

  • 2–3 pieces boneless, skinless chicken breasts (or thighs)
  • 1 tsp salt & pepper to taste
  • 0.5 tsp garlic powder
  • 0.5 tsp dried thyme
  • 0.5 tsp dried rosemary
  • 1 tbsp olive oil
  • 1 tbsp butter
  • 3 cloves garlic, minced
  • 0.5 cup chicken broth
  • 0.5 cup heavy cream (or half-and-half)
  • 1/3 cup grated Parmesan cheese
  • 0.5 tsp Dijon mustard (optional)
  • 1 tbsp chopped parsley or chives (for garnish)

Mashed Potatoes

  • 1.5 lbs Yukon gold or russet potatoes, peeled and cubed
  • 0.5 cup milk or cream
  • 2–3 tbsp butter
  • to taste Salt

Glazed Carrots

  • 3 cups baby carrots or sliced carrots
  • 2 tbsp butter
  • 1 tbsp brown sugar or honey
  • 0.25 tsp salt

Instructions

Notes

Use fresh herbs for best flavor and adjust seasoning to taste.
Calories: 650kcal
Cost: $15
Course: Main Course
Cuisine: American
Keyword: chicken, comfort food, glazed carrots, mashed potatoes