

Celebrate the Magic of Christmas with an Irresistible Red Velvet Cheesecake
Welcome to the festive season, where the aroma of baked goods fills the air and families gather around delicious treats! This Christmas Red Velvet Cheesecake is not just a dessert; it’s a celebration of flavors and textures that will impress your guests and satisfy your sweet tooth. Combining the rich, velvety goodness of red velvet cake with the creamy indulgence of cheesecake, this recipe is the perfect centerpiece for your holiday gatherings. Let’s dive into the delightful world of baking this festive treat!
Why You’ll Love This Recipe
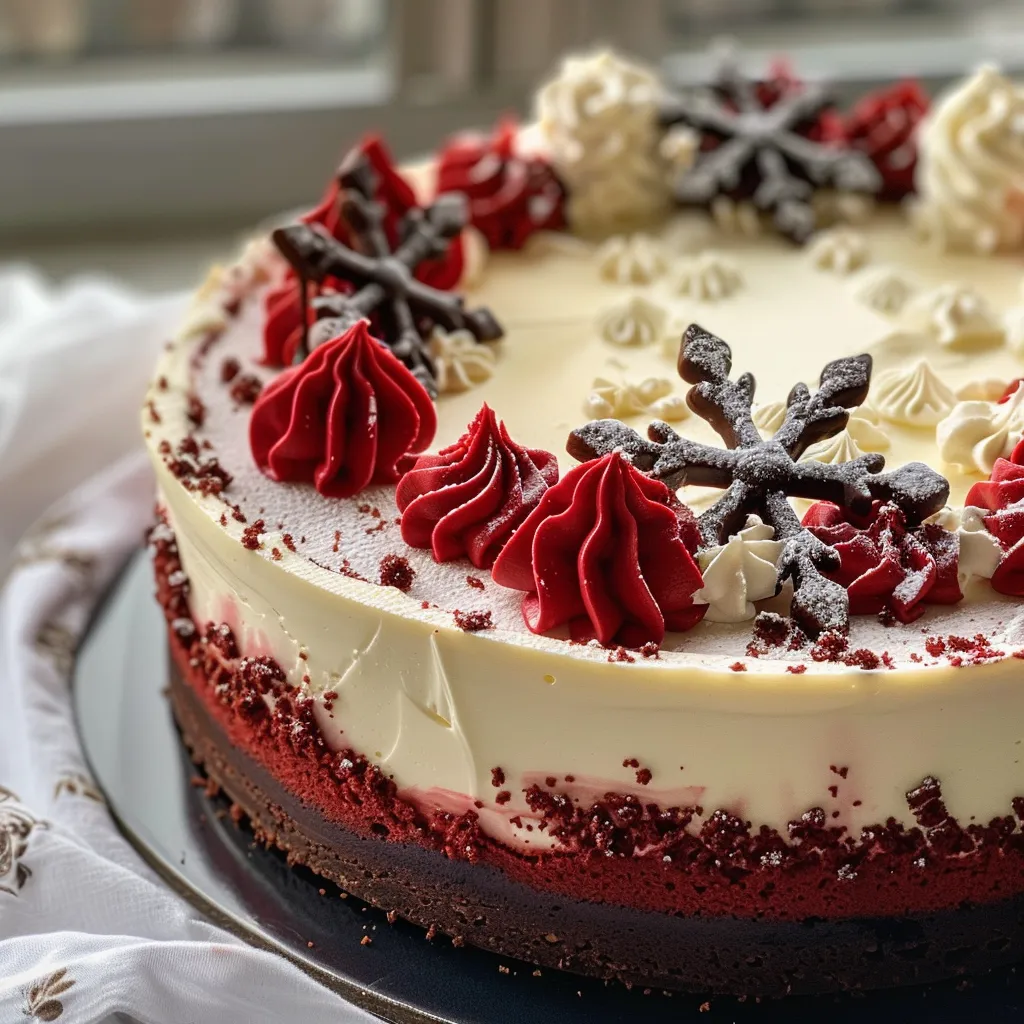
- Stunning Presentation: The vibrant red color and layered design make this cheesecake a showstopper at any holiday gathering.
- Decadent Flavor: The combination of rich red velvet and creamy cheesecake creates a flavor explosion that’s both festive and comforting.
- Simple Steps: With clear instructions and handy tips, this recipe is designed for bakers of all skill levels—yes, even you!
- Make-Ahead Friendly: Prepare it a day in advance to allow the flavors to meld and save time on the big day.
- Versatile Variations: Customize the recipe with toppings and flavor tweaks to suit your taste and impress your guests.
Ingredients You’ll Need
Gathering the right ingredients is key to achieving that perfect cheesecake. Here’s what you’ll need:
- 2 1/2 cups all-purpose flour: The base for our cake layers, providing structure.
- 2 tbsp unsweetened cocoa powder: Adds a hint of chocolate flavor to complement the red velvet.
- 1 tsp baking powder: Helps the cake rise for a fluffy texture.
- 1 tsp baking soda: Works with the vinegar to create a tender crumb.
- 1/2 tsp salt: Enhances the overall flavor.
- 1 3/4 cups granulated sugar: Sweetens the cake and cheesecake layers.
- 3/4 cup vegetable oil: Keeps the cake moist and tender.
- 1 cup buttermilk: Adds acidity for a rich flavor and tender texture.
- 2 large eggs: Acts as a binder and adds richness.
- 1-2 tbsp red food coloring: For that classic red velvet appearance.
- 1 tsp vanilla extract: A must for flavor depth.
- 1 tsp white vinegar: Reacts with baking soda for a lighter cake.
- 16 oz cream cheese: The star of the cheesecake layer, providing creaminess.
- 1/2 cup granulated sugar: Sweetens the cheesecake filling.
- 1/2 cup sour cream: Adds tanginess and richness to the filling.
- 8 oz cream cheese: For the frosting, making it luscious and smooth.
- 1/2 cup unsalted butter: Adds richness to the frosting.
- 3 cups powdered sugar: Sweetens the frosting for a perfect finish.
- 1 tsp vanilla extract: Enhances the flavor of the frosting.
Feel free to substitute ingredients based on your dietary needs. For instance, you can use gluten-free flour for a gluten-free version or dairy-free cream cheese for a dairy-free option.
Step-by-Step Instructions: Making Your Cheesecake
Let’s bring this festive dessert to life in just a few easy steps!
1. Prepare the Cheesecake Layer
- Preheat your oven to 325°F (163°C).
- In a mixing bowl, beat together the 16 oz cream cheese, 1/2 cup sugar, 1/2 cup sour cream, 2 eggs, and 1 tsp vanilla extract until smooth.
- Pour the cheesecake mixture into a greased 9-inch springform pan and bake for 40-45 minutes. The center should be set but slightly jiggly.
- Once done, let it cool completely before removing it from the pan. Chill in the refrigerator for at least 4 hours or overnight for best results.
2. Bake the Red Velvet Cake Layers
- Increase the oven temperature to 350°F (175°C).
- In a large mixing bowl, combine 2 1/2 cups flour, 2 tbsp cocoa powder, 1 tsp baking powder, 1 tsp baking soda, and 1/2 tsp salt.
- In another bowl, whisk together 1 3/4 cups sugar, 3/4 cup vegetable oil, 1 cup buttermilk, 2 eggs, 1-2 tbsp red food coloring, 1 tsp vanilla extract, and 1 tsp white vinegar.
- Combine the wet and dry ingredients, mixing until just combined.
- Divide the batter evenly into two greased 9-inch round cake pans and bake for 25-30 minutes. Allow to cool completely.
3. Make the Cream Cheese Frosting
- In a mixing bowl, beat 8 oz cream cheese, 1/2 cup unsalted butter, and 1 tsp vanilla extract until creamy and smooth.
- Gradually add the 3 cups powdered sugar until well combined and fluffy.
4. Assemble the Cheesecake
- Place one red velvet cake layer on a serving platter.
- Top it with the chilled cheesecake layer, then place the second red velvet layer on top.
- Spread the cream cheese frosting generously over the top and sides of the cake.
5. Chill and Serve
- Chill the assembled cake for at least 1 hour before serving to allow the flavors to meld.
- Slice and serve with a dollop of whipped cream if desired!
Pro Tips for Success
- Room Temperature Ingredients: Ensure all dairy ingredients are at room temperature for a smoother batter and filling.
- Don’t Overmix: Mix just until combined to avoid a tough cake.
- Chill Time: Giving your cheesecake enough time to chill is crucial for the best texture.
- Use a Water Bath: For a creamier cheesecake, bake the cheesecake layer in a water bath by placing the springform pan in a larger pan filled with water.
- Avoid Cracks: If you see cracks in your cheesecake, don’t fret! A generous layer of frosting will hide them perfectly.
- Knife Technique: For neat slices, warm your knife under hot water, wipe between cuts.
- Flavor Enhancements: Consider adding spices like cinnamon or nutmeg for a warm flavor twist.
- Storage Tips: Store leftover cheesecake in an airtight container in the fridge for up to 5 days.
Common Mistakes and Troubleshooting
- Overbaking: Keep an eye on your cheesecake; it should be slightly jiggly in the center when done.
- Underbaking the Cake Layers: Ensure they are fully cooled before assembly to prevent sogginess.
- Too Much Food Coloring: Start with less and add more until you reach your desired color.
- Frosting Too Runny: If your frosting is too runny, add more powdered sugar until it thickens.
Delicious Variations
- Chocolate Chip Red Velvet Cheesecake: Fold in mini chocolate chips into the red velvet batter for added sweetness.
- Nutty Delight: Add chopped pecans or walnuts to the cake layers for a crunchy texture.
- Fruit Topping: Top with fresh berries or a berry compote for a fruity twist.
- Spiced Version: Incorporate spices like cinnamon and nutmeg into the batter for a seasonal flair.
Storage and Make-Ahead Instructions
This cheesecake can be made ahead of time and stored in the refrigerator for up to 5 days. It’s best to store it in an airtight container to keep it fresh. If you’re looking to freeze the cheesecake, wrap it tightly in plastic wrap and aluminum foil; it can last in the freezer for up to 3 months. Just remember to thaw it in the fridge overnight before serving.
FAQ: Your Burning Questions Answered
- Can I use a different color for the cake? Absolutely! You can use any food coloring to create a fun twist.
- What can I substitute for buttermilk? You can make your own buttermilk by adding 1 tbsp of vinegar or lemon juice to 1 cup of milk.
- How do I know when the cheesecake is done? The edges should be set while the center remains slightly jiggly.
- Is it necessary to chill the cake? Yes, chilling allows the flavors to meld and the texture to set properly.
- Can I make this recipe gluten-free? Yes, just substitute all-purpose flour with a gluten-free blend.
- What’s the best way to serve this cheesecake? It’s delightful served cold, topped with whipped cream or fresh fruit.
- How long does this cheesecake last? It can last in the refrigerator for about 5 days.
- Can I add a layer of ganache? Absolutely! A chocolate ganache layer can add a rich touch!
Nutrition Tips and Dietary Adaptations
This cheesecake can be adapted to fit various dietary needs. For a lower sugar version, you can use sugar substitutes like stevia or erythritol. If you’re looking for a dairy-free option, use cashew cream or dairy-free cream cheese in place of traditional cream cheese. Remember, while this cheesecake is indulgent, enjoying it in moderation as part of a balanced diet is key!
Equipment Recommendations
- 9-inch Springform Pan: Essential for easy removal of the cheesecake.
- Mixing Bowls: A set of various sizes will aid in mixing different components.
- Electric Mixer: For smooth batter and frosting; a hand mixer works well too.
- Offset Spatula: Ideal for spreading frosting smoothly on the cake.
- Cooling Rack: Necessary for cooling your cake layers evenly.
Serving Suggestions
Serve your Christmas Red Velvet Cheesecake with a side of whipped cream or a drizzle of chocolate sauce for extra indulgence. Pair it with a warm cup of coffee or a festive spiced latte to elevate the experience. For a fun twist, serve slices with a scoop of vanilla ice cream for a delightful contrast!
Conclusion: Your Festive Baking Adventure Awaits!
Baking this Red Velvet Cheesecake is not just about creating a dessert; it’s about creating memories. Whether you’re sharing it with family or entertaining friends, this cake is sure to bring smiles and joy. So, gather your ingredients, embrace the process, and remember that every baking journey is perfect, even with a few hiccups! Happy baking and Merry Christmas!
Christmas Red Velvet Cheesecake Recipe
Ingredients
Cake Batter
- 2 1/2 cups all-purpose flour
- 2 tbsp unsweetened cocoa powder
- 1 tsp baking powder
- 1 tsp baking soda
- 1/2 tsp salt
- 1 3/4 cups granulated sugar
- 3/4 cup vegetable oil
- 1 cup buttermilk
- 2 large eggs
- 1–2 tbsp red food coloring
- 1 tsp vanilla extract
Cheesecake Layer
- 16 oz cream cheese
- 1/2 cup granulated sugar
- 1/2 cup sour cream
- 2 large eggs
- 1 tsp vanilla extract
- 8 oz cream cheese
- 1/2 cup unsalted butter
- 3 cups powdered sugar
Frosting
- 1 tsp vanilla extract
Instructions
- Bake the cheesecake layer at 325°F (160°C) for 40–45 minutes, then chill.
- Prepare red velvet cake layers at 350°F (175°C) for 25–30 minutes and cool completely.
- Make cream cheese frosting by beating cream cheese, butter, powdered sugar, and vanilla until smooth.
- Assemble the cake by layering red velvet, cheesecake, and frosting. Cover with frosting and chill for 1 hour before serving.

