Author

michael

Browsing

Welcome to the Ultimate Gluten Free Chocolate Cake Experience

If you think gluten free baking means sacrificing flavor or texture, think again! This gluten free chocolate cake is not just a treat for those avoiding gluten; it’s a decadent delight that anyone can enjoy. Picture this: a rich, moist cake that’s bursting with chocolate flavor, perfect for birthdays, holidays, or just a cozy night in with a cup of coffee. What’s more, this recipe is simple enough to whip up on a busy weekday, making it a go-to for anyone who loves baking without the fuss.

With this ultimate guide to gluten free chocolate cake, you’ll learn everything you need to know about creating a cake that’s not just gluten free, but also incredibly delicious. Let’s dive in!

Why You’ll Love This Recipe

  • Incredibly Moist: This cake stays moist and fluffy thanks to the perfect blend of ingredients, making it irresistible from the first bite.
  • Rich Chocolate Flavor: Using high-quality cocoa powder and hot coffee deepens the chocolate flavor, ensuring that every slice is a chocolate lover’s dream.
  • Easy to Make: With simple steps and common ingredients, this recipe is approachable for bakers of all skill levels. You’ll feel like a pro in no time!
  • Customizable: Whether you want to add nuts, swap in dairy-free alternatives, or top it with your favorite frosting, this cake is a blank canvas for your creativity.
  • Perfect for Any Occasion: Birthdays, anniversaries, or just a Tuesday, this cake fits right in, impressing everyone at the table — gluten-free or not!

Ingredient Breakdown

Here’s what you’ll need to create this indulgent gluten free chocolate cake, along with some helpful substitutions!

  • Gluten Free All Purpose Baking Flour: 2 2/3 cups, sifted. This is your base. Look for blends that include xanthan gum for the best texture.
  • Cocoa Powder: 1 cup, sifted. Use unsweetened cocoa for a rich flavor; Dutch-processed cocoa will yield a milder taste.
  • Baking Powder: 1 1/2 teaspoons. This will help your cake rise beautifully.
  • Baking Soda: 1 teaspoon. Works in conjunction with the vinegar to create a fluffy texture.
  • Salt: 1/2 teaspoon. Enhances the flavors of the cake.
  • Milk: 1 cup (dairy or non-dairy). Almond or coconut milk works well for a dairy-free option.
  • White Sugar: 1 cup. Sweetens the cake perfectly.
  • Light Brown Sugar: 3/4 cup. Adds moisture and a hint of caramel flavor.
  • Eggs: 3 large. They provide structure and moisture.
  • Vinegar: 1 teaspoon (white or apple cider). This helps activate the baking soda for a fluffy cake.
  • Vanilla Extract: 1 tablespoon. A must-have for flavor.
  • Oil: 2/3 cup (safflower, canola, or refined avocado). Keeps the cake moist and tender.
  • Hot Brewed Coffee or Boiling Water: 1 cup. Enhances the chocolate flavor.
  • Butter: 3/4 cup (1 1/2 sticks), softened. For the buttercream frosting.
  • Cocoa Powder for Frosting: 1/2 cup, sifted. Make your frosting rich and chocolatey!
  • Powdered Sugar: 3-5 cups, sifted. Adjust to get your desired frosting consistency.
  • Milk for Frosting: 2-4 tbsp (dairy or non-dairy). To achieve the right texture for your frosting.
  • Vanilla Extract for Frosting: 2 teaspoons. Enhances the sweetness of the frosting.

Step-by-Step Instructions

A decadent gluten-free chocolate cake displayed at an angle, showcasing its layers and smooth icing.

Follow these simple steps to create your gluten free chocolate cake that will wow everyone!

  1. Preheat your oven: Set it to 350 degrees Fahrenheit.
  2. Prepare your cake pans: Use either one 9×13 inch pan or two 8-inch round pans. Spray the bottoms with oil and line with parchment paper for easy release.
  3. Mix the wet ingredients: In a large mixing bowl, whisk together the milk, oils, eggs, vinegar, and vanilla until well combined.
  4. Combine the dry ingredients: In a separate bowl, whisk together the gluten free flour, cocoa powder, baking powder, baking soda, and salt.
  5. Combine wet and dry: Gradually whisk the dry mixture into the wet mixture until just combined. Don’t overmix!
  6. Add the hot coffee or boiling water: This will thin the batter. Whisk until combined; it will be thin.
  7. Pour the batter: Divide evenly into your prepared cake pans. For a layer cake, weigh the batter for even layers.
  8. Bake: For 35-45 minutes for a sheet cake, 32-37 minutes for layer cakes, or until a toothpick comes out clean.
  9. Cool: Let the cakes cool in the pans for 10-20 minutes, then flip onto a cooling rack and peel off the parchment.
  10. Make the frosting: Beat the softened butter until smooth, then add cocoa powder, sifted powdered sugar, milk, and vanilla until combined.
  11. Frost the cake: Once completely cooled, frost with your delicious buttercream frosting. Add sprinkles if desired. Enjoy your creation!

Pro Tips for Perfecting Your Gluten Free Chocolate Cake

  • Ingredient Temperature: Make sure your ingredients are at room temperature for better mixing and texture.
  • Sifting Matters: Always sift your dry ingredients to avoid clumps and ensure an even texture.
  • Don’t Overmix: Once combined, stop mixing to avoid a dense cake.
  • Use Quality Ingredients: High-quality cocoa powder and chocolate make a world of difference in flavor.
  • Let It Cool Completely: Frosting a warm cake can lead to melted frosting, so wait until it’s cool!
  • Measure Your Flour Properly: Use a kitchen scale for accuracy, or spoon and level your flour for best results.
  • Store Properly: Keep your cake tightly covered to maintain moisture.
  • Experiment with Flavors: Add a pinch of espresso powder to intensify the chocolate flavor.

Common Mistakes and Troubleshooting

Even experienced bakers can face challenges. Here’s how to avoid common pitfalls!

  • Dry Cake: This can happen if you overbake or measure flour incorrectly. Always check for doneness a few minutes before the timer goes off.
  • Dense Texture: Overmixing the batter can lead to a heavy cake. Mix until just combined.
  • Not Rising: Check the freshness of your baking powder and baking soda; they should be active!
  • Frosting Issues: If your buttercream is too thin, add more powdered sugar; if too thick, add a little more milk.

Delicious Variations

Get creative with these variations to put your own spin on this classic recipe!

  • Chocolate Chip Addition: Fold in 1 cup of gluten-free chocolate chips into the batter before baking for extra chocolatey goodness.
  • Nutty Twist: Add 1/2 cup of chopped walnuts or pecans for a delightful crunch.
  • Dairy-Free Option: Substitute all dairy with non-dairy alternatives like almond milk and coconut oil.
  • Fruity Flavor: Add 1 cup of mashed ripe bananas or applesauce for a unique flavor and extra moisture.

Storage and Make-Ahead Instructions

This cake is perfect for making ahead of time. Here’s how to store it properly:

  • Room Temperature: Store in an airtight container for up to 3 days.
  • Refrigerator: Can be kept for up to a week in the fridge, but allow it to come to room temperature before serving.
  • Freezing: Wrap tightly in plastic wrap and foil; freeze for up to 3 months. Thaw in the fridge overnight before serving.

Frequently Asked Questions

  • Can I use regular flour instead of gluten free flour? No, this recipe is specifically formulated for gluten free flour blends.
  • How do I know when my cake is done? Insert a toothpick in the center; it should come out clean or with a few moist crumbs.
  • Can I make this cake dairy-free? Yes! Simply use non-dairy milk and vegan butter for the frosting.
  • What’s the best way to frost my cake? Start with a crumb coat (a thin layer of frosting) to trap crumbs, then apply a thicker layer for a smooth finish.
  • Can I substitute eggs in this recipe? You can use flax eggs or applesauce, but this may change the texture slightly.
  • What’s the shelf life of this cake? Stored properly, it can last up to a week in the fridge or three months in the freezer.
  • Can I make cupcakes instead? Absolutely! Bake for around 18-22 minutes, or until a toothpick comes out clean.
  • What’s the best cocoa powder to use? Look for high-quality unsweetened cocoa powder for the richest flavor.

Nutritional Information and Dietary Adaptations

This gluten free chocolate cake is not just delicious; it can be made to fit various dietary needs:

  • Gluten Free: Made with gluten free flour blends.
  • Dairy Free: Substitute milk and butter with non-dairy alternatives.
  • Nut Free: Ensure that your gluten free flour blend is free from any nut-containing flours.
  • Reduced Sugar: You can experiment with natural sweeteners like maple syrup or coconut sugar, but the texture may vary.

Essential Equipment for Success

Make your baking experience smoother with these must-have tools:

  • Mixing Bowls: A good set of mixing bowls in various sizes will make preparation easier.
  • Measuring Cups and Spoons: Accurate measurements are key to successful baking.
  • Whisk and Spatula: Essential for mixing ingredients and scrapping down the sides of your bowls.
  • Stand Mixer or Hand Mixer: These make whipping ingredients a breeze, especially for the frosting.
  • Cooling Racks: Allows your cake to cool evenly and prevents sogginess.
  • Cake Pans: Non-stick pans or those lined with parchment paper ensure easy release.

Serving Suggestions

Here are some delightful ways to serve your gluten free chocolate cake:

  • With Whipped Cream: Top with homemade whipped cream for a classic dessert.
  • Fresh Berries: Serve with a side of fresh strawberries or raspberries for a refreshing contrast.
  • Ice Cream: A scoop of vanilla or chocolate ice cream takes this cake to the next level!
  • Drizzled with Ganache: Pour a simple chocolate ganache over the top for an extra indulgent treat.

Final Thoughts

This gluten free chocolate cake is not just a recipe, it’s an experience that you can share with family and friends. With every bite, you’ll be reminded that gluten free doesn’t mean flavor-free. So gather your ingredients, roll up your sleeves, and let’s bake something delicious together! Remember, cooking is all about having fun and creating memories.

Happy baking!

Gluten Free Chocolate Cake

Prep Time 20 minutes
Cook Time 40 minutes
Total Time 1 hour
Servings 12 pieces
Calories 420
A rich and moist gluten-free chocolate cake perfect for any celebration or indulgence. Easy to prepare with simple ingredients and delicious frosting.

Ingredients

Dry Ingredients

  • 2 2/3 cups Gluten Free All Purpose Baking Flour (sifted)
  • 1 cup cocoa powder (sifted)
  • 1 1/2 teaspoon baking powder
  • 1 teaspoon baking soda
  • 1/2 teaspoon salt

Wet Ingredients

  • 1 cup milk (dairy or non-dairy)
  • 1 cup white sugar
  • 3/4 cup light brown sugar
  • 3 eggs eggs
  • 1 teaspoon vinegar (white or apple cider)
  • 1 tablespoon vanilla extract
  • 2/3 cup oil (safflower, canola, refined avocado etc.)
  • 1 cup hot brewed coffee or boiling water
  • 3/4 cup butter (1 1/2 sticks)

Additional Ingredients

  • 1/2 cup sifted cocoa powder
  • 3-5 cups sifted powdered sugar (adjust to get your desired consistency)
  • 2-4 tbsp milk (dairy or non-dairy)
  • 2 tsp vanilla extract

Instructions 

  • Preheat oven to 350°F (175°C). Prepare pans and set aside.
  • Whisk wet ingredients, then add dry ingredients and mix until smooth. Pour in coffee and combine.
  • Pour batter into pans and bake for 32-45 minutes, until a toothpick comes out clean.
  • Cool cakes completely, then frost with buttercream and decorate as desired.
Notes

Ensure all ingredients are properly sifted for best texture.
Calories: 420kcal
Cost: $15
Course: Dessert
Cuisine: American
Keyword: chocolate, gluten free

Welcome to Your Ultimate Guide on Keto Fudge!

If you’ve been searching for a delicious and guilt-free treat to satisfy your sweet tooth while sticking to your keto lifestyle, you’re in the right place! This easy keto fudge recipe is not only simple to whip up, but it’s also utterly satisfying. With just a few everyday ingredients, you can indulge in a rich and creamy dessert that feels decadent without the sugar rush.

In this comprehensive guide, we’ll dive deep into everything you need to know about making keto fudge, including ingredient substitutions, expert tips, common mistakes to avoid, and even some scrumptious variations to keep your taste buds excited. So, grab your apron, and let’s get cooking!

Why You’ll Love This Recipe

  • Quick and Easy: This keto fudge comes together in under 30 minutes, making it perfect for a busy day. Just a few steps and you’ll have a delicious treat ready to chill!
  • Low-Carb Delight: With minimal carbs and no added sugar, this fudge is suitable for your ketogenic diet. It’s a guilt-free way to indulge your cravings!
  • Rich and Creamy Texture: The combination of heavy cream and butter creates a luscious mouthfeel that melts in your mouth.
  • Customizable Flavors: Whether you love chocolate, nuts, or even a hint of peppermint, this recipe allows for easy flavor variations!
  • Meal Prep Friendly: Make a batch ahead of time, and you’ll have a satisfying treat on hand for those sweet cravings throughout the week.

Ingredients Breakdown

Let’s take a closer look at the ingredients that make up this delightful keto fudge. Each component plays a critical role in creating the perfect balance of flavor and texture.

  • 1/2 cup heavy cream: This is the base for our fudge, providing richness and creaminess. If you’re dairy-free, you can substitute with coconut cream.
  • 1/3 cup granulated Stevia (or keto sweetener of choice): This sweetener gives the fudge its sweetness without the carbs. Feel free to use erythritol or monk fruit as alternatives.
  • 1/4 cup salted butter (4 tablespoons): Butter adds flavor and richness. For a dairy-free option, use coconut oil instead.
  • 1 teaspoon pure vanilla extract: This enhances the overall flavor of the fudge, making it even more delicious.
  • 9 oz sugar-free dark chocolate chips (e.g., Lily’s): The star of the show! Dark chocolate chips are low in sugar and provide that beloved chocolate flavor.
  • 1/2 cup chopped walnuts or pecans: These nuts add a delightful crunch and are optional if you prefer a smoother fudge.

Step-by-Step Instructions

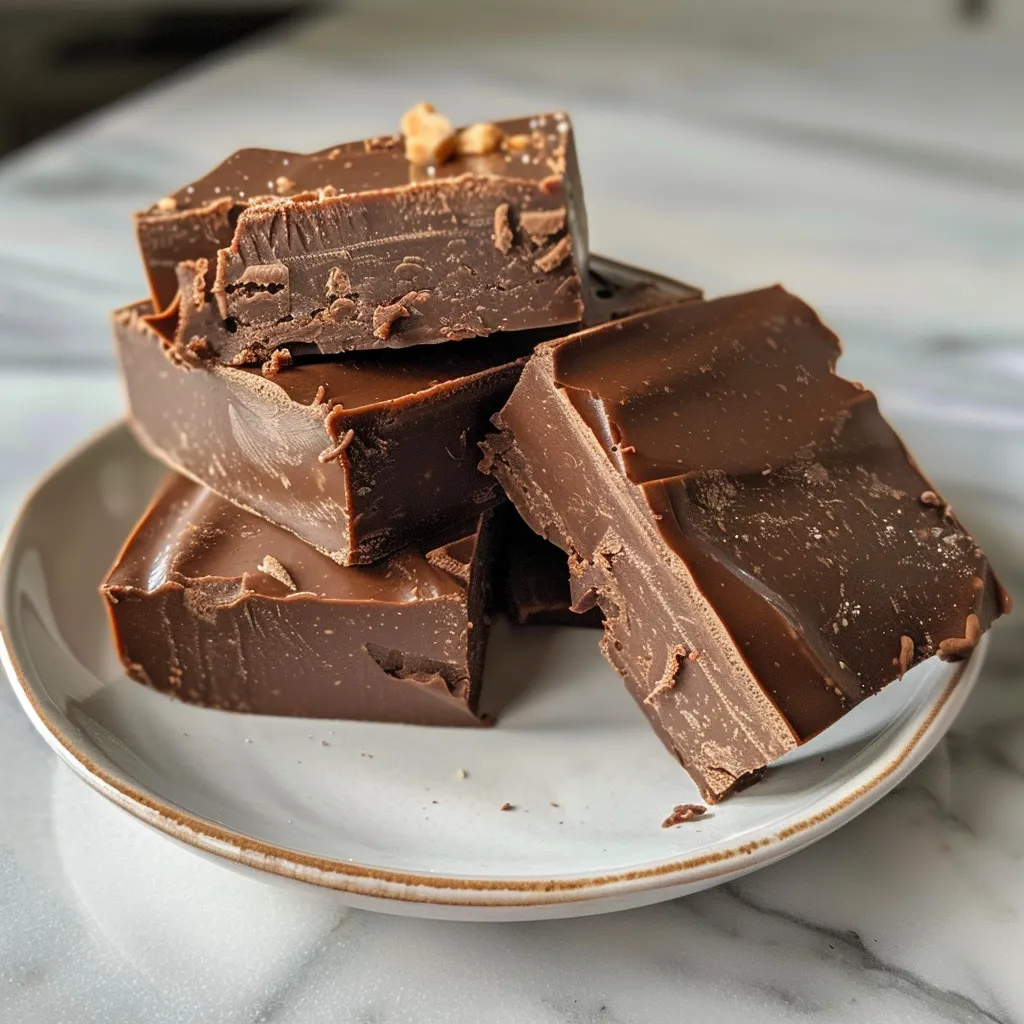
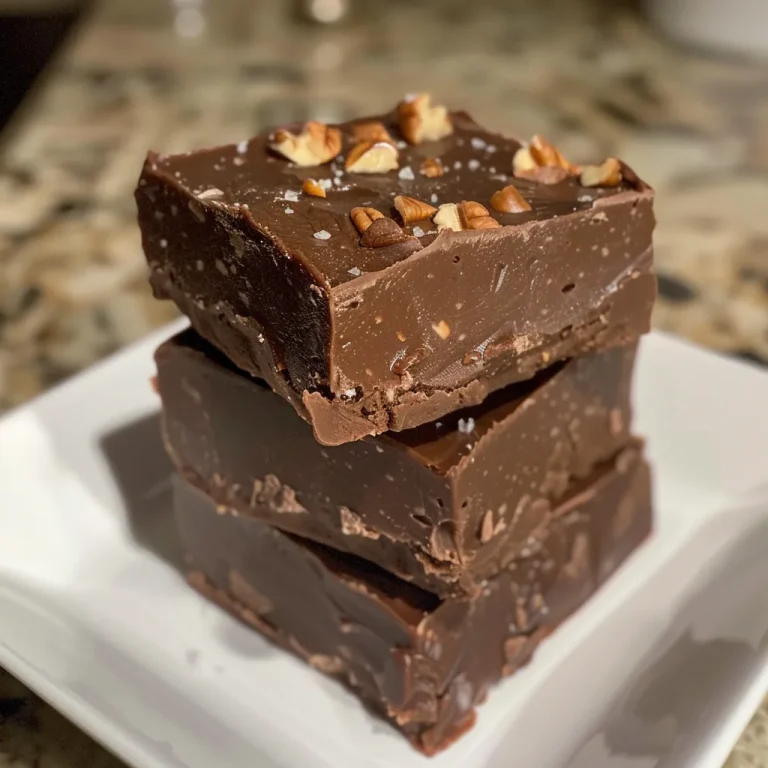
Side profile of decadent Easy Keto Fudge featuring a smooth texture and visible chocolate chips.

Now that we have our ingredients, let’s walk through the process of making this amazing keto fudge!

  1. Line an 8×4 loaf pan with parchment paper, leaving some overhang for easy removal.
  2. In a small saucepan, combine the heavy cream, butter, and sweetener.
  3. Bring to a simmer over medium heat, stirring frequently. Simmer for about 15 minutes or until the mixture thickens slightly.
  4. Remove from heat and add the chocolate chips, stirring until smooth and glossy.
  5. Pour the mixture into the prepared pan and spread evenly.
  6. Top with chopped nuts, gently pressing them into the surface.
  7. Refrigerate for at least 4 hours or overnight until fully set.
  8. Once set, lift the fudge from the pan using the parchment paper overhang, slice into 12 squares, and store in the fridge.

Expert Pro Tips for Perfect Fudge

  • Use quality chocolate: The better the chocolate chips, the richer your fudge will taste. Look for high-quality sugar-free options.
  • Don’t rush the cooling: Allow the fudge to set completely in the fridge for the best texture. Patience is key!
  • Experiment with sweeteners: Not all sweeteners behave the same way; if you find your fudge too sweet or not sweet enough, adjust the quantities to your taste.
  • Chill before cutting: For cleaner cuts and a firmer fudge, chill the fudge for a few hours before slicing.
  • Make it festive: Add a pinch of sea salt or a sprinkle of crushed peppermint for a seasonal twist!
  • Store properly: Keep the fudge in an airtight container in the fridge to maintain its freshness.
  • Microwave for a quick treat: If you fancy a warm dessert, microwave a piece for a few seconds to enjoy that melty goodness!
  • Double the recipe: If you love it, why not make more? This fudge can easily be doubled for larger gatherings.

Common Mistakes and Troubleshooting

Even the best cooks can run into a few hiccups while making fudge. Here are some common mistakes and how to avoid them:

  • Too soft: If your fudge doesn’t set, it may need more chilling time or too much liquid was added. Ensure you follow the measurements closely.
  • Too sweet: Adjust your sweetener to taste. Everyone’s preference is different!
  • Chocolate seizing: If your chocolate chips seize up, it’s likely due to moisture. Make sure your saucepan is dry before adding ingredients.
  • Uneven texture: Stir thoroughly to combine ingredients completely and ensure an even texture throughout.

Delicious Variations

Feeling adventurous? Here are some fun ways to switch up your keto fudge!

  • Peanut Butter Swirl: Add 1/4 cup of natural peanut butter to the chocolate mixture before pouring it into the pan for a nutty twist.
  • Mint Chocolate: Stir in a few drops of peppermint extract to the chocolate mixture for a refreshing flavor.
  • Coconut Delight: Mix in shredded unsweetened coconut for a tropical flair.
  • Spicy Kick: Add a dash of cayenne pepper for a surprising heat that pairs beautifully with chocolate.

Storage and Make-Ahead Instructions

Planning ahead? Here’s how to store your keto fudge and keep it fresh:

  • Refrigerator: Store the fudge in an airtight container in the fridge for up to 2 weeks.
  • Freezer: You can freeze the fudge for up to 3 months. Just cut it into squares and place them in a freezer-safe bag or container.
  • Thawing: To enjoy frozen fudge, let it thaw in the fridge for a few hours before serving.

Frequently Asked Questions

Got questions? We’ve got answers! Here are some common inquiries about making keto fudge:

  • Can I use regular sugar instead of a keto sweetener? Not recommended, as it will add carbs and ruin the keto aspect. Stick with keto-friendly sweeteners!
  • Is this fudge suitable for children? Absolutely! It’s a great way to introduce low-carb treats to the whole family.
  • Can I make this fudge dairy-free? Yes, use coconut cream and coconut oil as substitutes for heavy cream and butter.
  • How do I know when the fudge is set? It should be firm to the touch and hold its shape when sliced.
  • What if I don’t have a loaf pan? You can use any similar-sized container, just ensure it’s lined with parchment paper for easy removal.
  • Can I add protein powder to the fudge? Yes, you can mix in some unflavored or chocolate protein powder for an extra boost.
  • Why is my fudge grainy? This could be due to not mixing the sweetener thoroughly or using a sweetener that doesn’t dissolve well. Blend until smooth!
  • Can I use other nuts? Absolutely! Feel free to substitute with your favorite nuts or seeds.

Nutritional Tips and Dietary Adaptations

For those mindful of their nutritional intake, here are some tips:

  • Low-Calorie Sweeteners: Opt for erythritol or monk fruit to keep sugar content low while maintaining sweetness.
  • Healthy Fats: Incorporate almond butter or coconut oil for added health benefits.
  • Protein Boost: Consider adding a scoop of protein powder to make it a more satisfying snack.
  • Vegan-Friendly: Use plant-based substitutes for cream and butter to align with vegan diets.

Equipment Recommendations

Here’s what you’ll need to whip up this delicious keto fudge:

  • Small saucepan: For melting and mixing the fudge ingredients.
  • Loaf pan: A standard 8×4 loaf pan works perfectly for setting the fudge.
  • Parchment paper: Essential for easy removal of the fudge from the pan.
  • Spatula: Useful for mixing and spreading the fudge evenly.

Serving Suggestions

When it’s time to enjoy your keto fudge, here are some serving ideas:

  • With berries: Pair it with fresh berries for a refreshing contrast.
  • Ice cream topping: Crumble over low-carb ice cream for a delightful dessert.
  • Gift it: Wrap pieces in cute boxes for thoughtful gifts to friends and family.
  • On-the-go snack: Pack a few squares in your bag for a quick and satisfying treat during the day.

In conclusion, making keto fudge is not only a fun and rewarding experience, but it also allows you to enjoy a delicious treat without the guilt. Whether you’re following a keto diet or simply looking to reduce your sugar intake, this recipe is a fantastic addition to your dessert repertoire. So, gather your ingredients, follow the steps, and indulge in this guilt-free delight!

Easy Keto Fudge

Prep Time 10 minutes
Cook Time 15 minutes
Total Time 25 minutes
Servings 12 squares
Calories 220
A simple and delicious keto-friendly fudge that combines rich dark chocolate with nuts for a satisfying treat.

Ingredients

Dairy

  • 0.5 cup heavy cream
  • 1/3 cup granulated Stevia (or keto sweetener of choice)
  • 4 tablespoons salted butter
  • 1 teaspoon pure vanilla extract
  • 9 oz sugar-free dark chocolate chips (e.g., Lily’s)
  • 1/2 cup chopped walnuts or pecans

Instructions 

  • Line an 8×4 loaf pan with parchment paper.
  • Combine heavy cream, butter, and sweetener in a saucepan and simmer for 15 minutes.
  • Remove from heat, add chocolate chips, and stir until smooth.
  • Pour into the pan, top with nuts, and press gently.
  • Refrigerate for at least 4 hours until set, then cut into squares.

Notes

Store in the fridge for best freshness and texture.
Calories: 220kcal
Cost: $12
Course: Dessert
Cuisine: American
Keyword: chocolate, Fudge, keto

Welcome to the sweet world of chocolate covered strawberries! If you’re looking for a delightful treat that combines the sweetness of chocolate with the freshness of strawberries, you’ve landed in the right spot. This recipe is not only easy to follow but also requires just a handful of ingredients. So, let’s dive into this delicious journey that’s sure to brighten your day!

Why You’ll Love This Recipe

Chocolate covered strawberries are the perfect fusion of flavors and textures. Here are some reasons why you’ll adore this recipe:

  • Quick and Easy: With minimal prep time, you can whip these up in under 30 minutes!
  • Perfect for Any Occasion: Whether it’s a romantic date night or a cheerful family gathering, these treats are sure to impress.
  • Customizable: Use any type of chocolate you love, and add toppings to make them truly yours.
  • Healthier Indulgence: Strawberries are packed with vitamins, making this treat a guilt-free pleasure.
  • Fun Activity: Get the kids involved! Dipping strawberries in chocolate is a fun and messy activity that everyone will enjoy.

Ingredients Breakdown

Here’s what you’ll need to create these scrumptious treats:

  • 1 pound fresh strawberries: Choose ripe, firm strawberries for the best flavor and texture. Wash and dry them thoroughly.
  • 8 ounces semi-sweet chocolate chips: This will be your main coating. Feel free to use dark or milk chocolate if you prefer.
  • 2 ounces white chocolate chips (optional): For a beautiful drizzle, white chocolate adds a lovely contrast.
  • Parchment paper: Essential for lining your baking sheet to prevent sticking.

Step-by-Step Instructions

Ready to get started? Here’s how to make your chocolate covered strawberries:

  1. Line a baking sheet with parchment paper.
  2. In a microwave-safe bowl, add the semi-sweet chocolate chips. Melt them in the microwave in 30-second intervals, stirring in between until smooth.
  3. Grab a strawberry by its stem and dip it into the melted chocolate, covering about three-quarters of the berry.
  4. Let any excess chocolate drip off and place the dipped strawberry on the lined baking sheet.
  5. If using white chocolate, melt it in another bowl using the same method. Transfer it to a piping bag or zip-top bag for drizzling.
  6. Drizzle the melted white chocolate over the chocolate-covered strawberries.
  7. Let the strawberries sit at room temperature for about 30 minutes to set, or refrigerate to speed up the process.
  8. Serve immediately or store in the refrigerator until ready to enjoy.

Pro Tips for the Perfect Chocolate Covered Strawberries

Side view of fresh strawberries dipped in rich semi-sweet chocolate.

Want to elevate your chocolate covered strawberries? Here are some expert tips:

  • Choose the right chocolate: High-quality chocolate will give you the best flavor. Look for brands with high cocoa content.
  • Ensure strawberries are dry: Water can cause the chocolate to seize up, so make sure your strawberries are completely dry.
  • Don’t overheat chocolate: Melt it slowly to prevent burning. Stir frequently for a smooth consistency.
  • Use a fork for dipping: It helps to get an even coat of chocolate on your strawberries.
  • Experiment with toppings: Consider crushed nuts, coconut flakes, or sprinkles for added texture and flavor.
  • Try flavored chocolate: Add a little extract (like peppermint or almond) to your chocolate for a unique twist.
  • Chill before serving: Chilling helps the chocolate set faster, making for a cleaner finish.
  • Use seasonal fruits: In addition to strawberries, try this method with other fruits like bananas or pineapple!

Common Mistakes and Troubleshooting

Even the best can have hiccups in the kitchen. Here’s how to avoid common pitfalls:

  • Chocolate seizing up: If your chocolate becomes grainy, it may have come into contact with water. Always keep it dry.
  • Not enough chocolate: Make sure to use enough chocolate to coat the strawberries adequately.
  • Chocolate not setting: Ensure you let them sit at room temperature long enough, or refrigerate to speed up the process.
  • Strawberries leaking juice: This can happen if they’re too ripe. Use firm strawberries for best results.

Delicious Variations

Get creative! Here are some variations of chocolate covered strawberries to try:

  • Nutty Delight: Roll dipped strawberries in crushed nuts like almonds or hazelnuts.
  • Tropical Twist: Use white chocolate and sprinkle with toasted coconut flakes.
  • Spicy Kick: Add a sprinkle of cayenne pepper to dark chocolate for a surprising heat.
  • Minty Fresh: Infuse melted chocolate with peppermint extract for a refreshing flavor.

Storage and Make-Ahead Instructions

Want to prep these ahead of time? Here’s how:

  • Storage: Keep chocolate covered strawberries in an airtight container in the refrigerator for up to 2 days.
  • Make-Ahead: You can prepare the strawberries a day in advance. Just keep them in the fridge until it’s time to serve.

Frequently Asked Questions

Here are some common questions about chocolate covered strawberries:

  • Can I use frozen strawberries? Frozen strawberries work, but they can be mushy when thawed. Fresh is best!
  • What type of chocolate is best? Semi-sweet chocolate is a classic choice, but feel free to experiment with dark or white chocolate.
  • How do I make them shiny? Make sure to temper your chocolate for a beautiful, glossy finish.
  • Can I use chocolate bars instead of chips? Absolutely! Just chop the bars into small pieces for melting.
  • How do I transport them? Place them in a single layer in a container lined with parchment paper to avoid sticking.
  • What other fruits can I use? Try bananas, pineapple, or even cherries for a fun twist!
  • Can I add flavor to the chocolate? Yes! A few drops of extract can add a wonderful flavor to your chocolate.
  • How long can I keep them? For best flavor and texture, consume within 2 days of making.

Nutritional Tips and Dietary Adaptations

For those mindful of dietary preferences, here are some tips:

  • Vegan Option: Use dairy-free chocolate chips and ensure your strawberries are organic.
  • Low-Sugar Version: Opt for sugar-free chocolate alternatives.
  • Gluten-Free: This recipe is naturally gluten-free, making it suitable for those with gluten sensitivities.

Equipment Recommendations

Here’s what you’ll need to get started:

  • Microwave-safe bowl: For melting chocolate.
  • Baking sheet: To cool the dipped strawberries.
  • Parchment paper: To prevent sticking.
  • Piping bag or zip-top bag: For drizzling chocolate.

Serving Suggestions

How to enjoy your chocolate covered strawberries? Here are a few ideas:

  • On a Dessert Platter: Arrange them beautifully on a platter for parties.
  • As a Gift: Package them in a cute box or jar for a sweet gift.
  • With a Side of Whipped Cream: Serve alongside whipped cream for dipping.

Conclusion

And there you have it! With just a few simple ingredients and a little bit of love, you can create the most delightful chocolate covered strawberries that are perfect for any occasion. So, gather your supplies and dive into this fun and delicious project. Remember, cooking is about enjoying the process as much as the final product. Happy dipping!

Chocolate Covered Strawberries

Prep Time 15 minutes
Cook Time 10 minutes
Total Time 25 minutes
Servings 8 pieces
Calories 150
Delight in these easy-to-make, elegant treats of fresh strawberries dipped in smooth chocolate and drizzled with white chocolate for a perfect dessert or gift.

Ingredients

Fruits

  • 1 pound fresh strawberries, washed and dried
  • 8 ounces semi-sweet chocolate chips
  • 2 ounces white chocolate chips (optional, for drizzling) (Optional white chocolate for drizzling)
  • Parchment paper Parchment paper

Instructions 

  • Line a baking sheet with parchment paper.
  • Microwave chocolate chips in 30-second intervals, stirring until smooth.
  • Dip strawberries into melted chocolate, then place on parchment-lined sheet.
  • Melt white chocolate and drizzle over strawberries if desired.
  • Let sit at room temperature for 30 minutes to set or refrigerate.

Notes

Ensure strawberries are completely dry before dipping for best coating.
Calories: 150kcal
Cost: $15
Course: Dessert
Keyword: chocolate, strawberries

Indulge in Guilt-Free Decadence with Sugar-Free Sex In A Pan

Welcome to the sweet world of sugar-free desserts, where indulgence meets health without the guilt! Today, I’m excited to share with you a simple yet delightful recipe for Sugar-Free Sex In A Pan. This rich and creamy dessert is perfect for satisfying your sweet tooth while keeping your sugar intake in check. Whether you’re looking for a way to impress guests or just want to treat yourself, this dessert is about to become your new go-to. So, roll up your sleeves, and let’s dive into the deliciousness!

Why You’ll Love This Recipe

Here are just a few reasons why this Sugar-Free Sex In A Pan recipe should be on your must-try list:

  • Easy to Make: With simple ingredients and straightforward steps, you can whip this up in no time!
  • Rich Flavor: The combination of chocolate and cream cheese creates a decadent taste experience.
  • Guilt-Free Treat: Enjoy a satisfying dessert without the sugar overload that can derail your healthy eating plans.
  • Versatile Ingredients: This recipe allows for substitutions based on what you have on hand.
  • Perfect for Any Occasion: Whether it’s a family gathering or a cozy night in, this dessert fits right in.

Ingredients Breakdown

Let’s take a closer look at what you’ll need to create this delightful dessert:

  • 1 1/2 cups almond flour: A great gluten-free alternative to traditional flour.
  • 3 tbsp cocoa powder: Adds rich chocolate flavor; opt for unsweetened for a healthier option.
  • 1/4 cup sweetener: Choose your favorite sugar substitute like erythritol or stevia.
  • ¼ cup butter (melted): Adds richness; can substitute with coconut oil for a dairy-free option.
  • 1 tbsp vanilla extract: Enhances the flavor profile. Always use pure vanilla for the best taste!
  • A pinch of salt: Balances the sweetness.
  • 2 cups heavy cream: Essential for the creamy layers; can replace with coconut cream for a non-dairy version.
  • 1 1/2 tsp gelatin powder: Helps set the pudding; look for a vegetarian alternative if needed.
  • 1/3 cup sweetener (for pudding): Adjust based on your sweetness preference.
  • 1/4 cup cocoa powder (for pudding): Additional chocolate flavor.
  • 8 oz cream cheese: The star of the cheesecake layer; use full-fat for the best texture.
  • 1/2 cup heavy whipping cream: For the whipped topping; can substitute with a vegan whipping cream.

How to Make Sugar-Free Sex In A Pan

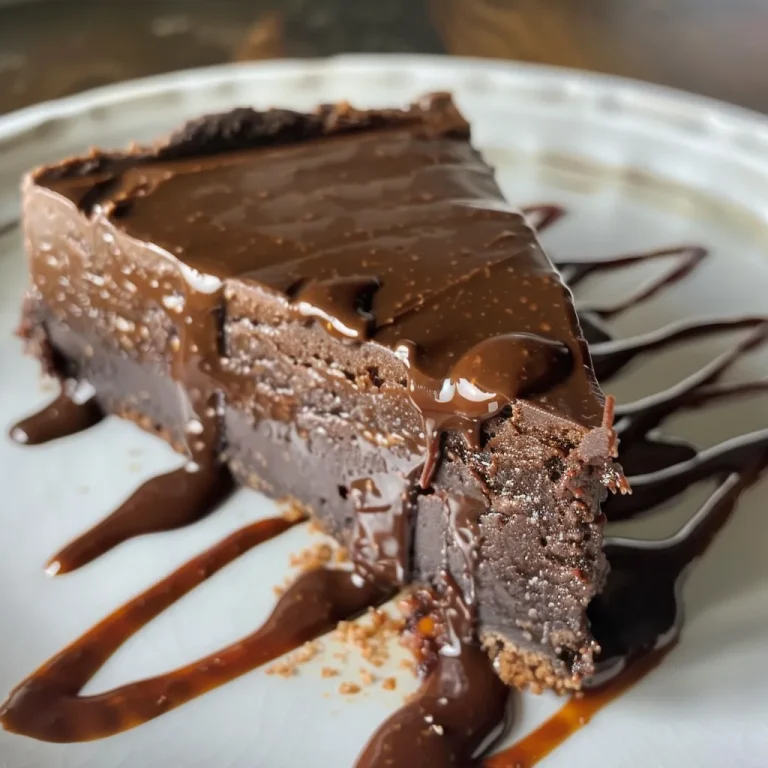
A side view of a delectable sugar-free dessert showcasing creamy layers and a rich chocolate topping.

Ready to get cooking? Here’s how to bring this delicious dessert to life, step by step:

1. Preheat the Oven

Start by preheating your oven to 320°F (160°C) and line a 9×9-inch square pan with parchment paper for easy removal later.

2. Prepare the Crust

In a large bowl, mix together almond flour, sweetener, cocoa powder, and a pinch of salt. Pour in the melted butter and vanilla extract. Mix until you achieve a sandy texture. Press this mixture evenly into the bottom of your prepared pan and bake for 15 minutes.

3. Make the Chocolate Pudding

In a small bowl, mix the gelatin powder with 1/4 cup of heavy cream and let it sit for a few minutes. Meanwhile, in a saucepan over medium-low heat, combine the remaining heavy cream, sweetener, cocoa powder, and salt. Stir constantly for about 5 minutes until bubbles start to form around the edges. Remove from heat, then mix in the vanilla extract and gelatin until fully combined. Let it cool at room temperature, then refrigerate for at least 30 minutes.

4. Create the Cheesecake Layer

In another bowl, combine the cream cheese and sweetener until creamy. Gradually add in 1/2 cup of heavy whipping cream and mix until smooth. Spread the cheesecake filling over the cooled crust and refrigerate.

5. Make the Whipped Cream Topping

In a mixing bowl, whip the remaining cream, sweetener, and vanilla extract until stiff peaks form. Once the pudding is chilled, spread it over the cheesecake layer. Top with your whipped cream and sprinkle with chocolate shavings if desired. Refrigerate for at least an hour before serving.

6. Enjoy!

Slice into squares, serve, and watch your friends and family devour this delightful dessert!

Pro Tips for Success

To ensure your Sugar-Free Sex In A Pan turns out perfectly every time, consider these expert tips:

  • Chill Time: Allow each layer to fully set before adding the next; this will help keep your dessert looking neat.
  • Experiment with Flavors: Don’t hesitate to add flavors like almond extract or coffee for a unique twist.
  • Check Sweetness: Taste as you go; everyone’s sweetness preference is different!
  • Use Quality Ingredients: Opt for high-quality cocoa powder and vanilla extract to elevate the flavor.
  • Keep it Cool: Store leftovers in the refrigerator to maintain texture and flavor.

Common Mistakes and Troubleshooting

Even experienced cooks can run into hiccups. Here are some common mistakes and how to avoid them:

  • Overmixing: Be careful not to overmix the cream cheese layer; overmixing can lead to a grainy texture.
  • Not Chilling Enough: If the pudding isn’t chilled enough, it may not set properly. Give it ample time in the fridge.
  • Incorrect Measurements: Always measure ingredients accurately for the best results.
  • Using the Wrong Sweetener: Not all sweeteners behave the same way. Use one that measures cup-for-cup with sugar for best results.

Delicious Variations

Want to switch things up? Here are a few tasty variations you can try:

  • Berry Bliss: Fold in fresh or frozen berries into the cheesecake layer for a fruity twist.
  • Nutty Delight: Add chopped nuts like walnuts or pecans to the crust for added texture.
  • Mint Chocolate: Incorporate mint extract into the pudding for a refreshing flavor profile.
  • Spiced Chocolate: Add a pinch of cinnamon or cayenne to the pudding for a warm, spicy kick.

Storage and Make-Ahead Instructions

This dessert can be made ahead of time and stored in the refrigerator for up to 3 days. Just be sure to cover it well so it doesn’t dry out. If you’re making it for a special occasion, you can prepare the crust and pudding layers a day in advance, then assemble it the day you plan to serve it.

Frequently Asked Questions

Got questions? I’ve got answers! Here are some common queries about this recipe:

  • Can I use a different type of flour? Yes, but almond flour works best for this recipe. Coconut flour can also be used, but adjust the amount since it’s more absorbent.
  • Is this dessert suitable for diabetics? Absolutely! This sugar-free version is perfect for those managing sugar intake.
  • Can I freeze this dessert? Yes, you can freeze individual squares. Just be sure to wrap them tightly to prevent freezer burn.
  • How do I make it dairy-free? Substitute the cream cheese with a dairy-free alternative and use coconut cream for the whipped topping.
  • What can I use instead of gelatin? Agar-agar is a great vegan substitute for gelatin in this recipe.
  • How long does it take to set? Allow at least one hour in the refrigerator for the dessert to set properly.
  • Can I add more chocolate? Of course! Feel free to sprinkle chocolate chips or shavings on top for extra indulgence.
  • What’s the best way to serve it? Cut into squares and serve chilled with a drizzle of sugar-free chocolate sauce if desired.

Nutrition Tips and Dietary Adaptations

This recipe can easily be adapted to fit various dietary needs:

  • Low Carb: With almond flour and sugar substitutes, this dessert is low in carbohydrates.
  • Keto-Friendly: Perfect for those on a ketogenic diet, just ensure all ingredients are compliant.
  • Gluten-Free: Made with almond flour, this dessert is naturally gluten-free.

Equipment Recommendations

To make this Sugar-Free Sex In A Pan, you’ll need:

  • Mixing Bowls: For combining your ingredients.
  • Whisk: Useful for mixing the pudding and cream cheese layers.
  • 9×9-inch Pan: Essential for baking the crust and assembling the dessert.
  • Parchment Paper: Makes for easy removal and cleanup.

Serving Suggestions

For an extra touch, serve your Sugar-Free Sex In A Pan with:

  • Fresh Berries: Strawberries, raspberries, or blueberries add a pop of color and flavor.
  • Chocolate Sauce: Drizzle some sugar-free chocolate sauce for an indulgent finish.
  • Mint Leaves: A sprig of mint adds a refreshing touch and beautiful presentation.

Now that you’re armed with everything you need to create this delightful dessert, it’s time to get cooking! Remember, the key to making **great food** is to enjoy the process. Happy cooking, and may your kitchen always be filled with love and laughter!

Sugar-Free Sex In A Pan

Prep Time 20 minutes
Cook Time 15 minutes
Total Time 35 minutes
Servings 12 pieces
Calories 450
A delicious sugar-free dessert with a crunchy crust, creamy cheesecake layer, and rich chocolate pudding topping.

Ingredients

Crust

  • 1.5 cups almond flour
  • 3 tbsp cocoa powder
  • 1/4 cup sweetener
  • ¼ cup butter (melted)
  • 1 tbsp vanilla extract

Chocolate Pudding

  • 2 cups heavy cream
  • 1.5 tsp gelatin powder
  • 1/3 cup sweetener
  • 1/4 cup cocoa powder
  • 1 tsp vanilla extract

Cheesecake Layer

  • 8 oz cream cheese
  • 1/3 cup sweetener
  • 1 tsp vanilla extract
  • 1/2 cup heavy whipping cream

Whipped Cream Topping

  • 1 cup heavy cream
  • 3 tbsp sweetener
  • 1 tsp vanilla extract

Instructions 

  • Preheat oven to 320F/160C and line a 9x9-inch pan with parchment.
  • Mix almond flour, sweetener, cocoa powder, and salt; add melted butter and vanilla. Press into pan and bake 15 minutes.
  • Prepare chocolate pudding by dissolving gelatin in 1/4 cup heavy cream; heat remaining cream with sweetener, cocoa, and salt. Combine with gelatin mixture and chill.
  • Mix cream cheese, sweetener, vanilla, and heavy cream for cheesecake; spread over crust. Chill.
  • Spread chocolate pudding over cheesecake; top with whipped cream. Refrigerate at least 1 hour before serving.

Notes

Ensure to chill the dessert thoroughly for best texture.
Calories: 450kcal
Cost: $15
Course: Dessert
Cuisine: American
Keyword: sugar free

Unlock the Magic of Meal Prep with High Protein Honey Garlic Chicken Bowls

Are you looking for a way to simplify your weeknight dinners while ensuring they are both delicious and nutritious? Look no further! This High Protein Honey Garlic Chicken Meal Prep Bowl is your ticket to satisfying, stress-free meals that you’ll look forward to enjoying. Packed with protein, vibrant veggies, and an irresistible honey garlic sauce, these bowls are perfect for busy families and anyone who loves tasty food without the fuss. Let’s dive into why this recipe is a true winner and how you can whip it up in no time!

Why You’ll Love This Recipe

  • Quick and Easy: With a total prep and cook time of just 15 minutes, you can have a healthy meal ready to go in no time!
  • High Protein: Each bowl is loaded with protein, making it perfect for meal prep enthusiasts looking to fuel their active lifestyles.
  • Flavor-Packed: The sweet and savory honey garlic sauce elevates the dish, making it a family favorite.
  • Versatile: Customize your bowls with your favorite veggies and grains to keep things fresh and exciting.
  • Meal Prep Friendly: These bowls store well in the fridge, allowing you to enjoy a delicious homemade meal all week long.

Ingredient Breakdown

Let’s take a closer look at the ingredients you’ll need for these delightful bowls:

  • Chicken: 2 pounds boneless, skinless chicken breasts or thighs (opt for thighs for extra juiciness).
  • Honey Garlic Sauce:
    • 1/3 cup honey
    • 1/4 cup low-sodium soy sauce (or tamari/coconut aminos)
    • 4 cloves garlic, minced
    • 1 tablespoon rice vinegar or apple cider vinegar
    • 1 tablespoon sesame oil (optional but adds great flavor)
    • 1–2 teaspoons sriracha or red pepper flakes (optional for heat)
  • Thickening Slurry: 1 tablespoon cornstarch mixed with 2 tablespoons water.
  • Grain Base: 3 cups cooked brown rice or quinoa.
  • Veggies:
    • 3 cups broccoli florets
    • 1 red bell pepper, sliced
    • 1 cup shredded carrots
  • Toppings:
    • 2 green onions, sliced
    • Sesame seeds
    • Lime wedges (optional for a zesty finish)
  • Cooking Oil: 1–2 tablespoons olive or avocado oil.
  • Salt and Pepper: To taste.

Step-By-Step Instructions for the 15-Minute Honey Garlic Chicken Recipe

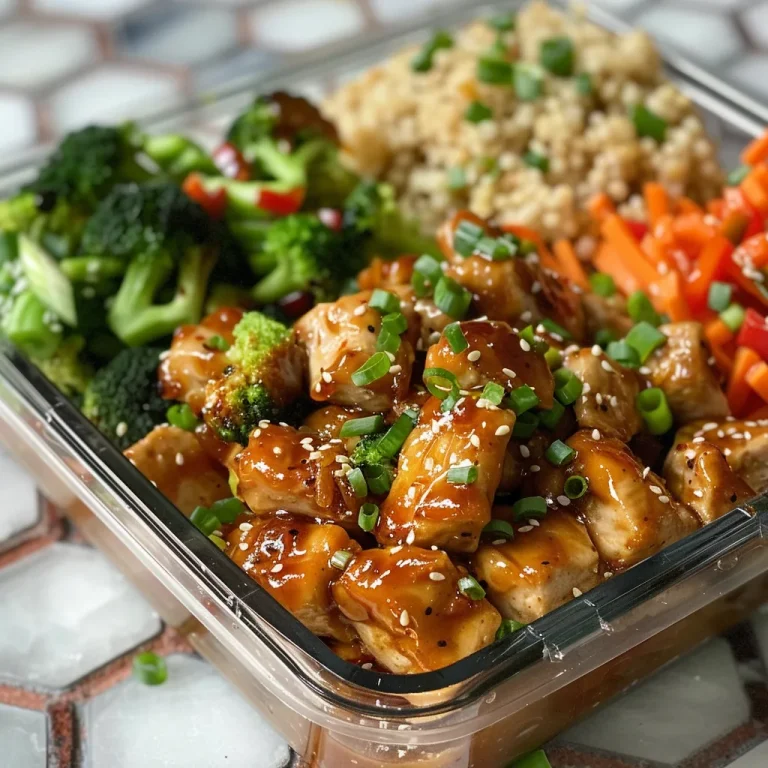
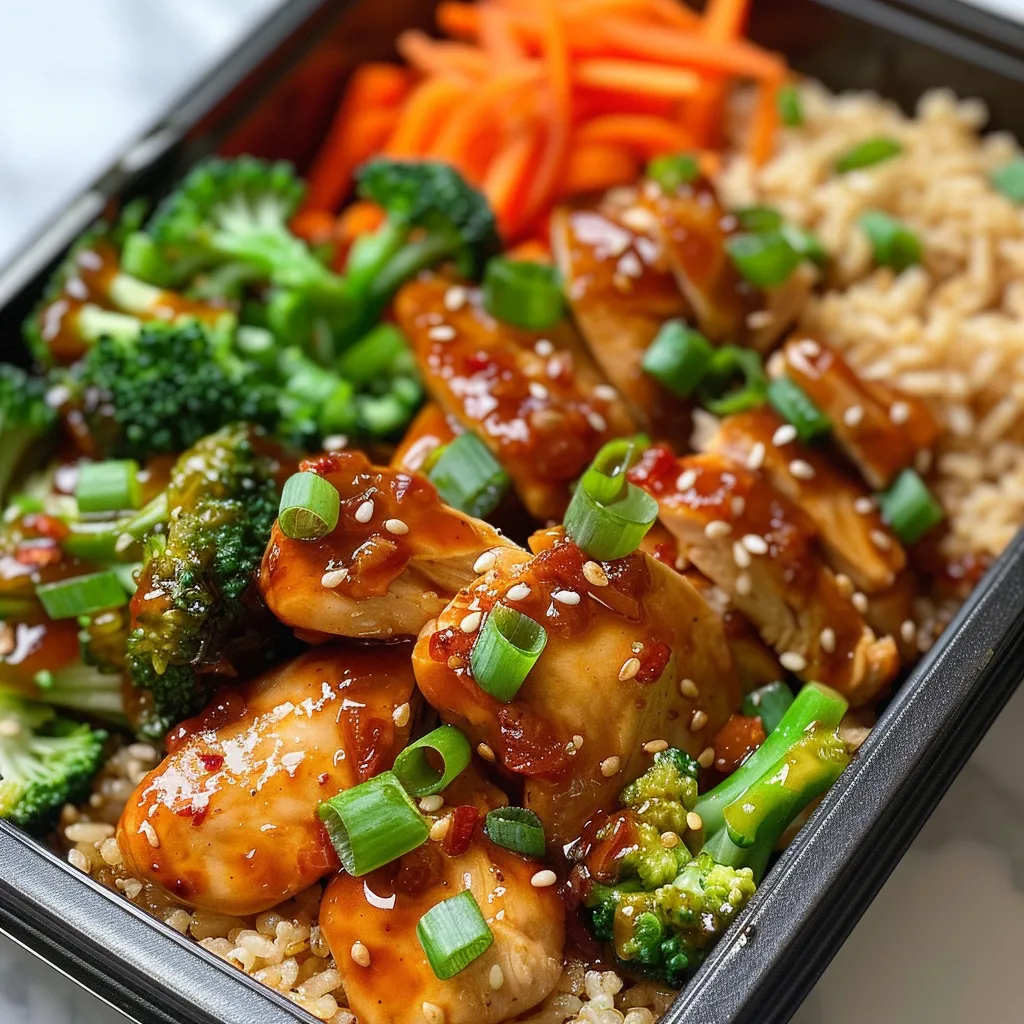
Juicy honey garlic chicken served with colorful vegetables and brown rice in a meal prep container.

Ready to get cooking? Follow these simple steps to create your High Protein Honey Garlic Chicken Meal Prep Bowls:

  1. Prep the Base: Cook brown rice or quinoa according to package directions. Fluff with a fork and set aside.
  2. Chop the Chicken: Cut the chicken into bite-sized pieces, pat dry, and season lightly with salt and pepper.
  3. Steam or Roast Veggies: Steam broccoli until crisp-tender (about 4–5 minutes) or roast at 425°F (220°C) for 12–15 minutes. Keep peppers and carrots crisp for texture.
  4. Make the Sauce: In a bowl, whisk together honey, soy sauce, garlic, vinegar, sesame oil, and sriracha if using. Set aside the cornstarch slurry.
  5. Sear the Chicken: Heat oil in a large skillet over medium-high heat. Add chicken in a single layer. Cook for 5–7 minutes, stirring occasionally, until browned and cooked through.
  6. Glaze It: Pour the sauce into the skillet. Once it simmers, stir in the cornstarch slurry. Cook for 1–2 minutes until the sauce turns glossy and clings to the chicken.
  7. Assemble Bowls: Divide grains into 4–5 meal prep containers. Add the chicken and sauce, followed by the veggies. Top with green onions and sesame seeds.
  8. Finish: Let everything cool slightly before sealing. Add lime wedges if you like a bright finish.

Pro Tips for Recipe Success

  • Marinate for Maximum Flavor: Let the chicken sit in the marinade for at least 10 minutes for deeper flavor.
  • Customize Your Veggies: Use seasonal veggies or whatever you have on hand for a personal touch.
  • Batch Cooking: Make a double batch of chicken and sauce for quick meals throughout the week.
  • Check Doneness: Ensure your chicken is fully cooked by checking it reaches an internal temperature of 165°F (74°C).
  • Keep It Crisp: If you’re meal prepping, store your veggies separately to maintain their crispness.
  • Sweetness Balance: Adjust the honey based on your personal taste preference; you can always add more later.
  • Storage: These bowls can be stored in the fridge for up to 4 days.
  • Reheat Gently: When reheating, do so on low heat to prevent drying out the chicken.

Common Mistakes and Troubleshooting

Even the best of us make mistakes in the kitchen! Here are some common pitfalls and how to avoid them:

  • Overcooking Chicken: Keep an eye on your chicken and remove it from heat as soon as it’s cooked through to avoid dryness.
  • Sauce Thickness: If your sauce is too thin, allow it to simmer a bit longer to thicken. If too thick, add a splash of water.
  • Veggie Overcooking: Avoid mushy veggies by monitoring them closely during cooking; they should be crisp-tender.
  • Inadequate Seasoning: Don’t be shy with salt and pepper; they enhance flavors significantly.

Variations to Elevate Your Bowls

Want to switch things up? Here are some fun variations to try:

  • Protein Swap: Substitute chicken with shrimp, tofu, or tempeh for a different twist.
  • Grain Alternatives: Use farro, bulgur, or cauliflower rice as a base instead of brown rice or quinoa.
  • Spicy Kick: Add chopped jalapeños or a drizzle of spicy chili oil for an extra kick.
  • Herb Infusion: Top with fresh herbs like cilantro or basil to brighten up the flavors.

Storage and Make-Ahead Instructions

These bowls are a meal prep dream! Here’s how to store them:

  • Refrigerate: Store in airtight containers in the fridge for up to 4 days.
  • Freeze: For longer storage, freeze the chicken and sauce separately from the grains and veggies. Thaw overnight in the fridge before reheating.
  • Reheat: Gently reheat in the microwave or on the stove over low heat, adding a splash of water if needed to keep it moist.

Comprehensive FAQ

Here are some frequently asked questions about this recipe:

  • Can I use frozen chicken? Yes, but ensure it’s fully thawed before cooking for even results.
  • Is there a gluten-free option? Absolutely! Use tamari or coconut aminos instead of soy sauce.
  • How long does the chicken stay fresh? When properly stored, it can last up to 4 days in the fridge.
  • Can I make this recipe vegan? Yes! Substitute chicken with tofu or chickpeas and use maple syrup instead of honey.
  • What can I serve with these bowls? Pair with a side salad or steamed veggies for a complete meal.
  • Can I make the sauce ahead of time? Definitely! You can prepare the honey garlic sauce in advance and store it in the fridge for up to a week.
  • How do I prevent the chicken from sticking to the pan? Make sure your pan is hot enough and use enough oil to help sear the chicken.
  • What’s the best way to cut chicken for this recipe? Cut against the grain into bite-sized pieces for tender chicken.

Nutrition Tips and Dietary Adaptations

This recipe not only tastes great but is also packed with nutritional benefits!

  • Protein Power: Each serving is high in protein, making it ideal for muscle recovery and satiety.
  • Fiber-Rich: The addition of whole grains and veggies adds fiber, promoting healthy digestion.
  • Healthy Fats: Incorporating sesame oil and optional toppings like sesame seeds provides healthy fats.
  • Low Sodium Option: Choose low-sodium soy sauce to keep your meal heart-healthy.

Equipment Recommendations

Here’s what you’ll need to make this recipe:

  • Sharp Knife: For easy chopping of chicken and veggies.
  • Cutting Board: A sturdy surface for all your prep work.
  • Large Skillet: A non-stick skillet is ideal for searing the chicken and making the sauce.
  • Whisk: For mixing the sauce ingredients thoroughly.
  • Meal Prep Containers: Airtight containers for storing your meal prep bowls.

Serving Suggestions

To make your meal even more delightful, consider serving your bowls with:

  • Fresh Lime Wedges: A squeeze of lime adds brightness and flavor.
  • Chopped Fresh Herbs: Garnish with cilantro or parsley for added freshness.
  • Crunchy Nuts: Add toasted sesame seeds or chopped peanuts for a satisfying crunch.

So there you have it! A comprehensive guide to making High Protein Honey Garlic Chicken Meal Prep Bowls that are not only easy to prepare but also packed with flavor and nutrition. Remember, cooking is all about enjoying the process, so don’t stress if things don’t go perfectly. Dive into your kitchen, try this recipe, and celebrate the joy of home-cooked meals! Happy cooking!

High Protein Honey Garlic Chicken Meal Prep Bowls - Easy, Flavorful, and Filling

Prep Time 15 minutes
Cook Time 20 minutes
Total Time 35 minutes
Servings 4 bowls
Calories 550
A delicious and nutritious meal prep featuring tender chicken, vibrant veggies, and a sweet-savory honey garlic sauce, perfect for busy weekdays.

Ingredients

Chicken

  • 2 pounds boneless, skinless chicken breasts (or thighs for extra juiciness)
  • 1/3 cup honey
  • 1/4 cup low-sodium soy sauce (or tamari/coconut aminos)
  • 4 cloves garlic, minced
  • 1 tablespoon rice vinegar or apple cider vinegar
  • 1 tablespoon sesame oil (optional but flavorful)
  • 1–2 teaspoons sriracha or red pepper flakes (optional for heat)
  • 1 tablespoon cornstarch (mixed with 2 tablespoons water (slurry))
  • 2 tablespoons water (for slurry)

Grain base

  • 3 cups cooked brown rice or quinoa

Veggies

  • 3 cups broccoli florets
  • 1 red bell pepper sliced
  • 1 cup shredded carrots

Toppings

  • 2 green onions sliced
  • sesame seeds
  • lime wedges (optional)

Cooking oil

  • 1–2 tablespoons olive or avocado oil
  • to taste Salt and pepper

Instructions 

  • Cook grains: Prepare brown rice or quinoa as per package instructions. Fluff and set aside.
  • Cut chicken into bite-sized pieces, season lightly with salt and pepper.
  • Steam or roast veggies until crisp-tender, keeping peppers and carrots crisp.
  • Whisk honey, soy sauce, garlic, vinegar, sesame oil, and sriracha. Set aside cornstarch slurry.
  • Cook chicken in oil until browned and cooked through, then add sauce and slurry. Simmer until glossy.
  • Assemble bowls: Divide grains, top with chicken, veggies, green onions, sesame seeds, and lime wedges if desired.

Notes

Feel free to customize with your favorite vegetables or spice levels.
Calories: 550kcal
Cost: $15
Course: Main Course
Cuisine: Asian-inspired
Keyword: chicken, Healthy, meal prep

Creating the Ultimate Strawberry Shortcake Cake: A Step-by-Step Guide

Strawberry shortcake is a classic dessert that embodies the spirit of summer. This delightful Strawberry Shortcake Cake combines fluffy cake layers, fresh strawberries, and luscious whipped cream to create a treat that’s perfect for any occasion. Whether you’re celebrating a birthday, hosting a barbecue, or simply indulging your sweet tooth, this cake is bound to impress. In just five simple steps, you’ll learn how to create a dessert that’s not just delicious but also a feast for the eyes!

Get ready to dive into this comprehensive guide that will ensure your Strawberry Shortcake Cake is a showstopper. With tips, variations, and answers to common questions, you’ll feel confident tackling this recipe!

Why You’ll Love This Strawberry Shortcake Cake

  • Easy to Make: Even if you’re a beginner, this recipe breaks down each step, making it accessible and enjoyable for everyone.
  • Fresh Ingredients: Using ripe strawberries and homemade whipped cream elevates the flavor, ensuring each bite is bursting with freshness.
  • Customizable Layers: Feel free to experiment with the cake layers and toppings to suit your taste — it’s a dessert that encourages creativity!
  • Perfect for Any Occasion: Whether it’s a picnic, birthday party, or just a Sunday treat, this cake fits right in.
  • Impressive Presentation: The layered look of the cake is visually stunning and will surely impress your guests!

Essential Ingredients for Strawberry Shortcake Cake

Before you start baking, let’s gather our ingredients. Each one plays a crucial role in creating the perfect Strawberry Shortcake Cake.

  • 2 cups all-purpose flour: The foundation of your cake, providing structure.
  • 1 cup granulated sugar: Sweetens the cake and helps it rise.
  • 1 tbsp baking powder: Gives your cake that light, fluffy texture.
  • 1/2 tsp salt: Enhances the flavors of the other ingredients.
  • 1/2 cup unsalted butter: Adds richness and moisture to the cake.
  • 3/4 cup milk: Binds the ingredients together for a smooth batter.
  • 2 large eggs: Provides moisture and stability to the cake.
  • 1 tsp vanilla extract: Adds depth and warmth to the flavor profile.
  • 2 cups fresh strawberries: The star of the show, sliced for maximum flavor and presentation.
  • 1 cup heavy whipping cream: For that luscious whipped cream topping.
  • 2 tbsp powdered sugar: Sweetens the whipped cream just enough without overpowering.

How to Make Strawberry Shortcake Cake: Step-by-Step Instructions

A close-up of a layered strawberry shortcake with cream and sliced strawberries.

Let’s get to the fun part! Follow these steps for a delicious Strawberry Shortcake Cake:

  1. Preheat your oven to 350°F (175°C). Grease and flour two 8-inch round cake pans to prevent sticking.
  2. In a large mixing bowl, combine the flour, sugar, baking powder, and salt. Whisk together until well blended.
  3. Add the softened butter, milk, eggs, and vanilla extract to the dry ingredients. Beat with a mixer on medium speed until the batter is smooth and creamy, about 2-3 minutes.
  4. Divide the batter evenly between the prepared pans. Bake for 25-30 minutes, or until a toothpick inserted into the center comes out clean.
  5. Allow the cakes to cool in the pans for about 10 minutes before transferring them to a wire rack to cool completely.

Prepare the Whipped Cream and Strawberries

While the cakes are cooling, let’s prepare the whipped cream and strawberries:

  • Whipped Cream: In a clean mixing bowl, whip the heavy cream and powdered sugar on high speed until stiff peaks form. This should take about 3-5 minutes. Be careful not to overwhip!
  • Strawberries: Wash and slice your fresh strawberries. You can toss them with a little sugar if you’d like them to macerate and release their juices.

Assembling Your Strawberry Shortcake Cake

Now comes the exciting part! Let’s assemble our cake:

  1. Place one cake layer on a serving plate. Spread half of the whipped cream over the top.
  2. Generously layer the sliced strawberries on top of the whipped cream.
  3. Add the second cake layer on top and repeat the process with the remaining whipped cream and strawberries.
  4. For added flair, you can decorate the top with whole strawberries or a sprinkle of powdered sugar.

Pro Tips for the Perfect Strawberry Shortcake Cake

To ensure your cake turns out perfectly, here are some expert insights:

  • Use Fresh Ingredients: Always opt for fresh, ripe strawberries for the best flavor. Frozen strawberries can work in a pinch but may alter the texture.
  • Chill Your Mixing Bowl: For extra fluffy whipped cream, chill your mixing bowl and beaters before whipping.
  • Don’t Overmix: When combining the batter, mix just until combined to keep your cake tender.
  • Layer Wisely: For a more stable cake, allow the layers to cool completely before assembling.
  • Experiment with Flavors: Add a splash of almond extract or a hint of lemon zest to the batter for a unique twist.
  • Stabilize Your Whipped Cream: For a firmer whipped cream, consider adding a tablespoon of cornstarch or gelatin.
  • Slice with Care: Use a serrated knife to cut the cake layers for clean, even slices.
  • Store Properly: If not serving immediately, store the assembled cake in the refrigerator for up to 2 hours to maintain its freshness.

Common Mistakes and Troubleshooting

Even the best bakers can run into issues. Here’s how to troubleshoot common problems:

  • Dry Cake: Ensure not to overbake and check your oven temperature with an oven thermometer.
  • Whipped Cream Too Runny: Make sure your cream is very cold before whipping and don’t skimp on the powdered sugar.
  • Strawberries Release Too Much Juice: If your strawberries are overly ripe, consider reducing the sugar or using them in layers instead of on top.

Delicious Variations to Try

Want to mix it up? Here are a few variations you can explore:

  • Chocolate Strawberry Shortcake: Add cocoa powder to the cake batter for a chocolate twist.
  • Berry Medley: Combine strawberries with raspberries or blueberries for a mixed berry shortcake.
  • Shortcake Trifle: Layer cake pieces, strawberries, and whipped cream in a glass for a stunning dessert presentation.
  • Almond Shortcake: Use almond flour or add almond extract to the batter for a nutty flavor.

Storage and Make-Ahead Instructions

If you want to prepare ahead of time, here’s how to store your cake:

  • Assembled cake can be stored in the refrigerator for up to 2 hours. After that, it’s best to store the cake layers and strawberries separately.
  • Store cake layers in an airtight container at room temperature for up to 2 days, or refrigerate for up to a week.
  • Strawberries can be prepared a few hours ahead and stored in the fridge until you’re ready to assemble.

FAQ: Your Strawberry Shortcake Questions Answered

  • Can I use frozen strawberries? Yes, but fresh strawberries will give the best flavor and texture.
  • How do I prevent my cake from sinking? Ensure you’re using the correct amount of baking powder and not overmixing the batter.
  • Can I make this cake gluten-free? Yes, substitute with a 1:1 gluten-free flour blend.
  • How long does the whipped cream last? Whipped cream is best used immediately but can be stored in the fridge for a day.
  • What can I use instead of milk? Almond milk or coconut milk can be great dairy-free alternatives.
  • How do I know when my cake is done baking? A toothpick inserted into the center should come out clean or with a few crumbs.
  • Can I frost the cake with something other than whipped cream? Absolutely! Cream cheese frosting or a light buttercream can also work beautifully.
  • How do I make the cake more flavorful? Consider adding lemon zest or a splash of vanilla extract for extra depth.

Nutritional Tips and Dietary Adaptations

This Strawberry Shortcake Cake can be adapted for various dietary needs:

  • Use low-fat milk and reduced-sugar options for a lighter version.
  • For a vegan option, substitute eggs with flaxseed meal and use plant-based butter and milk.
  • For a nut-free version, ensure all your ingredients are free from cross-contamination.

Equipment Recommendations

Here’s a handy list of tools that will make your baking process smoother:

  • Mixing Bowls: A set of mixing bowls in various sizes will help with your prep.
  • Electric Mixer: A handheld or stand mixer is essential for whipping the cream and mixing the batter.
  • Cake Pans: Invest in good quality, non-stick cake pans for even baking.
  • Offset Spatula: Perfect for spreading whipped cream smoothly on your layers.
  • Cooling Rack: Allows your cakes to cool evenly and prevents sogginess.

Serving Suggestions

When it’s time to serve, consider these ideas:

  • Garnish the Plate: Drizzle with a homemade strawberry sauce or a balsamic reduction for added flavor and presentation.
  • Pair with Ice Cream: A scoop of vanilla or strawberry ice cream can elevate your dessert experience.
  • Fresh Mint Leaves: Add a sprig of mint for a pop of color and freshness on each slice.

Conclusion

With this guide, you’re well-equipped to create a Strawberry Shortcake Cake that dazzles both in flavor and looks. Remember, cooking is about enjoying the process as much as the outcome. So don’t stress if things don’t go perfectly — embrace the journey! Now go ahead and make that cake; your sweet reward awaits!

Unforgettable Strawberry Shortcake Cake in 5 Simple Steps

Prep Time 20 minutes
Cook Time 30 minutes
Total Time 50 minutes
Servings 8 pieces
Calories 450
A delightful layered strawberry shortcake cake perfect for any celebration, combining fluffy cake, fresh strawberries, and whipped cream.

Ingredients

Dry ingredients

  • 2 cups all-purpose flour
  • 1 cup granulated sugar
  • 1 tbsp baking powder
  • 1/2 tsp salt

Wet ingredients

  • 1/2 cup unsalted butter, softened
  • 3/4 cup milk
  • 2 large eggs eggs
  • 1 tsp vanilla extract

Fruits and toppings

  • 2 cups fresh strawberries, sliced
  • 1 cup heavy whipping cream
  • 2 tbsp powdered sugar

Instructions 

  • Preheat oven to 350°F (175°C). Grease and flour two 8-inch pans.
  • Mix dry ingredients, then add butter, milk, eggs, and vanilla. Beat until smooth.
  • Divide batter into pans and bake for 25-30 minutes. Cool completely.
  • Whip heavy cream with powdered sugar until stiff peaks form.
  • Assemble cake: layer with whipped cream and strawberries, then top with remaining cream and strawberries.

Notes

For best results, serve immediately or refrigerate for up to 2 hours.
Calories: 450kcal
Cost: $15
Course: Dessert
Cuisine: American
Keyword: cake, strawberry

Welcome to the Comfort of One-Pan Cooking!

Hey there, fellow food lovers! Today, we’re diving into an exciting and delicious journey with my favorite recipe: Sheet Pan Roasted Fall Veggies with Tahini Sauce. This dish is not just a feast for the eyes; it’s a celebration of the cozy flavors of autumn, packed into a simple one-pan meal. Perfect for busy weeknights or a relaxed weekend dinner, it’s time to embrace the joy of cooking without the fuss!

Why You’ll Love This Recipe

Let’s get real — cooking should be enjoyable, not a chore! Here’s why this recipe is a keeper:

  • Time-Saving Delight: With everything roasted on a single sheet pan, cleanup is a breeze, giving you more time to relax.
  • Flavor Explosion: The combination of seasonal veggies, enhanced by a creamy tahini sauce, creates a mouthwatering experience.
  • Customizable Goodness: You can easily swap out veggies or proteins to suit your family’s tastes and dietary needs.
  • Healthful & Wholesome: Packed with nutrients and bursting with flavor, this dish is a guilt-free indulgence.
  • Kid-Friendly Fun: The sweet and spicy flavors make it a hit with kids and adults alike — who doesn’t love a little sweetness in their dinner?

Ingredient Breakdown

Here’s what you’ll need to create this delicious sheet pan wonder:

  • 2-3 sweet potatoes: Cubed (you can peel them or leave the skin on for extra fiber).
  • 1 lb of brussels sprouts: Sliced in half for that perfect roast.
  • 2 bell peppers: Sliced into strips, adding color and crunch.
  • 1/3 of a red onion: Thinly sliced, for a hint of sweetness.
  • 3 tbsp olive or avocado oil: To coat your veggies for roasting.
  • 1/2 tsp garlic powder: For that subtle garlicky flavor.
  • 1 tsp Italian seasonings: A mix of oregano, basil, and thyme for an aromatic touch.
  • Salt and pepper: To taste, enhancing all those fantastic flavors.
  • Tahini sauce ingredients:
    • 1/3 cup + 3 tbsp tahini: The star of the show!
    • 1/3 cup water: Adjust for sauce consistency.
    • 2 tbsp olive oil: Adds richness.
    • 2 tbsp apple cider vinegar: For a tangy kick.
    • 4 tsp of maple syrup: Balances the flavors with sweetness.
    • 2 cloves of garlic: Peeled, for a fresh taste.
    • Sriracha: Optional, depending on how spicy you like it!

Pro Tips for Perfect Roasted Veggies

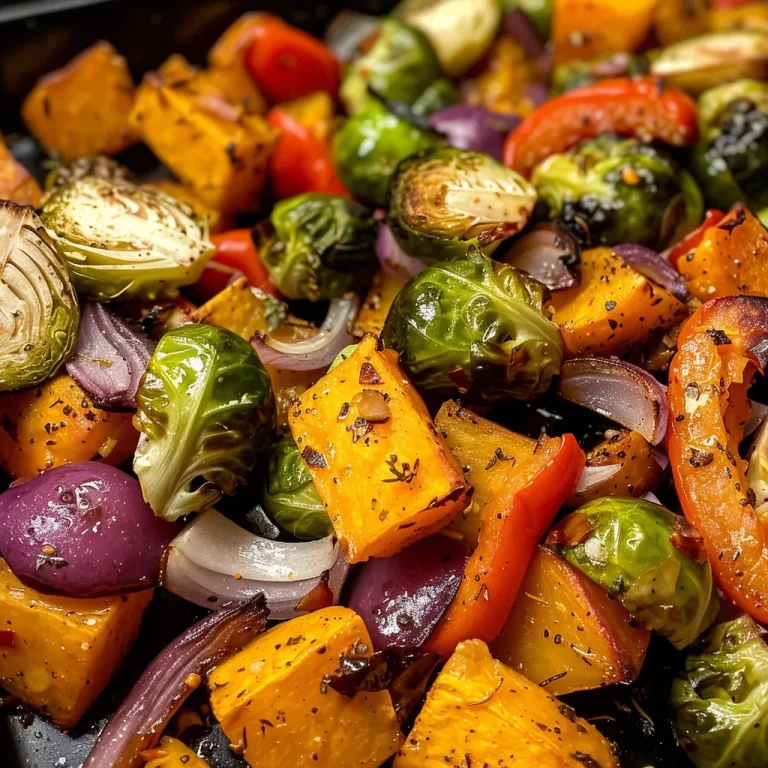
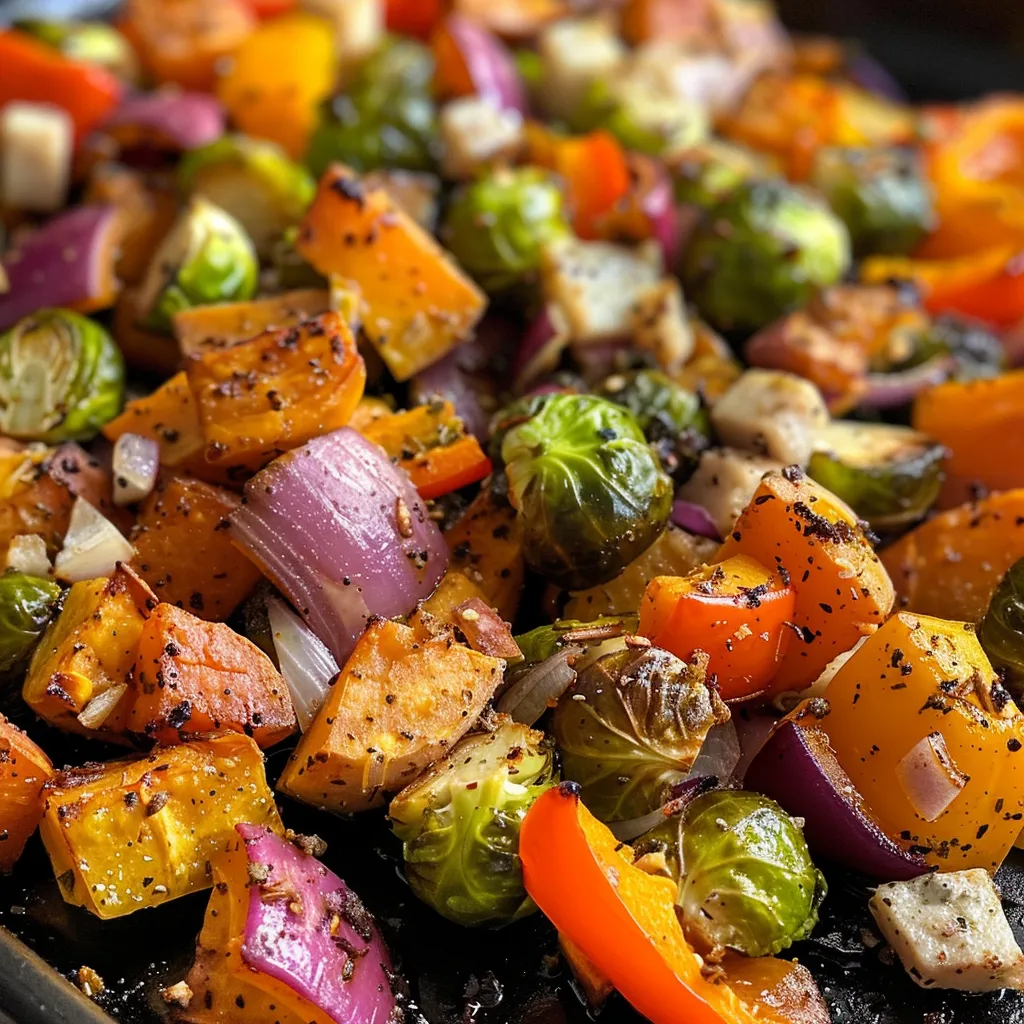
Vibrant fall vegetables including cubed sweet potatoes and sliced brussels sprouts topped with creamy tahini.

Let’s ensure your dish is a masterpiece with these expert insights:

  • Even Cuts: Ensure veggies are cut to similar sizes for even cooking. Aim for about 1-inch pieces.
  • Don’t Crowd the Pan: Give your veggies space to roast rather than steam. This helps them caramelize beautifully!
  • Varied Textures: Mix hard veggies (like sweet potatoes) with softer ones (like bell peppers) for a delightful contrast.
  • Season Generously: Don’t skimp on the oil and seasonings; they’re key to enhancing flavor!
  • Use Parchment Paper: Line your baking sheet with parchment for easy cleanup and to prevent sticking.
  • Halfway Stir: Stirring your veggies halfway through roasting ensures even cooking.
  • Adjust the Tahini Sauce: If it’s too thick, add a splash of water to reach your desired consistency.
  • Make It Ahead: Prep your veggies and sauce the night before to save time on busy days!

Avoiding Common Mistakes

Even the best of us make mistakes in the kitchen! Here’s how to sidestep some common pitfalls:

  • Overcooked Veggies: Keep an eye on your oven — overcooking can turn crisp veggies into mush. Aim for that perfect tender-crisp bite.
  • Unbalanced Flavors: Taste your tahini sauce before drizzling. Adjust sweetness or spice as needed to match your palate.
  • Skipping the Sauce: Don’t skip the tahini sauce! It’s what brings this dish together. Plus, it’s super easy to whip up!

Variations to Try

Feeling adventurous? Here are some fun variations to keep things exciting:

  • Protein Boost: Add chickpeas or tofu to the mix for extra protein.
  • Different Veggies: Swap in seasonal favorites like cauliflower, carrots, or beets for variety.
  • Herb Infusion: Add fresh herbs like rosemary or thyme before serving for an aromatic lift.
  • Sweet & Spicy Twist: Mix in some diced jalapeños for a spicy kick or add dried cranberries for a sweet touch!

Storage and Make-Ahead Instructions

Need to plan ahead? Here’s how to store and reheat your delicious creation:

  • Refrigerate: Store leftover roasted veggies in an airtight container in the fridge for up to 4 days.
  • Freezing: For longer storage, freeze roasted veggies in a single layer before transferring to a freezer bag. They’ll last up to 3 months.
  • Reheating: Reheat in the oven at 350°F until warmed through for best results.

Comprehensive FAQ

Got questions? I’ve got answers! Here are some frequently asked questions about this recipe:

  • Can I use frozen vegetables? Yes! Just adjust the roasting time as frozen veggies may need less time.
  • What can I substitute for tahini? Sunflower seed butter or Greek yogurt can work in a pinch if you’re out of tahini.
  • Is this recipe vegan? Absolutely! It’s entirely plant-based and packed with flavor.
  • How do I make this gluten-free? All ingredients listed are gluten-free, making it a safe choice for those with gluten intolerance.
  • Can I add nuts? Yes! Sprinkle some toasted almonds or walnuts for added crunch.
  • How spicy is the tahini sauce? It’s customizable! Adjust the sriracha to match your heat preference.
  • What should I serve this with? Pair it with grilled chicken, quinoa, or a fresh salad for a complete meal.
  • How can I make it more filling? Serve over a bed of brown rice or with a side of whole-grain bread for extra sustenance.

Nutrition Tips and Dietary Adaptations

This dish is not just delicious; it’s nutritious too! Here are some tips to maximize the health benefits:

  • Fiber-Rich: The variety of veggies provides a great source of dietary fiber, promoting digestive health.
  • Healthy Fats: Olive oil and tahini deliver good fats that are beneficial for heart health.
  • Vitamins Galore: Each veggie contributes essential vitamins and minerals, supporting overall health.
  • Dairy-Free Option: This recipe is naturally dairy-free, making it suitable for lactose-intolerant individuals.

Equipment Recommendations

Here’s what you’ll need to whip up this fabulous dish:

  • Large Baking Sheet: A sturdy, non-stick sheet will help achieve that perfect roast.
  • Sharp Knife: For chopping veggies with ease.
  • Mixing Bowl: To toss your veggies with oil and seasonings.
  • Blender or Food Processor: Essential for whipping up that creamy tahini sauce in no time!

Serving Suggestions

Once your dish is ready, here’s how to serve it up:

  • Drizzle Generously: Don’t hold back on the tahini sauce — it’s the finishing touch that elevates this dish!
  • Add Protein: Serve alongside your choice of grilled chicken, fish, or a hearty grain like farro or quinoa.
  • Garnish: Top with fresh herbs like parsley or cilantro for a pop of color and flavor.
  • Enjoy with Friends: This dish is perfect for sharing, so gather around the table and dig in!

Conclusion

And there you have it! A delightful and comforting recipe for Roasted Fall Veggies with Tahini Sauce that will warm your heart and fill your belly. Cooking doesn’t have to be complicated; with a little love and some simple ingredients, you can create magic in your kitchen. So roll up your sleeves, embrace the chaos, and remember: delicious food is always within reach, even on the busiest of days. Happy cooking!

Sheet Pan Roasted Fall Veggies With Tahini Sauce

Prep Time 10 minutes
Cook Time 35 minutes
Total Time 45 minutes
Servings 4 servings
Calories 250
A delicious and healthy roasted vegetable dish topped with creamy tahini sauce, perfect for a cozy fall meal.

Ingredients

Vegetables

  • 2-3 pieces sweet potatoes, cubed (option to peel)
  • 1 lb brussels sprouts, sliced in half
  • 2 pieces bell peppers, sliced into strips
  • 1/3 cup red onion, thinly sliced
  • 3 tbsp olive or avocado oil
  • 1/2 tsp garlic powder
  • 1 tsp Italian seasonings
  • to taste Salt and pepper
  • 1/3 cup plus 3 tbsp tahini
  • 1/3 cup water, plus more as needed
  • 2 tbsp olive oil
  • 2 tbsp apple cider vinegar
  • 4 tsp maple syrup
  • 2 cloves garlic, peeled
  • to taste Salt and pepper
  • to taste Sriracha (depending how spicy you like it)

Instructions 

  • Preheat oven to 425°F (220°C). Line a baking sheet with parchment paper.
  • Combine vegetables with oil and seasonings; spread evenly on the sheet.
  • Roast for 30-40 minutes, stirring halfway through.
  • Blend tahini, water, vinegar, maple syrup, garlic, and sriracha until smooth, adding water as needed.
  • Drizzle sauce over roasted veggies and serve. Store leftovers in an airtight container for up to 10 days.

Notes

Feel free to add protein like chickpeas or tofu for extra nutrition.
Calories: 250kcal
Cost: $15
Course: Main Course
Cuisine: American
Keyword: Vegetables

Discover the Magic of Red Velvet Wreath Cake

Welcome to the world of vibrant flavors and festive cheer! If you’re looking for the perfect centerpiece for your holiday gatherings, look no further than this stunning Red Velvet Wreath Cake. With its rich color and delicious cream cheese frosting, this cake is not just a treat for the taste buds but also a feast for the eyes. Whether you’re a seasoned baker or a kitchen novice, I promise you that this cake is both easy to make and utterly delightful to enjoy. Let’s dive into why this recipe is a must-try!

Why You’ll Love This Recipe

This Red Velvet Wreath Cake isn’t just a dessert; it’s an experience! Here are five reasons why you’ll adore making (and eating) this cake:

  • Visually Stunning: The deep red color and wreath shape make for a show-stopping dessert that’s perfect for any festive occasion.
  • Rich Flavor: With a combination of cocoa and buttermilk, this cake boasts a rich, moist texture with just the right amount of sweetness.
  • Easy to Decorate: The cream cheese frosting is not only delicious but also easy to pipe, making it simple to create a beautifully decorated cake.
  • Versatile for Occasions: This cake is perfect for holidays, birthdays, or any special occasion where you want to impress your guests.
  • Make-Ahead Friendly: You can prepare the cake in advance, allowing you to enjoy more time with your loved ones during the celebration!

Ingredient Breakdown with Substitutions

Before we get our hands dirty, let’s gather our ingredients. Here’s what you’ll need for the Red Velvet Wreath Cake, along with some handy substitutions:

  • All-Purpose Flour: Essential for structure. You can substitute with cake flour for a lighter texture.
  • Unsweetened Cocoa Powder: For a touch of chocolate flavor. Dark cocoa can enhance the richness.
  • Baking Soda: The leavening agent that helps the cake rise. Ensure it’s fresh for best results.
  • Granulated Sugar: Sweetness is key! You can use coconut sugar for a less processed option.
  • Vegetable Oil: Keeps the cake moist. You can switch to melted coconut oil if desired.
  • Buttermilk: Adds moisture and tang. You can make a substitute with regular milk and vinegar.
  • Red Food Coloring: For that signature color. You can reduce the amount for a subtler hue.
  • Eggs: For binding. A flaxseed meal mixture can be used for a vegan option.
  • Cream Cheese: Essential for the frosting. You can use dairy-free cream cheese for a vegan alternative.
  • Fresh Cranberries and Rosemary: Perfect for decoration. Feel free to use any seasonal fruits or edible flowers!

Step-by-Step Instructions

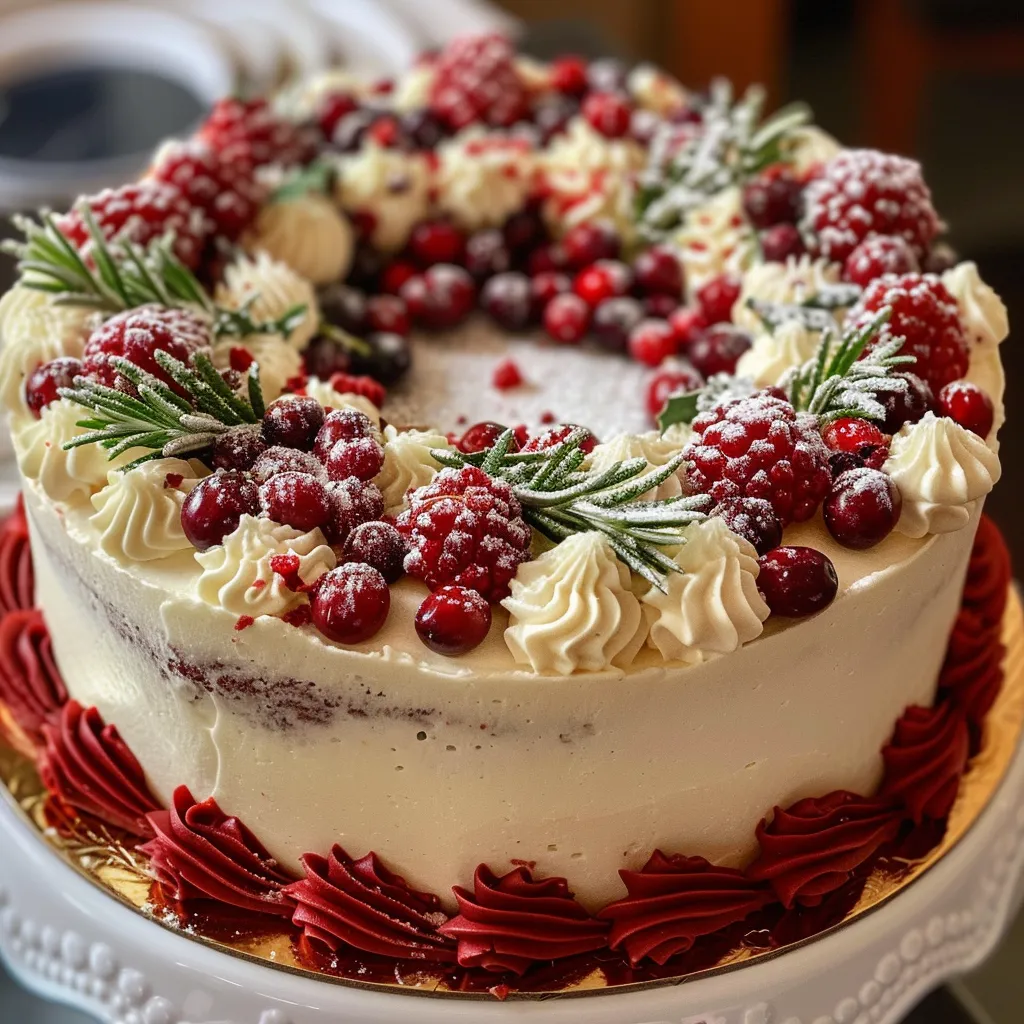
Juicy Red Velvet Wreath Cake adorned with cream cheese frosting and garnished with fresh cranberries and rosemary.

Now that we have our ingredients, let’s get baking! Follow these simple steps to create your delicious Red Velvet Wreath Cake:

  1. Preheat the oven to 350°F (175°C) and grease and flour a bundt pan.
  2. Sift together flour, cocoa powder, baking soda, and a pinch of salt in a medium bowl.
  3. In a large bowl, beat sugar and oil together until light and fluffy. Add eggs one at a time, mixing well after each addition.
  4. Mix in buttermilk, vanilla extract, vinegar, and red food coloring until combined.
  5. Gradually add the dry ingredients to the wet ingredients, stirring until just combined. Avoid overmixing!
  6. Pour the batter into the prepared bundt pan and bake for 45-50 minutes or until a toothpick comes out clean.
  7. Let the cake cool in the pan for 10-15 minutes before inverting it onto a wire rack to cool completely.

Frosting and Decoration

While the cake cools, let’s prepare the frosting!

  1. Beat together softened cream cheese and butter in a bowl until smooth.
  2. Gradually add powdered sugar, mixing until fully incorporated. Add vanilla and a pinch of salt to taste.
  3. Using a piping bag, decorate the cooled cake with the frosting. Get creative—swirls, rosettes, or a simple spread all work beautifully!
  4. Finish off by garnishing with fresh cranberries, rosemary, and a dusting of powdered sugar.

Pro Tips for Perfecting Your Cake

To ensure your Red Velvet Wreath Cake turns out perfectly, keep these expert tips in mind:

  • Room Temperature Ingredients: Make sure eggs and butter are at room temperature for better mixing.
  • Don’t Overmix: Mix until just combined to keep the cake tender.
  • Cool Completely: Always let the cake cool completely before frosting to prevent melting.
  • Testing for Doneness: Use a toothpick—if it comes out clean, the cake is ready!
  • Adjust for Altitude: If you’re at a high altitude, you may need to adjust baking time or ingredient amounts.
  • Flavor Boost: For an extra kick, add a teaspoon of espresso powder to the batter!
  • Storing Uneaten Cake: Keep any leftovers in an airtight container in the refrigerator for up to 5 days.
  • Freeze for Later: You can freeze the cake (before frosting) for up to 3 months—just wrap it well!

Common Mistakes and Troubleshooting

Even the best bakers make mistakes! Here are some common pitfalls and how to avoid them:

  • Dry Cake: This can happen if you overbake. Keep an eye on the timer!
  • Dense Texture: Overmixing can lead to a tough cake. Mix gently.
  • Too Sweet: Adjust sugar levels if you prefer a less sweet cake.
  • Frosting Too Runny: If your cream cheese frosting is too soft, add more powdered sugar to thicken it up.

Variations to Try

Feeling adventurous? Here are some fun variations on the classic Red Velvet Wreath Cake:

  • Chocolate Chip Twist: Fold in chocolate chips into the batter for added sweetness.
  • Nutty Crunch: Add chopped nuts like walnuts or pecans for a delightful crunch.
  • Spiced Version: Incorporate cinnamon and nutmeg for a warm, spiced flavor.
  • Layered Delight: Bake the batter in round pans and layer with frosting in between for a multi-layer cake.

Storage and Make-Ahead Instructions

This cake is perfect for making ahead of time. Here’s how to store it:

  • Room Temperature: Store uneaten cake in an airtight container at room temperature for up to 3 days.
  • Refrigerator: If you live in a warmer climate, store in the refrigerator for up to 5 days.
  • Freezing: Wrap the unfrosted cake tightly in plastic wrap and foil and freeze for up to 3 months.
  • Frosting Storage: Leftover cream cheese frosting can be stored in the fridge for up to a week; just give it a good stir before using.

Frequently Asked Questions

Got questions? Let’s answer some common queries about the Red Velvet Wreath Cake:

  • Can I make this cake vegan? Yes! Use flax eggs and dairy-free cream cheese for the frosting.
  • What can I use instead of buttermilk? Mix regular milk with a tablespoon of vinegar or lemon juice to create a quick substitute.
  • How do I prevent my cake from sticking to the pan? Make sure to properly grease and flour the bundt pan before adding the batter.
  • Can I use a different type of frosting? Absolutely! Cream cheese frosting is classic, but buttercream or ganache also work wonderfully.
  • How long does the cake last? The cake stays delicious for up to 5 days in the fridge.
  • Can I add flavoring to the frosting? Yes! Try adding lemon zest or vanilla extract for an extra flavor boost.
  • What’s the best way to serve this cake? Slice and serve with a dollop of whipped cream or alongside a hot cup of coffee.
  • Can I make mini versions of this cake? Yes! Use a mini bundt pan for adorable single servings.

Nutritional Tips and Dietary Adaptations

Looking to adapt this recipe to suit your dietary needs? Here are some tips:

  • Gluten-Free: Use a gluten-free all-purpose flour blend to make this cake gluten-free.
  • Lower Sugar: Substitute some of the granulated sugar with a natural sweetener like stevia or monk fruit.
  • Lower Fat: Swap out some of the oil for applesauce to reduce fat content.

Recommended Equipment

To make your baking journey easier, here’s a list of essential tools:

  • Bundt Pan: A good quality bundt pan is crucial for the perfect shape.
  • Mixing Bowls: Use a variety of sizes for different ingredients.
  • Electric Mixer: For smooth and creamy frosting, an electric mixer is a lifesaver.
  • Piping Bags: Useful for frosting decoration; you can use a plastic bag if you don’t have one!

Serving Suggestions

To elevate your cake experience, consider serving it alongside:

  • Fresh Berries: Raspberries or strawberries add a refreshing touch.
  • Coffee or Tea: A warm beverage is the perfect complement to this sweet treat.
  • Ice Cream: A scoop of vanilla or chocolate ice cream can turn your cake into a decadent dessert.

In conclusion, the Red Velvet Wreath Cake is not just a dessert; it’s a celebration of flavor, color, and joy. I hope you enjoy making (and sharing) this cake with your loved ones as much as I do. Remember, cooking is about connection and creativity, so don’t stress if things get a little messy—embrace the joy of baking! Happy baking, my friends!

Red Velvet Wreath Cake

Prep Time 30 minutes
Cook Time 50 minutes
Total Time 1 hour 20 minutes
Servings 12 pieces
Calories 450
A stunning red velvet cake decorated with cranberries and rosemary, perfect for festive occasions.

Ingredients

Baking ingredients

  • 0.25 cup unsweetened cocoa powder
  • 1 tsp baking soda
  • 2 large eggs
  • 1 cup buttermilk
  • 1 tsp vanilla extract
  • 1 tsp white vinegar
  • 2.5 cups all-purpose flour
  • 1.5 cups granulated sugar
  • 1 cup vegetable oil
  • 2 tbsp red food coloring

Frosting ingredients

  • 3.5 cups powdered sugar
  • 0.5 cup unsalted butter, softened
  • 8 oz cream cheese, softened
  • Pinch salt

Decorations

  • to taste fresh cranberries (for decoration)
  • to taste rosemary sprigs (for decoration)
  • for dusting powdered sugar (for dusting)

Instructions 

  • Preheat oven to 350°F (175°C). Grease and flour a bundt pan.
  • Sift dry ingredients: flour, cocoa powder, baking soda, and salt.
  • Mix wet ingredients: sugar, oil, eggs, buttermilk, vanilla, vinegar, and red food coloring. Combine with dry ingredients.
  • Pour batter into pan and bake 45-50 minutes. Cool and invert onto wire rack.
  • Beat cream cheese and butter, add powdered sugar, then decorate with frosting, cranberries, rosemary, and dust with powdered sugar.

Notes

Ensure the cake is fully cooled before decorating for best results.
Calories: 450kcal
Cost: $15
Course: Dessert
Cuisine: American
Keyword: red velvet

Welcome to your new favorite way to kickstart your morning! This energizing Greek yogurt breakfast bowl is not just a meal; it’s a celebration of flavors and nutrients that will fuel your day. Imagine creamy Greek yogurt topped with vibrant fresh berries, crunchy granola, and just a hint of sweetness. It’s a simple yet satisfying combination that feels indulgent while keeping you on track with your health goals. Let’s dive into why this recipe is a must-try!

Why You’ll Love This Recipe

This Greek yogurt breakfast bowl isn’t just delicious; it’s packed with benefits that make it a fantastic choice for your morning routine. Here are just a few reasons to love it:

  • Quick and Easy: This bowl comes together in under 5 minutes, perfect for busy mornings.
  • Customizable: Use your favorite fruits, nuts, or granola to make it your own.
  • Nutrient-Packed: Greek yogurt is rich in protein, keeping you full and satisfied until lunch.
  • Rich in Antioxidants: Fresh berries are loaded with vitamins and antioxidants, supporting your immune system.
  • Deliciously Versatile: Enjoy it for breakfast, a snack, or even dessert—whatever suits your mood!

Detailed Ingredient Breakdown

Let’s take a closer look at what makes this Greek yogurt breakfast bowl so special, along with some easy substitutions.

  • Greek Yogurt: Use plain Greek yogurt (full-fat or low-fat) for creaminess and protein. If you’re dairy-free, try coconut yogurt or almond yogurt.
  • Fresh Berries: Any combination of strawberries, blueberries, raspberries, or even blackberries works splendidly. Frozen berries can be used too—just thaw them first!
  • Granola: Store-bought or homemade, granola adds crunch. You can substitute with oats or nuts for a gluten-free option.
  • Honey or Maple Syrup: These are optional for sweetness; feel free to skip them if your berries are sweet enough!
  • Nuts or Seeds: Almonds, walnuts, or chia seeds add healthy fats and protein. Try toasting them for extra flavor!
  • Cinnamon: A dash of cinnamon enhances warmth and flavor. You can also try nutmeg or cardamom for a twist!

How to Assemble Your Greek Yogurt Breakfast Bowl

Now that you know what goes into this delicious bowl, let’s get to the fun part: making it! Here’s how:

  1. Scoop the Greek yogurt into your bowl and smooth it out for a pretty presentation.
  2. Arrange the berries neatly over the top, showcasing their colors.
  3. Sprinkle on the granola for crunch and those chopped nuts/seeds for extra protein.
  4. Drizzle with honey or maple syrup if you’re feeling sweet.
  5. Finish with a bit of cinnamon for that warm, cozy flavor.

Pro Tips for the Perfect Bowl

A vibrant bowl of Greek yogurt garnished with mixed berries, nuts, and a drizzle of honey.

Want to elevate your yogurt bowl to the next level? Here are some expert insights:

  • Quality Ingredients: Always opt for high-quality, fresh ingredients—it makes a world of difference in flavor.
  • Prep Ahead: You can pre-portion your yogurt and toppings in jars for a grab-and-go breakfast option!
  • Mix Textures: Combine crunchy, creamy, and juicy elements for a satisfying experience.
  • Layering: Try layering your ingredients in a glass for a beautiful presentation—perfect for brunch!
  • Experiment: Don’t be afraid to try new toppings or add ins—like cacao nibs or coconut flakes!
  • Seasonal Fruits: Use seasonal fruits for the freshest taste and nutrition—think peaches or figs in the summer!
  • Mindful Eating: Take your time to enjoy each bite; it’s not just about the food but the experience!
  • Balance Flavors: If your yogurt is plain, try to balance it with sweet fruits or a drizzle of honey for a well-rounded taste.

Common Mistakes & Troubleshooting

Even the best of us can make mistakes in the kitchen! Here’s how to avoid common pitfalls:

  • Too Thick: If your yogurt is too thick, add a splash of milk or water to loosen it up.
  • Unripe Berries: Choose ripe and sweet berries for the best flavor; underripe berries can taste sour.
  • Overly Sweet: If you find your bowl too sweet, balance it out with a dash of salt or a squeeze of lemon juice.
  • Granola Soggy: If you’re prepping in advance, keep granola separate until you’re ready to eat to maintain its crunch.
  • Too Much Topping: While toppings are great, too many can overwhelm the yogurt. Stick to a few key ingredients for balance.

Creative Variations to Try

If you’re feeling adventurous, here are some delightful variations to consider:

  • Tropical Paradise Bowl: Swap berries for pineapple and mango, add coconut flakes, and a drizzle of honey.
  • Savory Yogurt Bowl: Top yogurt with diced cucumber, cherry tomatoes, and a sprinkle of za’atar for a Mediterranean twist.
  • Peanut Butter & Jam: Stir in a spoonful of peanut butter and top with sliced bananas and a drizzle of homemade jam.
  • S’mores Delight: Use chocolate yogurt, top with graham cracker crumbs, mini marshmallows, and a drizzle of chocolate syrup.

Storage and Make-Ahead Instructions

Want to prep your breakfast bowls in advance? Here’s how to store them:

  • Refrigeration: Store your assembled yogurt bowl in an airtight container in the fridge for up to 24 hours.
  • Pre-Packed Toppings: Keep granola and nuts in separate containers to maintain their crunch.
  • Fruit Prep: Cut fruits like bananas or apples just before serving to prevent browning.
  • Batch Preparation: Make several bowls at once for easy breakfasts throughout the week!

Frequently Asked Questions (FAQs)

Got questions? We’ve got answers! Here are some common queries:

  • Can I use flavored yogurt? Yes, flavored yogurt will work! Just be mindful of the added sugars.
  • Can I make this vegan? Absolutely! Use plant-based yogurt and maple syrup instead of honey.
  • What if I don’t like Greek yogurt? Regular yogurt works fine, but it has a thinner consistency.
  • How can I make it higher in protein? Add a scoop of protein powder or more nuts/seeds!
  • Can I use frozen fruit? Yes, just thaw it beforehand to enhance the flavor.
  • How do I make it gluten-free? Ensure your granola is gluten-free, or substitute with nuts or oats.
  • How long does it stay fresh? Best eaten within a day, but you can store toppings separately for longer freshness.
  • Can I add superfoods? Definitely! Chia seeds, hemp hearts, and spirulina are great additions.

Nutrition Tips and Dietary Adaptations

This Greek yogurt breakfast bowl is not only delicious but can fit various dietary needs. Here are some tips:

  • Low-Carb: Use unsweetened Greek yogurt and skip the granola. Add nuts for crunch.
  • Dairy-Free: Opt for almond, coconut, or oat yogurt for a creamy base.
  • High-Fiber: Add chia seeds or flaxseeds for an extra fiber boost!
  • Protein-Packed: Mix in a scoop of protein powder or Greek yogurt with added protein.

Equipment Recommendations

While you don’t need fancy gadgets, here are a few tools that can make your yogurt bowl experience even better:

  • Mixing Bowls: A set of mixing bowls in assorted sizes for preparing ingredients.
  • Measuring Cups: For precise ingredient measurements—important for consistent results!
  • Spatula: A rubber spatula is perfect for scooping yogurt smoothly from the container.
  • Storage Containers: Airtight containers for keeping your ingredients fresh during meal prep.

Serving Suggestions

Finally, here are some delightful serving ideas to enjoy your Greek yogurt breakfast bowl:

  • Family Style: Serve a big bowl in the center for everyone to build their own!
  • Brunch Buffet: Perfect for weekends, let guests customize their bowls with different toppings.
  • On-the-Go: Prepare jars for a quick breakfast on busy mornings—just grab and enjoy!
  • With Coffee: Pair your bowl with a cup of your favorite coffee or tea for a complete breakfast.

So there you have it—a comprehensive guide to creating the perfect Greek yogurt breakfast bowl. Whether you’re in a rush or taking your time, this bowl will always bring a smile to your face. Remember, cooking is about connection and creativity, so have fun with it! Enjoy your delicious creation, and here’s to many bright mornings ahead!

Energizing Greek Yogurt Breakfast Bowl

Prep Time 5 minutes
Total Time 5 minutes
Servings 1 bowl
Calories 250
A quick and nutritious breakfast bowl featuring creamy Greek yogurt topped with fresh berries, crunchy granola, nuts, and a hint of cinnamon for a delightful start to your day.

Ingredients

Dairy

  • 1 cup plain Greek yogurt ((full-fat or low-fat))
  • 0.5 cup fresh berries ((strawberries, blueberries, raspberries))
  • 2 tablespoons granola ((store-bought or homemade))
  • 1 teaspoon honey or maple syrup ((optional))
  • 1 tablespoon chopped nuts or seeds ((almonds, chia, walnuts))
  • Dash cinnamon

Instructions 

  • Scoop the Greek yogurt into your bowl and smooth it out.
  • Arrange the berries over the yogurt.
  • Sprinkle granola and chopped nuts/seeds on top.
  • Drizzle with honey or maple syrup if desired.
  • Finish with a dash of cinnamon.

Notes

Feel free to customize the toppings with your favorite fruits and nuts.
Calories: 250kcal
Cost: $8
Course: Breakfast
Cuisine: Greek
Keyword: Yogurt

Kickstart Your Day with Breakfast Egg Muffins!

Are busy mornings making your breakfast routine feel like a chore? Fear not! With these Breakfast Egg Muffins, you can whip up a nutritious, satisfying meal in no time. Not only are they perfect for meal prepping, but they’re also loaded with protein and veggies—ideal for anyone looking to fuel their day right. Whether you’re a busy parent, a student on the go, or just someone who loves a hearty breakfast, these muffins are your ticket to quick and delicious mornings!

Let’s dive into why you’ll love this recipe, what you need, and how to make these delightful egg muffins in your own kitchen.

Why You’ll Love This Recipe

  • Quick and easy: Ready in 30 minutes, making them perfect for busy mornings.
  • Meal prep friendly: Make a batch ahead of time and store them in the fridge for quick grab-and-go breakfasts.
  • Customizable: Use whatever veggies or proteins you have on hand, allowing you to create a unique muffin every time.
  • Healthy and filling: Packed with protein and fiber, these muffins keep you satisfied until lunchtime.
  • Kid-approved: Kids love them! Get your little ones involved in choosing ingredients for a fun kitchen experience.

Ingredients Breakdown

Gathering your ingredients is the first step toward breakfast success! Here’s what you’ll need:

  • 10–12 large eggs: The base of our muffins. You can substitute with egg whites or a plant-based egg alternative for a lighter version.
  • 1/4 cup milk or dairy-free milk: Optional, but it adds creaminess. Almond, soy, or oat milk work great here.
  • Salt and black pepper: Essential for flavoring. Adjust to your taste!
  • 1 cup chopped vegetables: Think bell peppers, spinach, tomatoes, mushrooms, or onions. Use what you have in the fridge.
  • 1/2 cup cooked meat: Optional, but it adds protein. Try bacon, sausage, or diced chicken.
  • 1/2 cup shredded cheese: Optional, for a cheesy goodness. Use cheddar, mozzarella, or any cheese you prefer.
  • Olive oil or nonstick spray: For greasing the muffin tin. A must to prevent sticking!

Step-by-Step Directions

Side view of freshly baked egg muffins filled with chopped veggies and meat.

Now that you have your ingredients ready, let’s get cooking!

  1. Preheat the oven to 375°F (190°C) and grease a 12-cup muffin tin well with nonstick spray or olive oil.
  2. In a large bowl, whisk together the eggs, milk (if using), salt, and pepper until fully combined.
  3. Divide the chopped vegetables, cooked meat, and cheese evenly among the muffin cups, filling them halfway.
  4. Pour the egg mixture into each muffin cup, filling nearly to the top but not overflowing.
  5. Bake for 18–22 minutes or until the muffins are puffed and the centers are set.
  6. Let cool for a few minutes in the pan, then remove them and serve or store for later.

Pro Tips for Perfect Egg Muffins

  • Adjust cooking time: Ovens vary, so keep an eye on your muffins. They should be firm to the touch when done.
  • Don’t overfill: Avoid overflow by filling muffin cups only to about 3/4 full.
  • Cool completely: If storing for later, let muffins cool completely before placing them in containers.
  • Use silicone muffin liners: They make removal easier and are reusable for an eco-friendly option!
  • Experiment with spices: Add herbs like basil, oregano, or even a pinch of cayenne for extra flavor.
  • Mix and match: Feel free to use different combinations of veggies and proteins based on what you have!
  • Try different cheeses: From feta to pepper jack, cheese can change the flavor profile significantly.
  • Make mini muffins: For bite-sized snacks, reduce cooking time and use a mini muffin tin.

Common Mistakes and Troubleshooting

Even the best of us make mistakes in the kitchen! Here are some common pitfalls and how to avoid them:

  • Sticking muffins: Always grease the muffin tin well or use liners to prevent sticking.
  • Overcooked muffins: Watch the baking time closely. If they’re too dry, reduce the time next batch.
  • Underseasoned: Don’t be shy with salt and pepper! Taste the egg mixture before baking.
  • Filling too high: Overflow can happen. Stick to the filling guideline to keep clean-up easy.

Delicious Variations to Try

Want to mix things up? Here are some delightful variations to keep your breakfast exciting:

  • Spinach and Feta: Add sautéed spinach and crumbled feta for a Mediterranean twist.
  • Sausage and Cheddar: Incorporate cooked sausage and sharp cheddar for a hearty flavor.
  • Caprese Style: Use diced tomatoes, basil, and mozzarella for a fresh, Italian-inspired muffin.
  • Southwestern Kick: Add black beans, corn, and pepper jack cheese for a spicy, southwest flavor.

Storage and Make-Ahead Instructions

These muffins are perfect for meal prep! Here’s how to store them:

  • Refrigerate: Store in an airtight container in the fridge for up to 5 days.
  • Freeze: For longer storage, freeze muffins in a single layer, then transfer to a freezer-safe bag. They can last up to 3 months!
  • Reheat: Microwave for 30-60 seconds, or until heated through. You can also reheat in a toaster oven.

Frequently Asked Questions

If you still have questions, we’ve got answers! Here are some common queries:

  • Can I make these ahead of time? Absolutely! They’re great for meal prep.
  • Do I need to cook the vegetables first? Not necessarily, but cooking firmer veggies like onions can enhance their flavor.
  • Can I use just egg whites? Yes! Just substitute the whole eggs for egg whites for a lighter option.
  • How do I keep them from sticking? Use plenty of grease or silicone muffin liners to avoid sticking.
  • Can I eat them cold? Yes! They taste great cold and are perfect for on-the-go munching.
  • What if I don’t have a muffin tin? You can use any oven-safe dish; just adjust the cooking time as needed.
  • Can I customize the ingredients? Definitely! Feel free to use any veggies, meats, or cheeses you prefer.
  • Are they suitable for freezing? Yes! They freeze well and can be reheated easily.

Nutritional Benefits and Dietary Adaptations

Breakfast Egg Muffins are versatile and can cater to various dietary needs:

  • High in protein: Eggs provide a great source of protein, ideal for muscle maintenance.
  • Low-carb option: Skip the cheese and use veggies for a low-carb breakfast.
  • Vegetarian-friendly: Just omit the meat and load up on your favorite veggies.
  • Gluten-free: Naturally gluten-free, making them suitable for those with gluten sensitivities.

Equipment Recommendations

To make your egg muffins effortlessly, here’s what you’ll need:

  • Muffin tin: A standard 12-cup muffin tin works best. Consider silicone for easy removal!
  • Mixing bowl: A large bowl for whisking the egg mixture thoroughly.
  • Whisk: Essential for mixing the eggs and ensuring a fluffy texture.
  • Measuring cups and spoons: For precise ingredient measurements.

Serving Suggestions

These muffins are not just for breakfast! Here are some serving ideas:

  • With a side salad: Pair with a fresh salad for a light lunch or brunch option.
  • As a snack: Perfect for an afternoon snack—just grab and go!
  • Top with salsa: Add some fresh salsa or avocado for a flavor boost.
  • With toast: Serve alongside whole-grain toast for a heartier breakfast.

With these Breakfast Egg Muffins, you’ll never have to sacrifice taste for convenience again. They’re a breeze to prepare, customizable to your family’s preferences, and perfect for those hectic mornings. So grab your ingredients, preheat that oven, and get ready to enjoy a breakfast that not only nourishes but also delights!

Breakfast Egg Muffins

Prep Time 10 minutes
Cook Time 20 minutes
Total Time 30 minutes
Servings 12 muffins
Calories 150
These easy breakfast egg muffins are perfect for a quick, nutritious start to your day. Customize with your favorite vegetables and meats for a delicious, portable meal.

Ingredients

Eggs

  • 10–12 large eggs
  • 1/4 cup milk or dairy-free milk (optional)
  • to taste salt and black pepper
  • 1 cup chopped vegetables (bell peppers, spinach, tomatoes, mushrooms, onions)
  • 1/2 cup cooked meat
  • 1/2 cup shredded cheese (optional)
  • Olive oil or nonstick spray (for greasing)

Instructions 

  • Preheat oven to 375°F (190°C) and grease a 12-cup muffin tin.
  • Whisk eggs, milk, salt, and pepper in a bowl.
  • Divide vegetables, meat, and cheese into muffin cups, then pour egg mixture over.
  • Bake for 18–22 minutes until puffed and set.
  • Cool briefly, then remove and serve or store.

Notes

You can customize these muffins with your favorite ingredients for variety.
Calories: 150kcal
Cost: $15
Course: Breakfast
Keyword: Eggs