Author

michael

Browsing

Unlock the Magic of Rice Paper Wraps

Welcome to the world of rice paper wraps, where vibrant flavors and fresh ingredients come together to create delightful bites that are as enjoyable to make as they are to eat! If you’re looking for a quick, healthy meal that’s easy to prepare and a hit with family and friends, you’ve come to the right place. In this article, we’ll explore everything from the basics of making rice paper wraps to exciting variations that will keep your taste buds dancing. Let’s get rolling!

Why You’ll Love This Recipe

  • Quick and Easy: These wraps can be made in under 30 minutes, making them a perfect choice for busy weeknights.
  • Customizable: Fill them with your favorite proteins and vegetables, making them suitable for every dietary preference!
  • Fresh and Healthy: Packed with fresh veggies and herbs, these wraps are a light yet satisfying meal option.
  • Fun to Make: Get the whole family involved in the rolling process; it’s a great way to bond while cooking!
  • Great for Meal Prep: Prepare them ahead of time for easy lunches or snacks throughout the week.

Ingredients for Rice Paper Wraps

Here’s what you’ll need to create your delicious wraps. Feel free to mix and match ingredients based on your preferences:

  • 8 rice paper wrappers: These are the foundation of your wraps. Look for them in the international aisle of your grocery store.
  • 1 cup bell peppers, thinly sliced: Add color and crunch! You can use any variety you like.
  • 1 cup carrots, julienned: Sweet and crunchy, they add a lovely texture.
  • 1 cup cucumber, thinly sliced: Refreshing and hydrating; they balance out the other flavors.
  • 1 cup cooked shrimp or tofu (diced): A source of protein; shrimp adds a sweet touch, while tofu is perfect for a plant-based option.
  • 1/4 cup fresh cilantro leaves: Bright and flavorful, they elevate the dish.
  • 1/4 cup fresh mint leaves: These add a refreshing twist that complements the other ingredients.
  • 1/4 cup peanut sauce or hoisin sauce for dipping: Perfect for drizzling or dipping, adding that delightful umami flavor.

How to Make Rice Paper Wraps
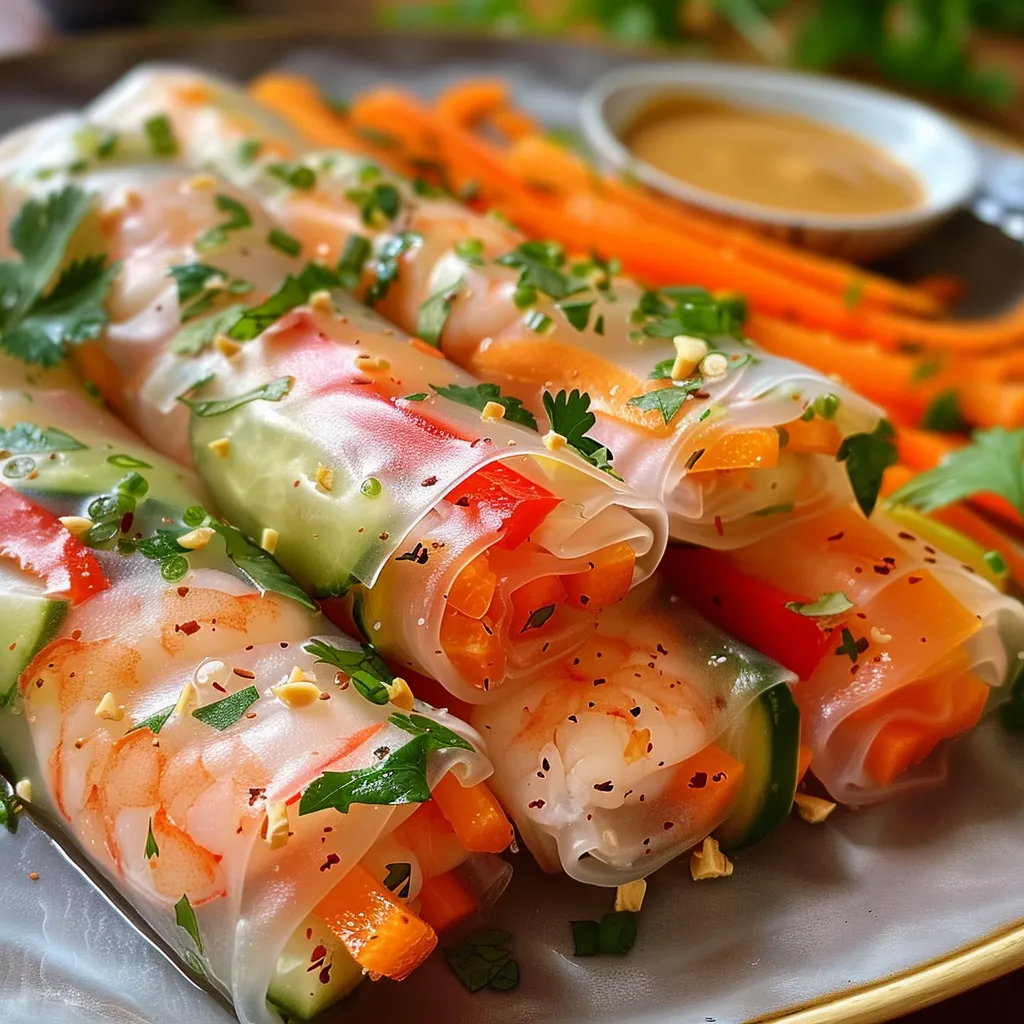
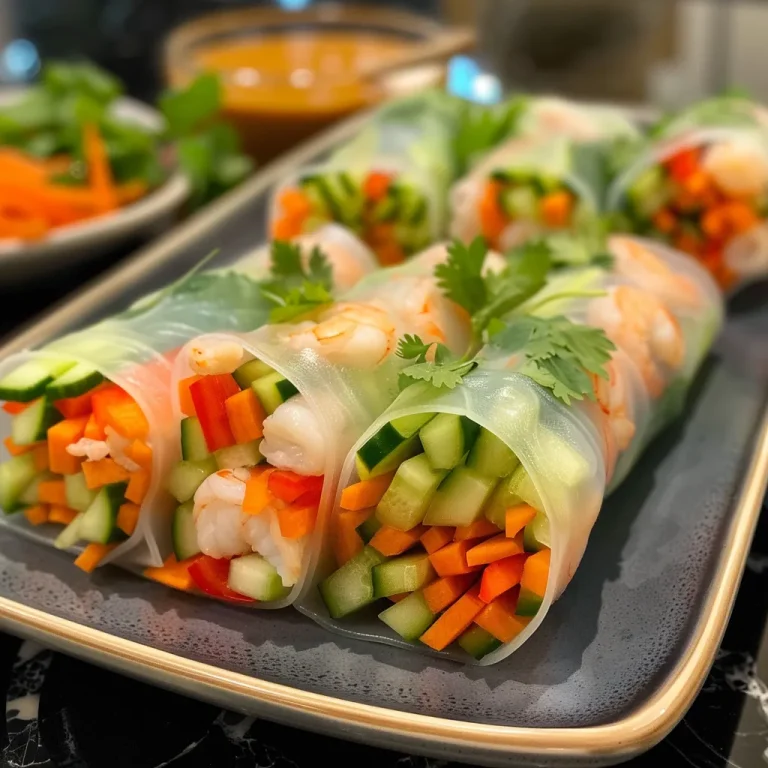
Side view of rice paper wraps showcasing vibrant ingredients like bell peppers and cucumbers.

Making rice paper wraps is a breeze! Just follow these simple steps:

  1. Gather all ingredients on a clean surface.
  2. Soak one rice paper wrapper in a bowl of warm water for 10-15 seconds until soft but not mushy. Lay it on a damp surface.
  3. Place a small amount of vegetables, protein, and herbs on the lower third of the wrapper.
  4. Fold in the sides and roll tightly from the bottom up, making sure to keep the filling secure.
  5. Repeat with remaining wrappers and fillings.
  6. Serve immediately with your choice of dipping sauce.

Perfecting the Cooking Process

To truly master your rice paper wraps, consider these pro tips:

  • Consistency is Key: Make sure your fillings are cut to similar sizes for even rolling and a professional look.
  • Don’t Overstuff: It’s tempting to fill them to the brim, but too much filling can lead to tears in the rice paper.
  • Keep Everything Moist: If your rice paper wraps start to dry out, they become hard to handle. Keep a damp cloth on hand to cover them.
  • Experiment with Dipping Sauces: Try different sauces to find your favorite combination! Soy sauce, sweet chili sauce, or even a homemade sesame dressing can add zing.
  • Use Fresh Ingredients: Fresh herbs and crisp vegetables will elevate the flavor and texture of your wraps.
  • Practice Makes Perfect: Don’t worry if your first few wraps aren’t perfect. It’s all part of the learning experience!

Add Your Touch

Want to make your wraps even more exciting? Here are some tasty variations you can try:

  • Spicy Thai Shrimp: Add a few slices of jalapeño or a drizzle of sriracha for a spicy kick.
  • Veggie Lovers: Skip the protein and load up on various vegetables like avocado, bean sprouts, and radishes.
  • Asian-Inspired: Include cooked vermicelli noodles and sesame oil for a unique twist.
  • Breakfast Wrap: Fill them with scrambled eggs, avocado, and salsa for a fun breakfast idea!

Storing & Reheating Rice Paper Wraps

If you have leftovers (though they’re unlikely!), here’s how to store them:

  • Storing: Keep your wraps in an airtight container in the fridge for up to 2 days. Place parchment paper between layers to prevent sticking.
  • Reheating: These wraps are best enjoyed fresh, but if you need to reheat them, microwave for a few seconds or dip them briefly in warm water to soften.

Common Mistakes and Troubleshooting

Even the best of us make mistakes! Here’s how to troubleshoot common issues:

  • Wraps tearing: This often happens if the rice paper is too dry. Ensure you soak them adequately.
  • Filling falling out: This indicates overstuffing. Use less filling next time and roll tighter.
  • Too soggy: If you’ve soaked the rice paper for too long, it can become too soft. Aim for a balance.

FAQs About Rice Paper Wraps

  • What are rice paper wraps made of? Rice paper wraps are made from rice flour and water, creating a delicate and chewy texture.
  • How do you store rice paper wraps? Keep them in an airtight container in the fridge with parchment paper between layers.
  • Can you freeze rice paper wraps? It’s not recommended, as the texture can change. Best used fresh!
  • What can I substitute for shrimp? Tofu, tempeh, or any favorite protein works wonderfully!
  • Are rice paper wraps gluten-free? Yes, rice paper is typically gluten-free, making it a great option for those with sensitivities.
  • How long do rice paper wraps last? They are best eaten fresh but can last up to 2 days in the fridge.
  • Can I make these wraps ahead of time? Absolutely! Prepare the fillings and wraps, and assemble them shortly before serving.
  • Can I add fruit to my wraps? Yes! Fruits like mango or strawberries can add a sweet contrast to savory fillings.

Nutrition Tips and Dietary Adaptations

Rice paper wraps can be incredibly nutritious. Here are some tips to enhance their health benefits:

  • Add More Veggies: Load up on a variety of colorful vegetables to boost fiber and vitamins.
  • Lean Proteins: Use grilled chicken or fish for a heart-healthy protein option.
  • Healthy Fats: Incorporate avocado or a sprinkle of nuts for added healthy fats.
  • Low Sugar Sauces: Opt for low-sugar dipping sauces to keep it healthy.

Equipment Recommendations

To make the process easier, consider these kitchen tools:

  • Cutting Board: A sturdy board for chopping your ingredients.
  • Sharp Knife: For precise cuts of your veggies and proteins.
  • Bowl: A shallow bowl for soaking the rice paper wraps.
  • Spatula: Handy for transferring the wraps to your serving plate.

Serving Suggestions

Serve your rice paper wraps with a side of your favorite dipping sauce. Here are some fun ideas:

  • Peanut Sauce: A classic that pairs beautifully with the wraps.
  • Sweet Chili Sauce: For a hint of sweetness and spice.
  • Hoisin Sauce: Adds a rich, umami flavor.
  • Yogurt Dip: A creamy option that contrasts nicely with the fresh wraps.

Conclusion

Rice paper wraps are a delightful canvas for creativity in the kitchen. With endless possibilities for fillings and dipping sauces, you can enjoy a fresh and flavorful meal that fits any occasion. Whether you’re meal prepping for the week or hosting a fun dinner party, these wraps are sure to impress. So gather your ingredients, roll up your sleeves, and get ready to enjoy the deliciousness that awaits. Happy wrapping!

Rice Paper Wraps

Prep Time 15 minutes
Total Time 15 minutes
Servings 4 servings
Calories 150
Fresh and healthy rice paper wraps filled with colorful vegetables and protein, perfect for a light meal or appetizer.

Ingredients

Rice Paper Wrappers

  • 8 pieces rice paper wrappers

Vegetables and Protein

  • 1 cup bell peppers, thinly sliced
  • 1 cup carrots, julienned
  • 1 cup cucumber, thinly sliced
  • 1 cup cooked shrimp or tofu (diced)

Herbs

  • 1/4 cup fresh cilantro leaves
  • 1/4 cup fresh mint leaves

Dipping Sauce

  • 1/4 cup peanut sauce or hoisin sauce for dipping

Instructions 

  • Soak a rice paper wrapper in warm water for 10-15 seconds until soft, then lay on a damp surface.
  • Place vegetables, protein, and herbs on the lower third of the wrapper.
  • Fold sides and roll tightly from bottom to top.
  • Repeat with remaining wrappers and fillings.
  • Serve immediately with dipping sauce.
Notes

Use fresh herbs for best flavor and serve immediately for optimal texture.
Calories: 150kcal
Cost: $12
Course: Appetizer
Cuisine: Vietnamese
Keyword: Rice Paper, Shrimp, Vegetables

Experience the Simplicity of Steamed Salmon with a Shanghai Twist

Welcome to a delightful culinary adventure! If you’re looking for a quick, healthy, and delicious meal, you’ve landed in the right spot. This steamed salmon recipe, inspired by the vibrant flavors of Shanghai, is not just easy to prepare but also rich in taste. With just a handful of ingredients, you can create a dish that feels fancy yet is perfect for a busy weeknight. So grab your aprons, and let’s dive into the world of flavors that await!

Why You’ll Love This Recipe

  • Quick and Easy: With minimal prep time, this dish can be on your table in under 30 minutes, making it perfect for busy nights.
  • Healthy and Nutritious: Salmon is packed with omega-3 fatty acids, making this meal not only delicious but also great for your heart health.
  • Flavorful Sauce: The combination of soy sauce, sesame oil, and rice vinegar creates a rich, umami-packed sauce that elevates the salmon to new heights.
  • Versatile Ingredients: Most ingredients are pantry staples, and you can easily swap or add veggies for a personal touch.
  • Impressive Presentation: The vibrant colors of the dish, combined with the aromatic herbs, make it a feast for the eyes as well as the palate.

Ingredients Breakdown

Here’s what you’ll need to whip up this amazing steamed salmon with a Shanghai twist:

  • 2 salmon fillets: Skin-on or skinless, it’s your choice! Salmon is rich in flavor and has a beautiful texture.
  • 2 tablespoons soy sauce: This gives the dish its savory depth. Feel free to use low-sodium soy sauce if you’re watching your salt intake.
  • 1 tablespoon sesame oil: Adds a nutty flavor that complements the fish perfectly.
  • 1 tablespoon rice vinegar: This adds a touch of acidity, balancing out the flavors.
  • 2 teaspoons sugar: Just a hint of sweetness to round out the dish.
  • 1 tablespoon fresh ginger, julienned: Ginger adds a zing that enhances the overall flavor.
  • 2 green onions, chopped: Fresh herbs bring brightness and a pop of color.
  • 1/2 teaspoon Chinese five-spice powder (optional): For those who love a hint of warmth and complexity.
  • Fresh cilantro (optional): A final touch for flavor and presentation.
  • 1 tablespoon vegetable oil: Drizzle this over the salmon for a lovely sizzle just before serving.

Step-by-Step Instructions

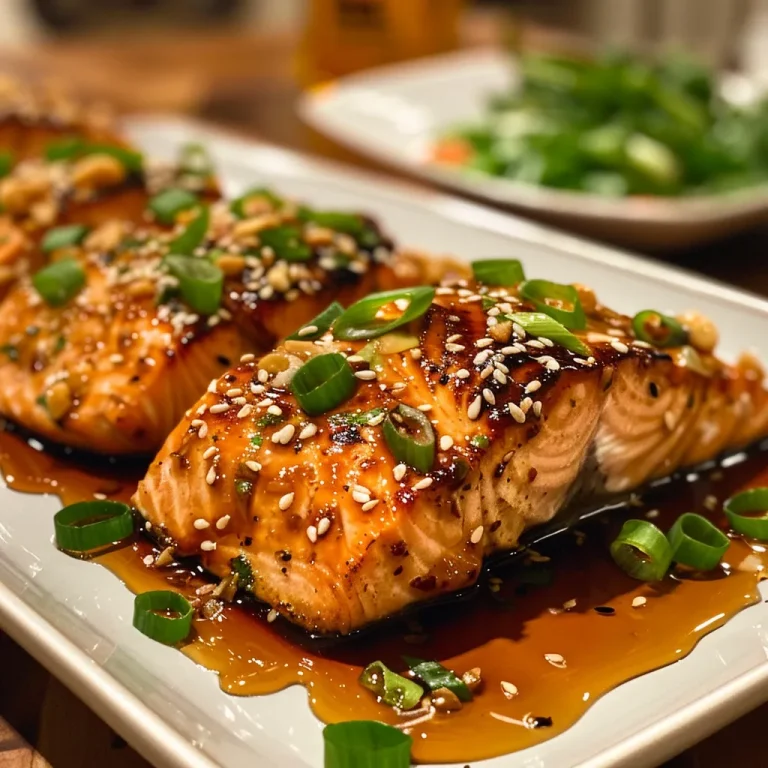
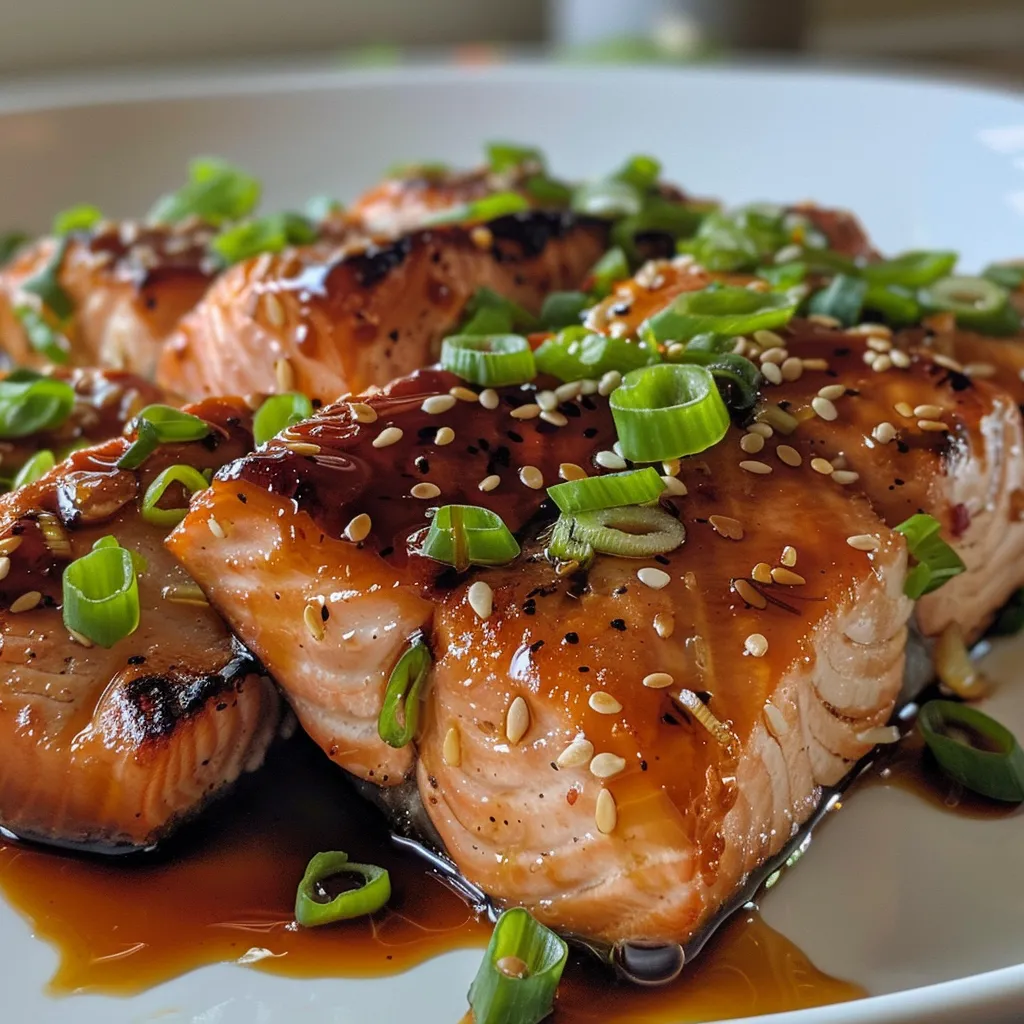
Side view of succulent steamed salmon with a drizzle of soy sauce and sesame oil.

Let’s get cooking! Follow these simple steps to prepare your mouthwatering steamed salmon:

  1. Prep the Salmon: Rinse the salmon fillets under cold water and pat them dry with paper towels. If you prefer, you can remove the skin, but leaving it on helps keep the fish moist during cooking.
  2. Season the Fish: Place the salmon fillets on a heatproof dish suitable for steaming. In a small bowl, mix together the soy sauce, sesame oil, rice vinegar, sugar, and five-spice powder (if using). Pour this mixture evenly over the salmon.
  3. Add Aromatics: Scatter the julienned ginger and chopped green onions over the salmon fillets. Let them marinate for about 10-15 minutes to let the flavors meld.
  4. Steam the Salmon: Set up your steamer or a pot with a steaming rack. Fill the pot with water and bring it to a simmer. Place the dish with the salmon on the rack, cover, and steam for about 8-10 minutes, or until the salmon is opaque and flakes easily with a fork.
  5. Finishing Touches: In a small pan, heat the vegetable oil over medium heat. Once it’s hot, carefully drizzle it over the steamed salmon to create a sizzling effect. This not only adds flavor but also makes the dish visually appealing.
  6. Garnish and Serve: If you’d like, garnish with fresh cilantro before serving. This dish is best enjoyed immediately!

Pro Tips for Perfect Steamed Salmon

  • Check for Doneness: For perfectly cooked salmon, aim for an internal temperature of 120-125°F for medium-rare. If you prefer it well-done, go for 145°F.
  • Don’t Overcrowd: If you’re steaming more than two fillets, ensure they have enough space to cook evenly.
  • Experiment with Aromatics: Feel free to add other herbs and spices, like garlic or lemongrass, for a different flavor profile.
  • Use Fresh Ingredients: Fresh ginger and green onions make a big difference in flavor. Whenever possible, opt for fresh over dried.
  • Steaming Alternatives: If you don’t have a steamer, you can use a colander placed in a pot with a lid or even a microwave, adjusting cooking times accordingly.
  • Leftover Love: If you have leftovers, they can be flaked into salads or wraps for a quick lunch the next day.
  • Marinating Time: Letting the salmon sit in the marinade longer enhances the flavor even more. Just don’t exceed 30 minutes to avoid curing the fish.
  • Oil Temperature: Be careful not to let the vegetable oil smoke before pouring it over the salmon; you want it hot but not burnt.

Common Mistakes and Troubleshooting

Here are some common pitfalls to avoid and solutions to ensure your dish turns out perfectly:

  • Overcooking: Keep an eye on the steaming time to prevent the salmon from becoming dry. If in doubt, remove it sooner rather than later.
  • Too Much Sauce: If your marinade seems too salty, reduce the amount of soy sauce next time or add more water to balance it out.
  • Uneven Cooking: Ensure your steaming setup allows for even heat distribution. Rotate the dish halfway through if necessary.
  • Flavorless Fish: If the salmon lacks flavor, consider increasing the marinating time or adding more aromatics.

Variations to Try

Looking to switch things up? Here are some variations you can try:

  • Asian-Inspired Veggies: Add sliced bell peppers, bok choy, or snap peas to the steaming setup for a complete meal.
  • Chili Garlic Twist: Add minced garlic and a pinch of red pepper flakes to the marinade for a spicy kick.
  • Herbaceous Delight: Experiment with different herbs, such as dill or basil, to complement the salmon.
  • Citrus Infusion: Add slices of lemon or lime on top of the salmon before steaming for a zesty flavor.

Storage and Make-Ahead Instructions

This dish is best enjoyed fresh, but here’s how to store leftovers:

  • Refrigeration: Store leftover steamed salmon in an airtight container in the refrigerator for up to 2 days.
  • Freezing: You can freeze cooked salmon for up to 3 months. Thaw in the refrigerator before reheating.
  • Make-Ahead: You can prep the marinade and season the salmon a day in advance. Just steam it fresh when you’re ready to eat!

Nutrition Tips and Dietary Adaptations

This recipe is inherently healthy, but here are some tips for various dietary needs:

  • Gluten-Free: Use tamari instead of soy sauce to keep it gluten-free.
  • Dairy-Free: This recipe is naturally dairy-free, making it suitable for various diets.
  • Low-Carb Option: Serve the steamed salmon over a bed of sautéed zucchini noodles instead of rice for a low-carb alternative.

Equipment Recommendations

To make your cooking experience smoother, consider these tools:

  • Steamer Basket: A bamboo or metal steamer works wonders for even cooking.
  • Heatproof Dish: Ensure your dish fits in your steamer or pot to avoid any mishaps.
  • Instant Read Thermometer: This helps you check the internal temperature quickly and accurately.

Serving Suggestions

Pair your steamed salmon with these delicious sides for a complete meal:

  • Steamed Rice: Fluffy white rice or brown rice absorbs the flavorful sauce beautifully.
  • Stir-Fried Vegetables: A mix of colorful veggies sautéed in sesame oil complements the dish perfectly.
  • Simple Salad: A light cucumber salad or mixed greens with a tangy vinaigrette balances the richness of the salmon.

Frequently Asked Questions

Got questions? Let’s clear them up!

  • Can I use frozen salmon? Yes, just ensure it’s fully thawed before preparing.
  • What can I substitute for soy sauce? Tamari or coconut aminos are great alternatives.
  • How do I know when the salmon is done? When it flakes easily with a fork and is opaque throughout.
  • Can I steam salmon with skin on? Absolutely! The skin helps keep the fish moist.
  • What’s the best way to reheat leftovers? Gently reheat in the microwave or steam again to avoid drying out.
  • Can I add other proteins? Yes! You can steam shrimp or tofu alongside the salmon for variety.
  • Is five-spice powder necessary? It adds depth but can be omitted if you prefer a simpler flavor.
  • Can I prepare this dish ahead of time? Yes, prepare the salmon and marinade in advance, then steam just before serving.

Cooking is all about exploration, and I hope this recipe inspires you to embrace the flavors of Shanghai in your kitchen. With simple steps and easy ingredients, you’re on your way to creating a meal that’s both comforting and delicious. Enjoy your culinary journey, and remember: delicious food is always within reach!

Steamed Salmon, Shanghai-Style

Prep Time 10 minutes
Cook Time 10 minutes
Total Time 20 minutes
Servings 2 servings
Calories 250
A delicious and healthy Shanghai-style steamed salmon with savory soy and ginger flavors, finished with a sizzling oil drizzle.

Ingredients

Salmon

  • 2 fillets salmon fillets (skin-on or skinless)
  • 2 tablespoons soy sauce
  • 1 tablespoon sesame oil
  • 1 tablespoon rice vinegar
  • 2 teaspoons sugar
  • 1 tablespoon fresh ginger, julienned
  • 2 green onions chopped green onions
  • 1/2 teaspoon Chinese five-spice powder (optional)
  • Fresh cilantro for garnish Fresh cilantro (optional)
  • 1 tablespoon vegetable oil (for drizzling)

Instructions 

  • Rinse and pat dry the salmon fillets. Place on a heatproof dish.
  • Mix soy sauce, sesame oil, rice vinegar, sugar, and five-spice powder. Pour over salmon.
  • Top with ginger and green onions. Let sit for 10-15 minutes.
  • Steam the salmon for 8-10 minutes until opaque and flaky.
  • Heat vegetable oil and pour over the steamed salmon for a sizzling effect. Garnish with cilantro and serve.

Notes

Ensure not to oversteam to keep the salmon tender and moist.
Calories: 250kcal
Cost: $15
Course: Main Course
Cuisine: Shanghai
Keyword: Salmon

Transform Your Meals with a Vibrant Sweet Potato & Avocado Salad

If you’re looking to brighten your day with a dish that’s not only delicious but also packed with nutrients, you’ve come to the right place! This Sweet Potato & Avocado Salad is the perfect combination of flavors and textures that come together effortlessly. With the natural sweetness of roasted sweet potatoes mingling with creamy avocado and the crunch of fresh vegetables, this salad is a delightful treat for your taste buds. Plus, it’s easy to prepare, making it ideal for busy weeknights or as a stunning side for gatherings.

This recipe is all about simplicity and satisfaction. In under an hour, you can whip up a dish that’s not just healthy but also incredibly filling. Whether you’re a seasoned chef or a kitchen newbie, I’m here to guide you step by step. So, roll up your sleeves and let’s dive into this culinary adventure!

Why You’ll Love This Recipe

  • Nutrient-Packed: Sweet potatoes are rich in vitamins A and C, while avocados provide healthy fats and fiber, making this salad a nutritional powerhouse.
  • Quick and Easy: With just a few simple steps, you can prepare this dish in under 40 minutes, perfect for busy days.
  • Versatile Dish: Enjoy it as a main course or as a side. It pairs beautifully with grilled meats or can stand alone as a hearty vegetarian option.
  • Flavor Explosion: The combination of cumin and smoked paprika enhances the natural sweetness of the potatoes, creating a dish full of flavor.
  • Make-Ahead Friendly: Prepare the salad ahead of time and store it in the fridge for a quick meal option throughout the week.

Ingredient Breakdown

Let’s talk about the ingredients you’ll need for this fantastic Sweet Potato & Avocado Salad. Each component plays a vital role in achieving that perfect balance of taste and texture.

  • Sweet Potatoes: 2 medium sweet potatoes, peeled and cut into 1-inch cubes. They provide a sweet, earthy base for your salad.
  • Avocado: 1 ripe avocado, diced. This adds creaminess and healthy fats, making the salad more satisfying.
  • Red Onion: 1/4 cup finely chopped. It contributes a nice crunch and a bit of bite to the dish.
  • Fresh Greens: 2 cups of arugula or mixed greens (optional). These add a fresh, peppery note that complements the other ingredients.
  • Fresh Herbs: 1/4 cup cilantro or parsley, chopped. Herbs brighten up the salad and add freshness.
  • Olive Oil: 2 tablespoons. A good quality olive oil adds richness, helping to bind the flavors.
  • Lime Juice: 1 tablespoon, fresh. This adds acidity to balance the sweetness of the potatoes and avocado.
  • Spices: 1 teaspoon ground cumin and 1/2 teaspoon smoked paprika. These spices elevate the flavor profile, enhancing the sweet and savory experience.
  • Salt and Pepper: To taste, rounding out the flavors.

Step-by-Step Instructions

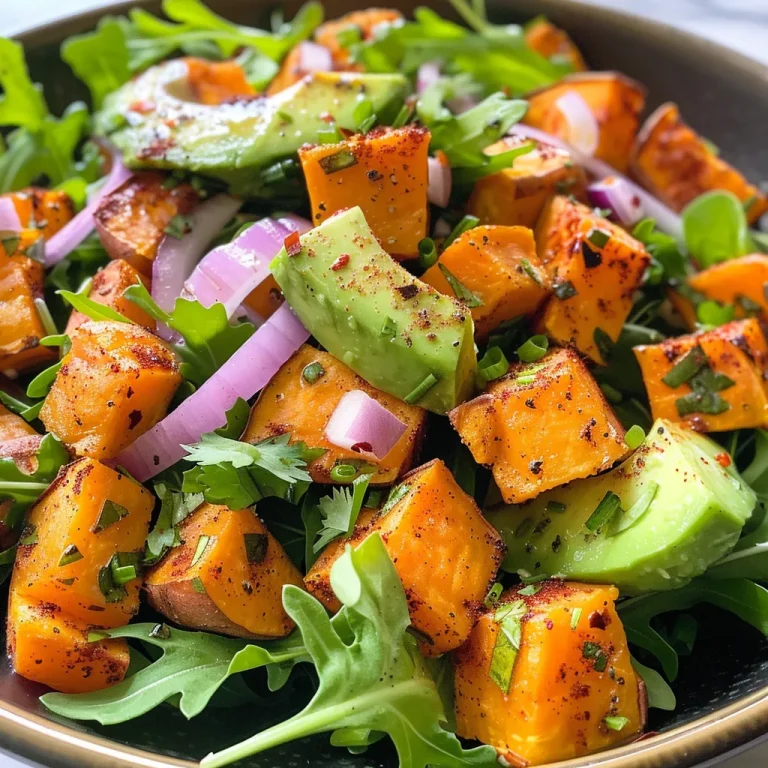
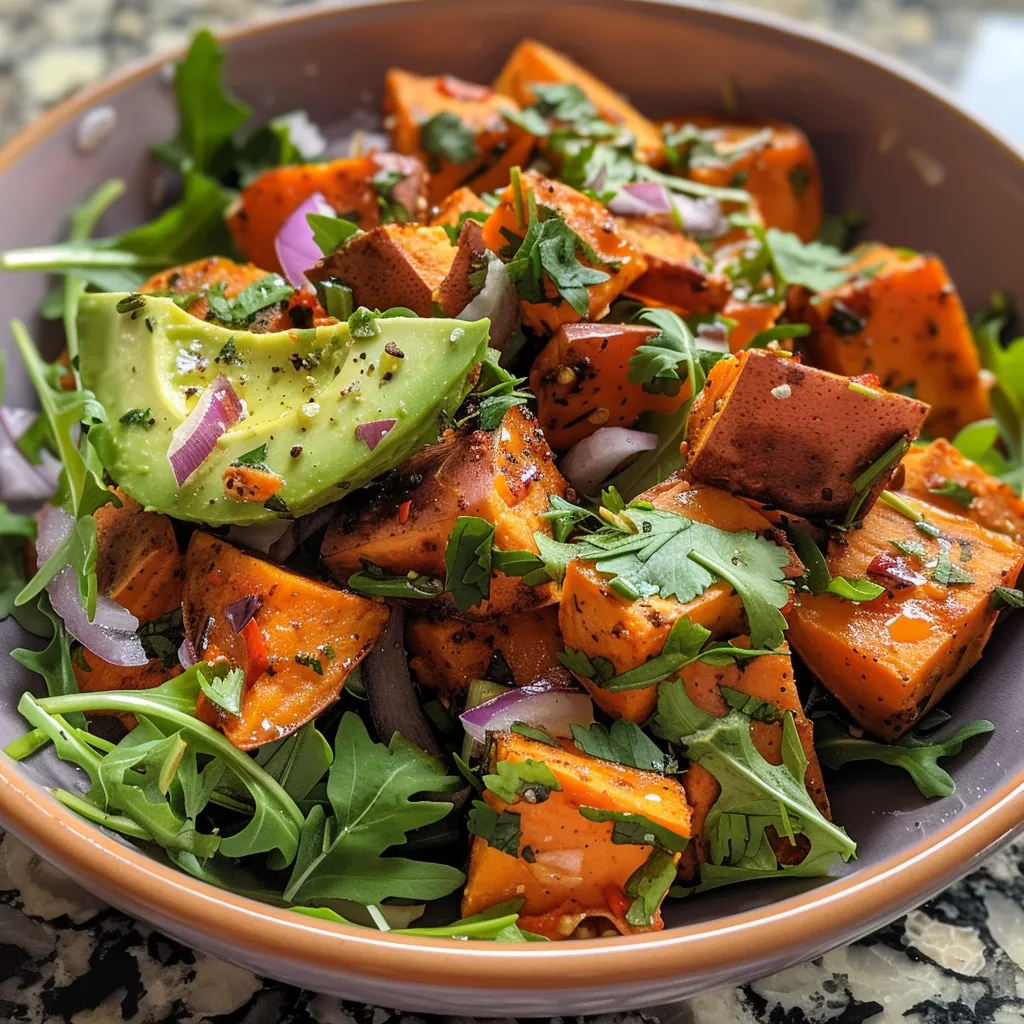
Side view of a fresh salad featuring sweet potatoes and avocado in a bowl.

Ready to start cooking? Follow these simple steps to create your delicious Sweet Potato & Avocado Salad.

  1. Preheat the Oven: Preheat your oven to 400°F (200°C) and prepare your baking sheet by lining it with parchment paper or lightly greasing it.
  2. Toss the Sweet Potatoes: In a large mixing bowl, toss the sweet potato cubes with 1 tablespoon of olive oil, ground cumin, smoked paprika, salt, and pepper until evenly coated.
  3. Roast the Sweet Potatoes: Spread the seasoned sweet potatoes in a single layer on the prepared baking sheet and roast for about 25-30 minutes, turning halfway through, until tender and lightly caramelized. Let them cool slightly after roasting.
  4. Combine Ingredients: In a large mixing bowl, combine the roasted sweet potatoes, diced avocado, finely chopped red onion, and fresh herbs. Gently toss to combine.
  5. Make the Dressing: In a small bowl, whisk together the remaining tablespoon of olive oil and lime juice. Pour the dressing over the salad mix and gently toss to coat. Season with extra salt and pepper if desired.
  6. Serve: If desired, arrange a bed of fresh arugula or mixed greens in serving bowls. Spoon the sweet potato salad on top or serve it on the side.
  7. Enjoy: Enjoy your sweet potato salad warm or chilled, paired with grilled meats or as a satisfying vegetarian main dish.

Pro Tips for Perfecting Your Salad

  • Uniform Cutting: Cut your sweet potatoes into even cubes to ensure they roast evenly. Aim for 1-inch pieces.
  • Don’t Skip the Cooling: Let the sweet potatoes cool slightly before adding them to the salad to prevent the avocado from browning.
  • Experiment with Herbs: While cilantro is great, feel free to swap it out for parsley or even basil for a different flavor profile.
  • Adjust Seasonings: Taste before serving! You might find you want a little more lime juice or salt to brighten things up.
  • Batch Cooking: Roast extra sweet potatoes and keep them on hand for quick salads or grain bowls throughout the week.
  • Mix and Match: This salad is versatile! Feel free to add other veggies like bell peppers, corn, or cherry tomatoes for added color and crunch.
  • Make it a Meal: Add protein such as grilled chicken, chickpeas, or quinoa to turn this salad into a filling meal.
  • Storage Tips: If you plan to store leftovers, keep the dressing separate until you’re ready to eat to maintain the freshness of the avocado.

Common Mistakes to Avoid

  • Overcooking Sweet Potatoes: Keep an eye on them while roasting. You want them tender but not mushy!
  • Skipping the Dressing: The dressing is key to bringing the flavors together. Don’t skip it or skimp on the lime juice!
  • Not Seasoning Properly: Salt and pepper are your friends! Don’t forget to season your ingredients to enhance their natural flavors.
  • Using Overripe Avocados: Make sure your avocado is ripe but not too soft. A perfectly ripe avocado will hold its shape better in the salad.

Variations to Try

  • Southwestern Twist: Add black beans, corn, and diced jalapeños for a spicy southwestern flair.
  • Mediterranean Style: Incorporate feta cheese, olives, and cherry tomatoes for a refreshing Mediterranean version.
  • Asian-Inspired: Drizzle with sesame oil and add edamame, shredded carrots, and a sprinkle of sesame seeds.
  • Grain Bowl: Serve the salad over a base of cooked quinoa or farro for a heartier meal.

Storage and Make-Ahead Instructions

This salad can be made ahead of time, making it perfect for meal prep! Here’s how to store it:

  • In the Refrigerator: Store the salad in an airtight container in the fridge for up to 3 days. Keep the dressing separate until ready to serve.
  • Make-Ahead Tips: Roast the sweet potatoes and chop the veggies ahead of time. Mix everything together just before serving to keep the avocado fresh.

Frequently Asked Questions

  • Can I use regular potatoes instead of sweet potatoes? Yes, you can substitute regular potatoes, but they will have a different flavor profile.
  • How can I make this salad vegan? This recipe is already vegan! Just ensure the dressing doesn’t contain any animal products if you’re using pre-made ones.
  • What can I use instead of lime juice? Lemon juice is a great alternative if you don’t have lime on hand.
  • Is this salad gluten-free? Yes, all the ingredients in this recipe are naturally gluten-free!
  • Can I add protein to this salad? Absolutely! Grilled chicken, chickpeas, or tofu would all be excellent additions.
  • How do I prevent the avocado from browning? Adding lime juice to the salad helps prevent browning, and storing leftovers in an airtight container also helps.
  • What dressing pairs well with this salad? The lime vinaigrette included in this recipe works perfectly, but you could also try a tahini dressing or balsamic vinaigrette.
  • Can I freeze this salad? It’s best not to freeze this salad, as the avocado and sweet potatoes can change texture once thawed.

Nutrition Tips and Dietary Adaptations

This Sweet Potato & Avocado Salad is not only delicious but also incredibly nutritious. Here are some additional tips to enhance its health benefits:

  • Boost Fiber: Add more veggies or legumes like chickpeas for extra fiber and protein.
  • Healthy Fats: Avocado provides healthy fats, but you can also drizzle some hemp seeds or nuts for added crunch and nutrition.
  • Low-Carb Option: If you’re watching your carb intake, consider replacing sweet potatoes with roasted butternut squash or zucchini.

Equipment Recommendations

To make this recipe a breeze, here’s a list of essential tools you’ll need:

  • Cutting Board: A sturdy cutting board for chopping your vegetables efficiently.
  • Chef’s Knife: A sharp knife will help you cut sweet potatoes and veggies easily.
  • Mixing Bowls: You’ll need a couple of bowls for mixing ingredients and making the dressing.
  • Baking Sheet: A good-quality baking sheet is crucial for roasting sweet potatoes evenly.
  • Whisk: For mixing the dressing smoothly.

Serving Suggestions

This Sweet Potato & Avocado Salad is a versatile dish that can be served in various ways:

  • As a Side Dish: Pair it with grilled chicken, fish, or steak for a well-rounded meal.
  • As a Main Course: Serve it as a light lunch or dinner with a slice of crusty bread or pita on the side.
  • In a Wrap: Wrap the salad in a tortilla for a delicious and portable meal option.

With its vibrant colors and bold flavors, this Sweet Potato & Avocado Salad is sure to become a favorite in your household! Remember, cooking is about joy and creativity, so don’t be afraid to experiment and make this recipe your own. Enjoy every bite, and happy cooking!

Sweet Potato & Avocado Salad

Prep Time 10 minutes
Cook Time 30 minutes
Total Time 40 minutes
Servings 4 servings
Calories 250
A vibrant and healthy salad combining roasted sweet potatoes with creamy avocado and fresh herbs, perfect for a light lunch or side dish.

Ingredients

Sweet Potatoes

  • 2 medium sweet potatoes, peeled and cut into 1-inch cubes
  • 1 ripe avocado, diced
  • 0.25 cup red onion, finely chopped
  • 2 cups fresh arugula or mixed greens (optional, for serving)
  • 0.25 cup fresh cilantro or parsley, chopped
  • 2 tablespoons olive oil
  • 1 tablespoon fresh lime juice (or lemon juice)
  • 1 teaspoon ground cumin
  • 0.5 teaspoon smoked paprika
  • to taste Salt and black pepper

Instructions 

  • Preheat oven to 400°F (200°C). Toss sweet potato cubes with 1 tbsp olive oil, cumin, paprika, salt, and pepper. Roast for 25-30 mins until tender. Let cool slightly.
  • In a large bowl, combine roasted sweet potatoes, diced avocado, red onion, and herbs. Gently toss.
  • Whisk remaining olive oil and lime juice to make dressing. Pour over salad and toss gently.
  • Serve on a bed of arugula or greens if desired. Enjoy warm or chilled.

Notes

For extra flavor, add a squeeze of lime or a sprinkle of additional herbs before serving.
Calories: 250kcal
Cost: $15
Course: Salad
Keyword: Sweet Potato

If you’re looking for a way to make dinner fun, flavorful, and oh-so-delicious, you’ve landed in the right spot! Welcome to your ultimate guide on how to whip up ultra crispy baked chicken nuggets at home. Forget about the deep-fried versions — these nuggets are not only healthier, but they also pack a crunch that will have everyone begging for seconds! In this comprehensive guide, we’ll cover everything from the ingredients you need to expert tips for achieving that perfect crunch.

Why You’ll Love This Recipe

This isn’t just any chicken nugget recipe. Here’s why it will become your go-to:

  • Ultra crispy texture: Our method ensures a delightful crunch that rivals any fast-food nugget.
  • Quick and easy: With simple steps, you can have dinner on the table in under 30 minutes.
  • Customizable: Perfect for picky eaters! Adjust the seasoning or dipping sauces to fit your family’s tastes.
  • Healthier option: Baked instead of fried, these nuggets provide a guilt-free indulgence.
  • Family-friendly fun: Get the kids involved in the kitchen for a memorable cooking experience!

Essential Ingredients for Ultra Crispy Baked Chicken Nuggets

Let’s break down what you’ll need to create these delicious bites. We’ve included some substitution options for those with dietary restrictions.

Main Ingredients

  • 240 g potato chips: Choose plain or flavored, but ensure they’re finely crushed for that crispy coating.
  • 680 g boneless, skinless chicken breasts: Cut into bite-sized pieces for even cooking.
  • 2 large eggs: These will help the coating stick and provide extra moisture.

Special Dietary Options

  • Gluten-free: Check your potato chips or use crushed rice cakes as an alternative.
  • Vegan: Substitute chicken with tofu or tempeh and replace eggs with a flaxseed mixture (1 tbsp flaxseed meal + 2.5 tbsp water).
  • Low-calorie: Use egg whites instead of whole eggs and consider using baked cornflakes instead of potato chips.

How to Prepare the Perfect Ultra Crispy Baked Chicken Nuggets: Step-by-Step Guide

Ready to dive in? Let’s get cooking!

First Step: Preheat and Prep Your Space

Start by preheating your oven to 200°C (400°F) and lining a baking sheet with parchment paper. This simple setup prevents sticking and makes cleanup a breeze, setting the stage for your ultra crispy baked chicken nuggets. If you’re adapting for dietary needs, like a vegan version, have your substitutes ready now to keep things smooth.

Second Step: Crush the Chips

Take your 240 g of potato chips and process them in a food processor or crush them with a rolling pin until you have fine crumbs, then transfer to a shallow bowl. This creates the crunchy coating that defines ultra crispy baked chicken nuggets, adding that irresistible texture. For a gluten-free option, double-check your chips or use an alternative like crushed rice cakes here.

Third Step: Whisk the Eggs

In a separate bowl, whisk your 2 large eggs until they’re smooth and well combined. This mixture will help the coating adhere to the chicken, ensuring each piece turns out perfectly coated for ultra crispy baked chicken nuggets. If you’re making a low-calorie swap, you could use an egg white substitute to reduce fats.

Fourth Step: Coat the Chicken

Working in batches, dip each of your 680 g bite-sized chicken pieces into the egg mixture, then roll them in the crushed chips for a thorough coating. Place the coated nuggets on your prepared baking sheet, spacing them out to allow air flow. This step is crucial for achieving that ultra crispy finish, and it’s a great spot to get the kids involved for some family fun!

Fifth Step: Bake to Perfection

Bake the nuggets for 12 minutes, then flip each one and bake for another 8 minutes until they reach an internal temperature of 74°C (165°F). Using a wire rack over the baking sheet can enhance crispness by letting air circulate, making your ultra crispy baked chicken nuggets even better. Keep an eye on the timer to avoid overcooking, especially if you’re adjusting for a different protein like turkey for variety.

Final Step: Serve and Enjoy

Once baked, remove the nuggets from the oven and let them cool for a minute before serving hot with dipping sauces like ketchup or ranch. This recipe yields 4-6 servings, perfect for a quick dinner, and you can pair it with sides like carrot sticks for a balanced meal. Your ultra crispy baked chicken nuggets are now ready to impress, offering a healthier alternative that still packs a punch of flavor.

Pro Tips for the Best Chicken Nuggets

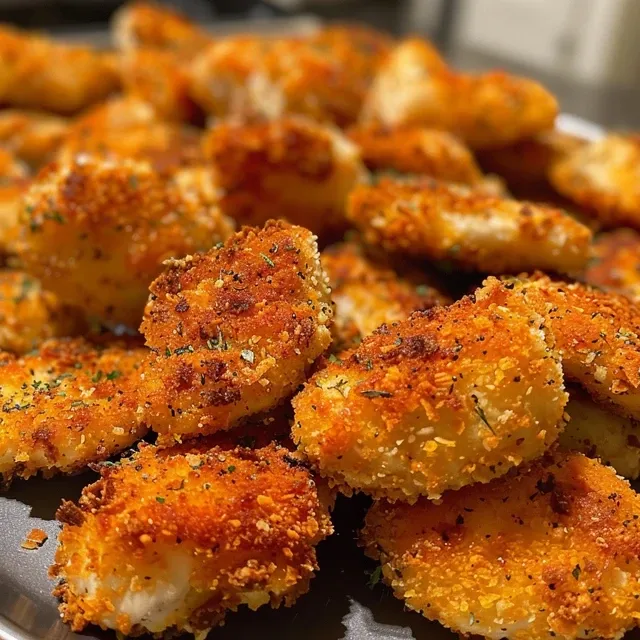
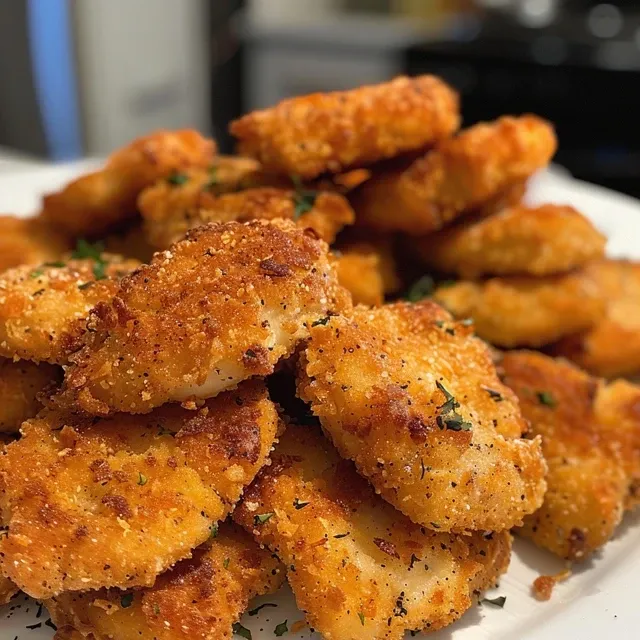
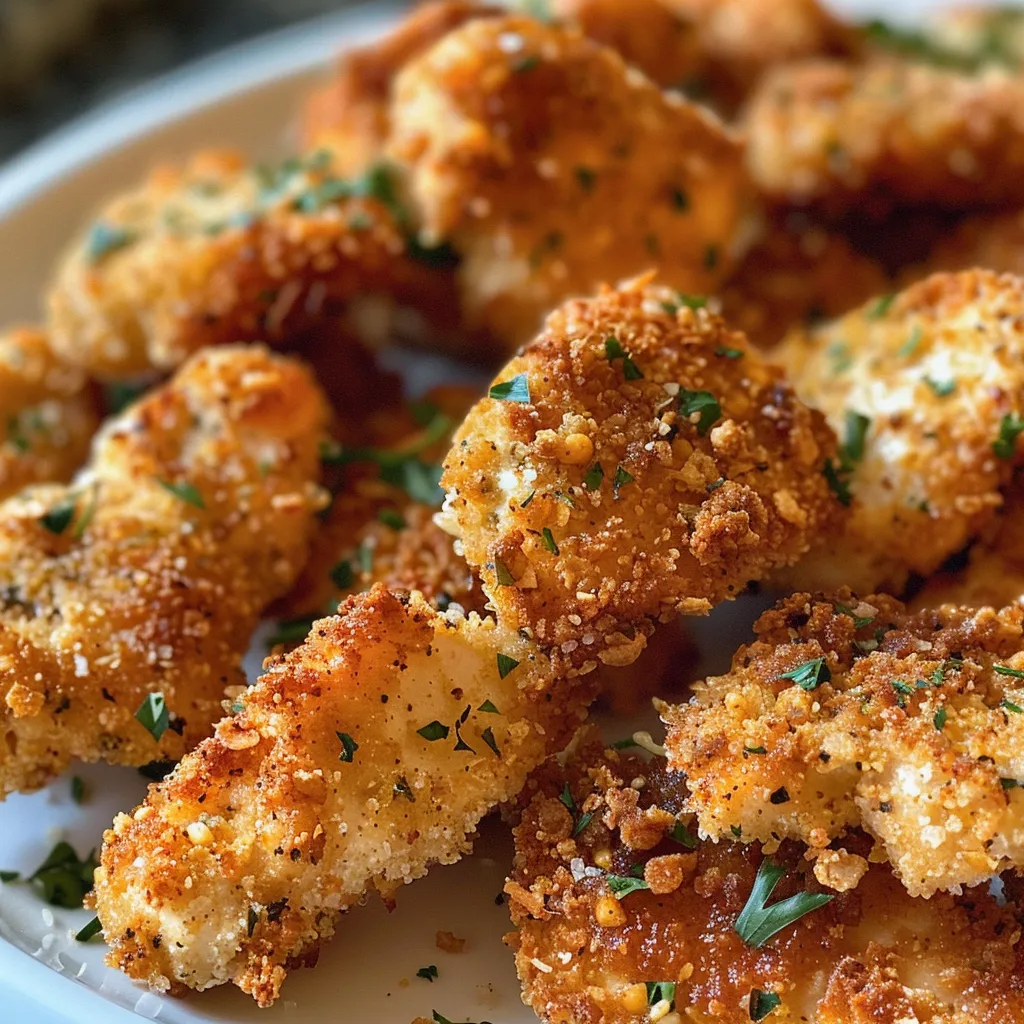
Juicy baked chicken nuggets, finely coated, displayed from the side.

Let’s take your chicken nugget game to the next level! Here are some expert insights:

  • Keep it cool: Chill the coated nuggets in the fridge for 30 minutes before baking to help the coating stick better.
  • Mix it up: Combine different types of chips for a unique flavor profile!
  • Spice it up: Add your favorite spices to the egg mixture for an extra flavor boost.
  • Batch cooking: Make a double batch and freeze uncooked nuggets for a quick meal later.
  • Monitor the temperature: Use a meat thermometer to ensure they’re cooked through without drying out.
  • Experiment with dips: Try different dipping sauces like honey mustard or BBQ for variety.
  • Use Panko: For an even crunchier texture, substitute some potato chips with Panko breadcrumbs.
  • Stay organized: Set up an efficient assembly line for coating to speed up the process.

Common Mistakes and Troubleshooting

Even the best cooks run into hiccups! Here are some common issues you might face and how to fix them:

  • Coating falling off: Make sure the chicken is well-coated in egg, and consider chilling the nuggets before baking.
  • Not crispy enough: Ensure you’re using enough crushed chips and avoid overcrowding on the baking sheet.
  • Dry nuggets: Monitor baking time closely and use a meat thermometer to check doneness.
  • Uneven cooking: Rotate your baking sheet halfway through cooking for even browning.

Variations to Try

Once you’ve mastered the basic recipe, why not switch it up? Here are some fun variations to keep things interesting:

  • Buffalo Chicken Nuggets: Toss cooked nuggets in buffalo sauce for a spicy kick.
  • Parmesan Garlic Nuggets: Mix grated Parmesan and garlic powder into the crushed chips for a savory twist.
  • Sweet and Sour Nuggets: Serve with a sweet and sour sauce for a tasty contrast.
  • Herb-Infused Nuggets: Add dried herbs like oregano or thyme to the egg wash for a fragrant flavor.

Storage and Make-Ahead Instructions

Want to make these nuggets ahead of time? Here’s how:

  • Refrigerator: Store cooked nuggets in an airtight container for up to 3 days.
  • Freezer: Freeze uncooked nuggets on a baking sheet, then transfer to a freezer bag. They’ll last up to 3 months!
  • Reheating: Reheat cooked nuggets in the oven at 180°C (350°F) for 10-15 minutes to restore crispness.

Frequently Asked Questions (FAQ)

Got questions? We’ve got answers! Here are some commonly asked questions about baked chicken nuggets:

  • Can I use chicken thighs instead of breasts?: Absolutely! Just be mindful that thighs may have a different cooking time.
  • What can I serve with chicken nuggets?: They pair perfectly with fries, salads, or veggie sticks for a balanced meal.
  • How do I make these nuggets spicier?: Add cayenne pepper or hot sauce to the egg mixture for a kick!
  • Can I bake these nuggets in an air fryer?: Yes! Cook at 200°C (400°F) for about 10-12 minutes, flipping halfway through.
  • What dips go well with chicken nuggets?: Classic choices include ketchup, BBQ sauce, ranch, or honey mustard.
  • Can I use a different type of coating?: Yes! Experiment with crushed crackers, cornflakes, or even ground nuts for unique flavors.
  • What’s the best way to store leftovers?: Keep them in an airtight container in the fridge for up to 3 days.
  • Can I reheat nuggets in the microwave?: You can, but they won’t be as crispy. Oven reheating is recommended for best results.

Nutrition Tips and Dietary Adaptations

Want to make these nuggets even healthier? Here are some tips:

  • Lean protein: Use skinless chicken breasts or try lean turkey for a lower-fat option.
  • Whole grain chips: Opt for whole-grain or baked chips for added fiber.
  • Vegetable add-ins: Serve with a side of veggies or a salad for a nutritious balance.
  • Portion control: Keep servings reasonable to manage calorie intake.

Equipment Recommendations

To make your cooking experience easier, here are some essential kitchen tools:

  • Food processor: For quick and easy chip crushing.
  • Baking sheet: A good quality, non-stick baking sheet is key for perfect nuggets.
  • Wire rack: Use this for baking to enhance crispiness.
  • Meat thermometer: Ensure your chicken is cooked to perfection and safe to eat!

Serving Suggestions

Now that you’ve got your crispy nuggets, let’s talk about how to serve them:

  • Creative platters: Arrange on a platter with a variety of dips for a fun appetizer at parties.
  • Kids’ meals: Pair with colorful veggies and fruit for a balanced children’s meal.
  • Meal prep: Include in lunchboxes with whole grain crackers and a piece of fruit.
  • Game day snacks: Serve with drinks and a selection of sauces for a crowd-pleaser.

So there you have it! Your one-stop guide to making ultra crispy baked chicken nuggets that are sure to impress. Remember, cooking is all about having fun and experimenting. So roll up your sleeves, gather your ingredients, and let’s create some crispy joy in your kitchen!

ultra crispy baked chicken nuggets

Prep Time 10 minutes
Cook Time 20 minutes
Total Time 30 minutes
Servings 4 servings
Calories 350
Enjoy these irresistibly crispy baked chicken nuggets, a healthier and flavorful alternative to fried snacks, perfect for quick family meals.

Ingredients

Coating

  • 240 g plain or flavored potato chips, finely crushed
  • 680 g boneless, skinless chicken breasts, cut into bite-sized pieces
  • 2 large eggs

Instructions 

  • Preheat oven to 200°C (400°F) and line a baking sheet with parchment paper.
  • Crush the potato chips into fine crumbs and whisk the eggs in a bowl.
  • Dip chicken pieces into eggs, then coat with crushed chips, and place on the baking sheet.
  • Bake for 12 minutes, flip, then bake for another 8 minutes until cooked through.
  • Let cool slightly, then serve hot with dipping sauces.

Notes

For extra crispiness, use a wire rack during baking.
Calories: 350kcal
Cost: $15
Course: Main Course
Keyword: baked, chicken, crispy

Welcome to the ultimate guide for crafting a mouthwatering creamy garlic mushroom pasta that’s both simple and scrumptious! This recipe is perfect for busy weeknights, as it delivers big flavor with minimal effort. With just a handful of ingredients, you’ll create a dish that not only satisfies your hunger but also warms your soul. Let’s dive into the world of flavors and textures that make this pasta a true comfort food staple!

Why You’ll Love This Recipe

Here are five compelling reasons to fall in love with this creamy garlic mushroom pasta:

  • Quick and Easy: This dish can be on your table in under 30 minutes, making it ideal for those hectic weeknights.
  • Versatile Ingredients: Use whatever mushrooms you have on hand and customize the creamy element to fit your dietary needs.
  • Rich Flavor Profile: The combination of sautéed garlic and mushrooms creates a deep, savory base that complements the creamy sauce perfectly.
  • Kid-Friendly: Kids love pasta, and the creamy sauce makes it even more appealing (yes, even for picky eaters!).
  • Perfect for Meal Prep: This pasta stores well and can be easily reheated, making it a great option for meal prep enthusiasts.

Detailed Ingredient Breakdown

Let’s take a closer look at the ingredients that bring this garlic mushroom pasta to life, along with some helpful substitutions:

  • Pasta: 8 oz of your favorite long pasta (linguine, fettuccine, or penne) works beautifully. Try gluten-free options if needed.
  • Olive Oil: 2 tbsp of extra virgin olive oil adds depth. You can substitute with avocado oil for a neutral flavor.
  • Mushrooms: 2 cups of sliced mushrooms (cremini, shiitake, or oyster) are recommended. Feel free to mix varieties for a flavor explosion!
  • Onion: ½ finely diced onion brings sweetness to the dish. Shallots are a lovely alternative.
  • Garlic: 3 minced garlic cloves infuse the sauce with aromatic goodness. Substitute with garlic powder if fresh isn’t available.
  • Black Pepper: ½ tsp for seasoning. Adjust to taste depending on your heat preference.
  • Lemon Zest: A splash of brightness with the zest of ½ lemon. Lime zest works as a refreshing substitute.
  • Vegetable Broth: ½ cup of unsalted vegetable broth enhances the flavor. Chicken broth can be used for a non-vegetarian version.
  • Dairy-Free Creamy Sauce: Use ½ cup of soaked cashews blended with ½ cup of water for a creamy texture. Alternatively, use ½ cup of whole-milk ricotta cheese for a dairy version.

How to Make Creamy Garlic Mushroom Pasta

Ready to cook? Follow these simple steps to create your creamy masterpiece:

  1. Boil the Pasta: Bring a large pot of well-salted water to a boil. Cook your pasta according to package directions until al dente. Before draining, scoop out about ½ cup of that starchy pasta water and set it aside. Drain the pasta and set it aside.

  2. Prepare the Creamy Base: If you’re going dairy-free, blend your soaked (and drained) cashews with ½ cup of fresh water until it’s as smooth as heavy cream. No lumps!

  3. Sauté the Mushrooms: In a large skillet or Dutch oven, heat the olive oil over medium-high heat. Add your sliced mushrooms in a single layer. Don’t stir them right away! Let them sit for 2-3 minutes to get a proper sear and develop those beautiful brown, flavorful bits. Then, give them a stir and cook until all are browned and have reduced in size.

  4. Add the Aromatics: Reduce the heat to medium. Push the mushrooms to the sides of the pan, creating a well in the center. Add the diced onion and a pinch of salt to the center. Cook for 3-4 minutes until softened and translucent. Now, add the minced garlic and cook for just 30-60 seconds until fragrant.

  5. Deglaze the Pan: Pour in the vegetable broth. As it hits the hot pan, use your spoon to scrape up all those delicious browned bits stuck to the bottom. Stir in the black pepper and lemon zest. Let it simmer for a minute to reduce slightly.

  6. Create the Creamy Sauce: Lower the heat to medium-low. Stir in your chosen creamy element—the blended cashew cream or the ricotta. Stir constantly until the sauce is heated through and beautifully unified, about 2-3 minutes. If it seems too thick, splash in a little of that reserved pasta water.

  7. Combine the Pasta: Add the drained, cooked pasta directly into the skillet with the sauce. Using tongs, toss to coat every noodle. Add splashes of the reserved pasta water as needed to create a silky, glossy sauce.

  8. Plate and Serve: Plate the pasta in warm, shallow bowls. Spoon any extra mushrooms and sauce from the pan over the top. Garnish with fresh lemon zest and chopped fresh parsley or chives. Serve immediately.

Pro Tips for Perfection

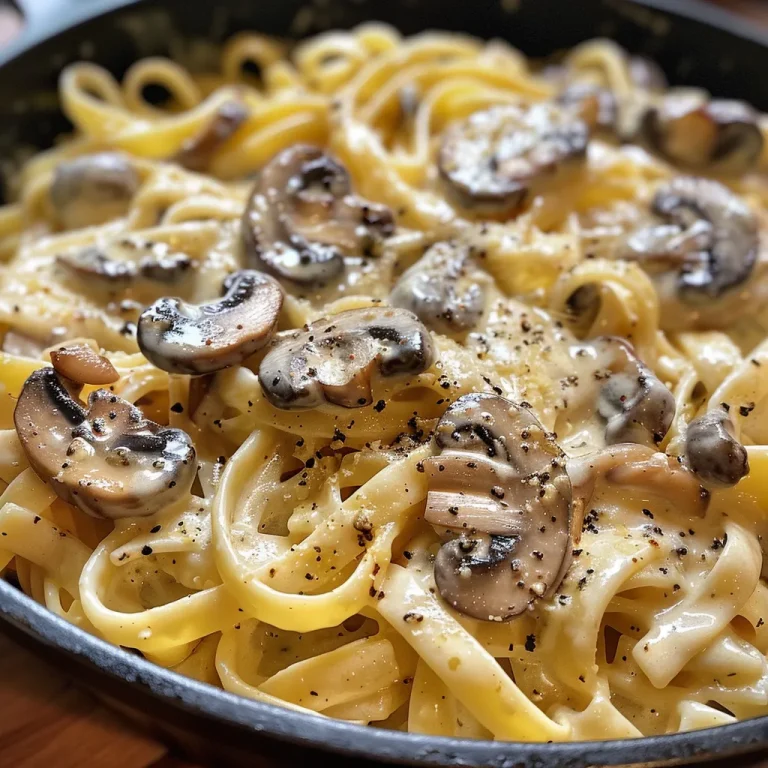
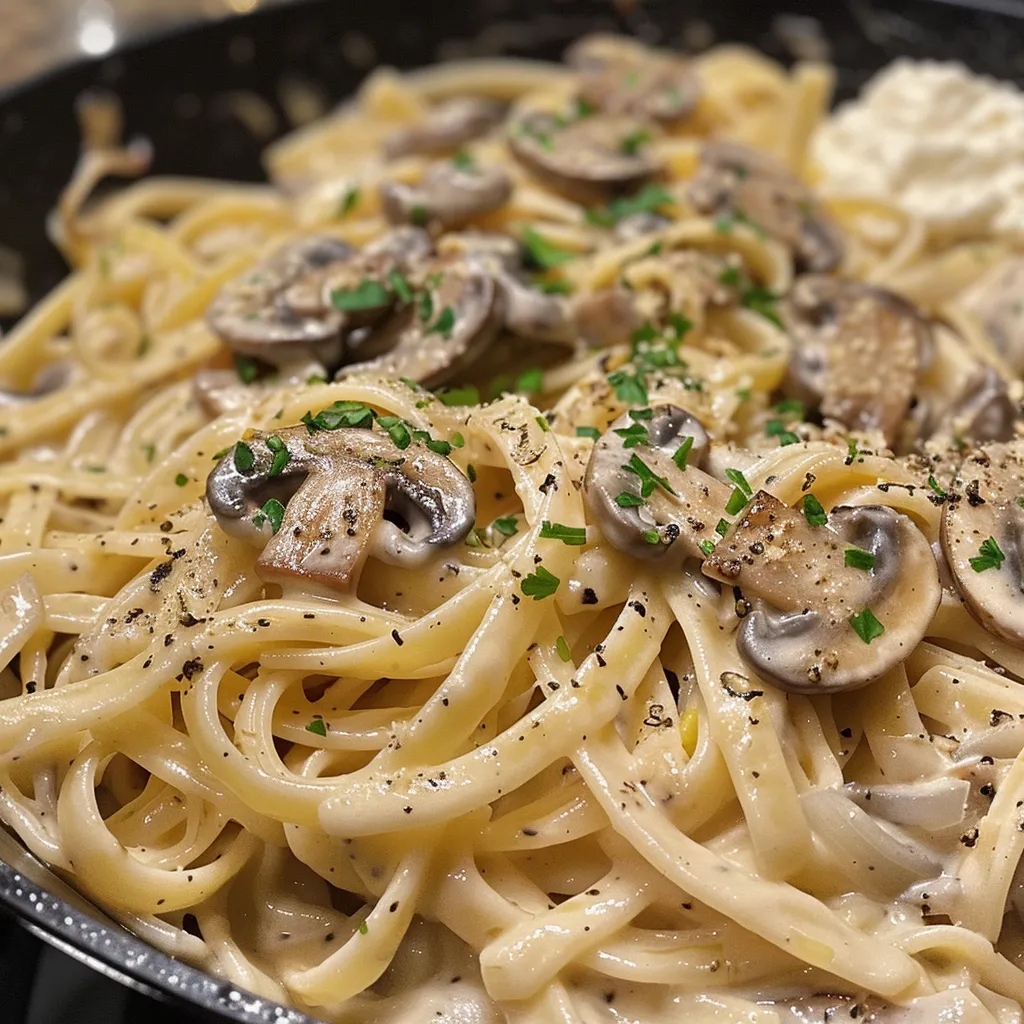
Side view of linguine pasta topped with mushrooms and creamy sauce.
  • Don’t Crowd the Pan: Ensure mushrooms are in a single layer for better browning and flavor.
  • Reserve Pasta Water: That starchy water is liquid gold! It helps create a silky sauce.
  • Fresh Ingredients: Use fresh garlic and herbs for the best flavor. Dried herbs can be used in a pinch but lack the same vibrancy.
  • Experiment with Cheese: Try adding some grated parmesan or nutritional yeast for a cheesy flavor without dairy.
  • Adjust Creaminess: If you prefer a lighter sauce, add more vegetable broth or pasta water to thin it out.
  • Chill the Pasta: For cold dishes or salads, rinse the pasta under cold water after cooking to stop the cooking process.
  • Flavor Boost: Add a splash of white wine after sautéing the mushrooms for an extra depth of flavor.
  • Try Different Mushrooms: Don’t hesitate to mix different types of mushrooms for a more complex taste.

Common Mistakes and Troubleshooting

We’ve all been there! Here are some common pitfalls and how to avoid them:

  • Mushrooms not browning: Make sure not to overcrowd the pan. Give them space to sear properly.
  • Too thick sauce: If your sauce is too thick, add a bit of the reserved pasta water until you reach your desired consistency.
  • Overcooking pasta: Always follow the package directions for cooking times to avoid mushy pasta.
  • Flavor lacking: Don’t skimp on seasoning! Taste as you go and adjust salt and pepper accordingly.
  • Dish too oily: If it feels greasy, try reducing the amount of oil next time or adding a splash more broth to balance it out.

Delicious Variations to Try

Looking to mix things up? Here are four delightful variations you can try:

  • Spinach and Feta: Add fresh spinach during the last minute of cooking and sprinkle with crumbled feta for a Mediterranean twist.
  • Spicy Kick: Incorporate red pepper flakes or chopped jalapeños for a bit of heat!
  • Sun-Dried Tomato: Mix in some chopped sun-dried tomatoes for a tangy, sweet flavor boost.
  • Herb-Infused: Experiment with fresh herbs like thyme, basil, or oregano for a garden-fresh taste.

How to Store and Freeze Creamy Garlic Mushroom Pasta

Want to keep leftovers? Here’s how to store your creamy pasta:

  • Refrigeration: Store in an airtight container in the fridge for up to 3 days. Reheat gently on the stove with a splash of broth or water.
  • Freezing: This dish can be frozen for up to 2 months. Allow it to cool completely, then transfer to a freezer-safe container. Thaw overnight in the fridge and reheat on the stovetop.

Make-Ahead Options

Want to prepare this dish ahead of time? Here are some tips:

  • Prep Ingredients: Chop your vegetables and mushrooms in advance and store them in the fridge.
  • Cook Pasta Ahead: Cook the pasta a few hours prior and toss it with a bit of oil to prevent sticking.
  • Make the Sauce Early: Prepare the sauce earlier in the day and reheat when ready to serve, adding a splash of pasta water for freshness.

Comprehensive FAQ

Here are some frequently asked questions about this creamy garlic mushroom pasta:

  • Can I use other types of pasta? Absolutely! Feel free to use any pasta shape you enjoy.
  • Can I make this dish vegan? Yes! Use the cashew cream and ensure your pasta is egg-free.
  • What mushrooms work best? Cremini and shiitake mushrooms offer the best flavor, but feel free to use what you have!
  • Can I add protein? Yes! Grilled chicken, shrimp, or even chickpeas can be wonderful additions.
  • How can I make it gluten-free? Use gluten-free pasta and ensure your broth is certified gluten-free.
  • Is it okay to use dried herbs? Yes, but fresh herbs are always recommended for the best flavor.
  • How do I reheat leftovers? Reheat gently on the stove, adding a bit of broth or water to loosen the sauce.
  • Can I make it ahead of time? Yes, you can prepare ingredients in advance and assemble when ready.

Nutrition Tips and Dietary Adaptations

This creamy garlic mushroom pasta can be tailored to meet various dietary needs:

  • Low-Carb Option: Substitute pasta with zucchini noodles or spaghetti squash for a low-carb alternative.
  • Protein Boost: Add grilled chicken or chickpeas for extra protein.
  • Low-Fat Version: Use less oil and opt for low-fat cheese alternatives or skip the cream altogether.

Equipment Recommendations

Here are some kitchen tools that can make your cooking process smoother:

  • High-Quality Skillet: A good non-stick skillet or cast iron pan is essential for even cooking.
  • Blender: For a creamy sauce, a high-speed blender works best to ensure a smooth texture.
  • Pasta Pot: A large pot with a strainer is ideal for cooking and draining pasta efficiently.

Serving Suggestions

Wondering what to serve with your creamy garlic mushroom pasta? Here are some ideas:

  • Garlic Bread: Serve with warm, crusty garlic bread for the ultimate comfort food experience.
  • Green Salad: A simple mixed greens salad with a tangy vinaigrette balances the richness of the pasta.
  • Wine Pairing: A crisp white wine, such as Sauvignon Blanc, pairs beautifully with the flavors in this dish.

In conclusion, this creamy garlic mushroom pasta is not just a recipe; it’s a celebration of flavor, simplicity, and comfort. Whether you’re cooking for yourself or loved ones, this dish is sure to impress. Remember, cooking is all about enjoying the process, so have fun and savor every bite. Happy cooking, friends!

Creamy Garlic Mushroom Pasta

Prep Time 10 minutes
Cook Time 20 minutes
Total Time 30 minutes
Servings 4 servings
Calories 520
A rich and creamy pasta dish featuring sautéed mushrooms, garlic, and a customizable sauce, perfect for a quick and satisfying meal.

Ingredients

Pasta

  • 8 oz Pasta (Linguine, Fettuccine, or Penne)
  • 2 tbsp Olive Oil
  • 2 cups Mushrooms, sliced (Cremini, shiitake, or oyster)
  • ½ Onion Onion, finely diced
  • 3 cloves Garlic Cloves, minced
  • ½ tsp Black Pepper
  • ½ Zest of Lemon Zest of ½ Lemon
  • ½ cup Unsalted Vegetable Broth

Dairy-Free Option

  • ½ cup raw cashews (soaked in hot water for 15 mins, or overnight)
  • ½ cup water

Dairy Option

  • ½ cup whole-milk ricotta cheese

Instructions 

  • Cook pasta in salted boiling water until al dente; reserve ½ cup pasta water, then drain.
  • If dairy-free, blend soaked cashews with water until smooth.
  • Sauté mushrooms in olive oil until browned; set aside.
  • Cook onion and garlic in the same pan; add broth, lemon zest, and black pepper; simmer briefly.
  • Stir in cashew cream or ricotta; combine with pasta, adding reserved water for sauce.

Notes

For extra flavor, garnish with fresh herbs and lemon zest before serving.
Calories: 520kcal
Cost: $15
Course: Main Course
Cuisine: Italian
Keyword: Creamy, Mushrooms, Pasta

Unlock the Magic of Gluten Free Savory Muffins

Welcome to the world of gluten free savory muffins, where flavor meets convenience! If you’re on the hunt for a delightful treat that’s not only easy to whip up but also perfect for busy mornings or cozy weekends, you’ve come to the right place. This recipe is designed for everyone, whether you’re gluten intolerant or just looking to try something new and delicious. Let’s dive into the magic of these irresistibly fluffy muffins that are bursting with flavor and made with simple ingredients!

Why You’ll Love This Recipe

These gluten free savory muffins aren’t just another recipe; they’re a game-changer. Here are five reasons why you’ll absolutely adore them:

  • Quick and Easy: With minimal ingredients and straightforward instructions, you’ll have these muffins ready in no time!
  • Endless Flavor Options: Customize them with your favorite cheeses and spices, making each batch uniquely yours.
  • Great for Meal Prep: Perfect for busy mornings, they can be made ahead and stored for a quick breakfast or snack.
  • Kid-Friendly: The cheesy goodness will win over even the pickiest eaters—kids will love them!
  • Freezable: Make a double batch and freeze them for a future treat that’s just as scrumptious!

Ingredient Breakdown

Let’s take a closer look at what you need to create these savory delights. Below, I’ve detailed the ingredients along with possible substitutions if you find yourself short on something.

  • 2 cups all-purpose gluten free flour blend: I recommend Better Batter for optimal results. If you can’t find it, any gluten-free blend will work, though results may vary.
  • 1 teaspoon xanthan gum: Omit this if your flour blend already contains it.
  • 1/4 cup cornstarch: This helps with texture. You can substitute with arrowroot powder if needed.
  • 2 1/4 teaspoons baking powder: Ensure it’s fresh for the best rise.
  • 3/4 teaspoon kosher salt: Essential for flavor enhancement.
  • 1 1/2 teaspoons minced dried onion (optional): Adds a hint of sweetness and depth.
  • 2 1/4 ounces Parmigiano-Reggiano cheese: Finely grated for a rich flavor. Feel free to replace it with Pecorino Romano.
  • 4 ounces sharp cheddar cheese: Grated (plus more for sprinkling). You can use any cheese you love, like Gouda or Monterey Jack.
  • 1 1/4 cups buttermilk: At room temperature for best results. You can substitute with dairy-free milk mixed with a splash of vinegar.
  • 4 tablespoons unsalted butter: Melted and cooled. If you’re dairy-free, use coconut oil or a vegan butter alternative.
  • 2 tablespoons neutral oil: Such as canola or vegetable oil, to keep muffins moist.
  • 2 eggs: At room temperature, beaten. For a vegan option, try flax eggs (1 tablespoon flaxseed meal + 2.5 tablespoons water = 1 egg).

Step-by-Step Instructions

Side view of freshly baked gluten-free muffins with visible cheese and a textured surface.

Ready to bake? Follow these simple steps to create your gluten free savory muffins:

  1. Preheat your oven to 350°F. Grease the wells of a standard 12-cup muffin tin and set it aside.
  2. In a large bowl, whisk together the gluten free flour blend, xanthan gum, cornstarch, baking powder, salt, and optional dried onion until well combined.
  3. Add the grated cheeses and mix to coat them in the dry ingredients, ensuring an even distribution.
  4. In a medium bowl, whisk together the buttermilk, melted butter, oil, honey, and eggs until fully combined.
  5. Create a well in the center of the dry ingredients and pour in the wet mixture. Stir until just combined; the batter will be thick but soft.
  6. Using a spring-loaded ice cream scoop or two spoons, fill the muffin tin almost to the top with batter. Smooth the tops with moist fingers and sprinkle a bit more cheddar cheese on top.
  7. Place the muffin tin in the oven and bake for about 22 minutes, or until a toothpick inserted in the center comes out with a few moist crumbs.
  8. Remove from the oven and let cool for about 5 minutes before transferring to a wire rack. Enjoy them warm!

Pro Tips for Perfect Muffins

To ensure that your muffins turn out perfectly every time, consider these expert insights:

  • Check your flour: Different gluten-free blends absorb liquid differently. You may need to adjust wet ingredients slightly for the right consistency.
  • Don’t overmix: Mix until just combined to keep your muffins tender. Overmixing can lead to dense muffins.
  • Room temperature ingredients: Using room temperature eggs and buttermilk helps with the emulsification process, leading to a lighter texture.
  • Test for doneness: Ovens vary, so check your muffins a few minutes early. They should be golden brown and spring back when lightly pressed.
  • Cool properly: Allow muffins to cool in the pan for a few minutes before transferring to a wire rack. This prevents sogginess.
  • Experiment with add-ins: Try adding herbs, cooked bacon, or vegetables for different flavor profiles!
  • Store wisely: To keep muffins fresh, store them in an airtight container at room temperature for up to 3 days or freeze for longer storage.
  • Reheat gently: If frozen, reheat muffins in the oven at 350°F for about 10 minutes for the best texture.

Common Mistakes and Troubleshooting

Even the best cooks encounter hiccups. Here are some common mistakes and how to fix them:

  • Muffins are too dense: This could be due to overmixing or too much flour. Ensure you measure accurately and mix gently.
  • Dry muffins: If your muffins are dry, you might have overbaked them. Next time, check for doneness a little earlier.
  • Not rising: Ensure your baking powder is fresh and your oven is preheated properly.
  • Flavor lacking: If the flavor is too mild, consider adding more cheese or spices to amp it up!

Delicious Variations

Get creative with these variations to make your gluten free savory muffins even more exciting:

  • Spinach and Feta: Toss in some fresh spinach and crumbled feta for a Mediterranean twist.
  • Bacon and Cheddar: Add crispy bacon bits to the batter for a savory kick.
  • Herbed Goat Cheese: Mix in goat cheese and fresh herbs for a fragrant flavor profile.
  • Buffalo Cauliflower: Incorporate cooked cauliflower and buffalo sauce for an extra spicy treat!

Storage and Make-Ahead Instructions

For optimal freshness, follow these storage tips:

  • Room temperature: Store muffins in an airtight container at room temperature for up to 3 days.
  • Refrigerator: For longer storage, keep them in the fridge for up to a week.
  • Freezing: Freeze muffins in a single layer on a baking sheet. Once frozen, transfer to a freezer bag for up to 3 months.
  • Defrosting: Let them thaw at room temperature or reheat directly from frozen in the oven.

Frequently Asked Questions

Here are some common queries about gluten free savory muffins:

  • Can I use almond flour? Yes, but you may need to adjust the other ingredients and hydration levels.
  • Can I make these dairy-free? Absolutely! Substitute with dairy-free cheese and a plant-based milk.
  • What if I don’t have buttermilk? Mix regular milk with a splash of vinegar or lemon juice as a substitute.
  • Can these muffins be made ahead of time? Yes, they store well and can be frozen for later enjoyment.
  • What’s the best way to reheat them? Reheat in the oven for the best texture, or microwave if you’re in a hurry.
  • Can I use different types of cheese? Yes! Feel free to experiment with your favorite cheeses.
  • How do I know when they’re done? Insert a toothpick into the center; it should come out clean or with few moist crumbs.
  • Can I add vegetables to the mix? Definitely! Just make sure they’re cooked and well-drained before adding.

Nutritional Insights and Dietary Adaptations

These muffins can be a part of a balanced diet. Here are some nutritional insights:

  • Protein boost: Adding cheese and eggs contributes to the protein content, making them more filling.
  • Fiber-rich options: Consider adding ground flaxseed or chia seeds for added fiber.
  • Low-carb alternatives: You can experiment with almond flour and other low-carb flour options for a keto-friendly version.

Essential Equipment Recommendations

Having the right tools can make all the difference. Here’s what I recommend:

  • Muffin Tin: A standard 12-cup muffin tin is essential for perfect muffin shape.
  • Mixing Bowls: Use a large bowl for dry ingredients and a medium bowl for wet ingredients.
  • Whisk: A good whisk is perfect for combining ingredients smoothly.
  • Measuring Cups and Spoons: Accurate measurements are crucial for baking success.
  • Cooling Rack: Helps cool muffins evenly after baking, preventing sogginess.

Serving Suggestions

These savory muffins can be served in various delightful ways:

  • Breakfast Delight: Pair with a poached egg on top for a nutritious breakfast.
  • Snack Time: Enjoy them warm with a smear of butter or your favorite spread.
  • Picnic Treat: Pack them for a picnic or road trip for a tasty, on-the-go snack.
  • Brunch Staple: Serve alongside a fresh salad or soup for a light lunch.

Conclusion

There you have it! A comprehensive guide to making these delightful gluten free savory muffins. With their rich flavors and easy preparation, they’re sure to become a staple in your kitchen. Remember, cooking is about enjoying the process and creating memories, so don’t stress if things don’t go perfectly. Embrace the flavors, share them with loved ones, and most importantly, have fun in the kitchen! Happy baking!

Gluten Free Savory Muffins

Prep Time 10 minutes
Cook Time 22 minutes
Total Time 32 minutes
Servings 12 muffins
Calories 220
These delicious gluten-free savory muffins are perfect for breakfast or snacks, packed with cheese and flavor.

Ingredients

Dry ingredients

  • 2 cups all purpose gluten free flour blend (Better Batter)
  • 1 teaspoon xanthan gum (omit if your blend contains it)
  • 0.25 cup cornstarch
  • 2.25 teaspoons baking powder
  • 0.75 teaspoon kosher salt
  • 1.5 teaspoons minced dried onion (optional)
  • 4 ounces Parmigiano-Reggiano cheese (finely grated)
  • 4 ounces sharp cheddar cheese (grated, plus more for sprinkling)

Wet ingredients

  • 1.25 cups buttermilk (at room temperature)
  • 4 tablespoons unsalted butter (melted and cooled)
  • 2 tablespoons neutral oil (like canola, vegetable or grapeseed)
  • 2 tablespoons honey
  • 2 eggs eggs (at room temperature, beaten)

Instructions 

  • Preheat oven to 350°F (175°C). Grease muffin tin wells.
  • Mix dry ingredients and cheeses in a large bowl.
  • Whisk wet ingredients in a separate bowl.
  • Combine wet and dry ingredients until just mixed; batter will be thick.
  • Fill muffin wells almost to top, sprinkle with extra cheese, and bake for 22 minutes.
  • Cool for 5 minutes, then transfer to wire rack. Serve warm.

Notes

Use fresh grated cheese for best flavor. Muffins are best served warm.
Calories: 220kcal
Cost: $15
Course: Breakfast
Cuisine: American
Keyword: gluten free, Muffins, savory

Welcome to Your New Favorite Chicken Nugget Recipe!

Are you ready to whip up a batch of the most delicious homemade chicken nuggets that are not just tasty but also healthy? These crispy, guilt-free chicken nuggets are perfect for busy nights when you need something quick, satisfying, and kid-approved. With just a handful of simple ingredients, they’re a family favorite that will become a staple in your kitchen!

Why You’ll Love This Recipe

Let’s dive into the reasons why this healthy homemade chicken nugget recipe should be your go-to:

  • Quick to Prepare: With a prep time of just 15 minutes and bake time of 15-20 minutes, these nuggets are ready in under 30 minutes!
  • Nutritious Ingredients: Made with boneless, skinless chicken breasts and almond flour, you can rest easy knowing your family is getting wholesome nutrition.
  • Kid-Friendly: These nuggets are a hit with kids—perfect for dipping, and they won’t even realize they’re eating something healthy!
  • Versatile Cooking Methods: Whether you want to bake them in the oven or use an air fryer for that extra crunch, this recipe accommodates your cooking style.
  • Customizable: This base recipe leaves room for creativity—try different seasonings or coatings to suit your family’s taste!

Ingredients You’ll Need

Here’s what you’ll need to make these tasty bites:

  • 1.5 pounds boneless skinless chicken breasts: Cut into 1-inch pieces for the perfect size.
  • 2 large eggs: These help bind the ingredients together.
  • 1 tablespoon water: To thin the egg mixture slightly.
  • 0.75 cup almond flour: A gluten-free substitute for breadcrumbs that adds a nutty flavor.
  • 1 teaspoon garlic powder: For savory depth.
  • 1 teaspoon onion powder: To elevate the taste.
  • 1 teaspoon paprika: Adds a hint of smokiness.
  • 0.5 teaspoon salt: Essential for flavor.
  • 0.25 teaspoon black pepper: For a touch of heat.
  • 1.5 cups cornflakes (crushed): This creates a crunchy coating that kids will love!

Making Your Chicken Nuggets

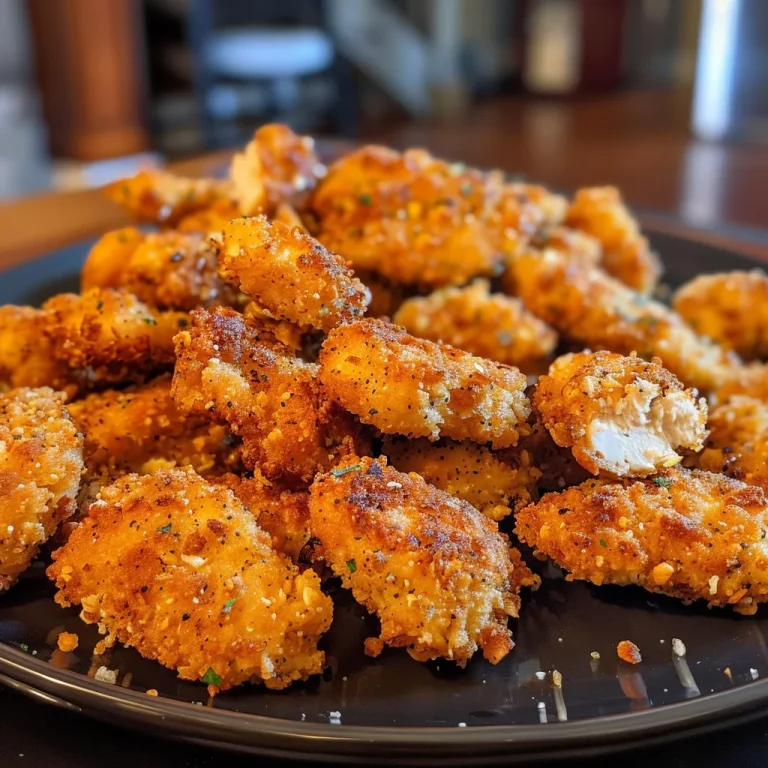
Close-up of juicy chicken nuggets, made with almond flour and cornflakes, on a rustic wooden table.

Now that you have your ingredients ready, let’s get cooking! Follow these easy steps to make your homemade chicken nuggets:

  1. Preheat your oven to 400°F (200°C) or set your air fryer to 380°F (193°C).
  2. In a bowl, whisk together the eggs and water until combined.
  3. In another bowl, mix the almond flour, garlic powder, onion powder, paprika, salt, and pepper.
  4. Dip each chicken piece first into the egg mixture, then coat it with the almond flour mixture.
  5. For an extra crunch, roll the coated chicken pieces in crushed cornflakes.
  6. Place your nuggets on a baking sheet lined with parchment paper or in the air fryer basket in a single layer.
  7. Bake for 15-20 minutes or air fry for about 10-12 minutes until golden brown and cooked through.

Pro Tips for Perfect Chicken Nuggets

Here are some expert insights to ensure your chicken nuggets turn out perfectly every time:

  • Uniform Size: Cut your chicken pieces evenly so they cook at the same rate.
  • Chill the Nuggets: If you have time, refrigerate the coated nuggets for 30 minutes before baking for an even crispier texture.
  • Don’t Crowd the Pan: Make sure to leave space between each nugget in the air fryer or on the baking sheet for optimal crisping.
  • Check for Doneness: Use a meat thermometer to ensure the internal temperature reaches 165°F (75°C).
  • Experiment with Coatings: Try using different nuts or seeds instead of almond flour for variety.
  • Use a Cooking Spray: Lightly spray the nuggets with olive oil before baking for an extra crispy finish.
  • Flavor Variations: Add herbs like oregano or thyme to the breading for different flavor profiles.
  • Meal Prep: Make a double batch and freeze some for a quick meal later on!

Common Mistakes & Troubleshooting

Even the best cooks make mistakes sometimes! Here are a few common pitfalls and how to avoid them:

  • Too Dry: If your nuggets turn out dry, ensure you’re not overcooking them. Keep an eye on the cooking time!
  • Coating Falling Off: Make sure the chicken is well-coated in egg before dredging it in the flour mix. You can also press the coating onto the chicken for better adherence.
  • Not Crispy Enough: If they lack crispiness, try increasing the cooking time slightly or adding a spray of oil.

Storage and Make-Ahead Instructions

These chicken nuggets can be made ahead of time and stored for later. Here’s how:

  • Refrigerate: Store cooked nuggets in an airtight container in the fridge for up to 3 days.
  • Freeze: Freeze uncooked nuggets on a baking sheet until firm, then transfer to a zip-top bag for up to 3 months. Bake from frozen, adding a few extra minutes to the cooking time.
  • Reheat: To reheat, simply bake in the oven at 375°F (190°C) until heated through and crispy.

FAQs About Homemade Chicken Nuggets

Here are some frequently asked questions to help you out:

  • Can I use chicken thighs instead of breasts? Yes! Chicken thighs will add a richer flavor and juiciness.
  • Can I make these nuggets gluten-free? Absolutely! Use almond flour or gluten-free breadcrumbs for the coating.
  • How do I make these nuggets spicier? Add cayenne pepper or chili powder to the breading mix for a kick!
  • What can I serve these nuggets with? Try dipping them in homemade sauces like honey mustard, BBQ, or ranch dressing.
  • Can I bake these without oil? Yes, but a light spray of oil helps achieve that crispy texture.
  • How long do they last in the freezer? They can be stored in the freezer for up to 3 months.
  • Can I use different types of nuts? Yes! Feel free to experiment with different nut flours or crushed nuts.
  • What’s the best way to reheat them? For the best texture, reheat in the oven or air fryer instead of the microwave.

Serving Suggestions

Pair your homemade chicken nuggets with these delicious sides for a complete meal:

  • Fresh Veggies: Serve with carrot sticks, cucumber slices, or bell pepper strips for a crunchy, healthy side.
  • Dips: Offer a variety of dips such as honey mustard, ketchup, or ranch dressing for extra flavor.
  • Salads: Toss your nuggets on top of a fresh green salad for a nutritious lunch.
  • Fruit: A side of apple slices or berries makes for a refreshing contrast to the savory nuggets.

Conclusion

Now you’re armed with everything you need to make the best healthy homemade chicken nuggets! Whether you’re cooking for your family or meal prepping for a busy week, these nuggets are sure to satisfy. Remember, cooking is all about enjoying the process and making it your own. So get in the kitchen, have fun, and enjoy every bite of these crispy, delicious nuggets!

Healthy Homemade Chicken Nuggets

Prep Time 15 minutes
Cook Time 20 minutes
Total Time 35 minutes
Servings 4 servings
Calories 350
Enjoy these crispy, baked chicken nuggets made with wholesome ingredients for a healthier snack or meal.

Ingredients

Protein

  • 1.5 pounds boneless skinless chicken breasts (cut into 1-inch pieces)
  • 2 large eggs eggs
  • 1 tablespoon water

Breading

  • 0.75 cup almond flour
  • 1 teaspoon garlic powder
  • 1 teaspoon onion powder
  • 1 teaspoon paprika
  • 0.5 teaspoon salt
  • 0.25 teaspoon black pepper

Crushed Cornflakes

  • 1.5 cups cornflakes (crushed)

Instructions 

  • Preheat oven to 400°F (200°C). Line a baking sheet with parchment paper.
  • In a bowl, beat eggs with water. In another bowl, combine almond flour, garlic powder, onion powder, paprika, salt, and black pepper. Place crushed cornflakes in a third bowl.
  • Dip chicken pieces into the egg mixture, then coat with the almond flour mixture, and finally roll in crushed cornflakes.
  • Arrange coated chicken pieces on the prepared baking sheet. Bake for 20 minutes until golden and cooked through.
  • Serve hot with your favorite dipping sauce.

Notes

For extra flavor, add herbs or spices of your choice to the coating mixture.
Calories: 350kcal
Cost: $12
Course: Main Course
Cuisine: American
Keyword: chicken, Healthy, nuggets

Whip Up Deliciously Creamy Keto Cauliflower Mashed Potatoes in Just 15 Minutes!

Are you looking for a side dish that’s not only delicious but also fits perfectly into your low-carb lifestyle? Look no further than this amazing Keto Cauliflower Mashed Potatoes recipe! In just 15 minutes, you can whip up a creamy, comforting side that’ll have your family begging for seconds. Whether you’re trying to cut carbs or just want a lighter alternative to traditional mashed potatoes, this recipe is here to impress!

But why should you love this recipe? Let’s dive into the mouthwatering details!

Why You’ll Love This Recipe

  • Quick and Easy: In just 15 minutes, you’ll have a delicious side dish ready, making it perfect for busy weeknights.
  • Low Carb Delight: This mashed cauliflower is a fantastic low-carb alternative to traditional mashed potatoes, allowing you to indulge without the guilt.
  • Creamy Texture: With the addition of cream cheese and butter, this recipe delivers a rich and satisfying texture that rivals the best mashed potatoes.
  • Customizable: Whether you want to add garlic, cheese, or herbs, this recipe offers plenty of room for your creative flair.
  • Healthy Ingredients: Packed with nutrients, cauliflower is a superfood that brings health benefits without sacrificing flavor.

Ingredient Breakdown

Here’s what you need to get started on your journey to creamy keto cauliflower mashed potatoes:

  • 1 large head of Cauliflower: This is the star of the show! Look for fresh, firm heads for the best results.
  • 1 tsp Olive oil: A drizzle of olive oil adds flavor and helps in cooking.
  • 2 cloves Garlic (minced): For that aromatic kick! You can adjust the amount based on your preference.
  • 2 tbsp Unsalted butter: Adds richness and flavor. Feel free to substitute with ghee for a dairy-free option.
  • 2 tbsp Cream cheese: This ingredient is crucial for that creamy texture. You can also use sour cream if you prefer.
  • 3/4 tsp Sea salt: Essential for bringing out the flavors.
  • Chives (optional, for garnish): A touch of color and freshness on top!

Pro Tips for the Perfect Cauliflower Mash

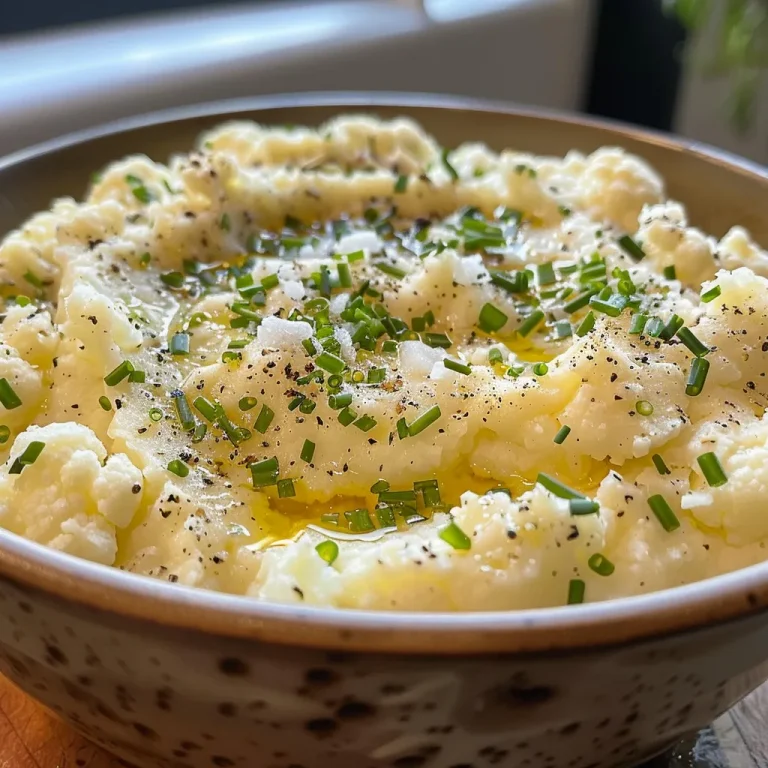
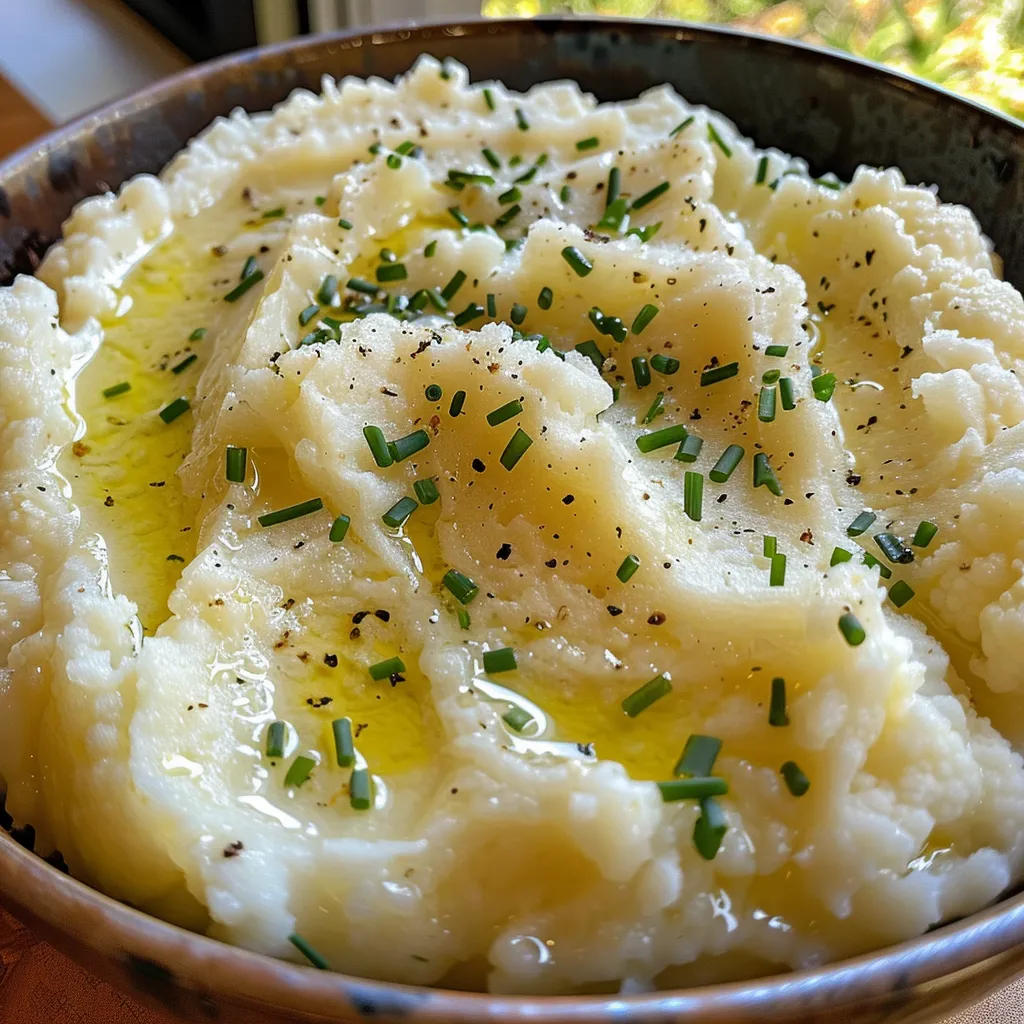
Side perspective of a bowl of Easy Keto Cauliflower Mashed Potatoes.

Now that you have your ingredients ready, here are some expert tips to ensure your mashed cauliflower turns out perfectly every time:

  • Don’t Overcook the Cauliflower: Steam or boil the cauliflower just until tender. Overcooking can make it watery.
  • Drain Well: If you’re boiling the cauliflower, make sure to drain it thoroughly to avoid a watery mash.
  • Use a Food Processor: For the smoothest texture, a food processor works wonders. Avoid mashing by hand, as it can leave lumps.
  • Taste as You Go: Don’t hesitate to add more seasoning or cream cheese to match your taste preferences!
  • Experiment with Flavors: Try adding roasted garlic or cheese blends for a unique twist.
  • Healthier Options: Substitute cream cheese with Greek yogurt or cottage cheese for a lighter version.

Common Mistakes and Troubleshooting

Even the best of us can have a mishap in the kitchen! Here are some common mistakes and how to fix them:

  • Too Watery: If your mash turns out watery, try adding a bit more cream cheese or butter to thicken it up.
  • Flavorless Mash: If it lacks flavor, add more salt or garlic. You can also mix in some grated cheese for a flavor boost!
  • Lumpy Texture: Make sure to blend it thoroughly. If you’re still facing lumps, you can pass it through a sieve for a smoother finish.

Variations to Try

Feeling adventurous? Here are some delicious variations to elevate your cauliflower mash:

  • Garlic Mashed Cauliflower: Add 4-5 cloves of roasted garlic for a rich, savory flavor.
  • Cheesy Cauliflower Mash: Mix in 1/2 cup of shredded cheese (like cheddar or parmesan) for a cheesy twist.
  • Herbed Cauliflower Mash: Stir in fresh herbs like rosemary or thyme for an aromatic touch.
  • Spicy Cauliflower Mash: Add a pinch of red pepper flakes or some cayenne for a kick!

Storage and Make-Ahead Instructions

If you want to prepare your mashed cauliflower ahead of time, here’s how to store it properly:

  • Refrigeration: Store leftovers in an airtight container in the fridge for up to 3 days.
  • Freezing: You can freeze the mash for up to 3 months. Thaw in the fridge overnight before reheating.
  • Reheating: Reheat in the microwave or on the stovetop. You may need to add a splash of cream or milk to restore creaminess.

Frequently Asked Questions

Got questions? We’ve got answers! Here are some common queries about this recipe:

  • Can I make this ahead of time? Yes, you can prepare it a day in advance and store it in the fridge.
  • Is mashed cauliflower suitable for keto? Absolutely! It’s a low-carb alternative to traditional mashed potatoes.
  • Can I use frozen cauliflower? Yes, frozen cauliflower works well! Just make sure to thaw and drain it before mashing.
  • What can I serve with mashed cauliflower? It pairs beautifully with grilled meats, roasted vegetables, or even as part of a hearty stew.
  • Can I make it vegan? Yes! Substitute butter and cream cheese with vegan options like coconut cream and margarine.
  • How do I get rid of the cauliflower smell? Boiling the cauliflower with a splash of vinegar can help neutralize the smell.
  • What’s the best way to mash it? A food processor typically gives the best texture, but you can also use a potato masher for a chunkier finish.
  • Can I add other vegetables? Sure! Mixing in steamed carrots or broccoli can add color and flavor.

Nutritional Tips and Dietary Adaptations

This recipe is not only delicious but can also be adapted to fit various dietary needs:

  • Low Carb: Perfect for those following a keto diet, as it’s low in carbs and high in healthy fats.
  • Gluten-Free: Naturally gluten-free, making it suitable for celiac or gluten-sensitive individuals.
  • Vegetarian: Easily adaptable for vegetarians with just a few ingredient swaps.

Equipment Recommendations

Here are some handy tools to make your cooking process smoother:

  • Food Processor: Essential for achieving that creamy texture.
  • Steamer Basket: Great for steaming cauliflower without losing nutrients.
  • Measuring Cups and Spoons: For accurate ingredient measurements, ensuring the best results.

Serving Suggestions

Now that you’ve made your creamy keto cauliflower mashed potatoes, here are some delightful ways to serve it:

  • With Gravy: Pour some homemade or store-bought gravy over the mash for a comforting dinner.
  • As a Base for Meat: Serve it alongside your favorite protein, like roasted chicken or grilled steak.
  • With Steamed Veggies: Pair it with a side of sautéed greens or roasted vegetables for a balanced meal.

In conclusion, this Keto Cauliflower Mashed Potatoes recipe is not only quick and easy but also delivers on taste and texture. Whether you’re embracing a low-carb lifestyle or just looking for a delicious side dish, you can’t go wrong with this creamy delight! So roll up your sleeves, grab your ingredients, and get ready to whip up a dish that even your non-keto friends will love. Remember, cooking is all about enjoying the process, and I’m so glad you’re here with me on this culinary adventure!

Easy Keto Cauliflower Mashed Potatoes Recipe in 15 Minutes

Prep Time 5 minutes
Cook Time 10 minutes
Total Time 15 minutes
Servings 4 servings
Calories 150
This quick and creamy cauliflower mash is a perfect low-carb alternative to traditional mashed potatoes, ready in just 15 minutes.

Ingredients

Vegetables

  • 1 large head Cauliflower
  • 1 tsp Olive oil
  • 2 cloves Garlic (minced)
  • 2 tbsp Unsalted butter
  • 2 tbsp Cream cheese
  • 3/4 tsp Sea salt

Garnish

  • Chives (optional, for garnish) Chives (optional)

Instructions 

  • Cut the cauliflower into florets and steam until tender, about 8-10 minutes.
  • In a large bowl, combine steamed cauliflower, minced garlic, olive oil, butter, cream cheese, and salt.
  • Use an immersion blender or food processor to blend until smooth and creamy.
  • Adjust seasoning if needed and garnish with chopped chives, if desired.

Notes

This dish is best served warm and can be stored in the refrigerator for up to 2 days.
Calories: 150kcal
Cost: $10
Course: Side Dish
Cuisine: American
Keyword: Cauliflower

Are you ready to whip up some sunshine in your kitchen? These easy gluten-free lemon muffins are here to bring cheer to your breakfast table or snack time! Bursting with zesty flavor and made with simple ingredients, this recipe is perfect for anyone, whether you’re gluten-free or just looking for a delightful treat. Let’s dive into the world of lemony goodness and make your kitchen smell amazing!

Why You’ll Love This Recipe

  • Quick and easy preparation: With straightforward steps, you can have these muffins ready in no time, making them perfect for busy mornings.
  • Perfectly fluffy texture: The combination of almond milk and sunflower oil ensures your muffins are light, fluffy, and oh-so-delicious!
  • Bright, refreshing flavor: The fresh lemon zest and juice elevate the flavor profile, leaving you wanting more after each bite.
  • Versatile for any occasion: Whether it’s a cozy breakfast or a coffee break snack, these muffins fit right in.
  • Family-friendly recipe: Everyone, including kids, will love the sweet and tangy taste of these lemon muffins.

Ingredients You’ll Need

Here’s what you’ll need to create these delightful muffins:

  • 1 cup sunflower oil: For moisture and richness.
  • 1 1/4 cup granulated sugar: Sweetens the muffins perfectly.
  • 4 large eggs: Provides structure and helps bind the ingredients.
  • 2 3/4 cup gluten-free all-purpose flour: The base of your muffins.
  • 1 teaspoon xanthan gum: Helps improve the texture (omit if your flour blend includes it).
  • 1/2 teaspoon salt: Balances the sweetness.
  • 2 teaspoons baking powder: Helps the muffins rise.
  • 1 cup almond milk: Adds moisture and a subtle nutty flavor.
  • 2 tablespoons lemon zest: For that bright lemon flavor.
  • 1/4 cup lemon juice: Enhances the lemony taste.

Ingredient Notes and Substitutions

Not sure about some ingredients? Here are a few tips:

  • Sunflower oil: You can substitute with canola oil or melted coconut oil if preferred.
  • Granulated sugar: Coconut sugar or honey can be used for a healthier twist.
  • Almond milk: Any plant-based milk or regular milk works well.
  • Gluten-free flour blend: Ensure you choose a quality blend that includes xanthan gum for the best results.
  • Lemon juice: Fresh is best, but bottled lemon juice will work in a pinch.

How to Make Gluten-Free Lemon Muffins

Side view of freshly baked gluten-free lemon muffins showing a fluffy interior.

Follow these simple steps to make your muffins:

  • Preheat the oven: Set it to 350°F (175°C) and adjust the oven rack to the center position. Grease a 12-cup muffin mold with oil or non-stick spray.
  • Prepare lemons: Grate the lemons for zest and squeeze the juice, removing any seeds.
  • Mix wet ingredients: In a large bowl, combine the sunflower oil, granulated sugar, and lemon zest. Beat well until blended.
  • Add eggs and milk: Incorporate the eggs, lemon juice, and almond milk. Whisk for one minute until light and fluffy.
  • Combine dry ingredients: In another bowl, sift the gluten-free flour, salt, baking powder, and xanthan gum, whisking to combine.
  • Mix it all together: Gradually add the dry mixture to the wet ingredients and mix until just combined. The batter will be thick.
  • Fill muffin cups: Spoon approximately 1/3 cup of the batter into each muffin cavity.
  • Bake: Place in the oven and bake for about 40 minutes, or until golden brown and a toothpick comes out clean.
  • Cool: Let the muffins cool in the mold for 10 minutes, then transfer to a wire rack to cool completely.

Pro Tips for Muffin Success

Want to ensure your muffins are the best they can be? Check out these expert tips:

  • Don’t overmix: Mix until just combined to maintain a tender texture.
  • Room temperature ingredients: Using room temperature eggs and milk helps with better mixing.
  • Check your baking powder: Make sure it’s fresh to ensure your muffins rise properly.
  • Use fresh lemons: For the best flavor, fresh lemons are key. The zest and juice make a huge difference.
  • Test for doneness: Always check with a toothpick to avoid overbaking.
  • Add a pinch of lemon zest to the glaze: For an extra zing if you choose to glaze your muffins.
  • Experiment with mix-ins: Consider adding blueberries, poppy seeds, or chopped nuts for a different twist.
  • Adjust sweetness to taste: Depending on your preference, feel free to tweak the sugar amount.

Common Mistakes and Troubleshooting

Even the best of us can run into a few hiccups! Here are some common mistakes and how to troubleshoot them:

  • Flat muffins: This usually comes from old baking powder. Always check the expiration date!
  • Dense muffins: Overmixing or not using enough rising agent can cause density. Keep mixing gentle.
  • Too dry or crumbly: Make sure you’re measuring flour correctly; too much can lead to dryness.
  • Burnt tops: If your oven runs hot, consider lowering the temperature a bit or covering with foil.

Variations to Try

Want to switch things up? Here are some tasty variations:

  • Blueberry Lemon Muffins: Add 1 cup of fresh or frozen blueberries to the batter for a fruity twist.
  • Lemon Poppy Seed Muffins: Stir in 2 tablespoons of poppy seeds for a delightful crunch.
  • Chocolate Chip Lemon Muffins: Mix in 1/2 cup of dairy-free chocolate chips for a sweet addition.
  • Coconut Lemon Muffins: Fold in shredded coconut for a tropical flair.

Storage and Make-Ahead Instructions

Want to enjoy these muffins later? Here’s how to store and make ahead:

  • Storage: Keep muffins in an airtight container at room temperature for up to 3 days. For longer storage, refrigerate them for up to a week.
  • Freezing: These muffins freeze well! Place them in a freezer-safe bag, and they’ll last up to 3 months. Thaw at room temperature or warm in the microwave.
  • Make-Ahead: You can prepare the batter the night before and refrigerate it. Just stir and bake in the morning!

FAQs About Gluten-Free Lemon Muffins

  • Can I use a different flour? Yes! Just make sure it’s a gluten-free flour blend that works for baking.
  • How can I make these muffins healthier? Reduce the sugar or substitute with a natural sweetener like honey or maple syrup.
  • What if I don’t have almond milk? You can substitute it with any non-dairy milk or regular milk if you’re not dairy-free.
  • Can I make these muffins vegan? Yes! Substitute eggs with flax eggs and use a plant-based milk.
  • What can I do if the muffins are too sweet? You can reduce the sugar in the recipe or add a bit more lemon juice to balance the sweetness.
  • How do I know when the muffins are done? A toothpick inserted into the center should come out clean or with a few crumbs.
  • Can I add frosting to these muffins? Absolutely! A light lemon glaze or cream cheese frosting would be delicious.
  • How long do these muffins last? They can last up to 3 days at room temperature or a week in the fridge.

Nutrition Tips and Dietary Adaptations

These muffins can fit into various dietary needs:

  • Gluten-free: The recipe is inherently gluten-free when using the right flour blend.
  • Dairy-free: Swap regular milk for almond or coconut milk.
  • Lower sugar: Adjust sweetness to your preference by reducing sugar or using alternatives.
  • Nut-free: Use soy or oat milk instead of almond milk for nut-free versions.

Equipment Recommendations

To make your baking experience smooth, here’s what you’ll need:

  • Muffin tin: A standard 12-cup muffin tin works best.
  • Mixing bowls: Have both large and medium bowls ready for mixing wet and dry ingredients.
  • Whisk: For combining ingredients effectively.
  • Measuring cups and spoons: Precision is key in baking!
  • Cooling rack: Essential for cooling your muffins properly.

Serving Suggestions

To enjoy your gluten-free lemon muffins to the fullest, try these serving ideas:

  • Serve warm: Enjoy them fresh out of the oven with a pat of butter or a spread of lemon curd.
  • Pair with tea or coffee: The perfect afternoon snack or breakfast companion!
  • Add a sprinkle of powdered sugar: For a touch of sweetness and presentation.
  • Mix with fresh fruit: Serve alongside fresh berries for a colorful plate.

Now that you have all the tips and tricks, go ahead and bake a batch of these heavenly gluten-free lemon muffins! Remember, cooking is all about enjoying the process and sharing delicious food with those you love. So happy baking, and thank you for joining me in the kitchen today!

Easy Gluten-free Lemon Muffins

Prep Time 15 minutes
Cook Time 40 minutes
Total Time 55 minutes
Servings 12 muffins
Calories 210
Delight in these moist, tangy gluten-free lemon muffins perfect for breakfast or a snack.

Ingredients

Wet Ingredients

  • 1 cup sunflower oil
  • 1 1/4 cup granulated sugar
  • 4 large eggs (room temperature, beaten)
  • 1 cup almond milk

Dry Ingredients

  • 2 3/4 cup gluten-free all-purpose flour
  • 1 teaspoon xanthan gum (omit if already included in flour blend)
  • 1/2 teaspoon salt
  • 2 teaspoons baking powder
  • 2 tablespoons lemon zest
  • 1/4 cup lemon juice

Instructions 

  • Preheat oven to 350F and grease a 12-cup muffin tin.
  • Mix sunflower oil, sugar, and lemon zest until well combined.
  • Add eggs, lemon juice, and almond milk; whisk until light and fluffy.
  • Combine dry ingredients; fold into wet mixture until just combined.
  • Spoon batter into muffin cups and bake for 40 minutes until golden and a toothpick comes out clean.
  • Cool muffins in the pan for 10 minutes, then transfer to a wire rack to cool completely.

Notes

Use fresh lemon zest for the best flavor.
Calories: 210kcal
Cost: $12
Course: Breakfast
Cuisine: American
Keyword: gluten free, Lemon, Muffins

Welcome to Your New Favorite Meal: The Veggie and Quinoa Power Bowl

Are you ready to elevate your weeknight dinners with a dish that’s as colorful as it is nutritious? Meet the Veggie and Quinoa Power Bowl — a delightful blend of roasted vegetables, fluffy quinoa, and a zesty lemon vinaigrette that brings flavor and nourishment to your table. Whether you’re a busy parent, a health-conscious individual, or just someone looking to jazz up their meals, this recipe is perfect for you. Let’s dive into why this bowl will become a staple in your kitchen!

Why You’ll Love This Recipe

  • Versatile and Customizable: This bowl is a canvas for your culinary creativity! Swap in your favorite vegetables or grains based on what’s in your fridge.
  • Meal Prep Friendly: Perfect for those busy weeks! Prepare your ingredients in advance and assemble your bowls quickly for lunches or dinners.
  • Packed with Nutrients: Each serving is loaded with protein from quinoa and fiber from vegetables, making it a nutritious choice for any meal.
  • Delicious Leftovers: The flavors meld beautifully overnight, making this bowl even tastier the next day — if it lasts that long!
  • Quick and Easy: With simple steps and minimal prep time, you can whip this up in about 30 minutes, making it ideal for weeknight meals.

Ingredients You’ll Need

Gather these ingredients to create your Veggie and Quinoa Power Bowl. Feel free to make substitutions based on your preferences or dietary needs!

  • 1 cup quinoa, rinsed: The star of the show! Quinoa is a gluten-free grain rich in protein.
  • 2 cups water or vegetable broth: Using broth adds extra flavor to the quinoa.
  • 1 medium red bell pepper, diced: Adds sweetness and crunch.
  • 1 medium zucchini, sliced: Tender and mild, it complements the other veggies.
  • 1 medium carrot, sliced: Provides color and a slight sweetness.
  • 1 small red onion, cut into wedges: Roasts beautifully and adds a savory depth.
  • 1 cup cherry tomatoes, halved: Juicy and vibrant, perfect for freshness.
  • 2 tablespoons olive oil: For roasting and dressing, it enhances flavor and texture.
  • 1 teaspoon dried oregano: A fragrant herb that elevates the dish.
  • Salt and black pepper to taste: Essential for seasoning.
  • 1 can black beans or chickpeas, drained and rinsed: Adds protein and fiber, making it heartier.
  • 1/4 cup roasted almonds or walnuts, roughly chopped: For a delightful crunch.
  • 2 tablespoons pumpkin seeds: Nutty and nutritious, sprinkle them on top!
  • 3 tablespoons extra virgin olive oil: Key for the lemon vinaigrette.
  • 2 tablespoons fresh lemon juice: Brightens the dish with acidity.
  • 1 teaspoon Dijon mustard: Adds a tangy depth to the dressing.
  • 1 teaspoon maple syrup or honey: Balances the acidity of the dressing.
  • 1 small garlic clove, finely minced: Infuses flavor into the vinaigrette.
  • Salt and black pepper to taste: Adjust to your preference.

Step-by-Step Instructions

Side view of a nutritious Veggie and Quinoa Power Bowl with vibrant ingredients and garnishes.

Follow these simple steps to create your Veggie and Quinoa Power Bowl:

  1. Preheat the oven to 425°F (220°C).
  2. Prepare the vegetables: Arrange the bell pepper, zucchini, carrot, red onion, and cherry tomatoes on a baking sheet. Drizzle with 2 tablespoons of olive oil, sprinkle with oregano, salt, and pepper. Toss to coat evenly.
  3. Roast the vegetables: Place in the oven and roast for 20 to 25 minutes, stirring halfway through, until tender and lightly caramelized.
  4. Cook the quinoa: In a saucepan, combine quinoa and water or broth. Bring to a boil, reduce heat, cover, and simmer for 15 minutes or until the liquid is absorbed. Remove from heat and let sit, covered, for 5 minutes. Fluff with a fork.
  5. Make the dressing: In a small bowl, whisk together olive oil, lemon juice, Dijon mustard, maple syrup or honey, garlic, salt, and pepper.
  6. Assemble your bowls: Divide quinoa among four bowls. Top each with roasted vegetables, beans, nuts, and seeds. Drizzle generously with lemon vinaigrette.
  7. Serve immediately, or refrigerate for a refreshing cold bowl later.

Pro Tips for the Perfect Bowl

  • Don’t overcrowd the baking sheet: This ensures your vegetables roast instead of steam, giving them that delicious caramelization.
  • Vary your vegetables: Use seasonal veggies like sweet potatoes, asparagus, or broccoli for different flavor profiles.
  • Experiment with grains: Substitute quinoa with farro, brown rice, or even a blend of grains for variety.
  • Make it a meal: Add a protein like grilled chicken, tofu, or tempeh to make it even heartier.
  • Prep ahead: You can prepare quinoa and dressing in advance for a quick assembly during busy days.
  • Adjust the dressing: Feel free to modify the dressing ingredients to suit your taste. Add herbs or spices for a personal touch!
  • Store leftovers properly: Keep them in airtight containers in the refrigerator to maintain freshness.
  • Embrace leftovers: Use leftover roasted vegetables in wraps, salads, or omelets for a delicious next-day meal.

Common Mistakes and Troubleshooting

Even the best cooks can make mistakes! Here are some common pitfalls and solutions to help you create a flawless Veggie and Quinoa Power Bowl.

  • Overcooked quinoa: Ensure you don’t let it boil too long; once the water is absorbed, remove it from heat.
  • Vegetables not roasting: Make sure your oven is preheated and that you’re not overcrowding the baking sheet.
  • Too much dressing: Start with a little and add more to taste; it’s easier to add than to take away!
  • Flavorless bowls: Always season your vegetables and quinoa adequately with salt and pepper.

Variations to Try

Don’t be afraid to mix things up! Here are some delicious variations to keep your meals exciting:

  • Southwestern Style: Add corn, black beans, avocado, and a chipotle dressing for a spicy twist.
  • Asian-Inspired: Use sesame oil, soy sauce, and top with edamame and shredded carrots.
  • Greek Twist: Incorporate feta cheese, olives, and a lemon-oregano dressing.
  • Breakfast Bowl: Top with a poached egg, avocado, and hot sauce for a hearty morning meal.

Storage and Make-Ahead Instructions

Planning ahead can save you time and hassle! Here’s how to store and prepare your bowl for later:

  • Refrigerate: Store your assembled bowl in airtight containers in the refrigerator for up to 3 days.
  • Make Ahead: Prepare quinoa, roasted vegetables, and dressing in advance; assemble when ready to eat.
  • Freezing: For longer storage, freeze roasted vegetables separately. Quinoa can also be frozen for up to 2 months.

Frequently Asked Questions

Here are some common questions to help you get the most out of your Veggie and Quinoa Power Bowl:

  • Can I use other grains instead of quinoa? Absolutely! Brown rice, farro, or even couscous work beautifully.
  • Is this recipe gluten-free? Yes! As long as you use gluten-free grains and broth, it remains gluten-free.
  • How can I make this vegan? This recipe is already vegan-friendly, just ensure all ingredients, including dressing, are plant-based.
  • What can I use instead of olive oil? Avocado oil or sesame oil are great alternatives for roasting and dressing.
  • How long can I keep leftovers? You can enjoy your leftovers for about 3 days if stored properly in the refrigerator.
  • Can I add protein to this bowl? Definitely! Grilled chicken, tofu, or chickpeas are excellent options to boost protein content.
  • Can I make this bowl ahead of time? Yes! You can prepare all components in advance for a quick meal later.
  • What’s the best way to reheat leftovers? Reheat in the microwave or on the stovetop, adding a splash of water or broth to keep it moist.

Nourishing Nutrition Tips

Eating healthy doesn’t have to be complicated! Here are some nutrition tips to enhance your Veggie and Quinoa Power Bowl:

  • Balance your plate: Aim for a mix of protein, healthy fats, and carbohydrates in your bowl for sustained energy.
  • Incorporate color: The more colorful your vegetables, the more nutrients you’re likely getting. Aim for a rainbow!
  • Watch the dressing: Dressings can add hidden calories. Use just enough to enhance flavor without overpowering the bowl.

Essential Equipment Recommendations

Having the right tools can make your cooking experience smoother and more enjoyable. Here’s what you’ll need:

  • Baking Sheet: A sturdy baking sheet for roasting your vegetables evenly.
  • Medium Saucepan: For cooking quinoa efficiently.
  • Mixing Bowls: Use various sizes for preparing your ingredients and mixing the dressing.
  • Whisk: A simple whisk is essential for blending your vinaigrette to perfection.

Serving Suggestions

How you serve your Veggie and Quinoa Power Bowl can enhance the experience! Here are some fun ideas:

  • Garnish with fresh herbs: A sprinkle of basil, parsley, or cilantro can brighten your dish.
  • Serve with a side: Pair with whole-grain bread or a fresh salad for a complete meal.
  • Customize your bowl: Allow family members to assemble their bowls with toppings like avocado, nuts, or cheese for a fun, interactive meal.

In conclusion, the Veggie and Quinoa Power Bowl is not just a meal; it’s an invitation to explore flavors, enjoy cooking, and nourish your body. With its versatility, ease of preparation, and abundant health benefits, it’s the perfect recipe to keep in your back pocket. So roll up your sleeves, gather your favorite ingredients, and get ready to whip up a bowl that’s not only satisfying but also delicious. Remember, cooking is about enjoyment, creativity, and connection, and this bowl embodies all of that. Happy cooking, friends!

Veggie and Quinoa Power Bowl

Prep Time 10 minutes
Cook Time 25 minutes
Total Time 35 minutes
Servings 4 servings
Calories 450
A vibrant and nutritious bowl combining roasted vegetables, protein-rich beans, and fluffy quinoa, drizzled with a tangy lemon vinaigrette.

Ingredients

Grains

  • 1 cup quinoa (rinsed)
  • 2 cups water or vegetable broth

Vegetables

  • 1 medium red bell pepper (diced)
  • 1 medium zucchini (sliced)
  • 1 medium carrot (sliced)
  • 1 small red onion (cut into wedges)
  • 1 cup cherry tomatoes (halved)

Additional ingredients

  • 2 tablespoons olive oil
  • 1 teaspoon dried oregano
  • Salt and black pepper to taste
  • 1 can black beans or chickpeas (drained and rinsed)
  • 1/4 cup roasted almonds or walnuts (roughly chopped)
  • 2 tablespoons pumpkin seeds

Dressing

  • 3 tablespoons extra virgin olive oil
  • 2 tablespoons fresh lemon juice
  • 1 teaspoon Dijon mustard
  • 1 teaspoon maple syrup or honey
  • 1 small garlic clove (finely minced)

Instructions

Notes

Feel free to customize with your favorite vegetables or toppings for added flavor and nutrition.
Calories: 450kcal
Cost: $15
Course: Main Course
Cuisine: Healthy
Keyword: Vegetables