
![['Close-up of Maple Pumpkin Granola featuring oats, coconut flakes, and pecans.', 'Side view of a bowl filled with Maple Pumpkin Granola, showcasing its textures and ingredients.', 'Detailed shot of Maple Pumpkin Granola with visible chunks of pecans and pumpkin seeds.', 'Close-up image of Maple Pumpkin Granola highlighting the golden color and chewy oats.']](https://cooksyra.com/wp-content/uploads/2026/07/maple-pumpkin-granola_1_U1.webp "Fall in Love with Simple: Homemade Maple Pumpkin Granola")
Discover the Warmth of Homemade Maple Pumpkin Granola
Welcome to the cozy world of homemade maple pumpkin granola! This delightful treat is not just a snack; it’s a warm hug in a bowl, ready to brighten your mornings or satisfy your cravings at any time of the day. If you’re tired of store-bought granola that can be filled with preservatives and added sugars, you’re in the right place. In this guide, we’ll walk through how to make your own delicious granola that’s packed with flavor and good-for-you ingredients.
With just a handful of simple ingredients, you can whip up a batch of this easy-to-make granola that’s bursting with the flavors of fall. Imagine the sweet aroma of maple syrup, the comforting essence of pumpkin, and the crunch of nuts and seeds all coming together in perfect harmony. Let’s dive in!
Why You’ll Love This Recipe
- Simplistic and Quick: This granola comes together in under an hour, making it a perfect option for busy mornings or last-minute snacks.
- Healthier Choice: Homemade granola allows you to control the ingredients, keeping it free from artificial additives and packed with nutrition.
- Versatile Usage: Enjoy this granola on its own, over yogurt, or sprinkled on top of your favorite oatmeal. It’s so versatile!
- Flavor Explosion: The combination of maple syrup and pumpkin puree creates a rich, comforting flavor that you’ll crave.
- Perfect for Gift Giving: Packaged beautifully, this granola makes a thoughtful gift for friends and family, especially during the fall season.
Ingredient Breakdown and Substitutions
Let’s take a closer look at the ingredients that make this pumpkin granola so special. Here’s what you’ll need:

★ Recommended Kitchen Tool
Personal Smoothie Blender
Make this recipe even easier with a quality Personal Smoothie Blender — a must-have kitchen staple!
- Coconut Oil (1/4 cup): Adds healthy fats and helps bind the granola. You can substitute with olive oil or melted butter if you prefer.
- Maple Syrup (1/4 cup): The star of the show! Any liquid sweetener like honey or agave can work here.
- Pumpkin Puree (1/2 cup): Provides moisture and flavor. You can use homemade pumpkin puree or canned for convenience.
- Old-Fashioned Rolled Oats (3 cups): The base of our granola. Quick oats can be used, but they won’t provide the same texture.
- Coconut Flakes (1/2 cup): For added sweetness and chewiness. Feel free to omit if you’re not a coconut fan.
- Chopped Pecans (1/2 cup): Gives a nice crunch. Walnuts or almonds are great alternatives.
- Pumpkin Seeds (1/4 cup): Packed with nutrients; sunflower seeds can be used instead.
- Pumpkin Pie Spice (2 teaspoons): A blend of spices that gives this granola its fall flavor. You can make your own using cinnamon, nutmeg, and ginger.
- Flaked Sea Salt (up to 1 teaspoon): Enhances the sweetness. Adjust to your taste.
How to Make Maple Pumpkin Granola
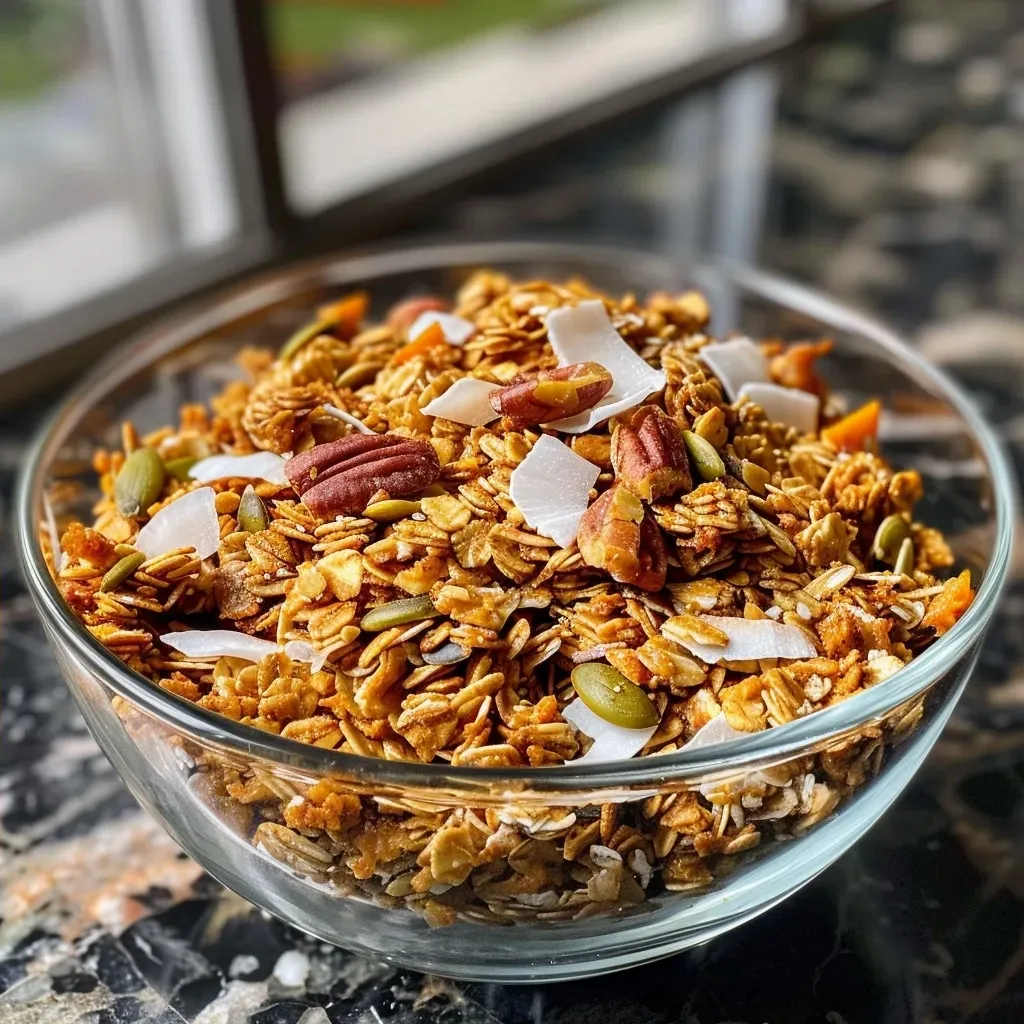
Ready to get cooking? Follow these simple steps to make your granola:
- Preheat the Oven: Set your oven to 325°F (160°C) and line a baking sheet with parchment paper or a silicone baking mat for easy cleanup.
- Mix Wet Ingredients: In a large microwave-safe bowl, combine coconut oil and maple syrup. Microwave for 30-60 seconds until melted. Stir in the pumpkin puree until well mixed.
- Add Dry Ingredients: To the bowl, add oats, coconut, pecans, pumpkin seeds, pumpkin pie spice, and salt. Stir well to ensure everything is evenly coated.
- Spread and Bake: Spread the mixture evenly on the prepared baking sheet. Bake for 35-40 minutes, stirring halfway through to ensure even browning. The granola will be soft when removed but will become crunchy as it cools.
- Cool and Break Apart: Allow the granola to cool for at least 15 minutes. Once cooled, break it into pieces of your desired size. Store in an airtight container.
Pro Tips for Perfect Granola
- Don’t Overbake: Keep an eye on your granola; overbaking can lead to a burnt flavor. It should be golden brown.
- Mix It Up: Feel free to add dried fruits or chocolate chips after baking for extra flavor and texture.
- Batch Making: Consider doubling the recipe if you find yourself reaching for this granola often—you’ll love having it on hand!
- Storage: Store in an airtight container at room temperature for 1-2 weeks. For longer freshness, consider refrigerating.
- Cooling Matters: Don’t skip the cooling step! This is when the granola firms up and gets crunchy.
- Experiment with Flavors: Try adding different spices or extracts, like vanilla or almond, for a unique twist.
- Mind the Salt: Adjust the salt to your taste; a little can enhance the sweetness.
- Use the Right Pan: A rimmed baking sheet allows for even cooking and prevents the granola from steaming.
Common Mistakes and Troubleshooting
Even the best of us can stumble in the kitchen! Here are some common pitfalls and how to fix them:
- Granola is too soft: Ensure it’s fully cooled before breaking apart; granola will harden as it cools. If it’s still soft, it may need more baking time.
- Burnt granola: Every oven is different. If your granola is browning too quickly, lower the temperature slightly and extend the baking time.
- Not crunchy enough: If you prefer a crunchier texture, bake a few minutes longer and stir halfway through to allow for even crisping.
Variations to Try
Granola is incredibly versatile! Here are some fun variations to consider:
- Chocolate Chip Maple Pumpkin Granola: Stir in mini chocolate chips after baking for a sweet twist.
- Nut-Free Version: Omit the nuts and replace them with sunflower seeds or more coconut flakes.
- Dried Fruit Granola: Add dried cranberries, raisins, or apricots after baking for sweetness and chewiness.
- Spiced Variation: Experiment with additional spices like ginger or allspice for an extra kick.
Storage and Make-Ahead Instructions
This granola is perfect for meal prep! Here’s how to store it:
- Airtight Containers: Store the granola in an airtight container at room temperature for up to two weeks.
- Freezing: For longer storage, freeze in a zip-top bag. Thaw at room temperature when you’re ready to enjoy it.
Frequently Asked Questions
- Can I use quick oats instead of rolled oats? Yes, but the texture will be different; rolled oats give a better crunch.
- What can I substitute for pumpkin puree? You can use applesauce or mashed bananas for a different flavor profile.
- Is this granola vegan? Yes, as long as you use pure maple syrup instead of honey.
- Can I add protein powder? Absolutely! Just mix in a scoop with the dry ingredients.
- How can I make it gluten-free? Use certified gluten-free oats and ensure all other ingredients are gluten-free.
- What’s the best way to serve granola? Enjoy it with yogurt, milk, or as a topping on smoothies and desserts.
- How do I make it less sweet? Reduce the amount of maple syrup or substitute with a less sweet alternative.
- Can I make this granola nut-free? Yes! Simply replace nuts with seeds or additional oats.
Nutrition Tips and Dietary Adaptations
This healthy fall granola recipe can be adapted to fit various dietary needs:
- Low Sugar: Reduce the maple syrup or substitute with a low-calorie sweetener.
- Protein Boost: Add protein powder or nuts to increase the protein content.
- Fiber Rich: Incorporate chia seeds or flaxseeds for an extra fiber boost.
Equipment Recommendations
Here’s what you’ll need to get started:
- Mixing Bowl: A large bowl for combining ingredients.
- Baking Sheet: A rimmed baking sheet to prevent spills.
- Parchment Paper: For easy cleanup and to prevent sticking.
- Spatula: To mix and spread the granola evenly.
Serving Suggestions
Now that you’ve made your delicious granola, here are some ideas for enjoying it:
- Breakfast Bowl: Serve over yogurt with fresh fruit and a drizzle of honey.
- Snack Time: Enjoy it by the handful as a satisfying snack.
- Parfaits: Layer with yogurt and berries for a beautiful and nutritious parfait.
- Baking Topping: Use it as a crunchy topping for muffins or baked fruit desserts.
In conclusion, making your own maple pumpkin granola is not just about the delicious end product; it’s about the joy of creating something from scratch that you can truly enjoy. So gather your ingredients, let your kitchen fill with the delightful scents of fall, and bask in the satisfaction of whipping up this wholesome treat. Remember, cooking is not just about the food; it’s about the love and care you put into each step. Happy cooking, friends!
Maple Pumpkin Granola
Ingredients
wet ingredients
- 1/4 cup coconut oil
- 1/4 cup maple syrup
- 1/2 cup pumpkin puree
dry ingredients
- 3 cups old-fashioned rolled oats
- 1/2 cup unsweetened coconut flakes or chips
- 1/2 cup chopped pecans
- 1/4 cup pumpkin seeds
- 2 teaspoons pumpkin pie spice
- up to 1 teaspoon flaked sea salt (or 1/2 teaspoon table salt)
Instructions
-
Preheat oven to 325°F (160°C) and line a baking sheet with parchment or silicone mat.
-
Combine coconut oil and maple syrup, microwave 30-60 seconds, then stir in pumpkin puree.
-
Add oats, coconut, pecans, pumpkin seeds, spices, and salt; mix well.
-
Spread evenly on baking sheet and bake 35-40 minutes. Cool for 15 minutes, then break into pieces.

![['A slice of Vegan Chai Chocolate Tart showcasing a rich chocolate layer on a crust.', 'Close-up view of a Vegan Chai Chocolate Tart with creamy filling and oat crust.', 'Side view of a decadent Vegan Chai Chocolate Tart with visible layers and spices.', 'A detailed view of a Vegan Chai Chocolate Tart highlighting its glossy chocolate topping.']](https://cooksyra.com/wp-content/uploads/2026/07/vegan-chai-chocolate-tart_1_U1-150x150.webp)
![['Close-up side view of golden brown butternut squash fritters on a plate.', 'Juicy butternut squash fritters arranged appealingly, showcasing their texture.', 'A vibrant display of crispy butternut squash fritters, highlighting their rich color.', 'Deliciously plated butternut squash fritters with a focus on their crispy edges.']](https://cooksyra.com/wp-content/uploads/2026/07/butternut-squash-fritters_1_U1-150x150.webp)