
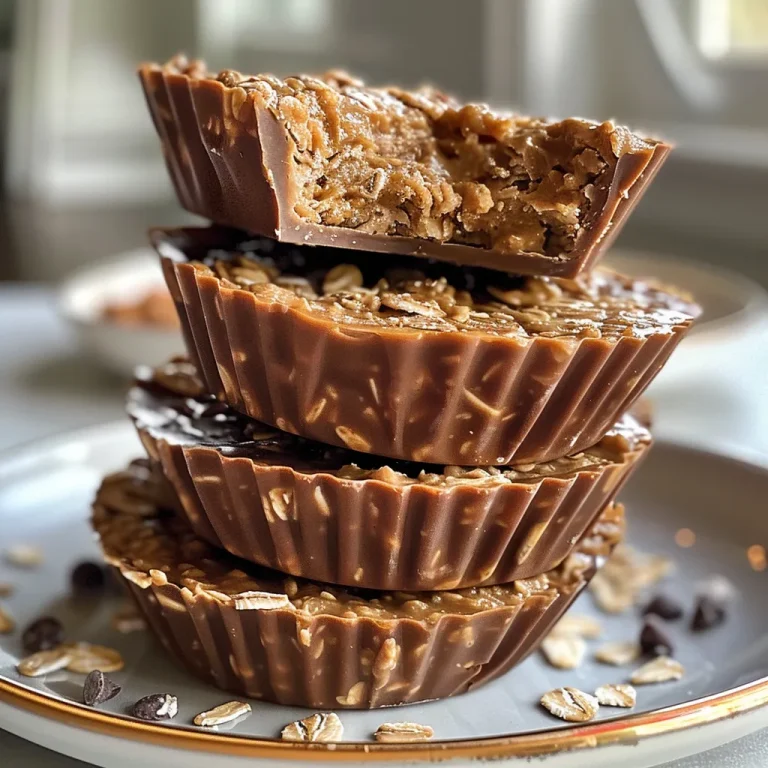
Delight in Simplicity: Your Guide to No-Bake Peanut Butter Oat Cups
If you’re looking for a swift and scrumptious treat, you’ve landed in the right place! These no-bake peanut butter oat cups are not just easy to make; they’re also satisfying and customizable to your taste. Perfect for a quick snack, dessert, or even a breakfast on the go, these cups will soon become a staple in your kitchen. Let’s dive into the deliciousness!
Why You’ll Love This Recipe
- Quick Preparation: Whip these up in under 30 minutes, making them perfect for busy days or last-minute gatherings.
- No Baking Required: Avoid heating up your kitchen with an oven. This recipe is all about simplicity and ease.
- Wholesome Ingredients: Packed with oats and peanut butter, these cups are nutritious and satisfying, perfect for both kids and adults.
- Vegan-Friendly: Using natural peanut butter and maple syrup ensures these treats are both vegan and delicious.
- Endless Customization: Add your favorite mix-ins like chocolate chips, nuts, or even dried fruits to make them uniquely yours.
Ingredients Breakdown
Here’s what you’ll need to create these delightful peanut butter oat cups:
- 2 cups (180g) rolled oats: Old-fashioned oats provide the best texture and chewiness.
- 1 cup (250g) natural peanut butter: Creamy or crunchy, this is the star ingredient that binds everything together.
- 1/4 cup (60ml) maple syrup: A natural sweetener that adds flavor and helps the mixture stick.
- 1 teaspoon vanilla extract: Enhances the overall flavor with a lovely aromatic touch.
- 1/4 teaspoon salt: A pinch of salt balances the sweetness and enhances the peanut butter flavor.
- Optional mix-ins: Consider adding 1/2 cup (90g) chocolate chips, chopped nuts, shredded coconut, or chia seeds for extra texture and taste.
How to Make It: Step-by-Step
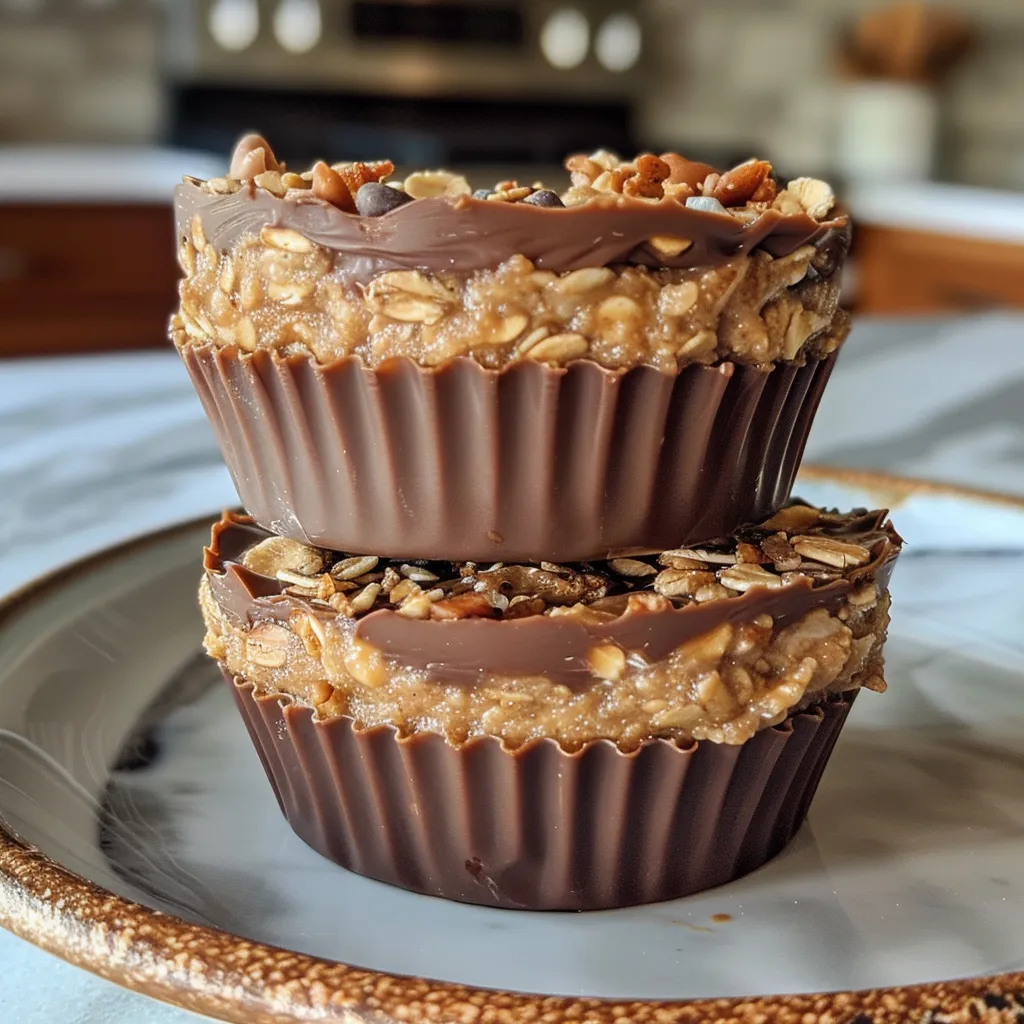
Follow these straightforward steps to prepare your no-bake peanut butter oat cups:
- Line a muffin tin with paper liners or lightly grease silicone molds.
- In a small saucepan over low heat, warm the peanut butter and maple syrup until smooth, stirring frequently. You can also use a microwave in 20-second bursts.
- Remove from heat and mix in vanilla extract and salt.
- Pour the warm peanut butter mixture over the oats in a large bowl. Stir until all oats are coated.
- Fold in any optional mix-ins you desire.
- Spoon the mixture into your prepared muffin tin or molds, pressing down firmly to compact.
- Chill in the refrigerator for at least an hour until set. For quicker results, freeze for 30 minutes.
- Once set, pop the cups out of the molds and enjoy!
Pro Tips for Success
- Use quality peanut butter: Choose natural peanut butter without added sugars or oils for the best flavor and health benefits.
- Don’t skip chilling: Chilling is crucial for setting the cups; it helps them hold their shape when served.
- Mix thoroughly: Ensure every oat is coated with the peanut butter mixture for a consistent taste in every bite.
- Experiment with flavors: Try adding cinnamon or cocoa powder for a unique twist.
- Adjust sweetness: Feel free to alter the amount of maple syrup based on your sweetness preference.
- Make ahead: These cups can be made a few days in advance, perfect for meal prepping.
- Store properly: Keep them in an airtight container in the refrigerator for up to a week.
- Presentation matters: Drizzle melted chocolate on top for a gourmet touch!
Common Mistakes & Troubleshooting
Even the best of us make mistakes in the kitchen! Here are some common pitfalls and how to avoid them:
- Too crumbly: If the mixture is too dry, add a bit more peanut butter or maple syrup.
- Too sticky: If it’s overly sticky, try adding a touch more oats to balance it out.
- Not setting properly: Ensure you chill them long enough; if they’re not firm after an hour, give them more time in the fridge.
Variations to Try
Mix things up with these exciting variations:
- Chocolate Lovers: Add cocoa powder to the peanut butter mixture and fold in chocolate chips.
- Fruit Fusion: Incorporate dried fruits like cranberries or apricots for a chewy texture.
- Nutty Delight: Swap out peanut butter for almond or cashew butter for a different flavor profile.
- Spiced Up: Add cinnamon or pumpkin spice for a seasonal twist.
Storage & Make-Ahead Instructions
These no-bake peanut butter oat cups are a great make-ahead snack! To store:
- Keep them in an airtight container in the refrigerator for up to one week.
- For longer storage, freeze them in a single layer, then transfer to a freezer-safe bag or container. They’ll last up to three months!
Frequently Asked Questions
Let’s tackle some common questions about these delicious cups:
- Can I use almond butter instead of peanut butter? Absolutely! Almond butter gives a different flavor but works just as well.
- Are these cups gluten-free? Yes, as long as you use certified gluten-free oats.
- Can I add protein powder? Yes, you can mix in a scoop of your favorite protein powder for an extra protein boost.
- What if I don’t have maple syrup? Honey makes a great substitute, but keep in mind it’s not vegan.
- How do I know when they’re set? They should be firm to the touch and hold their shape when removed from the mold.
- How can I make these nut-free? Try sunflower seed butter as a fantastic nut-free alternative.
- Can I make these in advance for meal prep? Absolutely! They’re perfect for prepping ahead of time.
- What’s the best way to enjoy them? They’re delicious straight from the fridge or drizzled with a bit of chocolate!
Nutritional Tips and Dietary Adaptations
These oat cups are not just tasty; they can also be tailored to fit various dietary needs:
- Protein Boost: Add a scoop of protein powder to the mixture.
- Lower Sugar: Use unsweetened applesauce instead of maple syrup for a lower-sugar option.
- High Fiber: Mix in chia seeds or flaxseeds for added fiber and omega-3 fatty acids.
Essential Equipment Recommendations
To make these delicious no-bake peanut butter oat cups, here’s what you’ll need:
- Muffin Tin or Silicone Molds: For shaping the cups.
- Mixing Bowl: A large bowl to combine all ingredients.
- Measuring Cups and Spoons: For accurate measurements of your ingredients.
- Small Saucepan: To warm the peanut butter and syrup.
Serving Suggestions
Enjoy your no-bake peanut butter oat cups in various delightful ways:
- As a snack: Perfect for an afternoon pick-me-up.
- With coffee: Pair with a cup of coffee or tea for a cozy treat.
- For breakfast: Great to grab on your way out the door.
- As a dessert: Serve with a drizzle of chocolate and fresh fruit for a decadent touch.
Now that you have the ultimate guide to making no-bake peanut butter oat cups, you’re ready to start your culinary adventure! Remember, cooking is all about enjoying the process and sharing good food with great company. So, roll up your sleeves, have fun, and indulge in these delicious treats. Happy cooking!
Easy No-Bake Peanut Butter Oat Cups
Ingredients
Oats
- 2 cups rolled oats (old-fashioned)
Peanut Butter
- 1 cup natural peanut butter (unsweetened, creamy or crunchy)
Maple Syrup
- 1/4 cup maple syrup
Vanilla Extract
- 1 teaspoon vanilla extract
Salt
- 1/4 teaspoon salt
Optional Mix-ins
- 1/2 cup chocolate chips, chopped nuts, shredded coconut, chia seeds (optional)
Instructions
- Line muffin tin or silicone molds. Mix oats and set aside.
- Warm peanut butter and maple syrup until smooth. Stir in vanilla and salt.
- Combine warm mixture with oats, mixing until coated and sticky.
- Fold in optional mix-ins if desired. Spoon into molds and press down.
- Chill for at least 1 hour until set. Remove and enjoy.