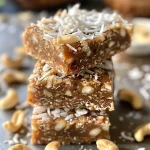
Indulge in the Simplicity of No-Bake Chocolate Coconut Oatmeal Treats
There’s something magical about no-bake desserts, and today, I’m excited to share a treat that’s not only delicious but also incredibly easy to make! Welcome to the world of No-Bake Chocolate Coconut Oatmeal Treats. With just a handful of ingredients, you can whip up these scrumptious bites that are perfect for a quick snack, an after-school treat, or even a sneaky midnight indulgence. Let’s dive into why you’ll love this recipe and how it can become a staple in your kitchen.
Why You’ll Love This Recipe
- Quick and Easy: These treats require no baking, so you can have them ready in just minutes. Great for busy days!
- Wholesome Ingredients: Made with rolled oats, shredded coconut, and dark chocolate, they are a guilt-free snack.
- Customizable: Feel free to add your favorite nuts, seeds, or dried fruits to make them your own!
- Perfect for Meal Prep: They store well in the refrigerator, making them a great make-ahead option for busy weeks.
- Kid-Friendly: Kids love them, and they can even help with the preparation, making it a fun family activity.
About the Ingredients
Understanding the ingredients is key to creating the best no-bake chocolate coconut oatmeal treats. Here’s a breakdown of what you’ll need:
- Rolled Oats: The foundation of these treats, providing texture and fiber. You can substitute with quick oats if you’re in a pinch, but be aware the texture will be slightly different.
- Unsweetened Shredded Coconut: Adds a chewy texture and a hint of tropical flavor. You can use sweetened coconut if you prefer a sweeter bite.
- Dark Chocolate Chips: For that rich, chocolaty goodness. Feel free to use milk chocolate if that’s more to your taste!
- Nut Butter: Acts as a binder and adds creaminess. Almond butter, peanut butter, or sunflower seed butter can be used based on dietary preferences.
- Honey or Maple Syrup: Natural sweeteners that help bind the mixture. For a vegan option, stick with maple syrup.
- Vanilla Extract: Just a splash enhances the overall flavor.
- Optional Add-Ins: Consider adding chopped nuts, dried fruit, chia seeds, or flaxseeds for extra nutrition and flavor.
Step-by-Step Instructions
Ready to make these delicious treats? Let’s walk through the process step-by-step:
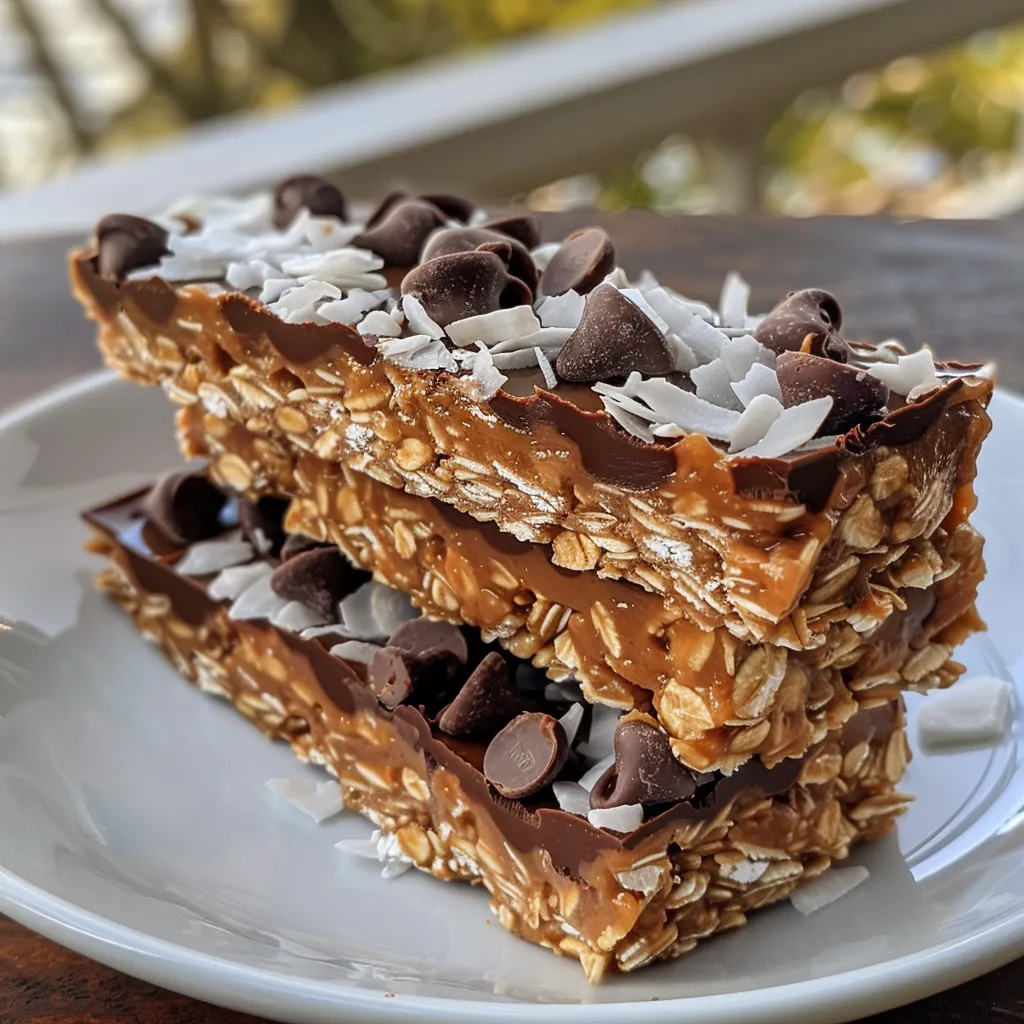
- Line a baking sheet with parchment paper and set aside.
- Melt chocolate chips in a microwave-safe bowl in 30-second intervals, stirring between each until smooth.
- In a separate bowl, mix nut butter, honey (or maple syrup), and vanilla extract until smooth.
- Stir the melted chocolate into the nut butter mixture until fully combined.
- Fold in rolled oats and shredded coconut until evenly coated. Add any optional mix-ins if desired.
- Scoop spoonfuls of the mixture and form small clusters on the prepared baking sheet.
- Refrigerate for at least 20 minutes, or until set.
- Store in an airtight container or enjoy immediately!
Expert Tips & Tricks
Before you get started, here are some expert tips to ensure your treats turn out perfectly:
- Use Fresh Ingredients: Ensure your oats and coconut are fresh for the best flavor.
- Experiment with Add-Ins: Mix in your favorite nuts or dried fruits to customize your treats.
- Chill for Best Results: Letting them set in the refrigerator helps them firm up nicely.
- Portion Control: Use a cookie scoop for evenly-sized treats that are easy to grab and go.
- Don’t Overheat the Chocolate: Stir continuously while melting to avoid burning.
- Store Properly: Keep them in an airtight container in the refrigerator to maintain freshness.
- Make a Double Batch: They’ll disappear quickly, so it’s always good to have extras!
- Top with Sea Salt: A sprinkle of sea salt can enhance the flavors and add a gourmet touch.
Common Mistakes & Troubleshooting
Even the best of us can make mistakes in the kitchen. Here are some common issues and how to avoid them:
- Too Sticky: If your mixture is too sticky, try adding more oats or coconut to balance the moisture.
- Not Setting Properly: If they’re not firming up, allow them more time in the fridge or add a bit more nut butter for binding.
- Chocolate Seizing: If your chocolate seizes, add a tiny bit of coconut oil to smooth it out.
Delicious Variations
Feel free to switch things up with these fun variations:
- Peanut Butter Lovers: Replace nut butter with creamy peanut butter for a classic flavor.
- Fruit and Nut: Mix in dried cranberries and walnuts for a chewy, crunchy treat.
- Nut-Free Option: Use sunflower seed butter instead of nut butter for a nut-free alternative.
- Chocolate Drizzled: Drizzle melted chocolate over the top for an extra touch of indulgence.
Storage and Make-Ahead Instructions
These treats are perfect for making ahead of time. Here’s how to store them:
- In the Refrigerator: Your no-bake chocolate coconut oatmeal treats will stay fresh for up to one week in an airtight container.
- For Longer Storage: Freeze them for up to three months. Just ensure they’re well-wrapped to prevent freezer burn.
Frequently Asked Questions
Got questions? I’ve got answers! Here are some commonly asked questions about these treats:
- Can I use quick oats instead of rolled oats? Yes, but the texture may vary slightly.
- What can I substitute for honey? Maple syrup is a great vegan alternative.
- How do I make them vegan? Use maple syrup and a plant-based nut butter.
- Can I add protein powder? Absolutely! Just replace part of the oats with your favorite protein powder.
- How do I prevent them from sticking together? Layer them between parchment paper when storing.
- Can I use different types of chocolate? Yes! Milk chocolate or white chocolate can be used based on your preference.
- What if I don’t have nut butter? You can use sunflower seed butter or even tahini.
- Are these treats gluten-free? Yes, as long as you use certified gluten-free oats.
Nutritional Tips and Dietary Adaptations
These treats are not just delicious; they can also be a nutritious option depending on your dietary needs:
- High Fiber: The oats and coconut provide a good amount of fiber to keep you feeling full.
- Healthy Fats: Nut butter adds healthy fats, which are essential for a balanced diet.
- Lower Sugar Option: If you want to reduce sugar, simply cut back on the honey or maple syrup.
Equipment Recommendations
A few tools can make this process even smoother:
- Microwave-safe Bowl: For melting chocolate easily.
- Mixing Bowl: A large bowl for combining ingredients.
- Parchment Paper: Essential for easy cleanup and preventing sticking.
- Cookie Scoop: For uniform-sized treats.
Serving Suggestions
These treats are perfect on their own, but here are some fun ways to serve them:
- On a Platter: Arrange them on a platter for a delightful dessert display.
- With Fruit: Pair them with fresh fruit for a balanced snack.
- In Lunch Boxes: A fantastic addition to kids’ lunch boxes for a sweet surprise.
Conclusion
And there you have it! With just a few simple ingredients and minimal effort, you can create these delightful No-Bake Chocolate Coconut Oatmeal Treats that everyone will love. Whether you enjoy them as a quick snack, an after-dinner treat, or a fun family activity, they’re sure to bring joy to your kitchen. Remember, cooking is all about having fun and experimenting, so don’t be afraid to make this recipe your own. Happy cooking!
No-Bake Chocolate Coconut Oatmeal Treats
Ingredients
Dried ingredients
- 2 cups rolled oats
- 1 cup unsweetened shredded coconut
- 1 cup dark chocolate chips
- 1/2 cup nut butter
- 1/3 cup honey or maple syrup
- 1 tsp vanilla extract
- 1 optional add-ins (chopped nuts, dried fruit, chia seeds, or flaxseeds) (optional)
Instructions
- Line a baking sheet with parchment paper.
- Melt chocolate chips in 30-second intervals, stirring until smooth.
- Mix nut butter, honey, and vanilla until smooth.
- Combine melted chocolate with nut butter mixture.
- Stir in oats, coconut, and optional add-ins. Scoop onto sheet and refrigerate for 20 minutes.