Beat the Heat with Homemade Frozen Yogurt Berry Pops
The summer sun is blazing, the kids are asking for treats, and you find yourself dreaming of something cool, refreshing, and delicious. Enter these Easy Frozen Yogurt Berry Pops! In less than an hour, you can whip up a batch of these delightful pops that blend creamy Greek yogurt with bright, juicy berries. They’re not just a treat; they’re a healthy snack that everyone in the family will love. And the best part? You can customize them to fit your taste and dietary needs, making them perfect for busy days or last-minute gatherings. Let’s dive into this delightful recipe and discover why you’ll want to keep these frozen yogurt berry pops in your freezer all summer long!
Why You’ll Love This Recipe
- Quick and Easy: With minimal prep time, you can have these tasty pops ready in no time, making them ideal for busy parents.
- Healthy Ingredients: Packed with Greek yogurt and fresh berries, these pops provide a nutritious option over sugary store-bought treats.
- Kid-Friendly: The creamy texture and sweet flavor make these pops appealing to children, and you can involve them in the making process!
- Customizable: Adjust the sweetness, swap in different fruits, or add fun mix-ins like chocolate chips or nuts to suit your family’s preferences.
- Perfect for Any Occasion: Whether it’s a backyard barbecue or a simple afternoon snack, these pops are a hit, serving as a refreshing treat for kids and adults alike.
Ingredients for Your Frozen Yogurt Berry Pops
Here’s what you’ll need to create these delicious pops:
- 2 cups Greek yogurt: Plain or vanilla works best for a creamy base.
- 2 cups Mixed berries: Use fresh or frozen berries like strawberries, blueberries, or raspberries for vibrant color and flavor.
- 2 tablespoons Honey or maple syrup: Adjust to your preferred sweetness; feel free to substitute with agave or stevia if desired.
- 1 tablespoon Lemon juice: Enhances the freshness of the berries and adds a lovely zing.
- 1 teaspoon Vanilla extract: For a wonderful aroma and extra flavor boost.
- 1 tablespoon Chia seeds: Optional, but they add a nice texture and a boost of omega-3 fatty acids.
- 1/4 cup Crushed nuts: Optional for crunch; think almonds, walnuts, or pecans for added nutrition.
How to Make Your Frozen Yogurt Berry Pops
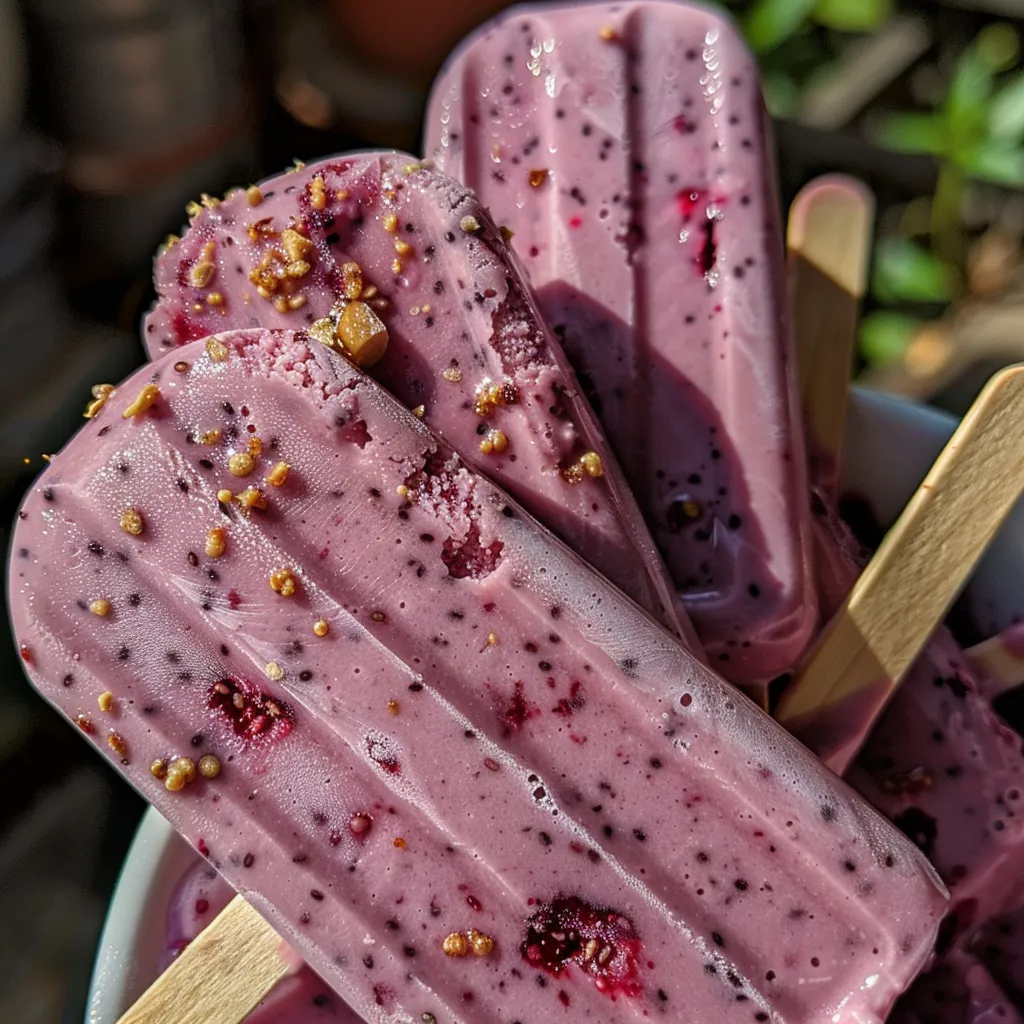
Ready to get started? Here’s a simple step-by-step guide:
- In a mixing bowl, combine the Greek yogurt, honey or maple syrup, lemon juice, and vanilla extract. Stir until smooth and creamy.
- Add the mixed berries to the yogurt mixture. If you prefer smoother pops, blend the berries in a food processor before adding; for chunkier pops, fold them in whole.
- Pour the mixture into popsicle molds, filling them about 3/4 full to allow for expansion as they freeze.
- If using, sprinkle chia seeds and crushed nuts on top before inserting the popsicle sticks.
- Cover the molds and place them in the freezer for at least 4-6 hours, or until fully frozen.
- To remove the pops, run warm water over the outside of the molds for a few seconds and gently pull out the popsicles.
Pro Tips for Perfect Frozen Yogurt Berry Pops
- Use ripe fruit: The riper the berries, the sweeter and more flavorful your pops will be. Choose berries that are vibrant and fragrant.
- Experiment with flavors: Try adding a splash of coconut milk or a hint of mint for a unique twist.
- Adjust sweetness: Taste your mixture before pouring into molds. If it’s not sweet enough for your liking, add more honey or syrup.
- Non-dairy options: Substitute Greek yogurt with coconut yogurt or almond yogurt for a dairy-free version.
- Mix and match: Don’t hesitate to use different fruit combinations—mango, peach, or kiwi can all work beautifully!
- Make it colorful: Layer different fruit mixtures in the molds for a stunning visual effect.
- Using molds: Silicone molds can make it easier to remove the pops without breaking.
- Store properly: Keep your pops in an airtight container in the freezer to prevent freezer burn.
Common Mistakes and Troubleshooting
Even the best of us can run into a few hiccups in the kitchen. Here are some common issues and how to fix them:
- Pops won’t come out: If your pops are stuck, try letting them sit at room temperature for a few minutes or running warm water over the outside of the mold.
- Too sweet or not sweet enough: You can always adjust the sweetness by adding more honey or a splash of lemon juice if it’s too sweet.
- Texture issues: If your pops are icy rather than creamy, it might be due to too much liquid. Stick with the ratios provided for best results.
- Flavor imbalance: If the flavor seems off, consider adding a pinch of salt or more lemon juice to enhance the overall taste.
Fun Variations to Try
Get creative and mix things up! Here are some delicious variations to consider:
- Chocolate Banana Yogurt Pops: Blend in 1 banana and 2 tablespoons of cocoa powder for a chocolatey treat.
- Mango Coconut Pops: Swap the berries for 2 cups of mango puree and add 1/2 cup of coconut milk.
- Peach Melba Pops: Combine 2 cups of peach puree with a handful of raspberries for a summer classic.
- Nutty Berry Pops: Add 1/4 cup of almond butter to the yogurt mixture for a nutty flavor and creamy texture.
How to Store and Make-Ahead Instructions
These frozen yogurt berry pops can be made ahead of time and stored with ease:
- Store your pops in an airtight container in the freezer for up to 2 months. Just be sure to label them with the date!
- To make ahead, prepare the pops on the weekend and enjoy them throughout the week as a quick snack or dessert.
Frequently Asked Questions
Got questions? We’ve got answers! Here are some common queries about frozen yogurt berry pops:
- How long do frozen yogurt pops last? They can last in the freezer for up to 2 months, but they’re best enjoyed within the first month for optimal texture and flavor.
- Can I make these pops dairy-free? Absolutely! Substitute Greek yogurt with a plant-based yogurt alternative like coconut or almond yogurt.
- What’s the best way to sweeten these pops? Honey or maple syrup works wonderfully, but feel free to use stevia or agave if you prefer a low-calorie option.
- Can I use frozen berries? Yes! Frozen berries are a great alternative and can make your pops even creamier.
- What if I don’t have popsicle molds? You can use small cups or ice cube trays with wooden sticks as a substitute.
- Can I add other ingredients? Definitely! Consider adding nuts, seeds, or even a splash of yogurt smoothie for an extra kick.
- Are these pops healthy? Yes! They are rich in protein, vitamins, and antioxidants, making them a nutritious treat.
- Can I blend different fruits together? Yes! Mixing fruits can create delightful flavor combinations. Just ensure they complement each other!
Nutritional Tips and Dietary Adaptations
These frozen yogurt berry pops are not only delicious but also nutritious! Here are some tips to enhance their health benefits:
- High protein: Greek yogurt is a great source of protein, which helps keep you feeling full and satisfied.
- Add superfoods: Consider adding superfoods like spirulina or protein powder for an extra health boost.
- Watch the sugar: Adjust the amount of sweetener based on your dietary needs; you can even skip it entirely if your berries are sweet enough.
Essential Equipment for Making Pops
Having the right tools can make the process smoother:
- Popsicle molds: Choose silicone molds for easy release, or classic plastic molds for a traditional feel.
- Blender or food processor: This is essential for combining the yogurt and berries smoothly.
- Mixing bowls: A sturdy bowl for mixing your ingredients before pouring them into molds.
- Spatula: Great for scraping down the sides of your blender and transferring the mixture into molds.
Serving Suggestions for Your Frozen Pops
When it’s time to serve, consider these fun ideas:
- Serve with fresh fruit: Arrange pops on a plate with fresh berries for a colorful display.
- Pair with yogurt: Serve alongside a dollop of yogurt for a creamy contrast.
- Garnish with mint: A sprinkle of fresh mint can add a refreshing touch to your presentation.
In Conclusion
So there you have it—your ultimate guide to making Easy Frozen Yogurt Berry Pops! This recipe is not only simple and quick but also allows for endless customization to fit your family’s tastes. Whether you’re whipping them up for a sunny day treat or a last-minute dessert, these pops are sure to impress. So grab your ingredients, get the kids involved, and start creating delicious, healthy snacks that everyone can enjoy. Remember, cooking is all about having fun and exploring flavors—enjoy the process, and don’t be afraid to make it your own!
Easy Frozen Yogurt Berry Pops for a Refreshing Homemade Treat
Ingredients
Dairy
- 2 cups Greek yogurt (Plain or vanilla recommended)
- 2 cups Mixed berries (Fresh or frozen)
- 2 tablespoons Honey or maple syrup (Adjust to preferred sweetness)
- 1 tablespoon Lemon juice (Enhances berry freshness)
- 1 teaspoon Vanilla extract (For aroma)
- 1 tablespoon Chia seeds (Optional for extra texture)
- 0.25 cup Crushed nuts (For crunch)
Instructions
- In a blender, combine Greek yogurt, berries, honey, lemon juice, vanilla extract, and chia seeds. Blend until smooth.
- Pour the mixture into popsicle molds, leaving a little space at the top.
- Sprinkle crushed nuts into each mold if desired.
- Insert sticks and freeze for at least 4 hours or until solid.
- Remove from molds and enjoy your refreshing berry yogurt pops!