If you’re looking for a dessert that’s as easy as it is delicious, you’ve landed in the right place! These **No-Bake Strawberry Crunch Cheesecake Cups** are perfect for any occasion, whether it’s a summer gathering, a special family dinner, or just a sweet treat to enjoy on a quiet night. With minimal ingredients and no baking required, you’ll feel like a culinary superstar without the hassle. Let’s dive into why you’ll absolutely love this recipe!
Why You’ll Love This Recipe
- Quick and Easy: Whip these up in under 30 minutes, perfect for last-minute dessert cravings or gatherings.
- No Baking Required: Enjoy a delicious cheesecake without ever turning on the oven. This means less mess and more time to relax!
- Individual Servings: Perfectly portioned in cups, these cheesecake delights are great for parties and gatherings. Everyone can have their own!
- Customizable: Feel free to tweak the flavors! Add your favorite fruits or swap out the cookies to create your unique twist.
- Kid-Friendly: This fun dessert is simple enough for children to help make, making it a wonderful activity to share!
Ingredient Breakdown
Here’s what you’ll need to create your scrumptious strawberry crunch cheesecake cups:
- 1.5 cups crushed golden sandwich cookies: These form the base. You can substitute with graham crackers or any favorite cookie for different flavors.
- 4 tbsp melted butter: This helps bind the crust together. If you prefer a vegan option, coconut oil works beautifully!
- 8 oz cream cheese (softened): The star of the cheesecake filling. Use a vegan cream cheese for a dairy-free option.
- 0.5 cup powdered sugar: This sweetens the cheesecake. Feel free to adjust the sweetness based on your preference.
- 1 tsp vanilla extract: Adds depth to the flavor. Use pure vanilla for the best results.
- 1 cup heavy whipping cream: Essential for that rich, creamy texture. For a lighter version, you can use coconut cream instead.
Instructions to Create Your Dessert
Follow these simple steps to assemble your cheesecake cups:
- Mix the crust: In a bowl, combine the crushed cookies and melted butter. Press the mixture into the bottom of your serving cups to form a solid base.
- Prepare the cheesecake filling: In a separate bowl, beat the softened cream cheese, powdered sugar, and vanilla extract until smooth and creamy.
- Whip the cream: In another bowl, whip the heavy cream until stiff peaks form, then gently fold it into the cheesecake mixture. This gives the filling that light, airy texture.
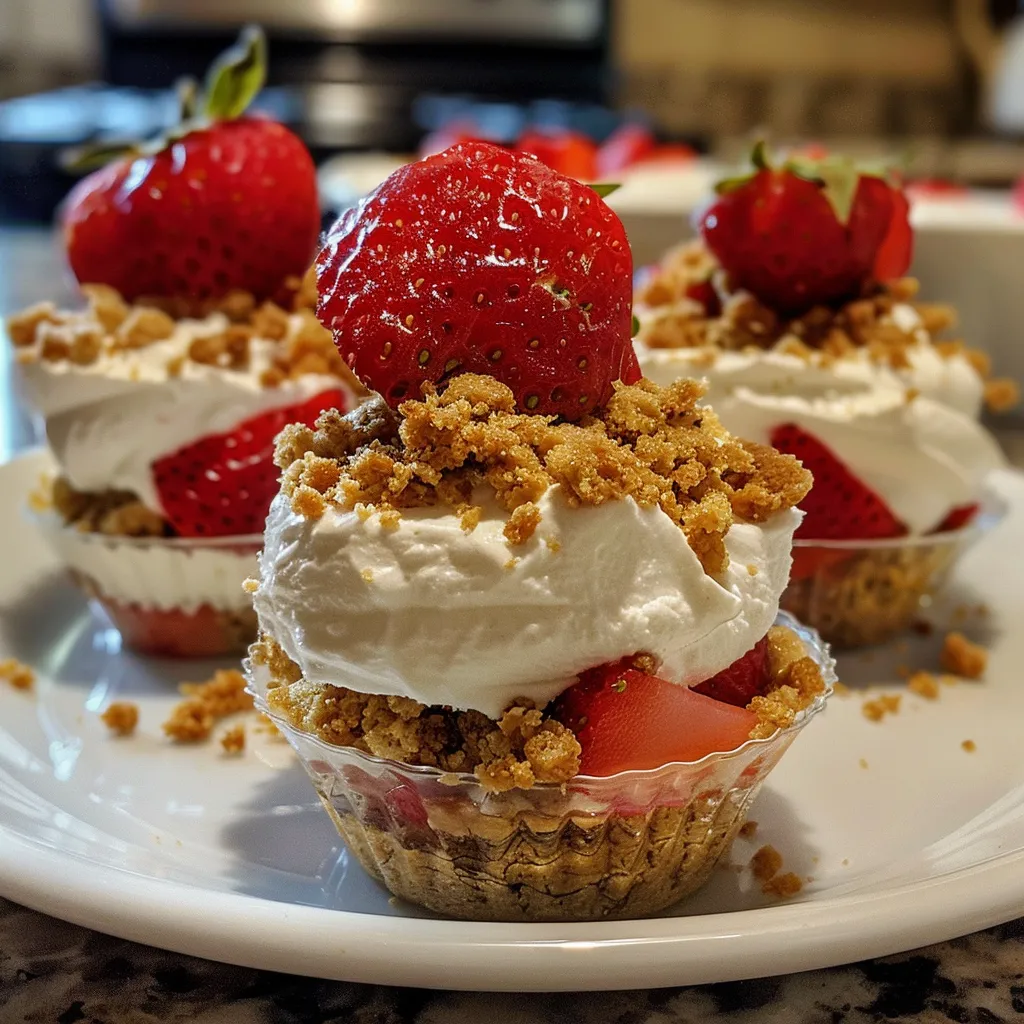
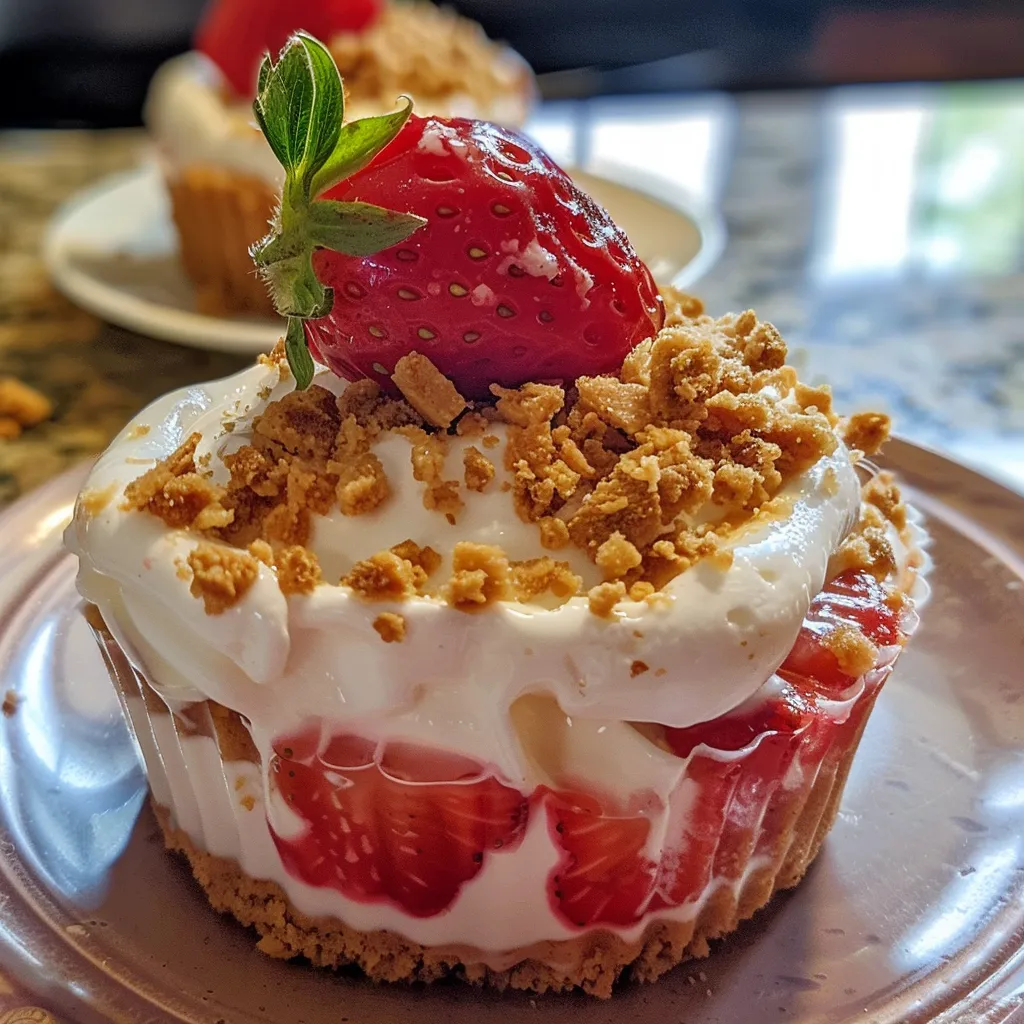
- Layer it up: Start with the crust, then add a layer of cheesecake filling, followed by fresh strawberries, and top with the crunch topping.
- Chill: Cover the cups and place them in the fridge for at least 1-2 hours to set. If you can wait, overnight chilling is even better!
Pro Tips for Perfect Cheesecake Cups
- Use Room Temperature Ingredients: Ensure your cream cheese is at room temperature for a smooth filling. Cold cream cheese can result in lumps.
- Chill for Best Results: The longer you chill the cups, the better the layers will set, resulting in a firmer texture.
- Choose Fresh Strawberries: For the best flavor, use ripe, fresh strawberries. Frozen ones can be used but may alter the texture.
- Decorate with Whipped Cream: Before serving, add a dollop of whipped cream on top for a beautiful finish.
- Make Ahead: These cups can be prepared a day in advance, making them an excellent choice for entertaining.
- Experiment with Flavors: Try adding lemon zest or other fruit purees to the cheesecake filling for a twist!
- Tidy Layers: Use a piping bag to layer the cheesecake filling neatly for a professional look.
- Use Clear Cups: Glass or clear plastic cups allow for a beautiful presentation, showcasing the layers!
Common Mistakes and Troubleshooting
Even the best cooks can run into hiccups! Here’s how to troubleshoot:
- Too Runny Filling: If your cheesecake filling is too runny, make sure you whipped the cream to stiff peaks and folded gently.
- Crust Crumbling: If your crust falls apart, add a bit more melted butter to help it stick together.
- Lumpy Filling: This usually happens with cold cream cheese. Always let it soften properly before mixing.
- Over Mixing: When folding whipped cream into the cheesecake mixture, be gentle. Over mixing can deflate the air, making it less fluffy.
Variations to Try
Here are some fun ways to switch things up with your cheesecake cups:
- Chocolate Strawberry Crunch: Add cocoa powder to the crust and use chocolate cream cheese for a decadent twist.
- Berry Medley: Swap out strawberries for a mix of berries like blueberries and raspberries for a colorful dessert.
- Nutty Delight: Incorporate crushed nuts into the crust for added crunch and flavor.
- Minty Fresh: Add mint extract to the filling for a refreshing mint cheesecake experience.
Storage and Make-Ahead Instructions
These cheesecake cups can be made ahead of time and stored in the fridge for up to 3 days. Just keep them covered to maintain freshness. If you want to freeze them, it’s best to freeze the cheesecake without the toppings. Thaw in the fridge before serving.
Frequently Asked Questions
- Can I use low-fat cream cheese? Yes, you can! Just note that it may alter the texture slightly.
- How long can I keep these cheesecake cups in the fridge? They’re best enjoyed within 3 days, but can last up to a week if stored properly.
- Can I use a different type of cookie for the crust? Absolutely! Any cookie that crumbles well will work.
- Is it necessary to chill the cheesecake cups? Yes, chilling helps the layers set and improves the overall texture.
- Can I make these dairy-free? Yes! Use dairy-free cream cheese and coconut cream for the filling.
- What can I substitute for whipped cream? You can use whipped coconut cream or a dairy-free alternative.
- What if I don’t have heavy cream? You can substitute with a non-dairy heavy cream alternative or simply use more cream cheese to achieve a thicker texture.
- Can I make these gluten-free? Yes! Use gluten-free cookies for the crust.
Nutritional Tips and Dietary Adaptations
To make your dessert healthier, consider using less sugar or a natural sweetener like honey or maple syrup. For a lighter option, replace heavy cream with Greek yogurt or use a whipped topping that’s lower in fat. Always check labels for allergens, especially if serving to guests with dietary restrictions.
Equipment Recommendations
For this recipe, you’ll need:
- Mixing Bowls: Use multiple bowls to keep your ingredients organized.
- Hand Mixer: A hand mixer makes it easy to achieve smooth cream cheese and whipped cream.
- Piping Bag: Helpful for layering the cheesecake filling neatly.
- Cups or Glasses: Clear cups are ideal for showcasing your beautiful layers.
Serving Suggestions
Serve your cheesecake cups chilled, topped with extra strawberries or a drizzle of chocolate sauce. Pair them with a refreshing beverage like iced tea or lemonade for a delightful dessert experience.
And there you have it! A comprehensive guide to making the best No-Bake Strawberry Crunch Cheesecake Cups. Remember, cooking should be fun, so don’t stress about perfection. Enjoy the process, share with loved ones, and savor every delicious bite. Happy cooking!
No-Bake Strawberry Crunch Cheesecake Cups
Ingredients
Crust
- 1.5 cups crushed golden sandwich cookies
- 4 tbsp melted butter
Filling
- 8 oz cream cheese (softened)
- 0.5 cup powdered sugar
- 1 tsp vanilla extract
Topping
- 1 cup heavy whipping cream
Additional
- 1 cup sliced strawberries
- 0.5 cup crunch topping (e.g., granola or crushed cookies)
Instructions
- Mix crushed cookies and melted butter, then press into cups to form crust.
- Beat softened cream cheese, powdered sugar, and vanilla until smooth.
- Whip heavy cream until stiff peaks form and fold into the cream cheese mixture.
- Layer crust, filling, sliced strawberries, and crunch topping in cups.
- Chill for 1–2 hours before serving.