Welcome, fellow chocolate lovers! If you’ve ever craved the rich, velvety goodness of chocolate truffles but thought they were off-limits due to dietary restrictions, you’re in for a delightful surprise. Today, I’m excited to share a recipe for Sugar Free Chocolate Truffles that’s not only easy to make but also utterly satisfying. With just four simple ingredients, you can whip up these decadent treats in no time, proving that delicious doesn’t have to be complicated!
In this article, we’ll explore the joys of creating sugar free chocolate truffles, the benefits of making them at home, and some tips to ensure your truffles turn out perfectly every time. So grab your apron, and let’s dive into the world of creamy, chocolatey bliss!
Why You’ll Love This Recipe
- Quick and Easy: With just a few simple steps, you can have these truffles ready in under an hour, making them perfect for last-minute cravings or unexpected guests.
- Only Four Ingredients: You won’t need a long grocery list! All you need are chocolate chips, heavy cream, vanilla essence, and cocoa powder to create these rich morsels.
- Guilt-Free Indulgence: These truffles are sugar-free, meaning you can satisfy your sweet tooth without derailing your dietary goals. Enjoy them without the guilt!
- Versatile Treats: Whether you’re a keto follower or just looking to reduce sugar, these truffles can be adapted to fit various dietary needs.
- Impressive Presentation: Roll them in cocoa powder or nuts, and you’ve got a treat that looks as good as it tastes—perfect for gifting or special occasions!
Ingredient Breakdown
Let’s take a closer look at the ingredients you’ll need to make these delightful homemade chocolate truffles.
- 1 cup no-sugar chocolate chips: The base of your truffles, these chips provide the rich chocolate flavor without the added sugar. You can opt for dark or semi-sweet varieties depending on your preference.
- 1/2 cup heavy cream: This ingredient adds creaminess and richness to the chocolate mixture, creating that indulgent texture we all love. If you want a lighter option, you can substitute with coconut cream.
- 1 teaspoon vanilla essence: A splash of vanilla enhances the chocolate flavor, making your truffles taste even more decadent.
- 1 cup cocoa powder, unsweetened: Not only does this provide a lovely coating for your truffles, but it also adds to the rich chocolate experience. Feel free to use flavored cocoa for a twist!
Substitutions and Variations
If you’re looking to personalize your truffles, here are some simple substitutions and variations to consider:
- Nut Butters: For a creamier texture, try adding 2 tablespoons of almond or peanut butter to the chocolate mixture.
- Flavor Extracts: Experiment with almond, mint, or orange extracts for a unique flavor profile.
- Coating Options: Instead of cocoa powder, roll your truffles in finely chopped nuts, shredded coconut, or even crushed freeze-dried fruit for a fun twist!
- Dairy-Free Alternative: If you’re dairy-free, use coconut milk or almond cream in place of heavy cream for a delicious alternative!
Pro Tips for Perfect Truffles
To help you achieve truffle perfection, here are some expert insights:
- Temperature Control: Melt the chocolate slowly over low heat or in the microwave in short bursts. This prevents the chocolate from seizing up.
- Chill Before Shaping: Allow the mixture to chill in the refrigerator for at least 30 minutes. This makes it easier to scoop and shape your truffles.
- Use a Cookie Scoop: For uniform sizes, use a cookie scoop to portion out your truffles before rolling them. This will ensure they cook evenly and look delightful.
- Roll in Cocoa Powder: After shaping, roll the truffles in cocoa powder to give them a beautiful coating and enhance the chocolate flavor.
- Experiment with Textures: Feel free to mix in crushed nuts or seeds into the chocolate mixture for added crunch and flavor!
- Keep Them Cool: Store your truffles in the fridge to maintain their shape and texture. They can last up to two weeks in an airtight container!
- Mind the Sweetness: Taste your mixture before chilling; if you prefer it sweeter, consider adding a few drops of liquid stevia or your favorite sugar substitute.
- Presentation Matters: For a more elegant touch, drizzle melted chocolate over the finished truffles before serving.
Common Mistakes and Troubleshooting
Making truffles can be a breeze, but here are some common pitfalls to avoid:
- Chocolate Seizing: If your chocolate becomes grainy or clumpy, it may have come into contact with water. Always keep your utensils and surfaces dry.
- Too Soft to Shape: If your mixture is too soft, it may not hold its shape. Chill it longer in the refrigerator until it firms up.
- Overheating Chocolate: Always melt chocolate slowly to avoid burning it. If it does burn, it’s best to start over.
- Uneven Coating: To ensure a thick, even coating, roll your truffles in cocoa powder or other coatings while the mixture is still soft.
Storage and Make-Ahead Instructions
You can easily make these truffles ahead of time. Here’s how to store them:
- Refrigerator Storage: Keep your truffles in an airtight container in the refrigerator for up to two weeks. They’ll stay fresh and delicious!
- Freezing: For longer storage, freeze your truffles on a baking sheet until solid, then transfer them to a freezer-safe container. They’ll last for up to three months—just let them thaw in the fridge before serving.
Serving Suggestions
These sugar free chocolate truffles are versatile and can be enjoyed in many ways:
- Gift Them: Place them in a decorative box or jar for a thoughtful homemade gift that anyone will appreciate.
- Pair with Coffee: Enjoy these truffles alongside a rich cup of coffee or tea for a delightful afternoon treat.
- Make a Dessert Platter: Serve your truffles on a platter with fresh fruit, nuts, and other sweets for an impressive dessert spread.
- Indulge Solo: Of course, you can always enjoy a few truffles on your own while watching a movie or reading a book—because you deserve it!
Comprehensive FAQ
Let’s address some common questions about making and storing your homemade chocolate truffles.
- Can I use different types of chocolate? Yes, you can use any sugar-free chocolate chips you prefer. Just keep in mind that different chocolates may alter the taste and texture slightly.
- How long do these truffles last? They can last up to two weeks in the refrigerator and up to three months in the freezer when stored properly.
- Can I use a different sweetener? Absolutely! Feel free to substitute your favorite sugar-free sweetener, but be mindful of the sweetness level.
- What if my truffles are too soft? If they’re too soft to roll, chill them longer. If they’re already rolled, return them to the fridge until firm.
- Can I add spices? Yes! Adding spices like cinnamon or cayenne can elevate the flavor profile of your truffles.
- Are these truffles vegan? They can be made vegan by using dairy-free chocolate and coconut cream instead of heavy cream.
- What’s the best way to coat the truffles? Roll them in cocoa powder, crushed nuts, or coconut flakes while the mixture is still soft for better adherence.
- Can I make these truffles ahead of time? Yes! They can be made ahead of time and stored in the fridge or freezer for later enjoyment.
Nutritional Tips and Dietary Adaptations
These truffles are not only sugar-free but can be made with various dietary adaptations:
- Low-Carb/Keto Friendly: This recipe is perfect for those following a low-carb or keto diet, allowing you to satisfy your sweet cravings without the carbs.
- Nut-Free Option: Use seeds or omit nuts altogether if you’re preparing these for someone with nut allergies.
- Gluten-Free: All ingredients in this recipe are gluten-free, making them a safe treat for those with gluten sensitivities.
Equipment Recommendations
Here’s what you’ll need to whip up your sugar free chocolate truffles effectively:
- Microwave-Safe Bowl: For melting your chocolate chips smoothly.
- Rubber Spatula: To mix the ingredients thoroughly.
- Cookie Scoop: For even portions when shaping your truffles.
- Airtight Container: For storing your delicious truffles.
And there you have it—everything you need to create mouthwatering sugar free chocolate truffles that will impress your taste buds and keep your health goals on track. Remember, cooking is all about having fun and experimenting, so don’t hesitate to make this recipe your own!
So grab your ingredients, roll up your sleeves, and let’s make some magic happen in the kitchen. You’ve got this! Enjoy your truffles, and happy cooking!
Best Sugar Free Chocolate Truffles
Ingredients
Chocolate
- 1 cup no-sugar chocolate chips
- 0.5 cup heavy cream
- 1 teaspoon vanilla essence
- 1 cup cocoa powder, unsweetened
Instructions
- Heat the heavy cream until just boiling, then pour over the chocolate chips. Let sit for 2 minutes.
- Stir until smooth and glossy, then add vanilla essence. Chill the mixture for 2 hours.
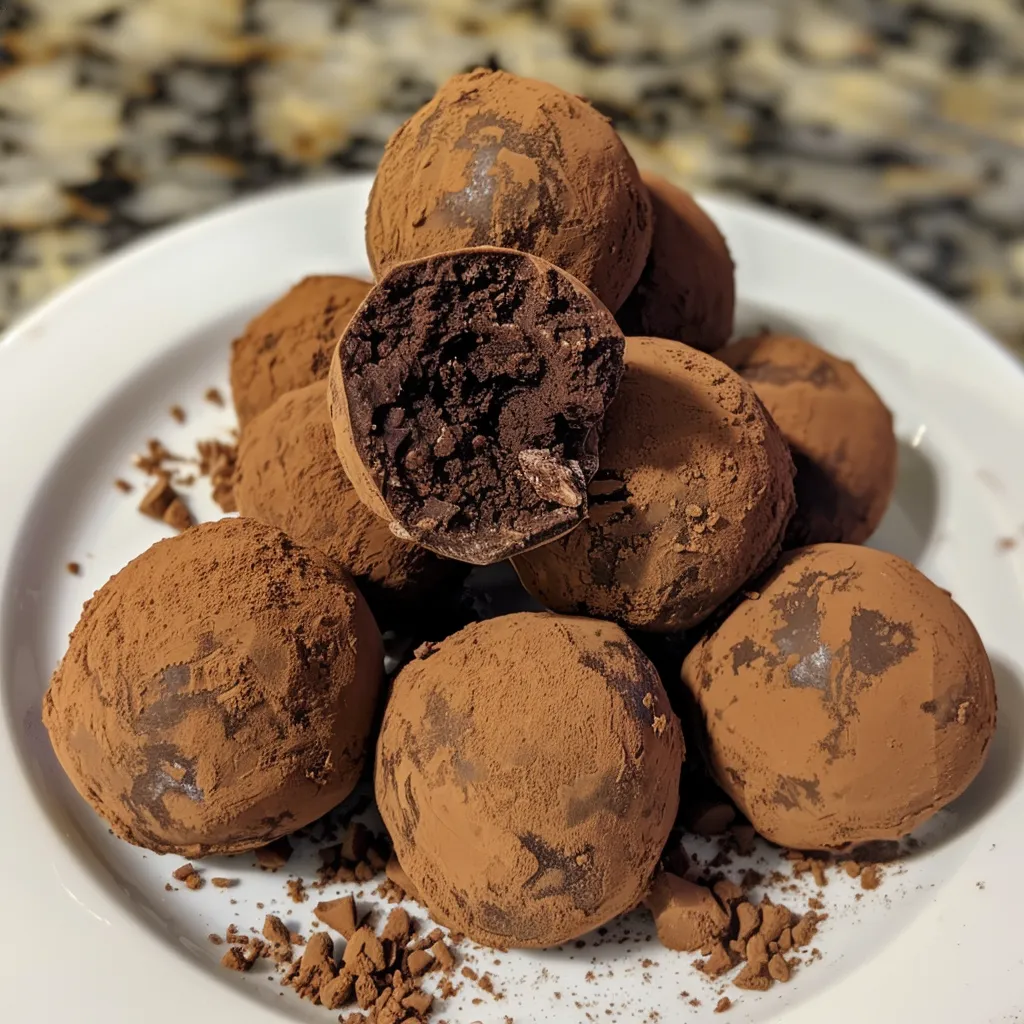
- Once firm, scoop out small portions and roll into balls.
- Roll each ball in cocoa powder until fully coated.
- Place the truffles on a tray and refrigerate for 30 minutes before serving.