
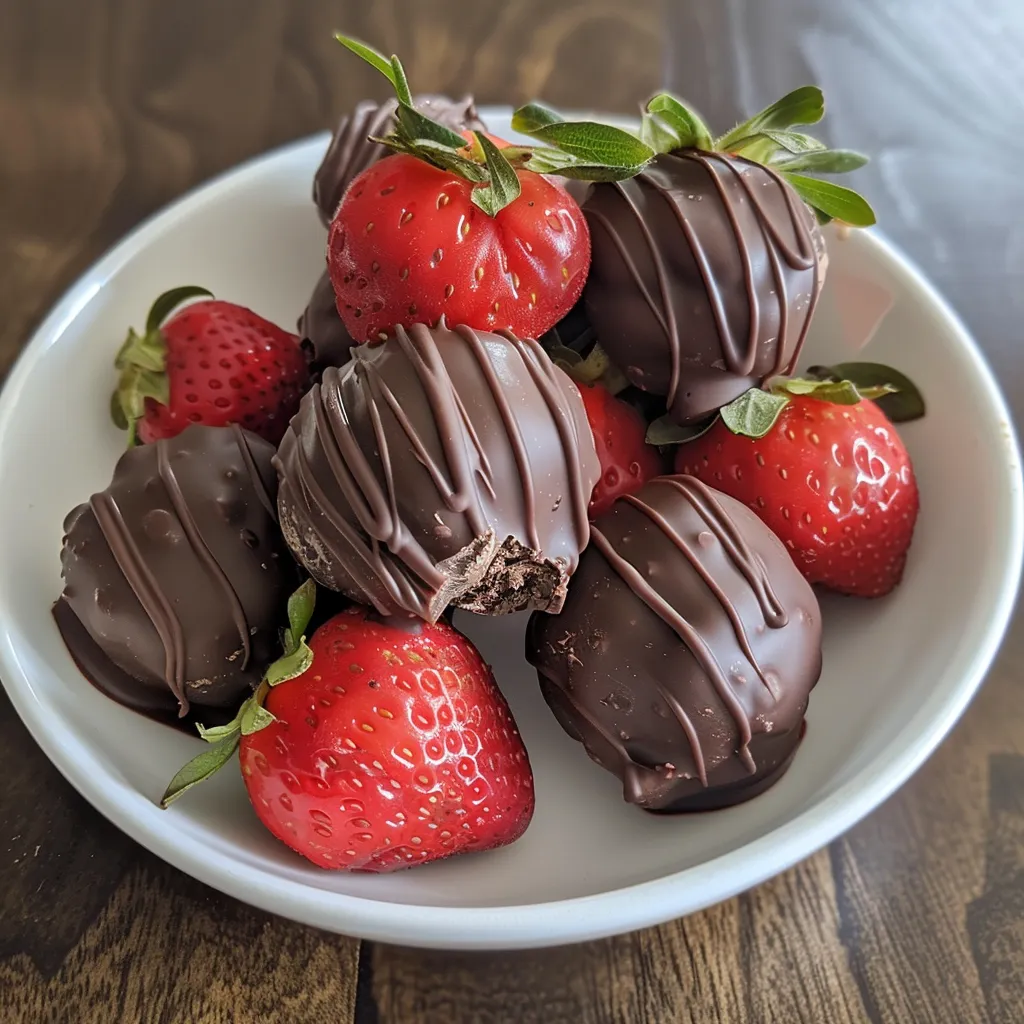
Indulge in Decadence: Your Ultimate Guide to Chocolate-Covered Strawberry Truffles
Welcome to a world where chocolate-covered strawberries meet the luxurious delight of truffles! If you’ve ever dreamed of creating an exquisite dessert that not only looks stunning but also tastes divine, you’re in the right place. This guide will walk you through the process of making Chocolate-Covered Strawberry Truffles that will wow your family and friends. With a few simple ingredients and our step-by-step instructions, you’ll be crafting these delightful treats in no time! Let’s dive into the deliciousness!
Why You’ll Love This Recipe
- Quick and Easy: This recipe allows you to whip up a batch of truffles in under two hours, making it perfect for last-minute gatherings.
- Unique Flavor Profile: Combining the rich taste of chocolate with the fruity essence of strawberries creates a dessert that tantalizes the taste buds.
- Customizable: You can easily adapt the recipe to suit your preferences, whether you want to use different types of chocolate or add fun toppings.
- Stunning Presentation: These truffles look as good as they taste, making them a fantastic centerpiece for any dessert table.
- Perfect for Any Occasion: Whether it’s a birthday, holiday, or just a treat for yourself, these truffles are sure to impress!
Ingredients Breakdown
To create these scrumptious Chocolate-Covered Strawberry Truffles, you’ll need the following ingredients:
- 1 oz (28 g) freeze-dried strawberries: Provides a concentrated strawberry flavor without the moisture.
- 6 oz (170 g / 1 cup) white chocolate melting wafers: Offers a creamy base that pairs beautifully with the strawberry powder.
- 3 oz (85 g) heavy cream: Adds richness and helps the chocolate melt smoothly.
- 6 oz (170 g) dark chocolate melting wafers: For coating, providing a delicious contrast to the sweetness of the filling.
- Sprinkles: Optional, for a festive touch!
- Candies: Optional, to mix in or top your truffles for added texture.
- Lollipop sticks: Optional, for a fun, portable treat.
Feel free to make substitutions based on your preferences:
- Chocolate Variations: Use milk chocolate or semi-sweet instead of dark chocolate if you prefer a sweeter truffle.
- Non-Dairy Options: Substitute heavy cream with coconut cream for a dairy-free version.
- Nut Allergies: Skip the nuts or sprinkles if you’re serving guests with allergies.
Step-by-Step Instructions
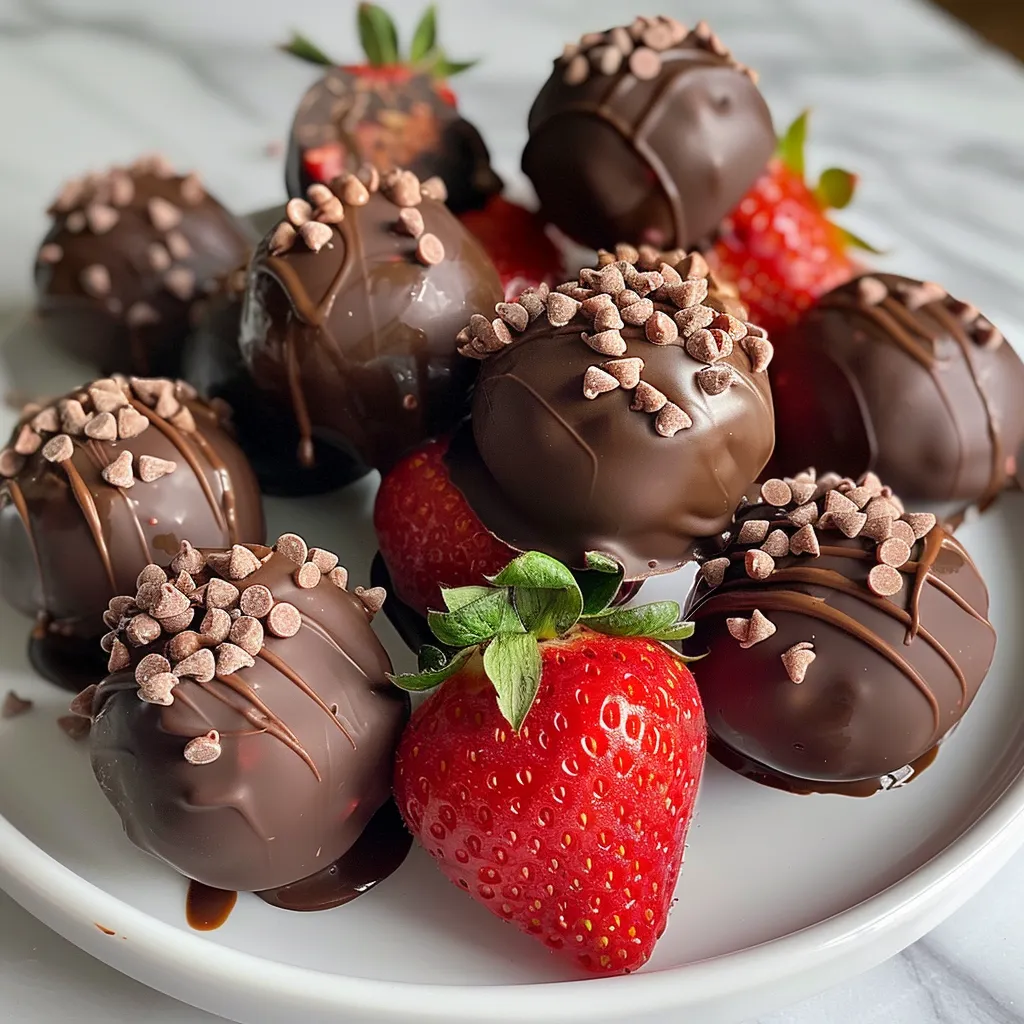
Now, let’s get cooking! Follow these simple steps to create your chocolate-covered strawberry truffles:
- Add the freeze-dried strawberries to a food processor and blend them into a fine powder.
- Allow the dust to settle before opening the processor to avoid a strawberry cloud!
- Sift the strawberry powder through a fine mesh sieve for a smoother texture, ensuring a delightful mouthfeel.
- In a heatproof bowl, combine the strawberry powder and white chocolate melting wafers.
- In a saucepan, heat the heavy cream until it just begins to simmer.
- Pour the hot cream over the chocolate mixture and let it sit for 1 minute before stirring until smooth and fully melted.
- Cover the mixture and refrigerate for 1 hour or until firm but workable.
- Scoop out about 13 portions and roll them gently into balls.
- Place the truffles on a parchment-lined tray and refrigerate for another hour.
- If the truffles are too soft, freeze them for 15 minutes to firm up.
- Melt the dark chocolate using a double boiler or microwave in 20-second intervals, stirring until glossy and smooth.
- If using, insert lollipop sticks into each truffle.
- Dip each truffle into the melted chocolate, allowing the excess to drip off.
- Place the truffles back on the parchment to set, and sprinkle with sprinkles or candies before the chocolate hardens.
- Let the truffles set completely before serving to ensure a beautiful finish.
Expert Pro Tips
- Temperature Control: Ensure your cream is hot but not boiling for the best melting results.
- Texture Matters: For a smoother truffle, ensure no lumps remain when mixing the chocolate and cream.
- Chill Thoroughly: Chilling the truffles properly prevents them from losing shape when dipped in chocolate.
- Keep It Clean: Use a fork or dipping tool to keep your hands clean while coating the truffles.
- Storage Tips: Store truffles in an airtight container in the refrigerator for up to a week.
- Flavor Boost: Add a splash of vanilla extract to the chocolate mixture for an extra layer of flavor.
- Experiment with Fillings: Feel free to add crushed nuts, coconut, or other flavorings to your truffles for a unique touch.
- Make Ahead: These truffles can be made a day in advance, giving you more time to enjoy your event!
Common Mistakes and Troubleshooting
Even the best cooks can run into hiccups! Here’s how to tackle common issues:
- Chocolate Seizing: If your chocolate becomes grainy, it may have been overheated. Try adding a teaspoon of coconut oil to rescue it.
- Truffles Falling Apart: If they’re too soft, ensure they’ve chilled long enough before coating. If necessary, re-chill them.
- Too Sweet: Balance the sweetness by using dark chocolate for coating or adding a pinch of sea salt.
- Sticking to the Parchment: Allow the truffles to set completely before trying to remove them from the parchment.
Delicious Variations
Don’t be afraid to get creative! Here are some fun variations to try:
- Mint Chocolate Truffles: Add a few drops of mint extract to your chocolate mixture for a refreshing twist.
- Coconut Bliss Truffles: Roll your truffles in shredded coconut instead of sprinkles for a tropical flavor.
- Nutty Delight: Incorporate crushed nuts into the chocolate mixture or sprinkle on top for added crunch.
- Spicy Surprise: Add a pinch of cayenne pepper to the chocolate for a surprising kick!
Storage and Make-Ahead Instructions
These truffles can be made ahead of time and stored in the refrigerator for up to a week. To preserve their freshness:
- Store in an airtight container between layers of parchment paper to prevent sticking.
- For longer storage, freeze truffles for up to 3 months. Allow them to thaw in the fridge before serving.
Frequently Asked Questions
- Can I use fresh strawberries instead of freeze-dried?
Fresh strawberries will introduce moisture, making it difficult to form a stable filling. We recommend sticking with freeze-dried. - Can I use chocolate chips instead of melting wafers?
Yes, but melting wafers are designed for easy melting and coating, while chocolate chips may not melt as smoothly. - How do I know when the chocolate is melted?
Stir frequently. When it’s glossy and smooth without lumps, it’s ready! - Can I make these vegan?
Absolutely! Use dairy-free chocolate and coconut cream for a vegan-friendly treat. - What’s the best way to decorate the truffles?
Get creative! Use crushed nuts, sprinkles, or drizzle melted chocolate over the top for a beautiful finish. - How can I prevent the truffles from melting?
Keep them in a cool place and store them in the fridge until you’re ready to serve. - What’s the best way to serve these truffles?
They’re perfect for parties! Serve them on a decorative platter or on lollipop sticks for easy handling. - Can I flavor the chocolate coating?
Yes! You can add extracts like almond or orange for extra flavor in the coating.
Nutrition Tips and Dietary Adaptations
For those mindful of nutrition or dietary needs, consider these options:
- Low-Sugar Version: Use sugar-free chocolate and substitute heavy cream with low-fat alternatives.
- Gluten-Free: This recipe is naturally gluten-free, but always check ingredient labels.
- Nut-Free Options: Skip any nut toppings to accommodate nut allergies.
Tools and Equipment Recommendations
Here’s what you’ll need to make these truffles:
- Food Processor: For blending the freeze-dried strawberries into a fine powder.
- Heatproof Bowl: To melt the chocolate and cream together.
- Parchment Paper: For lining your tray, preventing sticking.
- Double Boiler or Microwave: For melting chocolate without burning.
- Measuring Cups and Spoons: To ensure you get the ratios just right!
Serving Suggestions
These truffles can stand alone as a dessert or be paired with other treats:
- Serve alongside fresh fruit for a refreshing contrast.
- Pair with coffee or tea for a delightful afternoon treat.
- Add to a dessert platter with other chocolate treats for a sweet spread.
Conclusion
Creating your own Chocolate-Covered Strawberry Truffles is not just about making a dessert; it’s about indulging in a delightful experience that brings joy to you and your loved ones. With this comprehensive guide, you’re equipped to create truffles that are not only delicious but also visually stunning. So, roll up your sleeves, gather your ingredients, and let the chocolate magic begin! Remember, the kitchen is a place for creativity and fun, so embrace the process and enjoy every bite of your delicious creations!
Chocolate-Covered Strawberry Truffles with Freeze-Dried Strawberries
Ingredients
Dried ingredients
- 1 oz freeze-dried strawberries
- 6 oz white chocolate melting wafers
- 3 oz heavy cream
- 6 oz dark chocolate melting wafers
Decorations
- Sprinkles
- Candies
- Lollipop sticks
Instructions
- Add freeze-dried strawberries to a food processor, blend into a powder, then sift for smoothness.
- Mix strawberry powder and white chocolate wafers, heat heavy cream until simmering, then pour over mixture and stir until smooth. Chill for 1 hour.
- Shape into 13 balls, refrigerate for 1 hour, then freeze 15 minutes if soft.
- Melt dark chocolate, insert lollipop sticks if desired, dip truffles, and decorate with sprinkles or candies. Let set before serving.


