
![['Close-up of a freshly baked apple crisp with a golden-brown topping.', 'Side view of a warm apple crisp dessert, showcasing its crumbly texture.', 'Juicy apple crisp with visible layers of apples and oat topping.', 'Delicious apple crisp served in a dish, highlighting its apple and sugar blend.']](https://cooksyra.com/wp-content/uploads/2026/07/easy-apple-crisp_1_U1.webp "Wholesome Warmth: Crafting the Perfect Easy Apple Crisp")
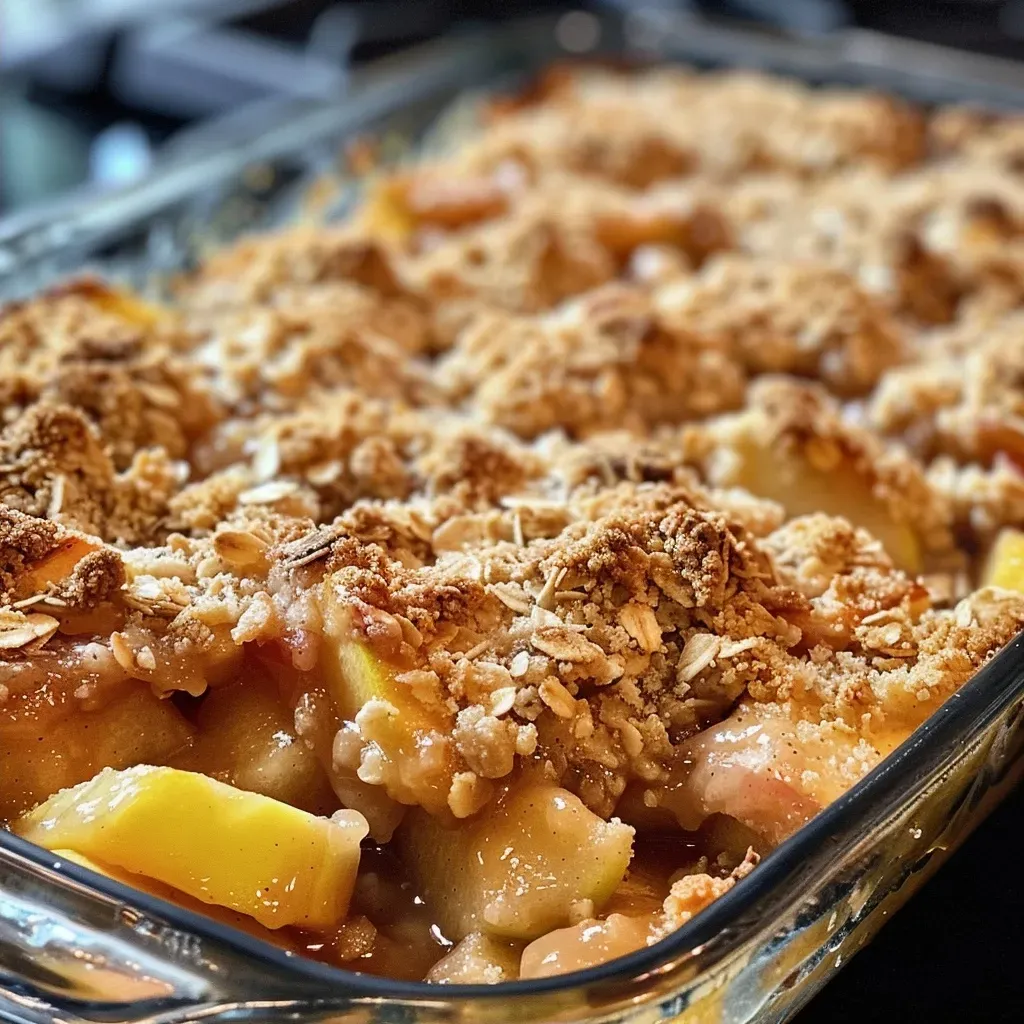
Welcome to your new favorite fall dessert! If you’re looking for a recipe that combines the comforting flavors of baked apples with a crispy, buttery topping, you’ve found it. This easy apple crisp is not just a treat; it’s a celebration of simple ingredients and delightful outcomes. With just a handful of components and a little love, you can create a dessert that fills your home with warmth and your heart with joy.
Why You’ll Love This Recipe
- Quick and Easy: With just 15 minutes of prep time, this recipe is perfect for busy weeknights or spontaneous gatherings.
- Versatile Ingredients: Use any apples you have on hand, whether golden delicious or Granny Smith, making it adaptable to your pantry.
- Customizable Toppings: Feel free to adjust the crisp topping with nuts or spices to suit your taste.
- Make-Ahead Friendly: Prepare ahead of time and bake just before serving for maximum freshness.
- Heavenly Aroma: Baking this dessert will fill your kitchen with a tantalizing scent that’s sure to make everyone eager for dessert.
Ingredient Breakdown
Let’s dive into the ingredients that make this apple crisp recipe shine. Here’s what you’ll need:
- 6 golden delicious apples: Peeled and chopped. Feel free to mix varieties for enhanced flavor.
- 2 Tbsp granulated sugar: This helps to balance the tartness of the apples.
- 3/4 tsp ground cinnamon: A warm spice that elevates the dish.
- 1 1/2 tsp lemon juice: Adds brightness and prevents browning of apples.
- 1 cup light brown sugar: For a rich, caramel flavor in the topping.
- 3/4 cup old fashioned oats: Gives the crisp its signature texture. Quick oats can also be used, though the texture will differ.
- 3/4 cup all-purpose flour: Helps bind the topping together.
- 1 tsp ground cinnamon: Extra flavor for the topping.
- Pinch of kosher salt: Balances sweetness.
- 1/2 cup cold unsalted butter: Diced into small cubes, this creates a flaky texture in the topping.
Pro Tips for the Best Apple Crisp
- Choose the Right Apples: Opt for firm varieties like Granny Smith or Honeycrisp for a perfect balance of sweetness and tartness.
- Don’t Overmix the Topping: Mix just until combined to maintain a crumbly texture that bakes beautifully.
- Experiment with Spices: Add nutmeg or cardamom for extra warmth and flavor.
- Serve Warm: Best enjoyed fresh out of the oven with a scoop of vanilla ice cream on top.
- Make it a Breakfast Treat: Leftover apple crisp makes a fantastic breakfast when paired with yogurt!
- Store Properly: Keep leftovers in an airtight container in the fridge to maintain freshness.
- Use a Baking Dish with Sides: This helps catch any bubbling juices from the apples.
- Check for Doneness: The topping should be golden brown and the apples tender when it’s ready.
Common Mistakes and Troubleshooting
Even the best chefs encounter hiccups in the kitchen! Here are some common pitfalls and how to avoid them:

★ Recommended Kitchen Tool
Professional Chef Knife Set
Make this recipe even easier with a quality Professional Chef Knife Set — a must-have kitchen staple!
- Too Watery: If your filling is too wet, try using a thicker variety of apple or add a tablespoon of cornstarch.
- Burnt Topping: If the topping browns too quickly, cover it with foil during the last few minutes of baking.
- Not Enough Crisp: Ensure the oats and flour are well incorporated into the topping for that perfect crunch.
- Apples Not Cooked: If apples are still crunchy after baking, cover and bake a bit longer until tender.
Delicious Variations to Try
Want to mix things up? Here are some fun twists on the classic easy apple crisp:
- Berry Apple Crisp: Add a cup of mixed berries for a fruity flavor explosion.
- Caramel Apple Crisp: Drizzle caramel sauce over the apples before topping with the crisp for an indulgent treat.
- Nutty Apple Crisp: Incorporate chopped nuts like pecans or walnuts into the topping for extra crunch.
- Maple Apple Crisp: Substitute maple syrup for granulated sugar for a unique flavor.
Storage and Make-Ahead Instructions
This apple crisp recipe is fantastic for making ahead! Here’s how to store it:
- Refrigerator: Store leftovers in an airtight container; it will last for up to 3 days.
- Freezer: Freeze before baking for up to 3 months. Thaw overnight in the fridge before baking.
- Reheating: Warm in the oven at 350°F until heated through for the best texture.
Frequently Asked Questions
Got questions? I’ve got answers! Here are some FAQs about this delightful dessert:
- Can I use other fruits? Yes! Pears, peaches, or berries can also work beautifully in this recipe.
- Is there a gluten-free option? Absolutely! Substitute the all-purpose flour with a 1:1 gluten-free baking blend.
- Can I use pre-made pie filling? You can, but homemade filling gives a fresh taste that’s hard to beat!
- How can I make this vegan? Use coconut oil instead of butter and maple syrup in place of sugar.
- What’s the best way to peel apples? A sharp peeler works wonders, but you can also slice the apples and remove the skins with a knife.
- Can I make this in advance? Yes! Assemble it ahead of time and bake just before serving.
- How do I know when it’s done? The topping should be golden brown, and the apples should be tender.
- What can I serve with apple crisp? Vanilla ice cream, whipped cream, or a drizzle of caramel sauce are all excellent choices!
Nutrition Tips and Dietary Adaptations
Cooking with health in mind? Here are some tips to make this dessert fit your dietary needs:
- Reduce Sugar: Cut the sugar in half for a less sweet dessert or use a sugar substitute.
- Add Fiber: Incorporate whole grain oats to boost fiber content.
- Portion Control: Serve in smaller dishes to help manage portion sizes.
Equipment Recommendations
To create your apple crisp masterpiece, you’ll need a few essential kitchen tools:
- Baking Dish: A 9×13 inch dish works well for this recipe.
- Mixing Bowls: Use medium-sized bowls for mixing ingredients easily.
- Peeler and Knife: Essential tools for prepping your apples.
- Measuring Cups and Spoons: Precise measurements ensure the best results.
- Spoon or Spatula: For mixing and spreading the topping evenly.
Serving Suggestions
Now that your easy apple crisp is out of the oven, here are some delicious ways to serve it:
- With Ice Cream: A scoop of vanilla ice cream on top is the ultimate indulgence!
- Drizzled with Caramel: Add a drizzle of salted caramel for an extra layer of flavor.
- Sprinkle of Nuts: Toasted nuts can add crunch and enhance the flavor.
- Fresh Cream: A dollop of whipped cream can make this dessert even more decadent.
And there you have it, folks! In just a few simple steps, you’ve created a comforting dessert that’s perfect for any occasion. Remember, cooking is about joy and connection, so invite family and friends to share in this delightful treat. Happy baking!
Old Fashioned Easy Apple Crisp
Ingredients
Filling
- 6 pieces golden delicious apples (peeled and chopped) (other varieties can be used, can also be sliced)
- 2 Tbsp granulated sugar
- 3/4 tsp ground cinnamon
- 1 1/2 tsp lemon juice
Topping
- 1 cup light brown sugar
- 3/4 cup old fashioned oats (quick oats can be used, but it may have a slightly different texture)
- 3/4 cup all-purpose flour
- 1 tsp ground cinnamon
- 1/2 cup cold unsalted butter (diced into small cubes)
Instructions
-
Preheat oven to 350°F (175°C).
-
Mix sliced apples with sugar, cinnamon, and lemon juice; place in a baking dish.
-
Combine oats, flour, cinnamon, salt, and brown sugar; cut in cold butter until crumbly.
-
Sprinkle the topping evenly over the apples.
-
Bake for 40 minutes until golden and bubbly.

![['Close-up view of a slice of pumpkin cobbler topped with vanilla ice cream.', 'Side view of a juicy pumpkin cobbler, showcasing its golden-brown crust and creamy filling.', 'Detailed image of pumpkin cobbler with ice cream melted on top, highlighting its rich texture.', 'Close-up shot of a warm pumpkin cobbler, revealing its layers and inviting aroma.']](https://cooksyra.com/wp-content/uploads/2026/07/pumpkin-cobbler_1_U1-1-150x150.webp)
![['Close-up view of a pumpkin donut with a glossy glaze and sprinkles.', 'A side view of a freshly baked pumpkin donut topped with cream cheese icing.', 'Juicy pumpkin donut photographed from the side, showcasing its fluffy texture.', 'Delicious pumpkin donut highlighted with a creamy frosting and a sprinkle of cinnamon.']](https://cooksyra.com/wp-content/uploads/2026/07/pumpkin-donuts_1_U1-150x150.webp)