Welcome to Your Strawberry Shortcake Cake Adventure!
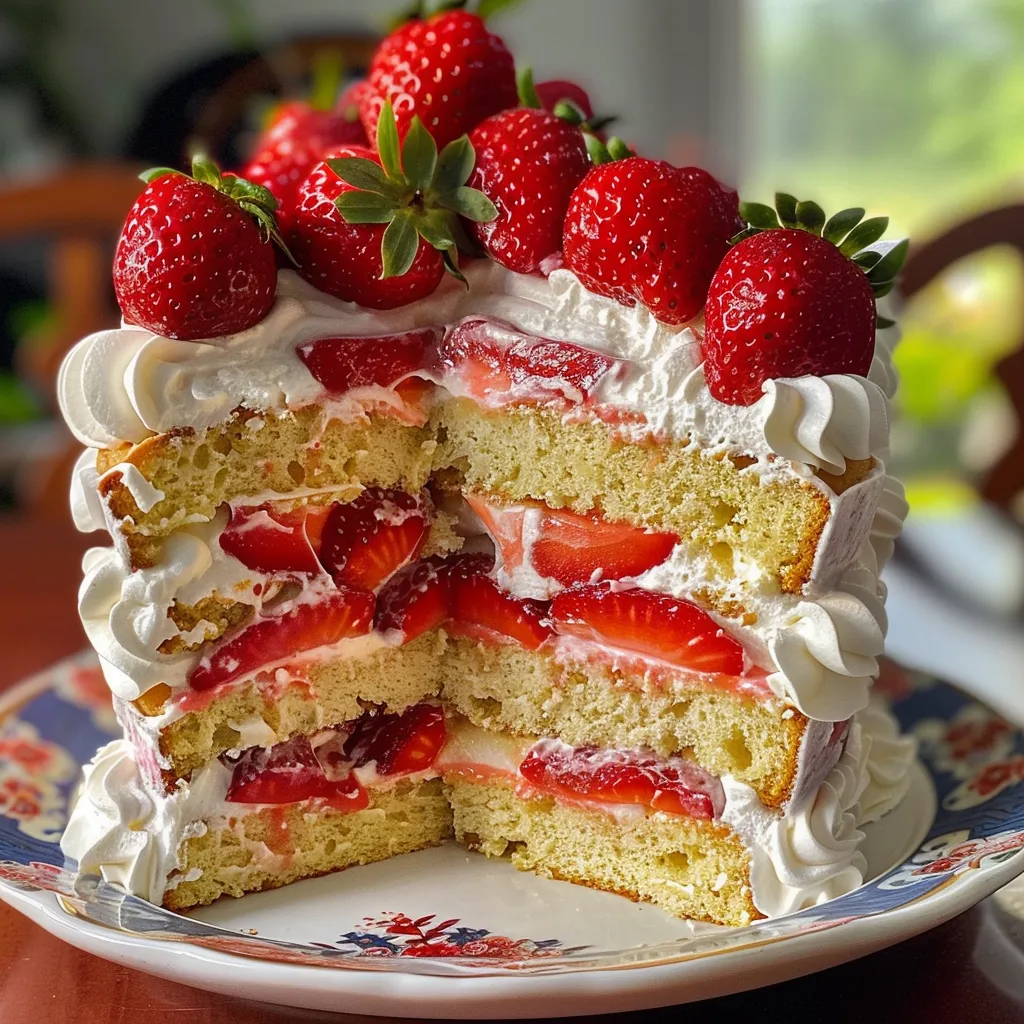
If you’re looking for a dessert that embodies the joy of summer, look no further than this delightful Strawberry Shortcake Layer Cake. With its fluffy cake layers, luscious whipped cream, and vibrant strawberries, this recipe is not just a treat; it’s an experience! Perfect for celebrations or a casual family dinner, this cake is sure to impress. Let’s dive into why you’ll love this recipe and how to create your own masterpiece!
Why You’ll Love This Recipe
Here are five delightful reasons to start baking:
- Incredible Flavor: The combination of sweet strawberries and whipped cream creates a cake that’s bursting with flavor, making every bite a treat!
- Easy to Make: With simple ingredients and straightforward steps, even novice bakers can tackle this recipe with confidence.
- Perfect for Any Occasion: Whether it’s a birthday party, a picnic, or just a family gathering, this cake is a showstopper and always welcomes compliments.
- Make-Ahead Friendly: You can prepare the cake layers and whipped cream in advance, making it a great option for busy schedules.
- Customizable: Feel free to get creative with this recipe! Add different fruits, flavors, or even experiment with the cake layers.
Ingredient Breakdown
Here’s what you’ll need to create your Strawberry Shortcake Layer Cake:
- All-Purpose Flour: 2 ½ cups (315g) – Essential for structure. You can substitute with gluten-free flour for a gluten-free version.
- Baking Powder: 2 ½ teaspoons – Helps the cake rise and become fluffy.
- Baking Soda: ½ teaspoon – Adds extra leavening for a light texture.
- Kosher Salt: ½ teaspoon – Enhances all the flavors in the cake.
- Unsalted Butter: ¾ cup (170g), room temperature – Provides richness. If dairy-free, you can use a plant-based butter.
- Granulated Sugar: 1 ¾ cups (350g) – Sweetens the cake perfectly. Consider using coconut sugar for a healthier alternative.
- Large Eggs: 4, room temperature – Binds the ingredients together and contributes to the cake’s moisture.
- Vanilla Extract: 1 tablespoon – Adds a lovely aroma and flavor.
- Sour Cream: 1 cup (240g), room temperature – Keeps the cake moist and adds a slight tang. Greek yogurt can be a substitute.
- Whole Milk: ½ cup (120ml), room temperature – Combines with other wet ingredients for a smooth batter.
- Fresh Strawberries: 1 ½ pounds (680g), hulled and sliced – The star of the show! Feel free to mix in other berries if you like.
- Granulated Sugar (for macerating): ¼ cup (50g) – Helps draw out the juices from the strawberries.
- Lemon Juice: 1 tablespoon – Brightens the flavor of the strawberries.
- Heavy Whipping Cream: 2 ¼ cups (540ml), cold – For making your fluffy whipped cream.
- Powdered Sugar: ⅔ cup (80g) – Sweetens the whipped cream.
- Vanilla Extract (for whipped cream): 1 tablespoon – Enhances the flavor of the cream.
Step-by-Step Instructions
1. Macerate the Strawberries
Start by prepping the strawberries. Toss the sliced strawberries with granulated sugar and a splash of lemon juice. Set them aside at room temperature to draw out their juices, making them incredibly flavorful and soft.
2. Bake the Cake Layers
Preheat your oven to 350°F (175°C). Grease and line three 8-inch round cake pans with parchment paper.
In a bowl, whisk together the flour, baking powder, baking soda, and salt.
In a large mixing bowl, beat the butter and sugar until light and fluffy (about 3-4 minutes). It should look pale and airy.
Add the eggs one at a time, mixing well after each addition, followed by the vanilla extract.
Next, alternate adding the dry ingredients with the sour cream and milk, starting and ending with the dry ingredients to keep the batter smooth. Divide the batter evenly between the prepared pans.
Bake for 23-28 minutes or until a toothpick inserted into the center comes out clean. Let the cakes cool in the pans for 10 minutes before transferring them to a wire rack to cool completely. (Patience is key here—you don’t want to frost warm cakes!)
3. Make the Whipped Cream
Once the cakes are cool, whip the heavy cream, powdered sugar, and vanilla extract until soft peaks form. The cream should hold its shape but remain fluffy. Be careful not to overbeat, as it can turn grainy.
4. Assemble the Cake
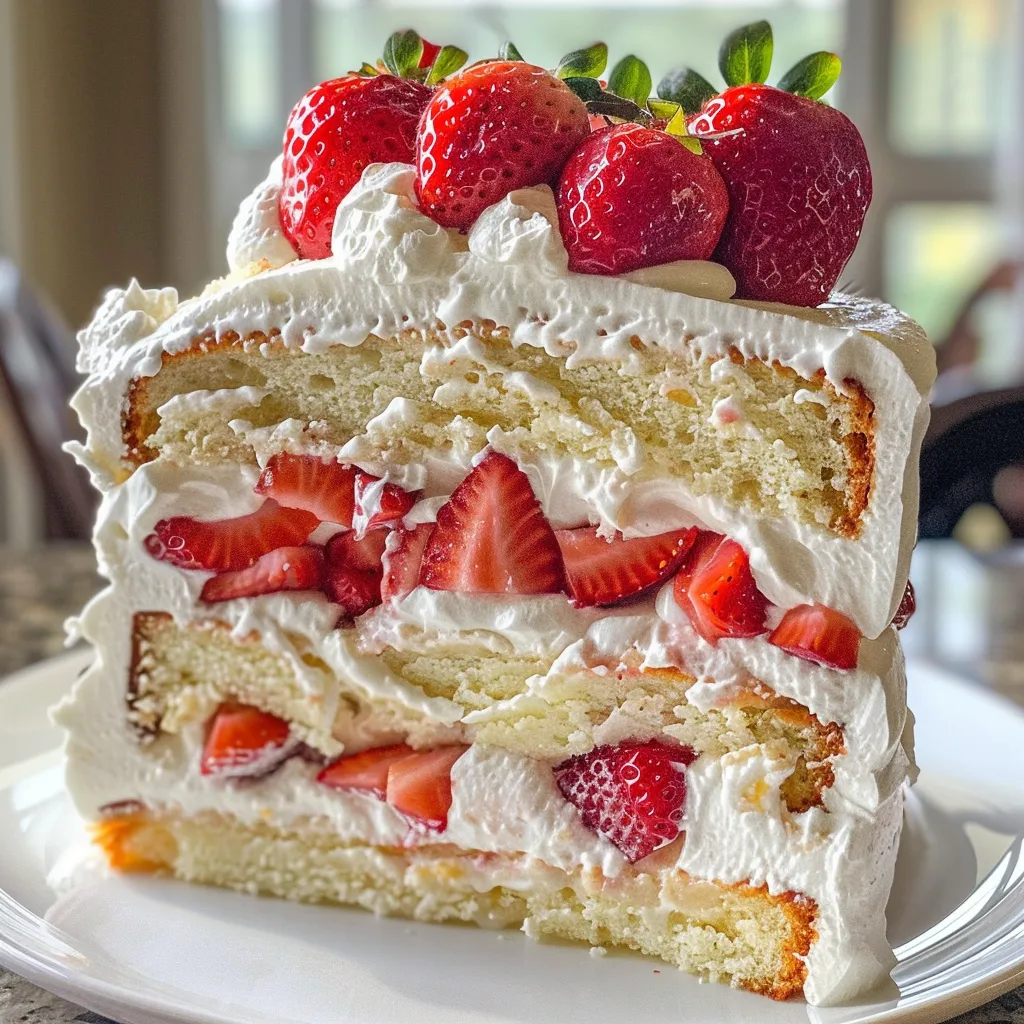
Place your first cake layer on a serving plate or cake board. Spoon a generous amount of whipped cream on top, spreading it evenly to the edges. Add some of the macerated strawberries over the whipped cream, letting some juices soak into the cake.
Repeat with the second layer (cake, whipped cream, strawberries). For the final layer, you can either go lighter on the strawberries for a clean look or pile them high for a rustic aesthetic.
5. Chill and Serve
Pop the assembled cake into the fridge for at least 30 minutes to help it set. This makes it easier to slice and keeps the whipped cream from sliding around. Just before serving, garnish with extra berries or a dusting of powdered sugar to make it extra special!
Pro Tips for Success
Here are some expert insights to elevate your baking experience:
- Room Temperature Ingredients: Ensure that butter, eggs, sour cream, and milk are at room temperature for the best mixing results.
- Don’t Overmix: Overmixing can lead to dense cake layers. Mix just until combined for a light texture.
- Use Fresh Ingredients: Fresh strawberries make a significant difference in flavor. Look for ripe, sweet ones!
- Chill Your Tools: For the best whipped cream, chill your mixing bowl and beaters before whipping.
- Layer with Care: When assembling, don’t be afraid to be generous with the whipped cream and strawberries for a luscious bite!
- Experiment with Flavors: Add extracts like almond or orange to the whipped cream for a unique twist.
- Test for Doneness: Every oven is different; check for doneness a few minutes before the suggested baking time.
- Use Parchment Paper: This ensures easy removal of your cake layers without sticking.
Common Mistakes and Troubleshooting
Even seasoned bakers make mistakes, and that’s perfectly okay! Here are some common issues and how to fix them:
- Dense Cake: This often occurs from overmixing or using cold ingredients. Remember to mix just until combined and use room temperature ingredients.
- Dry Cake: If your cake turns out dry, it may have been baked too long. Keep an eye on it during the last few minutes of baking.
- Soggy Layers: If your cake layers become soggy, ensure to macerate the strawberries just enough to enhance their flavor without overwhelming the cake.
- Whipped Cream Deflation: If your whipped cream doesn’t hold its shape, it may be under-whipped. Ensure to whip until soft peaks form.
Delicious Variations
Feel like mixing things up? Try these variations:
- Chocolate Strawberry Shortcake: Swap out half of the flour for cocoa powder for a chocolatey twist.
- Berry Medley: Use a mix of strawberries, blueberries, and raspberries for a colorful cake.
- Lemon Zest: Add lemon zest to the cake batter for a zesty flavor that complements the strawberries.
- Nutty Crunch: Add chopped nuts or toasted coconut layers for added texture and flavor.
Storage and Make-Ahead Instructions
This cake is best enjoyed fresh, but you can make components ahead of time:
- For the Cake: Bake the layers a day in advance. Wrap them tightly in plastic wrap and store at room temperature.
- For the Whipped Cream: Prepare and store in the fridge for up to 2 days. Just give it a quick whip before using to restore its fluffiness.
- For Assembled Cake: Store in the refrigerator for up to 2 days. If left longer, the layers may become soggy.
FAQ: Your Strawberry Shortcake Questions Answered
- Can I use frozen strawberries? Yes, but fresh strawberries yield the best flavor and texture. If using frozen, thaw and drain them well.
- How can I make this cake gluten-free? Substitute all-purpose flour with a gluten-free blend and ensure your baking powder is gluten-free.
- What’s the best way to slice the cake? Use a serrated knife and clean it between slices for clean cuts.
- Can I freeze the cake? Yes, freeze the layers wrapped tightly in plastic wrap for up to 3 months. Thaw them in the fridge before assembling.
- How do I prevent the cake from collapsing? Ensure your cake layers are fully cooled before stacking and adding whipped cream.
- What’s the difference between whipped cream and stabilized whipped cream? Stabilized whipped cream includes ingredients like gelatin or cornstarch to help it hold its shape longer.
- Can I use other fruits? Absolutely! Peaches, raspberries, or even bananas can be delicious substitutes.
- How do I make the whipped cream sweeter? Adjust the amount of powdered sugar to taste depending on your preference.
Nutritional Information and Dietary Adaptations
Each slice of this cake is a delicious treat. For those watching their intake, here are some tips:
- Reduce Sugar: You can cut down the sugar in the cake and whipped cream for a slightly healthier option without losing flavor.
- Portion Control: Serving smaller slices can help manage calorie intake while still enjoying this delightful dessert.
- Dairy-Free Option: Use non-dairy substitutes for butter and cream for a dairy-free version that still tastes great!
Equipment Recommendations
To make your baking experience smoother, consider these essential tools:
- Mixing Bowls: A set of various sizes will make mixing easier and more efficient.
- Electric Mixer: A stand mixer or hand mixer saves time and effort in beating the butter and whipping cream.
- Cake Pans: Invest in quality non-stick cake pans for easy release.
- Offset Spatula: Perfect for spreading whipped cream and leveling out the frosting.
- Wire Cooling Rack: Essential for cooling your cake layers evenly and quickly.
Serving Suggestions
Your Strawberry Shortcake Layer Cake is ready to shine! Here are some ways to serve it:
- Garnish: Top with fresh mint leaves or additional strawberries for a pop of color.
- Accompanying Beverages: Pair with sweet iced tea, lemonade, or a light sparkling wine for an elegant touch.
- Presentation: Serve on a beautiful cake stand to showcase your delicious creation.
Conclusion: Celebrate with Cake!
Now that you have the ultimate guide to creating a mouthwatering Strawberry Shortcake Layer Cake, it’s time to get baking! Remember, the kitchen is a place for creativity and joy, and with this recipe, you’re not just making a cake but memories as well. Don’t stress over perfection—embrace the process, laugh at the mishaps, and enjoy each delicious slice. Happy baking!
Strawberry Shortcake Layer Cake
Ingredients
Dry Ingredients
- 2.5 cups all-purpose flour
- 2.5 teaspoons baking powder
- 0.5 teaspoon baking soda
- 0.5 teaspoon kosher salt
Wet Ingredients
- 0.75 cup unsalted butter (room temperature)
- 1.75 cups granulated sugar
- 4 large eggs (room temperature)
- 1 tablespoon vanilla extract
- 1 cup sour cream (room temperature)
- 0.5 cup whole milk (room temperature)
Strawberries
- 1.5 pounds fresh strawberries (hulled and sliced)
- 0.25 cup granulated sugar
- 1 tablespoon lemon juice
Whipped Cream
- 2.25 cups heavy whipping cream (cold)
- 0.666 cup powdered sugar
- 1 tablespoon vanilla extract
Instructions
- Macreate the strawberries by tossing sliced strawberries with sugar and lemon juice; set aside.
- Preheat oven to 350°F (175°C). Prepare three 8-inch pans, whisk dry ingredients, and beat butter and sugar until fluffy. Add eggs and vanilla, then alternate adding dry ingredients with sour cream and milk. Divide batter and bake for 23-28 minutes. Cool completely.
- Whip heavy cream, powdered sugar, and vanilla until soft peaks form.
- Assemble the cake by layering cake, whipped cream, and strawberries. Repeat layers and garnish as desired. Chill for at least 30 minutes before serving.